Deja Vu

Since the reason I went to Quilting on the Square yesterday was to get back that feeling I had when I lived in a small town, I thought I’d share with you some of the pictures of our house in a small town in Indiana.  Our house was next to the county library and a block from our own town square.

The courthouse sits in the middle of the Town Square (photo courtesy of Wikimedia Commons)

This house was built around 1893.

And, this is what it looked like when we lived there a few years ago.  Needless to say, we had lots of Trick-or-Treaters on Halloween.

As they came up to the front doors, they found 2 very tall doors that would open wide for large items to pass through.

Just on the other side of that door, was a lot of original woodwork and the charm of the Victorian era.


Barrel (curved) walls and original parquet floors in the entryway…  You can also see 1 of the 3 fireplaces in the front parlor.

The other 2 fireplaces are in the dining room on the left and the back parlor (living room) on the right.

Old houses are not all glam and glitz.  There is a lot of work and expense with upkeep.  I stripped 3 thick layers of flooring off the kitchen and laundry room floors to get to the original pine flooring.  When we bought the house, it was in good condition, but we added a lot of work and money to put the charm back into the house.

The monster, killer rosebush.  I hated that thing.  It was beautiful, but its limbs and thorns were so thick – you certainly did not want to get caught in its “grasp.”  See the tree face up yonder?  That’s on one of those original “stick” trees in the black and white picture of the house above.

I had 15 rose bushes, several flower beds and lots and lots of Hostas.  Hostas lined the other side of the garage and the front porch.  We also had 3 arbors.  Clematis was growing on this one, and Wisteria was growing on the third arbor.  Little did I know how invasive Wisteria was!

I could get anything to grow in that black soil.  This sunflower was the tallest I’ve ever seen; it towered above my garage.

Anyhow, I hope you enjoyed your visit to my old house.  You never know what’s inside of those old, scraggly looking houses.  Like old people, old houses may be weathered, but you may find some jewels inside and well worth the visit.

Quilting on the Square

This has been a particularly rough week.  I’ve been working my tail off this week, doing volunteer stuff for 2 quilting guilds.  By Friday night, I was nearly in tears.  I was so dog gone tired and my body hurt all over.  So, in spite of how busy I know I am right now, I decided to take a break.

I used to live in a small town in Indiana.  I loved living in the small town, away from the hustle and bustle  and rat race of busy city life.  We moved to the Kansas City area 3 years ago to be near family, and we moved into a house that is far enough out from the city for me to be okay and close enough in to the city for my husband to be okay.   So… my way of taking a break yesterday was to get far enough away from the city to feel like I am in another world.

Have you ever been to Quilting on the Square in Holton, Kansas?  I have been meaning to get there, but never had.  Yesterday I got there.  Quilting on the Square is a quilt store that is located on the corner of Holton’s town square.  Holton is a charming little town that is like being in fairy tale world of days gone past.  It’s close enough to Topeka, but it is far enough out to have that small town feel.

Mark and Mary Pfeiler, Quilting on the Square’s owners, took me on a tour of their newly extended store.  They also showed off their new room for their longarm quilting machine and business – I was envious!  For whatever reason, I was transported into another world as I gazed open-mouth like a child in a candy store at their fabrics, etc.  They have it all arranged so colorfully well, that you feel like you are having an out of body experience  as you put bolt of bolt of fabric on the counter to be cut and taken home.  There were so many fabrics that I love.  I don’t know what happened, but I left there with more fabric than I think I’ve bought in the last year.  But, you know what?  As I drove home, I was at peace.  I was at peace with what I’d spent, and I was at peace with the shared experience with Mary, Mark, and their assistants.  If you haven’t been there, you need to go!!!  I warn you, though, to take your SUV, van or truck, your debit card and credit card and all the cash you can stash.  You’ll be glad you did.


Do you know who Hollis Chatelain is?

I am shocked when I find out people do not know who Hollis Chatelain is.  To me she is a rock star.  But, really, she is a quilter.  She is an artistic quilter, an award winning quilter, and she is known internationally.    When people see her quilts, they gasp.  They stare in wonder, trying to figure out how on earth she does what she does and where she gets her ideas.  She is my hero, and when I grow up, I want to be just like her.  Or… I want to have her artistic quilting talent in my next life.

So, the 2 quilting guilds that I belong to (Blue Valley Quilters Guild in Olathe, KS and Mo-Kan Machine Quilters Guild in Overland Park, KS) are co-hosting Hollis the first week of September; just 2 weeks away.  I feel so fortunate to be able to meet Hollis in person and to see her quilts in person.  I get to go to her morning lecture, “The Relationship Between Drawing and Quilting” on Tuesday morning, Sept. 4th.  Tuesday evening I get to attend her lecture, “The Emotion of Color.”  And, I get to take a couple of workshops with her as my teacher: all day Wednesday and Thursday (Sept. 5 & 6) I’ll be learning “Painting Images with Dyes” and on Friday, the 7th, I will learn about “Quilt Line as the Third Design Aspect.”

Take a look at her website at http://hollisart.com.  Eleven of her quilts have been part of a traveling exhibition called Imagine Hope.  You can find out more about that at http://imaginehopeworldwide.org/.  But, I think you will especially enjoy hearing her speak about her work and experiences at http://www.youtube.com/watch?v=u3uBoH1xt-E.  And, if you ever get a chance to see the movie, “Stitched” with her in it, DO IT!!!  If you are a quilter, you will really enjoy it.  To buy the DVD, contact Jena Moreno at http://www.stitchedfilm.com/home.html for more information.

Hollis’ quilt won Viewer’s Choice Award at the International Quilt Festival’s show in Houston, Texas; November, 2011 – yes, that “picture” behind her is a quilt that she quilted on her domestic sewing machine!  If you ever get a chance to see this up close and personal, look for all the other little people within the stitching of the face.  I guarantee you will walk away from it with a new perspective.

*Note: pictures are from Hollis’ Facebook page and Imagine Hope’s Facebook Fan Page

FOR MORE INFORMATION on any of these events, please click on the “Contact Me” tab at the top of this blog page.

Sneak Peak

I haven’t been posting too much lately, because I’ve been up to something…  I am making the Opportunity Quilt for one of  my quilt guilds for 2013, and other than taking care of necessary life requirements, I have been working diligently on this quilt.  I can’t let anyone see the completed quilt until its unveiling at the guild meeting in either December or January.  But, I can give you a sneak peak so you can see what I’ve been working on.


Can you tell what kind of quilt it is going to be?  I mean, what “style” is it going to be?  This/these has/have been appliqued and then embroidered.  There are 4 of these that will go at the top of a bed quilt, where the pillows are tucked under.  Here’s another one…


The rest of the quilt is already pieced together.  I just need to add these to the top and then layer the “quilt sandwich” of backing, batting, and top and then quilt it.  I will give you a peak of the quilting later.

What have YOU been up to?

Traveling Pin Cushion

I saw this blog showing how to make a traveling pin cushion and thought, “What a good idea!”  http://www.rileyblakedesigns.com/cutting-corners/2012/08/03/traveling-pincushion/ This is soooo cute.  For us lazies who are okay with a plain cushioned top over a container, though, this can be adapted.  You could probably get one of those paper boxes at a craft store, cover it with fabric and then cushion the lid.  You could also attach a pin holder to the inside of the lid.  It would safely keep your items together and would be great for us who like to do handwork while we are out or traveling.

Dyeing to do this!

I have been wanting to learn how to dye for the longest time, now; many years, in fact – it’s on my Bucket List.  I’ve looked in to classes, but they either don’t seem to work out with my schedule or they cost too much.  An acquaintance of mine said she’d arrange for a dyeing class so I could finally learn, but it hasn’t happened yet.   So, I got tired of waiting and decided to do some research and teach myself how to dye.  I found a 6-shade value kit that is reasonably priced at www.handsonhanddyes.com so I bought it and set to work learning how to dye today.  Cindy Lohbeck, the owner of Hands on Hand Dyes, does an excellent job of explaining the process in writing.

Dyeing can be a messy process.  One of the suggestions was to put the cups for dyeing into a large plastic bin.  I am so glad I did, as you can see how the dye spilled over the edges.  You can also use a plastic table cloth and newspapers to soak up the drips, too.  Can you already see that there are 6 shades of the same color?

And, here are the finished products; 6 gradations of the Red Red Wine kit from Hands on Hand Dyes.  I had a hard time choosing just one color/package, because they all looked so yummy.  But, in the end, I chose this color for one reason.  I am making the Opportunity Quilt for one of the quilting guilds I belong to, and I haven’t been able to find the right color.  I thought maybe this would come close.  A few weeks back, when I went to Colorado, I bought fabric at 3 different quilt stores in hopes of finding the right color of rose to match some of the flowers in the main fabric of the Opportunity Quilt.  When I got them home and compared them to the base fabric, only a couple of them would work.  Well, guess what?  These dyed fat quarters will be perfect for the applique I will be adding to the quilt.


An added surprise that I found in one of the fat quarters I had dyed was that the scrunching I had done to produce the mottled effect made 2 hearts right in the middle of the fabric.

Cool, huh?


Oops! Please add more batting and backing fabric.

One of the problems that longarm quilters face is when a customer brings their own batting and backing.  Customers may not understand why they need to provide so much more fabric for the backing and also for the batting – I will show you why.   Personally I request a minimum of 6 inches more in length and width.  In other words, if the quilt is 72 inches x 80 inches, I will request that they provide both batting and backing that is at least 78 inches x 86 inches.  I’d rather have 4 or more inches more on each side, which would be at least another 8 inches from the quilt top measurements.  In this case, the batting and backing would need to be at least 80 inches x 86 inches.  I provide batting and backing for the customer, and it’s always better for me to do this so that I don’t have to worry about issues that may come up.

The reason we want you, the customer, to provide us with extra batting and backing is this.

You can’t really see all the roller bars, but that black pole that you see with my cheater clips is one of the rollers (those white clips on the black pole help me make sure I am rolling the quilt stop straight – they are lined up to the border seams).  I have 3  roller bars on my machine’s table.  You would think that they would roll all 3 layers (top, batting, and backing) at the same rate… but, they don’t.  Those rollers seem to suck up the backing and the batting much more than they do the top.

Let me show you an example, using a magazine.


As you look at this rolled up magazine, you will see that the front of the magazine (the top layer) does not meet the back of the magazine (bottom layer on a quilting machine, which would be the backing).  In fact, this letter size magazine has the top rolled up part extending about an inch beyond the bottom.  In between the 2 are the pages (batting) of the magazine.  If you can get that much difference on that small a piece, imagine what happens when you have a quilt top that is 72 inches x 80 inches.  You need a lot more batting and backing than you do for the quilt top.

So, here is my dilemma.  I picked up a charity quilt to work on that had the batting and backing included.  I measured before I put it all on the machine and feared the worst because I didn’t think there was enough extra batting and backing.  When you lay them all out on the table, they look fine, like you have plenty of batting and backing.   I told myself I was just being paranoid and that, surely, I could do this.  I’d just be careful.

Well, this is what happened.

As you can see, the batting came up too short.  I folded the flowery, quilt top fabric back, so you can see that there is not enough batting for this quilt.   I am VERY lucky on this one, because I thought the backing would be too short as well.  I barely have enough backing – it’s the rose and blue plaid.  If you come up short on the backing, you basically have to take the quilt off and sew extra fabric onto the back and then re-attach it to the table/frame, etc.  I can’t tell you how relieved I am not to have to do that!!!

I can fix the issue of batting much easier.  There are 2 ways I can deal with this, and I’m curious as to which way YOU would fix it.   That navy blue fabric with the pink flowers is the border of the quilt.

I stitched in the ditch all around the border and used an allover design for the body of the quilt.  So, one of the things I could do to add batting would be simply to remove the batting already in the border area beyond the stitch in the ditch.  I’d cut a piece of batting to butt up against the stitch in the ditch and then enclose it by stitching along the edge and quilting it with the border quilting design (big flowery design).  OR… I could just cut about 2 more inches of batting the length of the batting already there and just continue on my merry way.

Either way, my concern is whether or not there will be a gap where I’ve added batting.  In other words, will there be a gap  next to the stitch in the ditch if I choose that option?  Or, will there be a “no batting gap” in the middle of that border where the battings would meet?  Certainly I can whip stitch the 2 battings together where they butt up against each other.  But, I’d really only be able to do that if they meet in the middle of the border.  Butting a solid piece up against the stitch in the ditch could be less noticeable and less work, but will the batting migrate away from that seam?

What would YOU do?

Eye see it now… I think.

For those of you who do or do not know me personally, here is the latest update on my left eye.  This may well be the most boring of my posts yet!  😉  I basically only have one eye that I use to quilt with.  Right now I almost cannot see at all out of my left eye.  It’s like looking through a cloud.  But, I just had a tube shunt put into my left eye on Monday to help control the pressure in that eye (my bad eye).  I think good eye pressure numbers are between 15 and 20.  Mine has been as high as 46.

But, I’ve had several surgeries on that eye, so it’s been a little pissed off and rightfully so.   Hopefully, as my eye heals from this latest surgery, the “cloud” will clear up to wax paper vision, so I’ve got better peripheral vision in that left eye when I drive.  Yes, I can drive.  I am legally blind in that left eye, but so far my right eye is playing nice so that I can continue to drive.  I don’t yet feel comfortable being the driver with passengers (other than my dogs).

Cataracts tend to develop over several years before the eye doctors will do surgery… something about not being able to correct your vision with 20/50 lenses or better.  So, by the time you get your cataracts removed and a new lens put in, you have difficulty reading huge letters and numbers (like the price of gas on those big signs at gas stations – that huge).  I had cataract surgery on my left eye February, 2011 and on my right eye in April, 2011.  By the end of September, 2011 I started having serious problems with my left eye.  Apparently, the retina had detached several months before with no symptoms in my vision.  Because it had been detached for so long, there were now rips and tears, holes, and LOTS of scar tissue building up in there.

My first retinal surgery was the end of September, 2011.  They removed what scar tissue they could and repaired what damage they could.  They also put oil in my eye instead of a gas bubble.  That meant that I’d have to get the oil removed later with another surgery.  I think the decision for the oil instead of the gas bubble was to help hold things in place longer and with less restrictions.   By the time they were ready to do my next surgery to remove the oil and put a gas bubble in its place, my eye pressure was up to 46.  Drops helped the pressure, but it liked to hover in the 30s.

So, my second retinal surgery was the mid/late January, 2012 when they put a gas bubble in my eye which was dissipating quickly.  My retina detached a little over a week later.  My third retina surgery was February 6, 2012.  This time they put a scleral buckle around my eyeball, hopefully to hold the retina in place better.  That surgery was very painful with painful lingering effects.

My spirits were soooo down during this time.  After retina surgery, you have to lay flat in some way.  I had to lay face-down for 24 hours after my first surgery and then on my sides for the next week or more.  After each retinal surgery, the restrictions increased with the surgeries in 2012 resulting in me not being allowed to do anything at all other than lay on my left side – it made for a painful cauliflower ear.  I wasn’t allowed to read or use the computer for weeks and not allowed to sew either.  Nor was I allowed to get up and move around or do any chores.

With nothing but time on your hand, the thoughts that go through your mind are very depressing and “trying” to your spirits.  I really did want to die, especially if I would have to have another retinal surgery.  I can’t tell you how difficult it is for me to just sit or lay and do nothing.  It was quite a mental struggle for me – I had reached rock bottom.  During this time I tried to figure out “why.”  Why had this happened to me and why was I required to lay there in solitude and emptiness and do nothing?  I believe things happen for a reason, so I figured the lesson I was supposed to learn was to stop over-doing and always doing stuff.  Slow down and smell the coffee.  Life is short – we shouldn’t be in such a rush as to take it and the people in our lives for granted.  Through this I learned that people’s feelings play such a bigger role in their being than I’d ever imagined.  We tend to get so crazy busy with our lives that we forget how our actions and words will affect others.

So, for now, my goal is to bring beauty to the world of others through my quilting, through providing knowledge for others about the different aspects of quilting, and through acceptance of the differing personalities in the world, but also through trying to make all feel accepted, vital and special in their part and gifts to our world.

Yes, with each eye surgery I will lose a bit more physical vision and I risk another retinal detachment each time they poke or dig around in my eye.  Also, I am dealing with lattice degeneration in my “good” right eye, which means that the retina will most likely detach in my right eye in time.  But, as I deal with the loss of physical vision, I think I’ve learned to see things more clearly in the emotional and sensual realm.   In time I may become legally blind in both eyes, but I will continue to “see” in different ways.  And, I will surely quilt until the day I die regardless of whether or not I can “see” what I’m doing.  Otherwise, my spirit truly will die – my quilting is my lifeline.  I hope that sharing it with you will provide a lifeline for you as well.

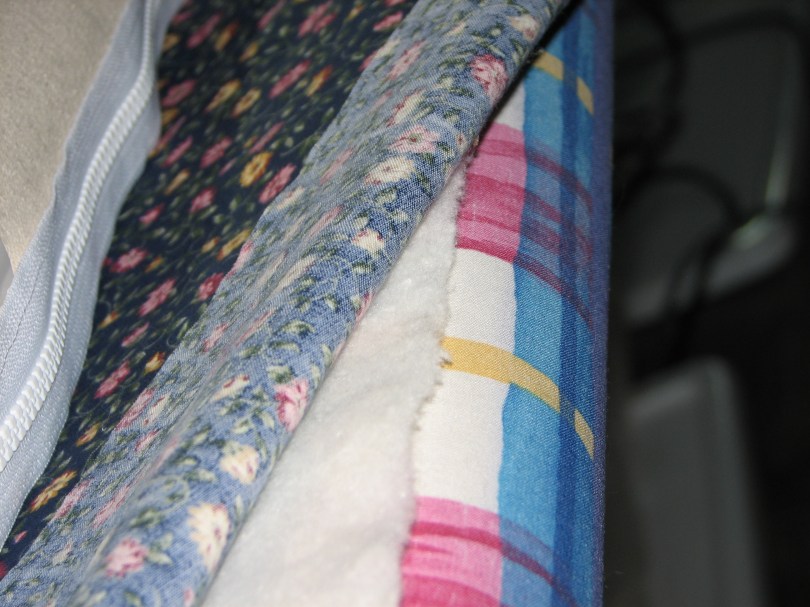
Here is a quilt I made with one eye.

And, here is the detail stitching that I put in it  of a fairy smelling the flower (using one eyeball).

By the way, this quilt was juried and made it into the American Quilter’s Society show in Grand Rapids, Michigan August 22-25, 2012.

The point is… things happen to us, but it’s how we choose to react that makes us who we are.