Mask Making Mania

  • Materials Used:
  • 2 pieces of 7″ x 9″ fabric
  • 1 strip of 1 to 1+1/2″ x 7″ fabric
  • 2 strips of stretched 1″ x 6″ T-shirt fabric
  • Optional: some type of filter and/or wire

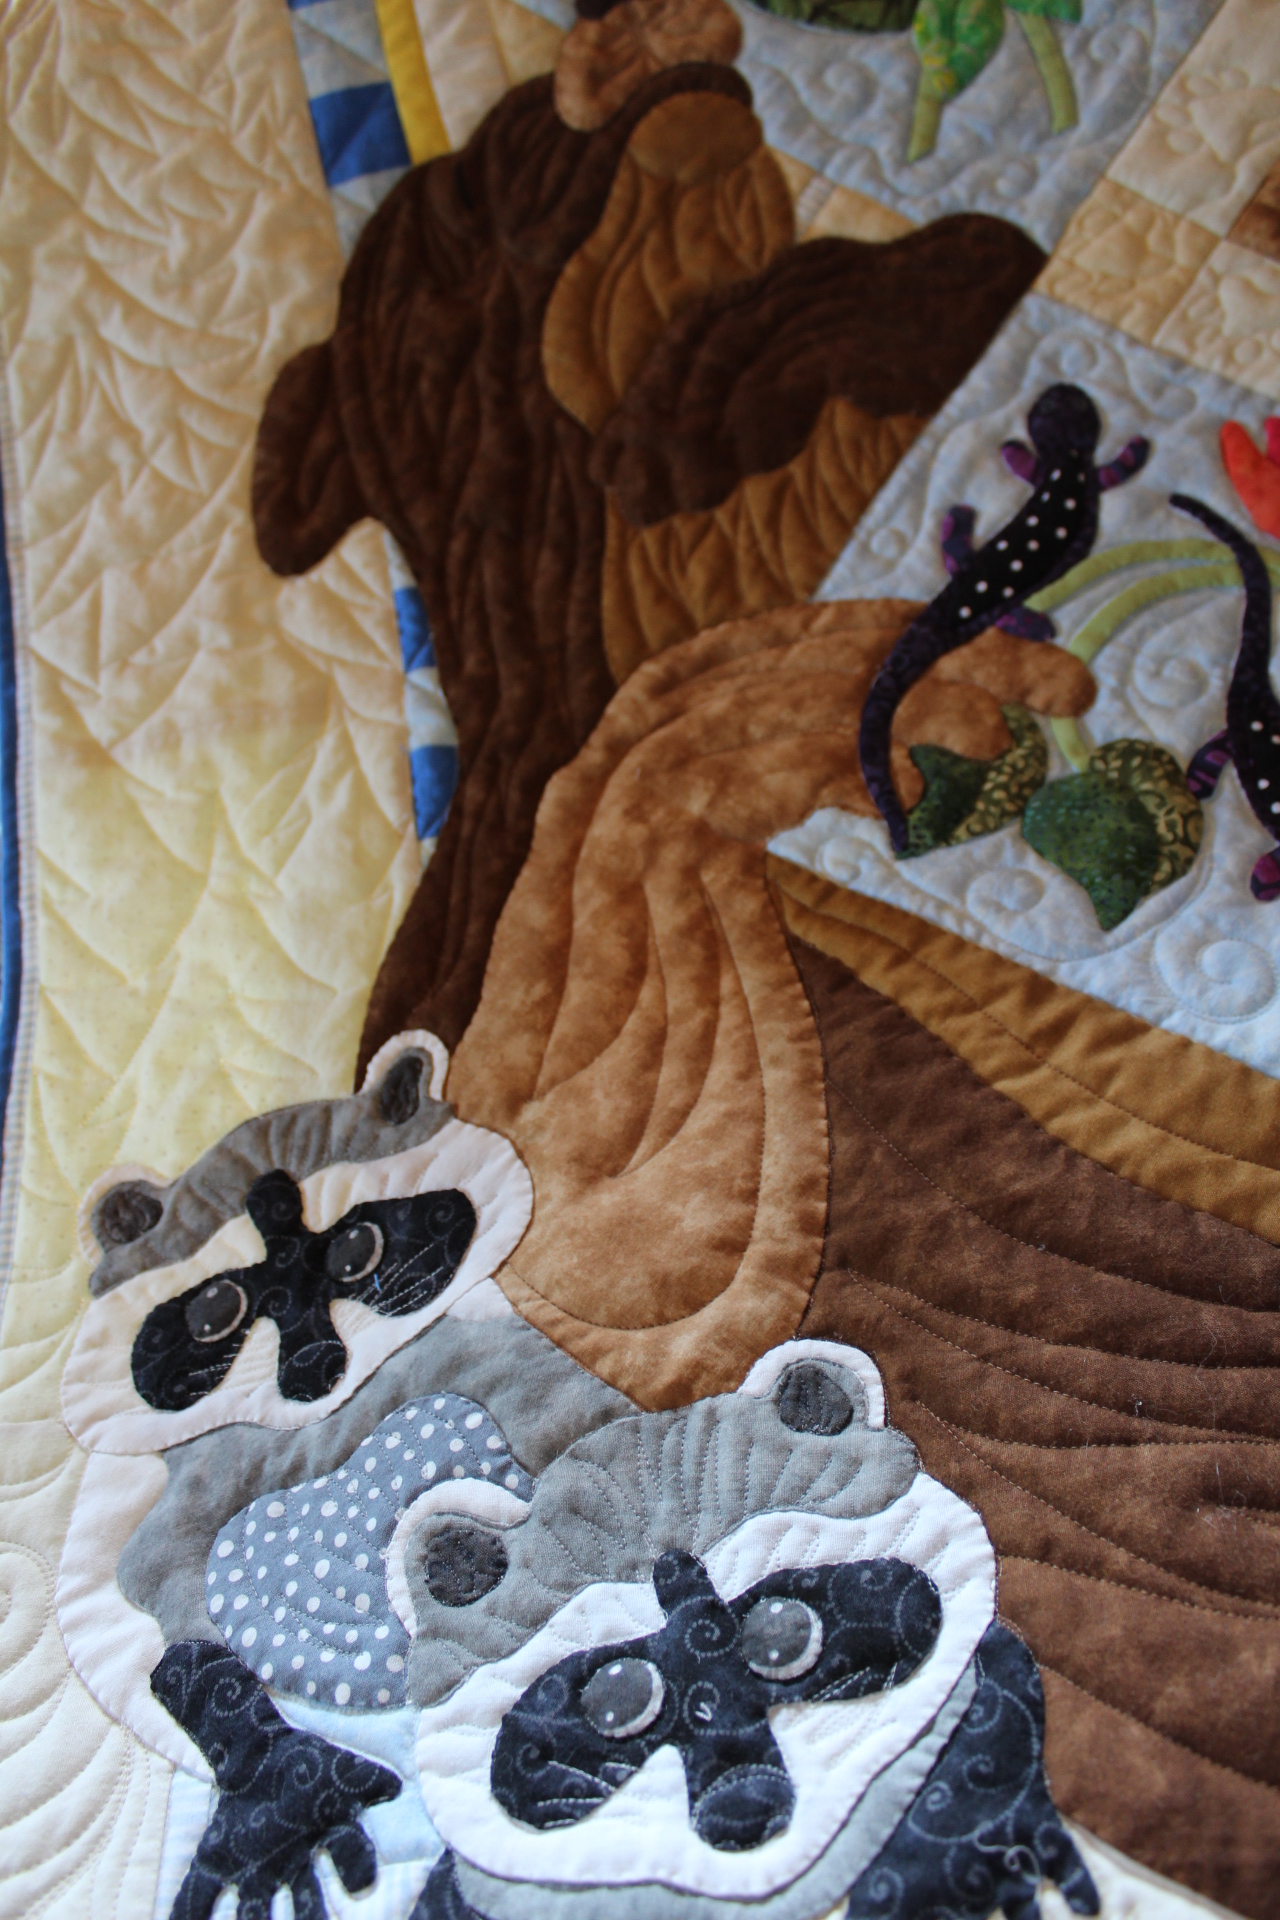
Along with everyone else, I am making fabric masks. I am also making masks from special microbial fabric the hospital provided for them. The fabric masks will go to family, friends in need, and special places that need at least some form of protection. I looked at and tried a lot of different patterns, until I came up with something that works for ME. It may not work for you, and if that is the case maybe you can adapt it to work for you.

People are insisting these masks need some kind of wire to go over the bridge of the nose. I always tend to overthink things, and my first thought was… won’t they need to be washed after wearing them in public? What happens if you sew those wires into the mask? Won’t they rust? So, I created a sleeve, much like a sleeve to hang your quilt, over the bridge of the nose. I don’t have enough pieces of wire, pipe cleaners, or twist ties to sew into the mask anyhow, so a sleeve is what you get. Find your own wire.

Also, people are suggesting a place in or on the mask to add a hepa filter of sorts. So, I adapted for that as well. I made 2 different kinds of masks, the ones that do not have pleats but look like jock straps across your face and the ones with pleats. Don’t get me wrong. I am fine with the ones that look like jock straps. The other ones don’t take as long for me to make, and I made fewer mistakes with them… except for those darned pleats. I’ll get to those in a minute.

I start out with 2 pieces of 7″ x 9″ quilt shop quality and/or batik fabric. Most masks are using 6″ x 9″ pieces of fabric, but I can’t seem to get my pleats to work right so I just added an inch. They’re supposed to be under your chin and almost up to your eyeballs anyway.

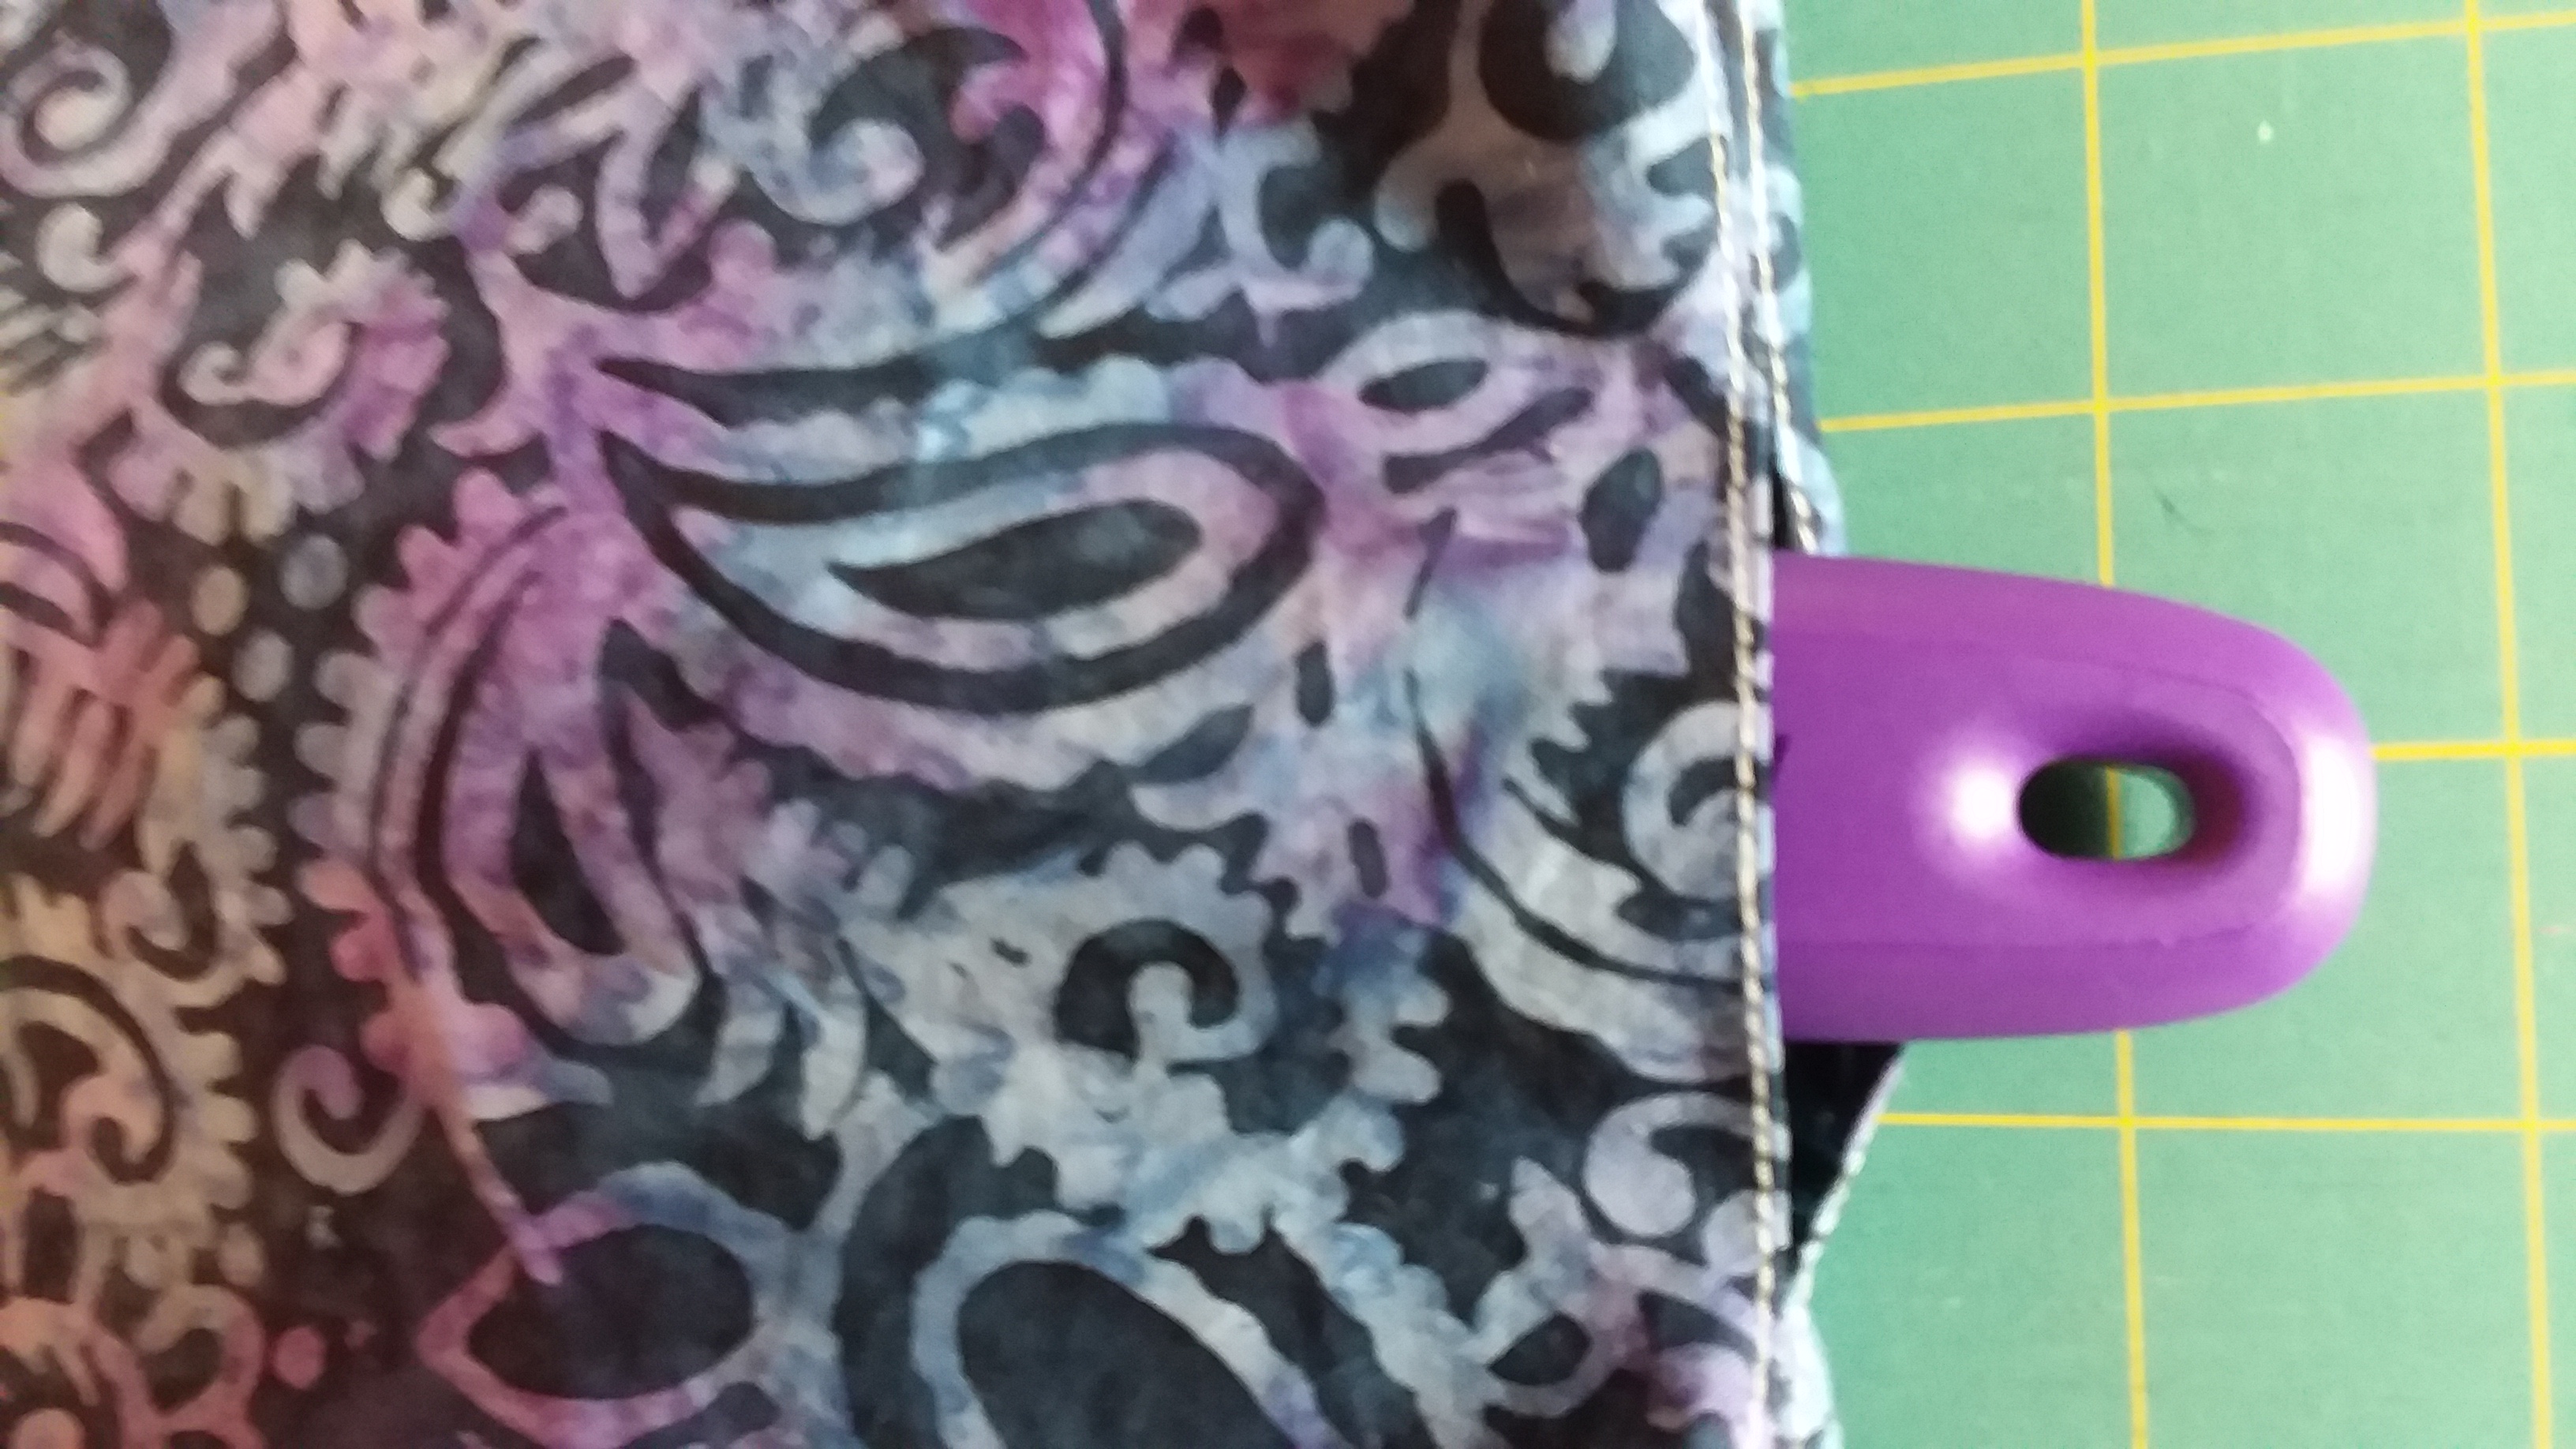
This is where I accommodate the use of a filter. Using a 1/4″ seam allowance with right sides of the fabric facing each other, I sewed 3 inches on either end of one 9″ side and then sewed along either side of that seam to hold each side of the seam in place. See where the rotary cutter peeks through? That’s a slot for inserting a filter. You should have 3 inches sewn shut with a 3 inch hole for inserting the filter and then another 3 inches sewn shut on the other end.

Next, I sewed along the other 9″ side.

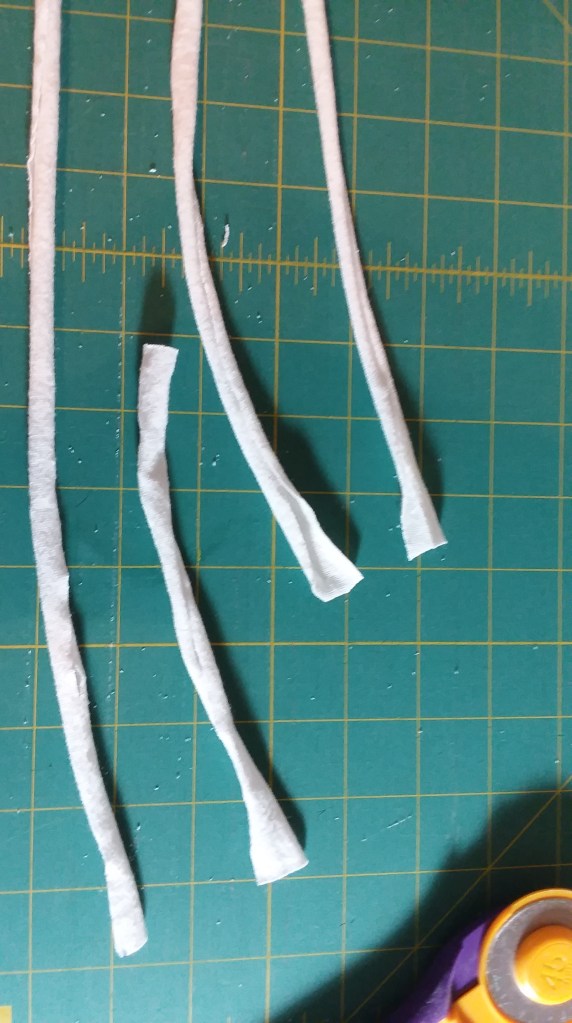
By this time, a lot of people are having trouble finding elastic, and are using elastic headbands, pony tail holders or are making fabric ties. As I experimented, I had problems with getting the elastic to fit around my ears correctly. Plus, it wasn’t very comfortable. I wanted to try the option of using T-shirt fabric, especially since I had some brand new T-shirts that need to go to the thrift shop (that is closed right now). So, I cut the sleeve of a T-shirt into 1 inch strips. If you stretch them, they will curl to a round shape. Cut those into 7 (corrected) 6 inch strips.

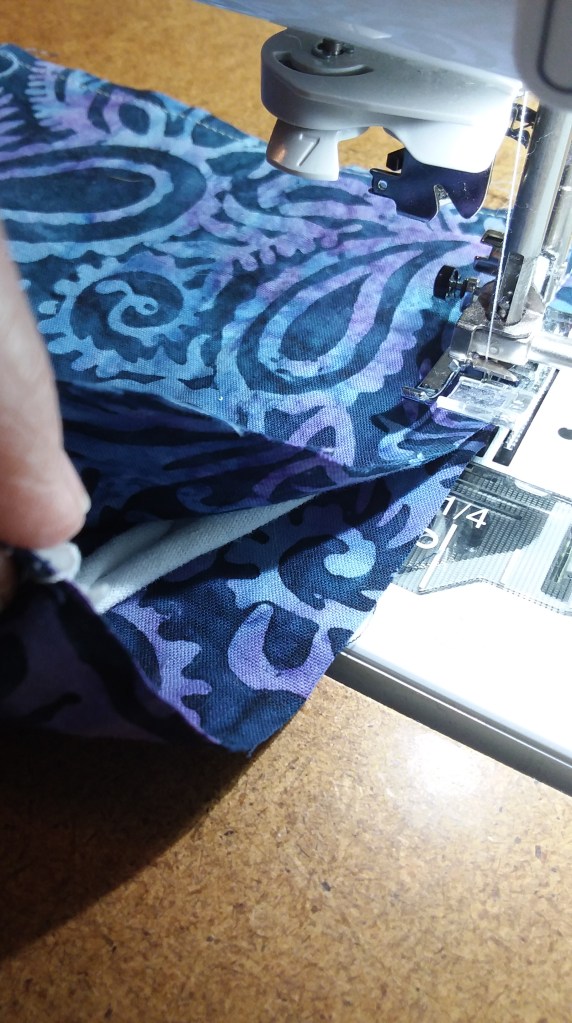
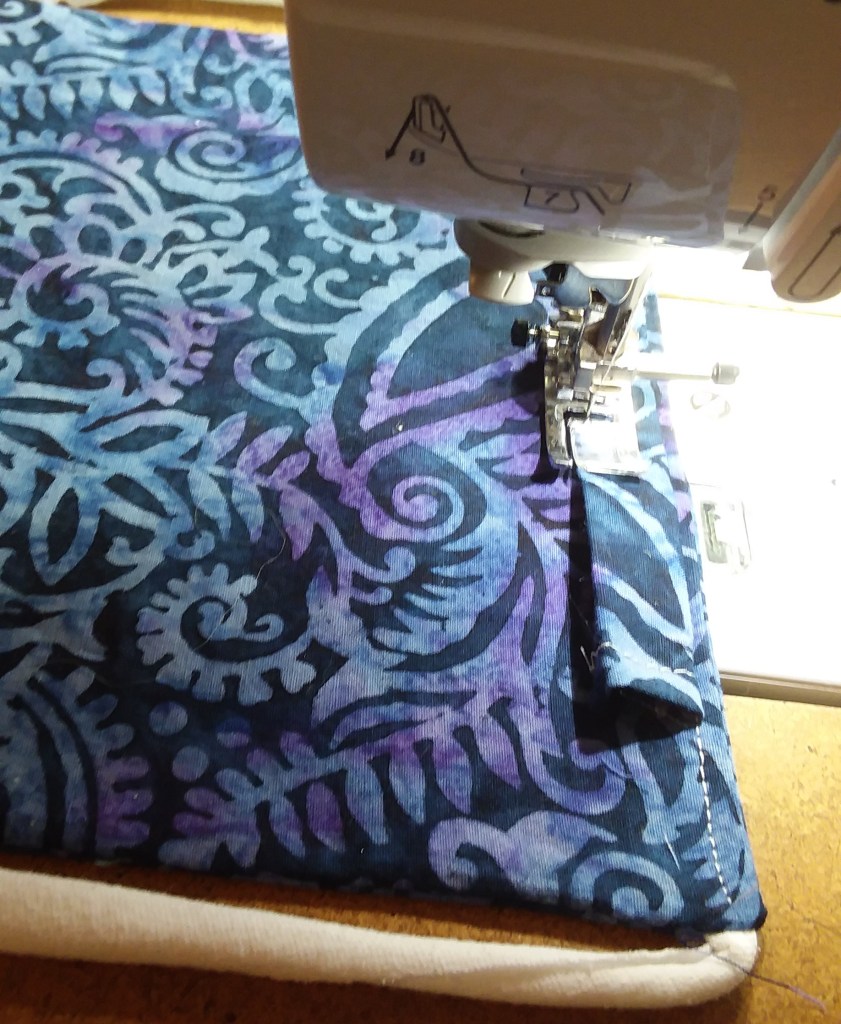
At this point, you are going to sew a 6″ T-shirt strip on the inside of either/both open sides. Make sure you have an edge of the strip sticking out in each corner and that the rest is tucked safely inside so that it doesn’t get caught while you are stitching.

So, now the mask is all enclosed and needs to be inverted. This is where that slot for the filter comes in handy. Turn it right side out through the hole and voila!

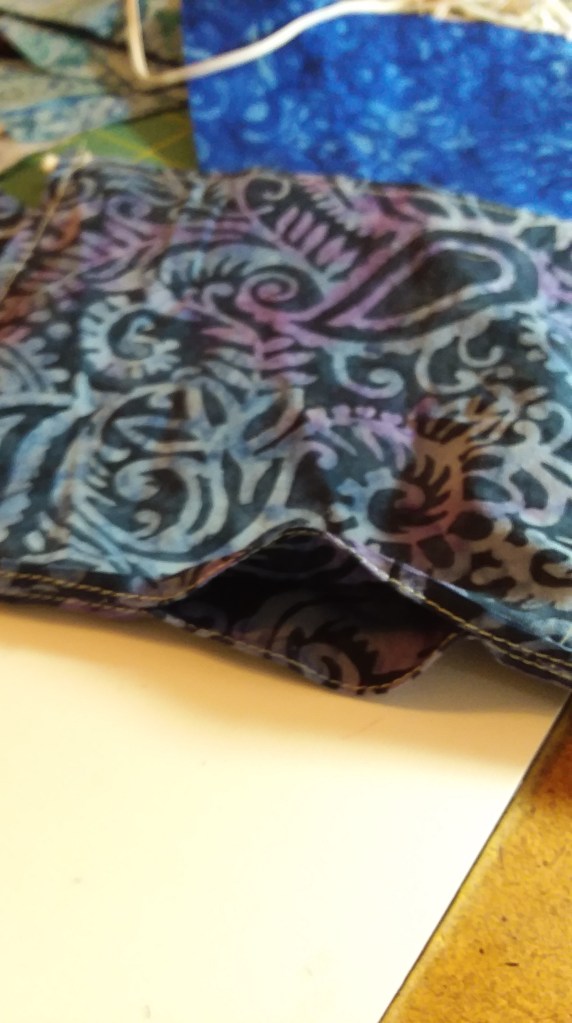
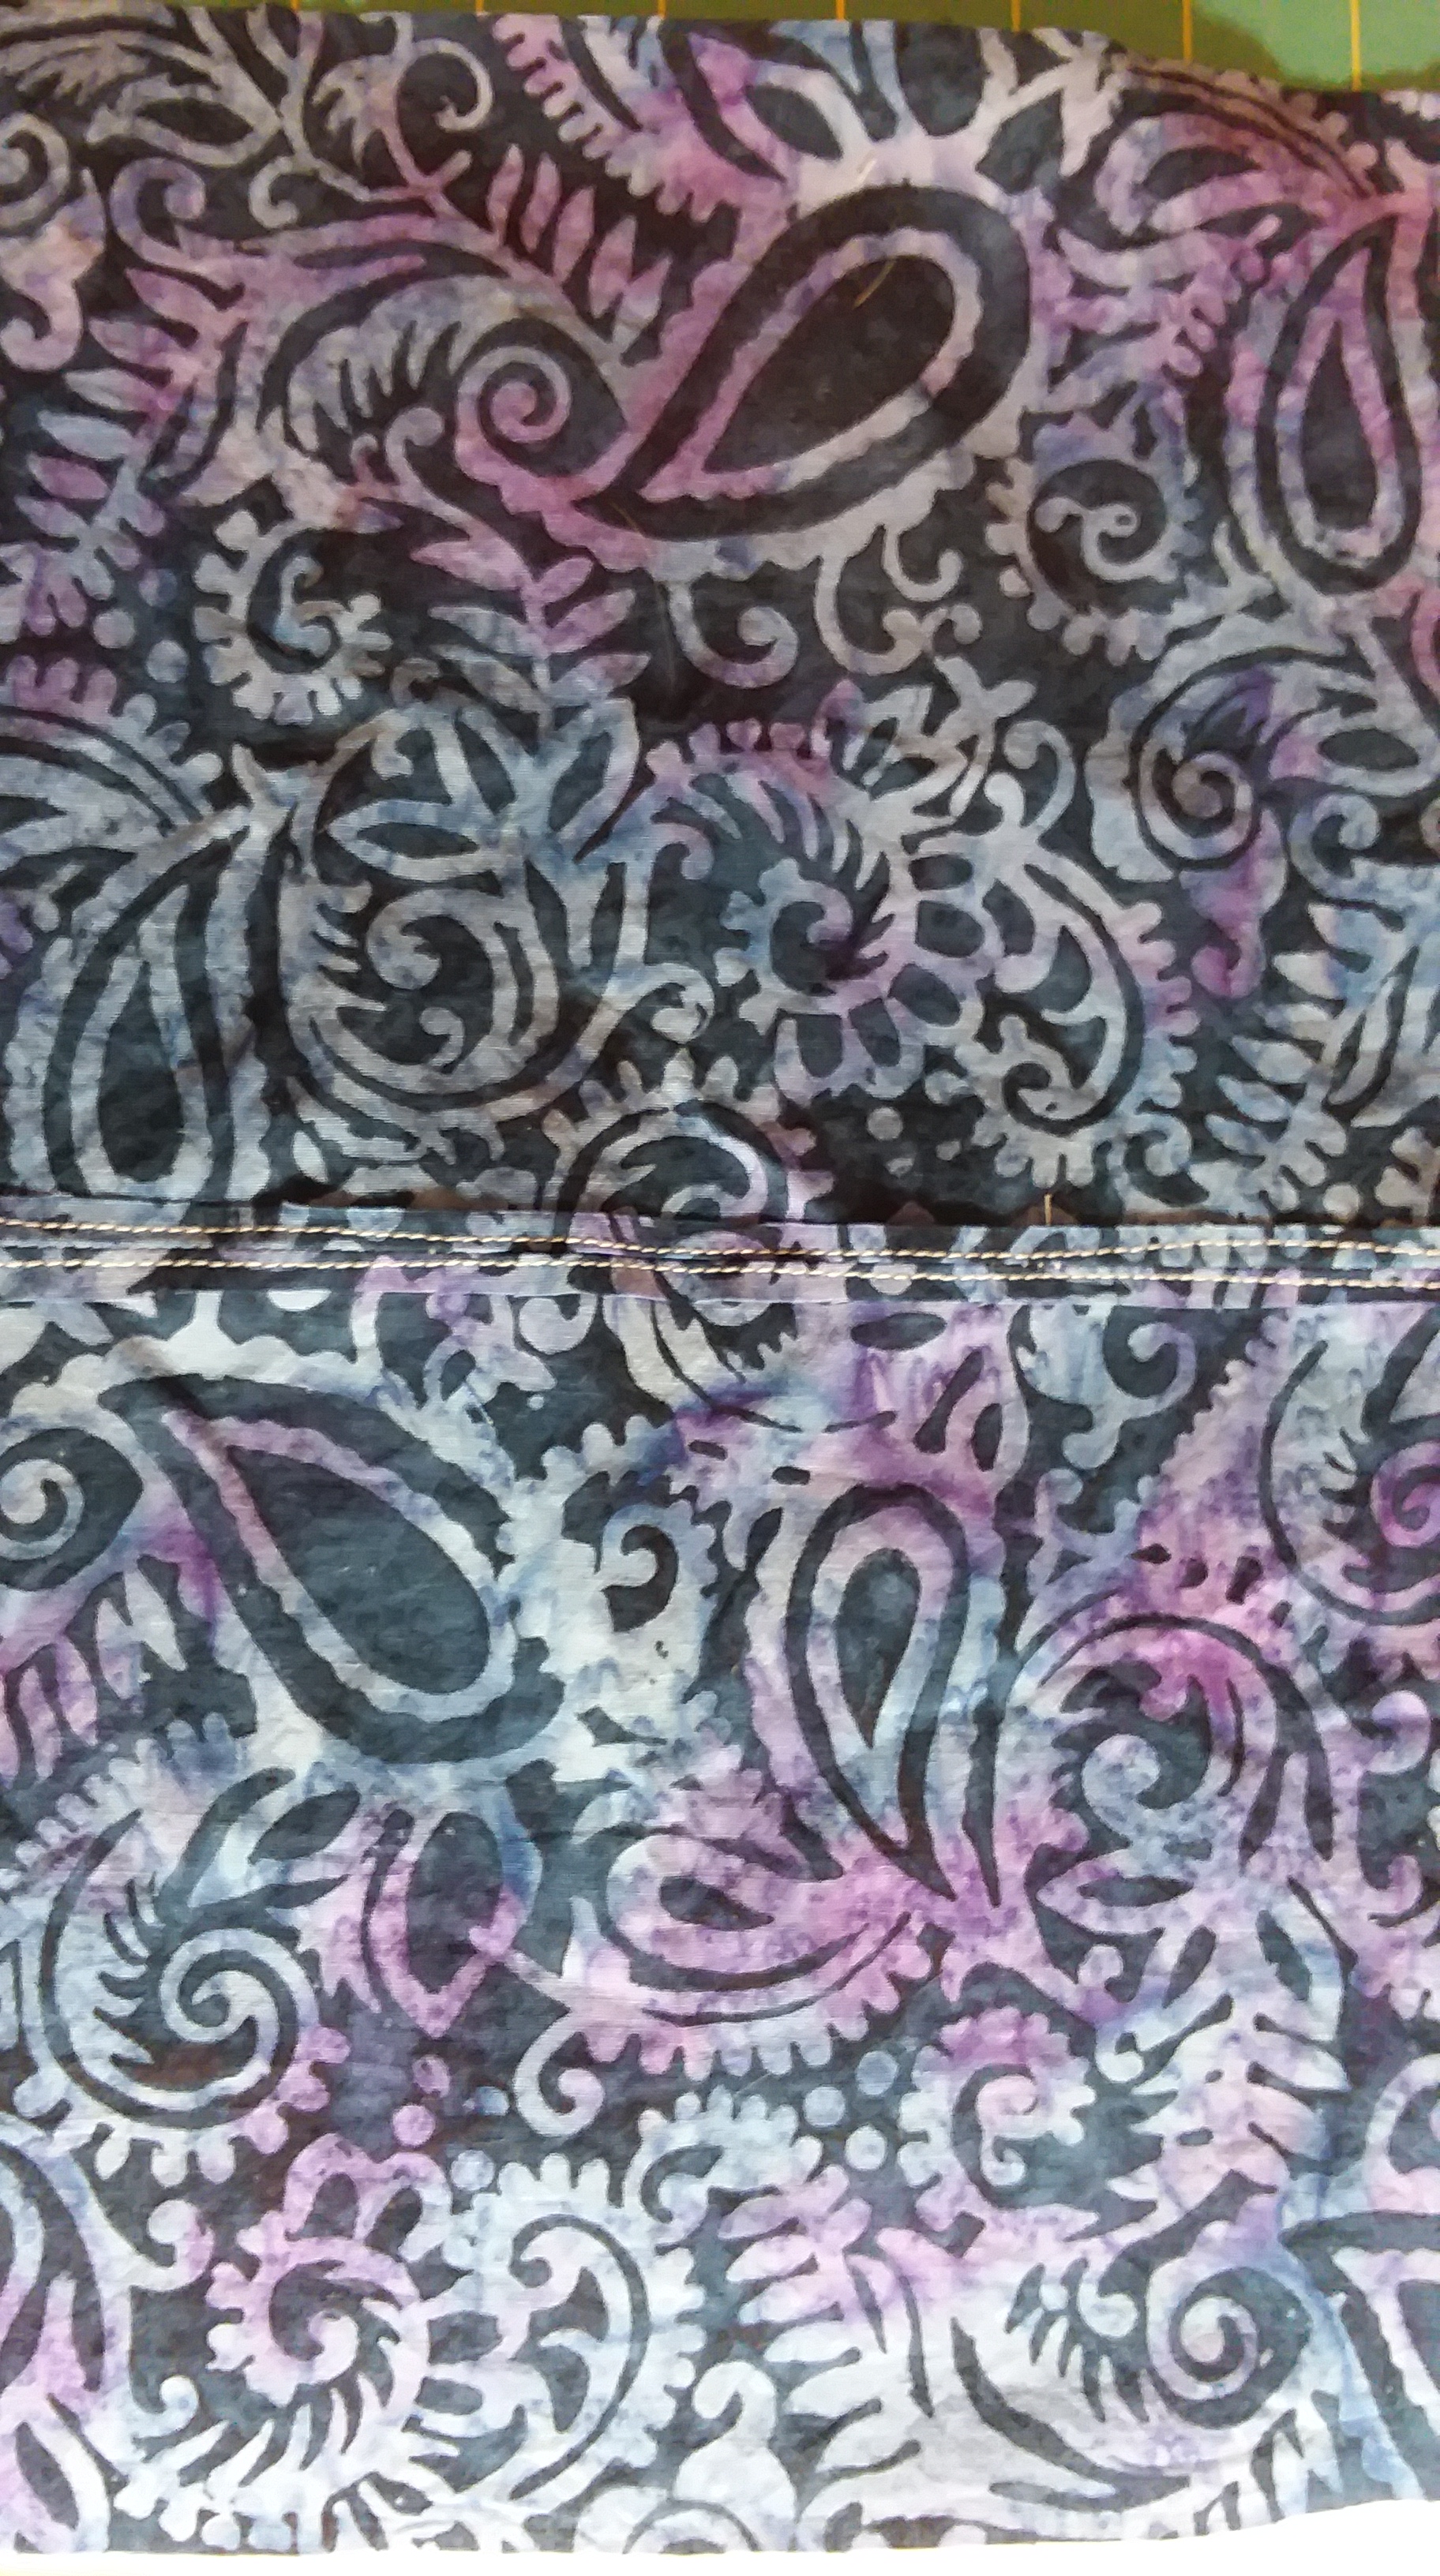
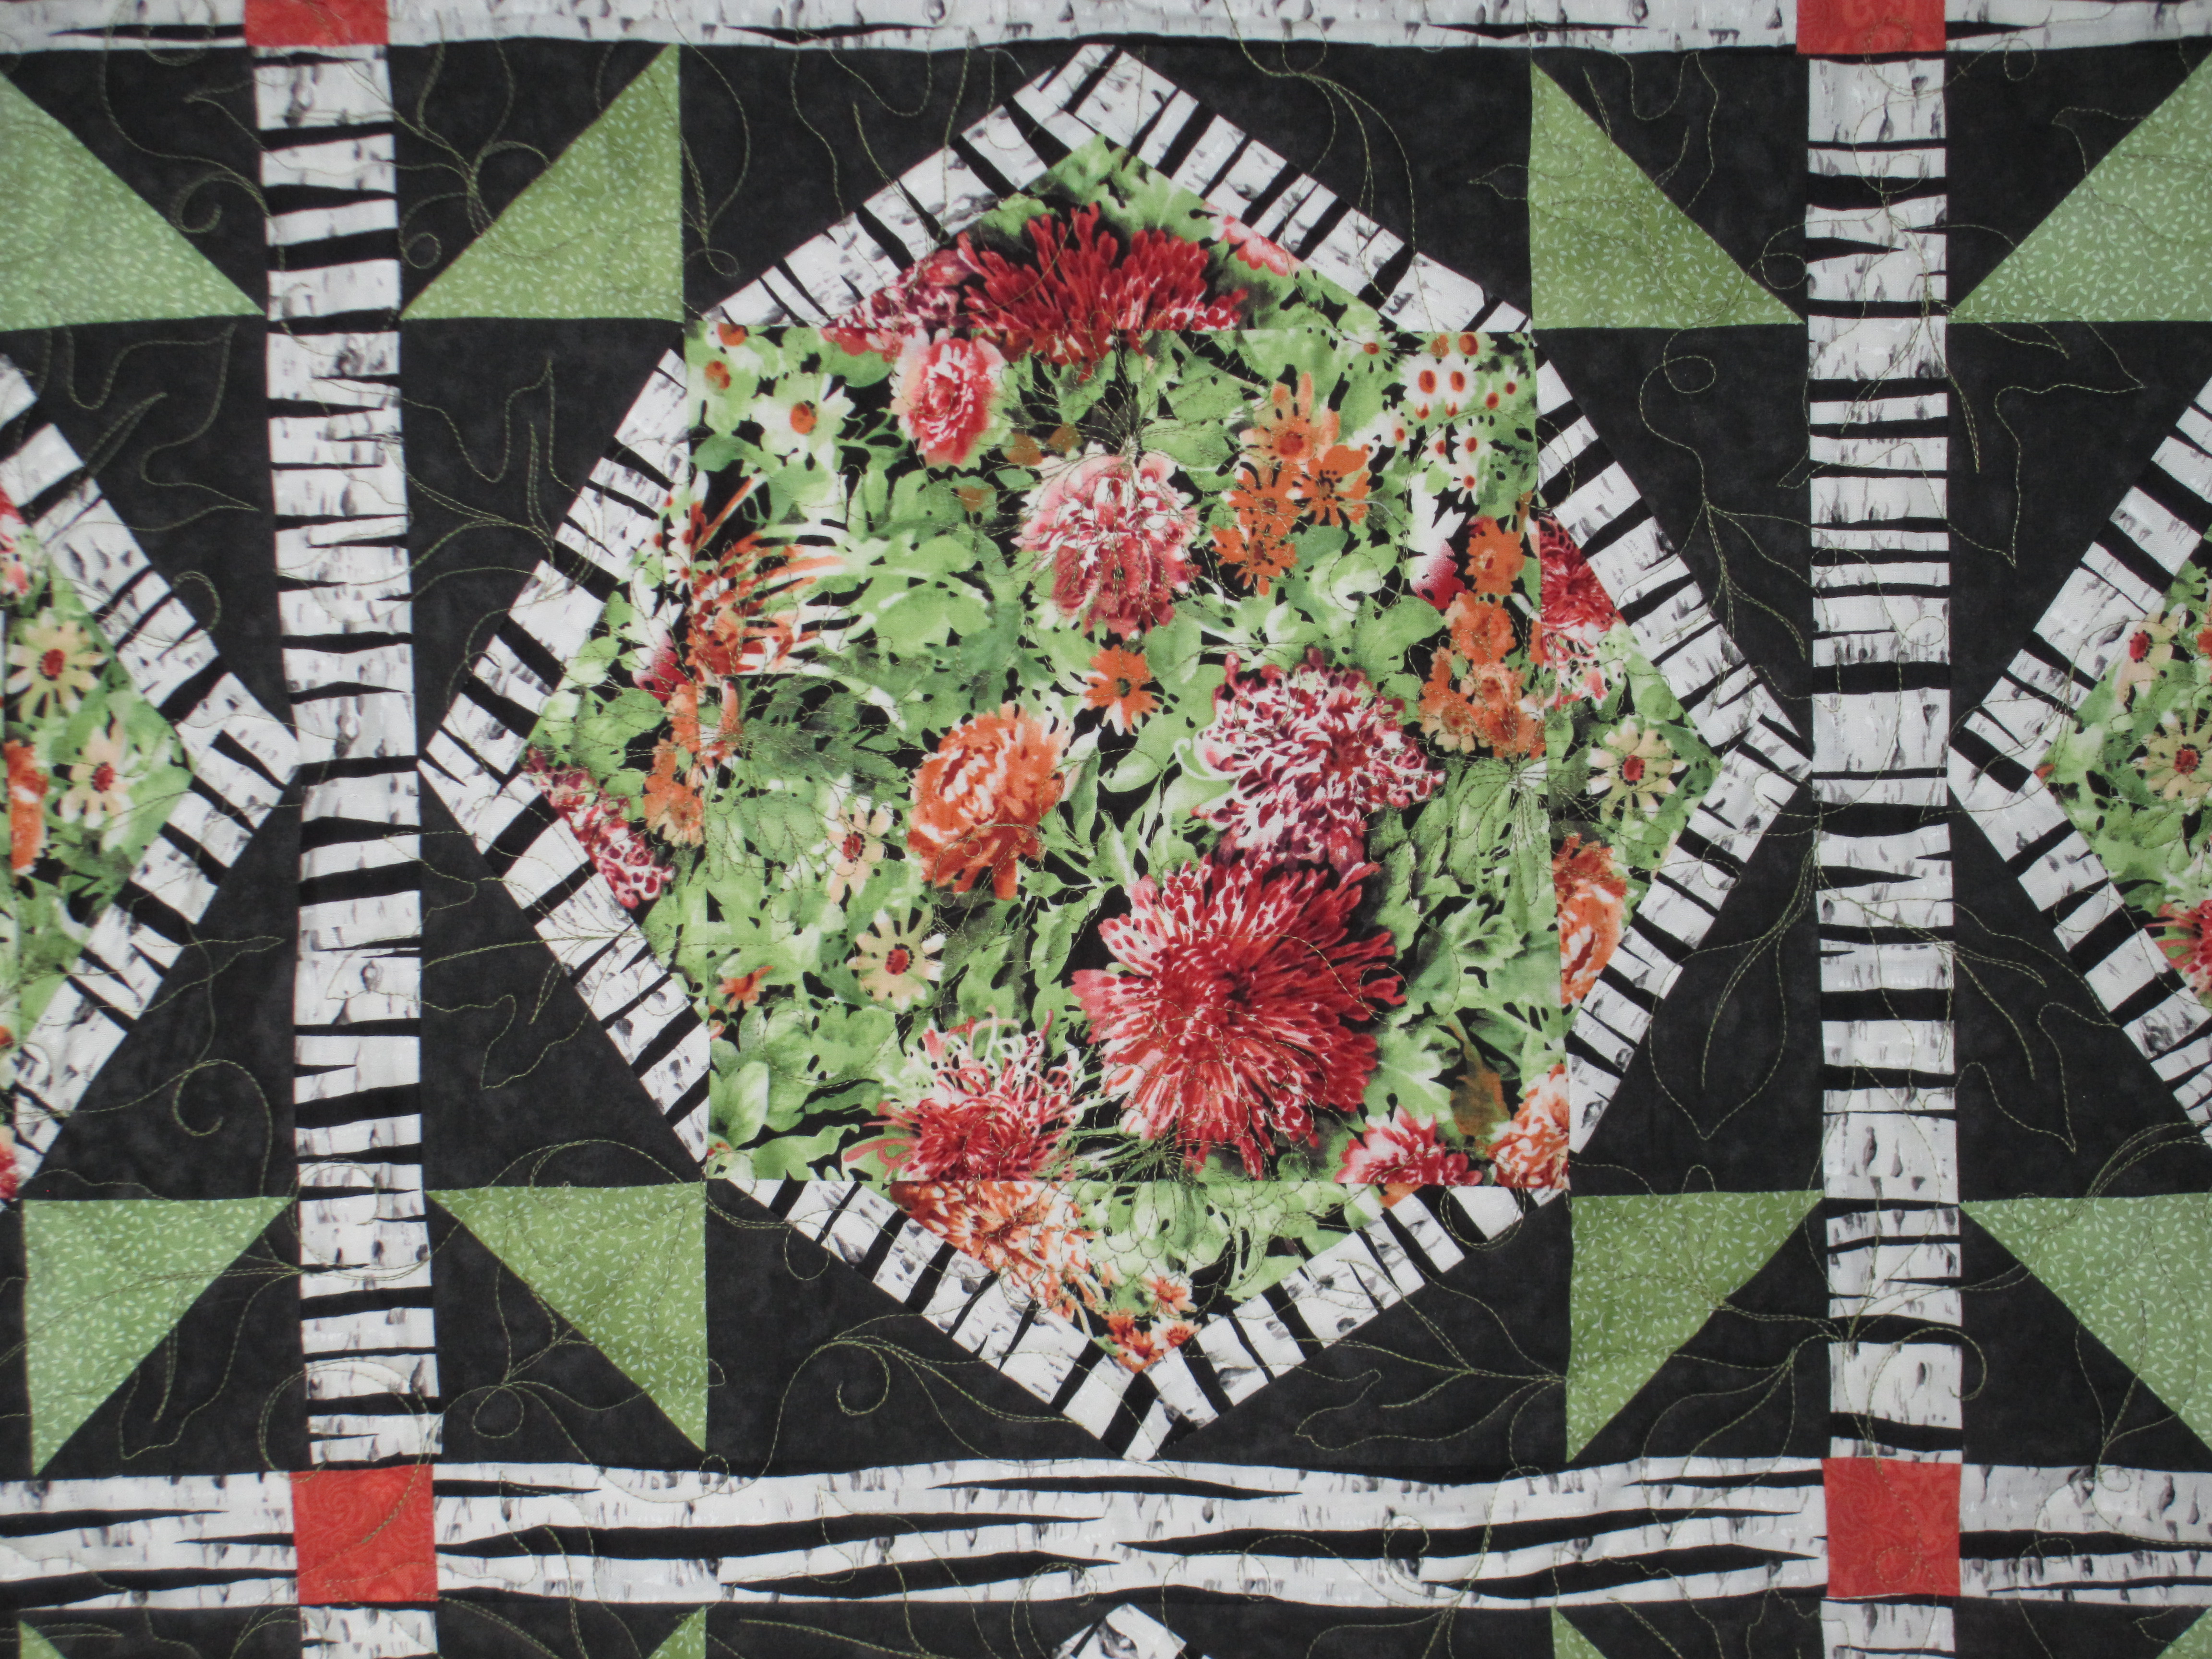
Next, I sewed that little wire sleeve at the bridge of the nose… along the opposite side of the filter “hole”. I cut about 1+1/4″ x 7″ strips for my sleeves. Some people may like it a little tighter so 1″ wide would work for them. And, some people probably need a little wider, so 1+1/2″ would be best for them. Find what works for you. This happened to work for me. There are a couple of ways to sew them on. First, you want to turn under each skinny end and sew those down and then you can either iron the long ends under about 1/4″ inch and sew down on top of those. OR, I found I like sewing an open side along the top edge and then sewing on top down the other side. I know I’m not explaining that well, and I apologize. In the picture of the black and white fabric, you can see the fabric is barely tucked under the top of the mask (on the back side). I sewed along there and then turned the mask over to sew along the other side. It gives a tad more wiggle room for the wire.

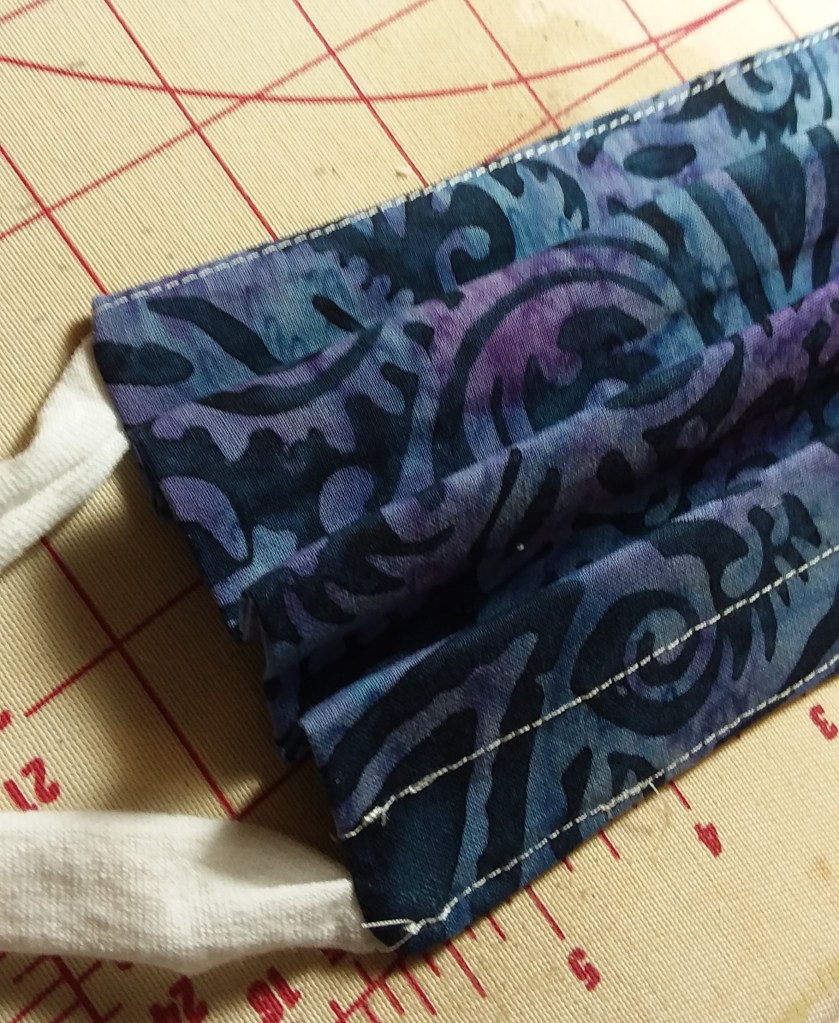
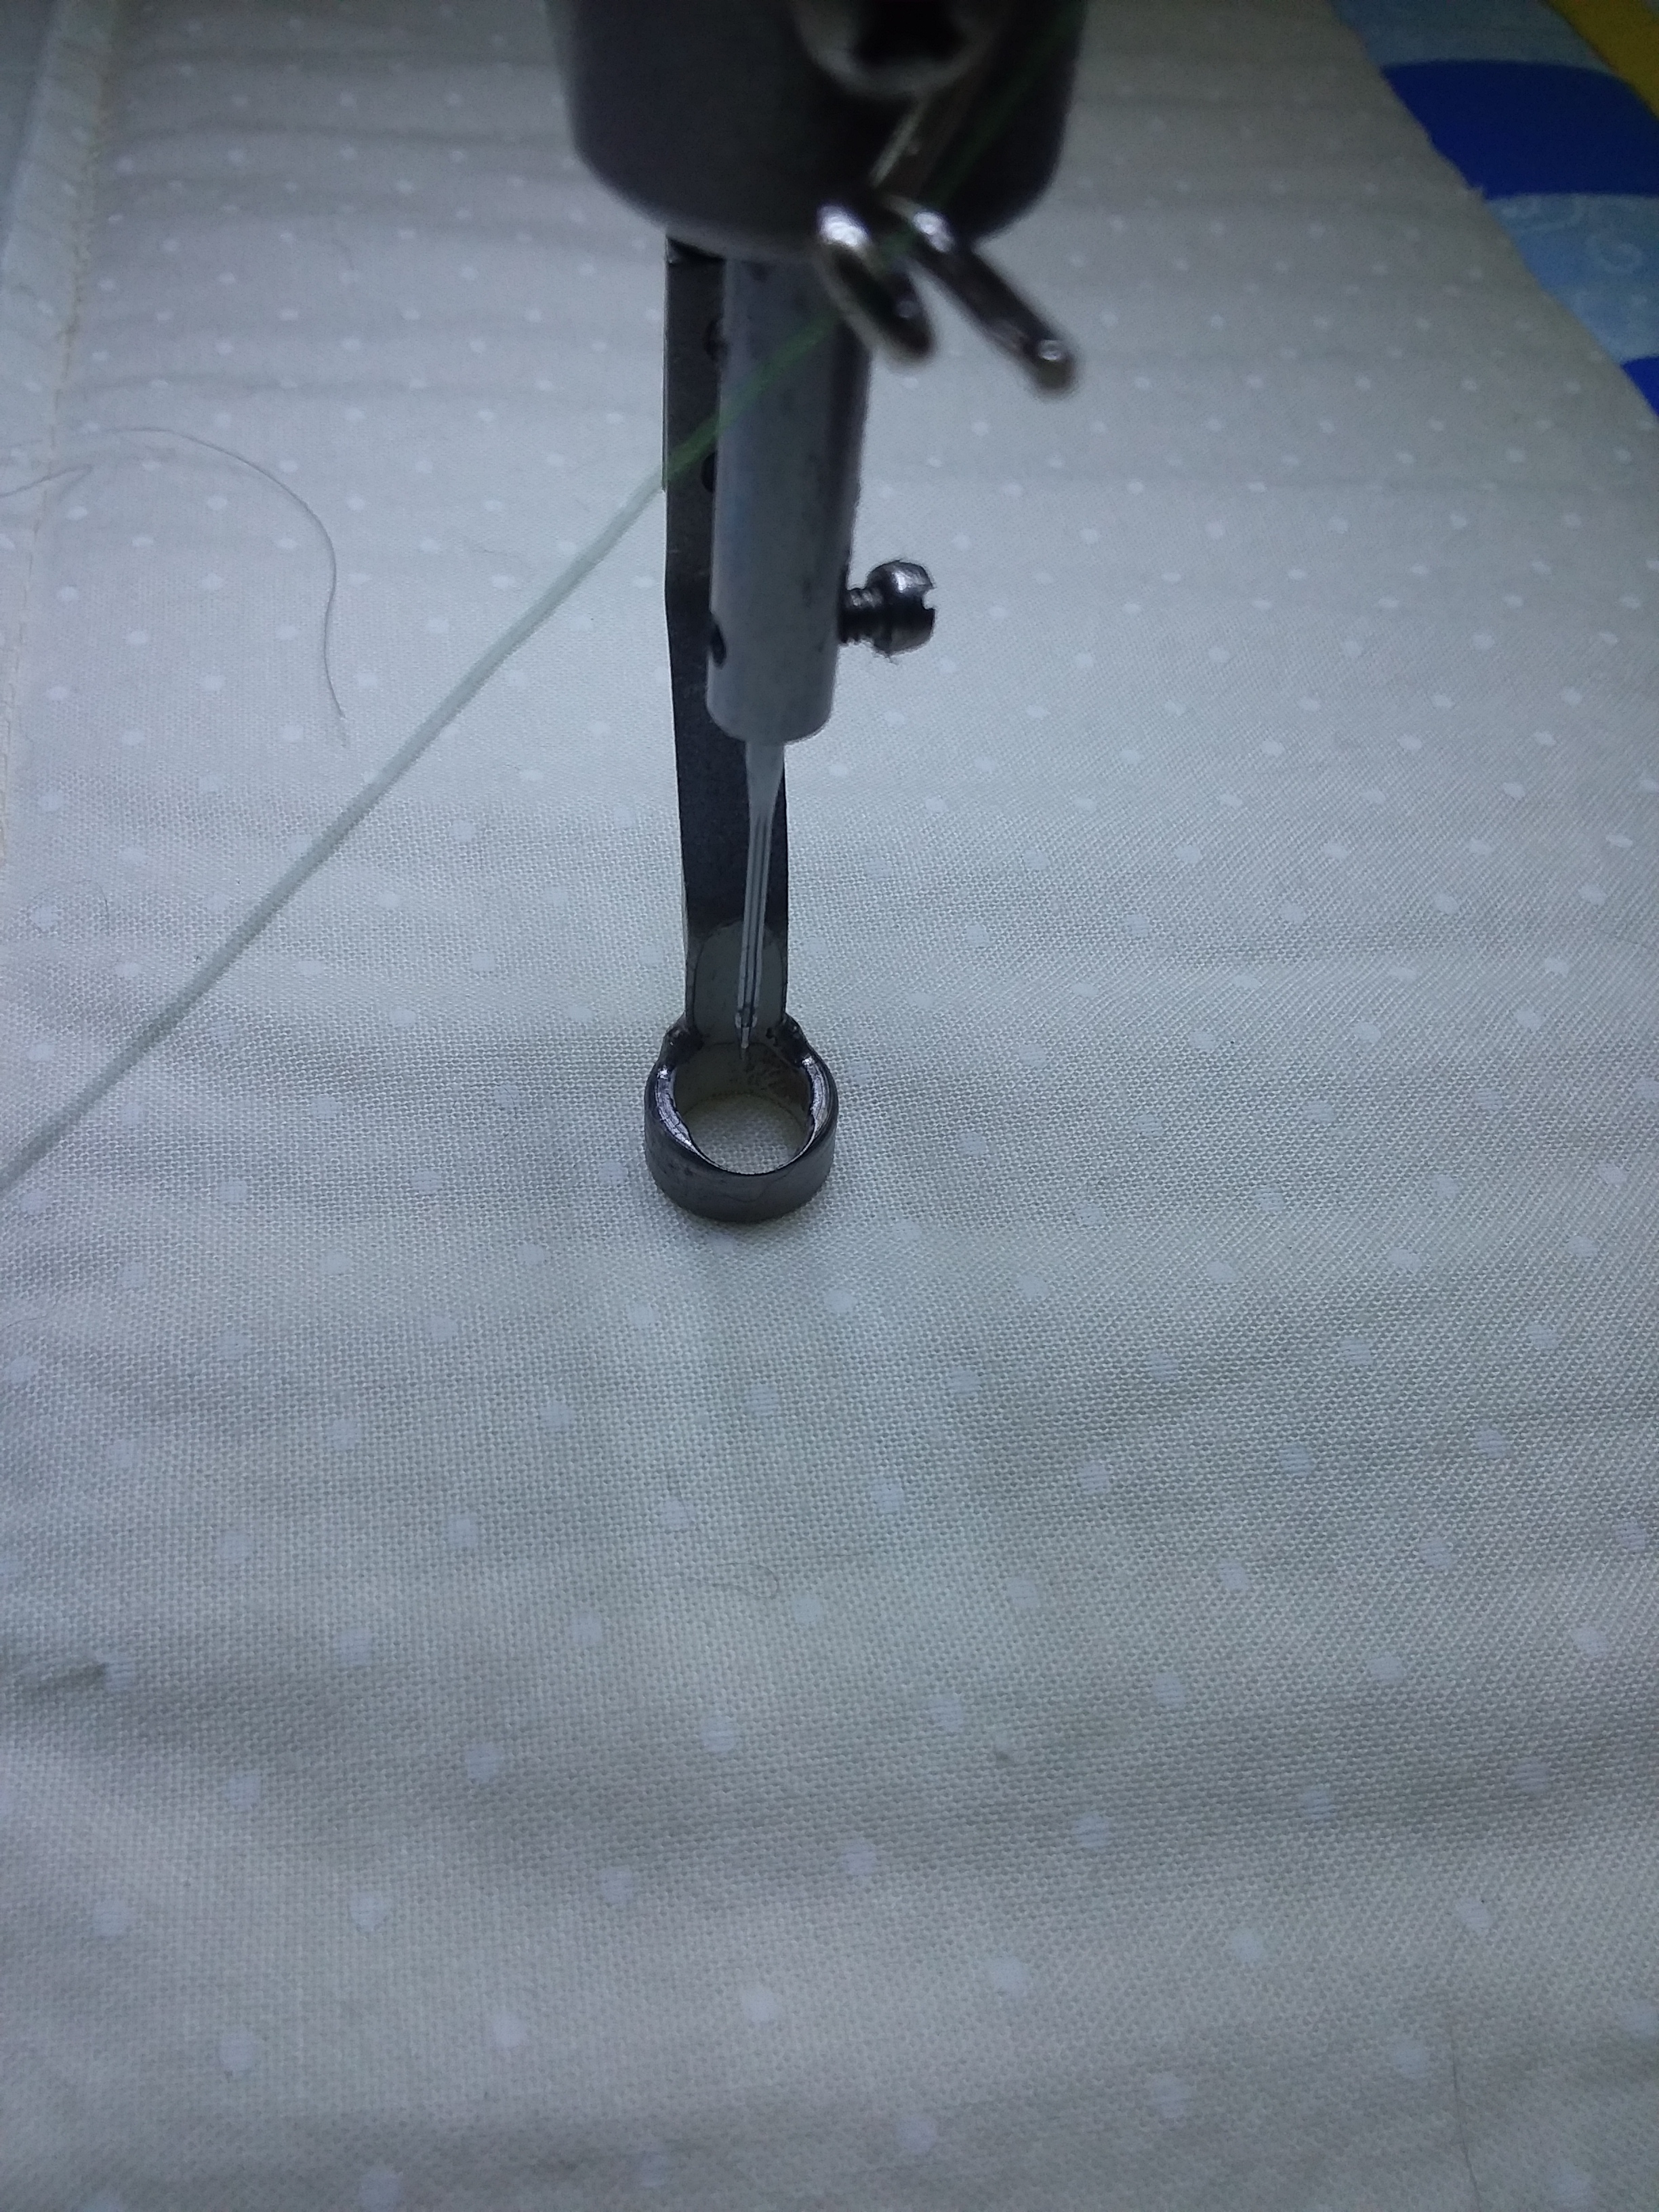
And, now we come to the part where I had the most trouble of all… making the pleats. Some directions I’ve seen give you precise measurements to use. Others tell you to make 3 pleats; that’s it, just make 3 pleats (of whatever size you like). I had masks that were longer on one side than the other and looking pretty sad. I just saw a trick this morning for which I do not have pictures. But, this person suggested folding your mask down the middle along the 9″ side and ironing a crease. Then open it up and fold both edges to that middle crease and iron creases there. That way you have 3 creases to guide you. I’m going to try that with my next mask, but I suspect I will end up having the same problems as before. So, my advice for you… just do the best you can. It’ll all work out okay.

Find your mask style and please stay healthy and happy.

*Note: this post has been corrected to reflect a correction. I wore a mask with 7″ elastic today, and it was not tight enough. But, if I get the elastic too tight, it pulls my ears forward and is uncomfortable. That was the reason I switched to T-shirt fabric. My recommendation is that, before you sew the T-shirt fabric or elastic in place, put the unfinished mask up to your face and gauge how long you think it should be for YOUR face to make it snug, but not uncomfortable. You need to be able to breathe but allow germs to float inside your mask.

Under the Sea

Finally finished with this one. It started out as a figment of my imagination, and I ran with it. I made this for my toddler grandson, so it’s a little too “involved” for that age, but I ran with it anyway.

When my daughter was pregnant, she had talked about making an ocean life quilt for her baby-to-be, but you know how pregnancy sucks up your life; that’s exactly what happened. I was already well into another quilt for the baby, so there was no way I could also whip one of these up, too. Time has passed and the ideas never left my head. The problem is how to make a sea life quilt for a toddler that does not look like it should belong to someone older. Well, I put smiles on the creatures faces… ALL of them.

I started out by trying to use up a bunch of charm squares I’d gotten in a fabric exchange (of charm squares) and then randomly placing them with darker colors towards the bottom and lighter closer to the top. That would be my background. The picture above doesn’t do the coloring justice. Now, how to fill it up? Initially I had too many fronds of seaweed. I was randomly making different appliques, trying to fill the scenery. You can always take some away, but I didn’t want to have to make more later. So, I took some of the seaweed away, and I wish I had taken more.

I always learn something with each quilt I make. With this one, I wish I had made it a little more square. I was trying to place all those creatures at the bottom of the sea where they “belonged” and ran out of room. That is the reason for the random starfish elsewhere. I also wish I had made the fish different sizes. The clown fish really are too big, but they are colorful, and I needed that. I don’t know what possessed me to make all the fish around the same size. Lesson learned… thank goodness it’s for a toddler.

In placing the applique pieces, there were things I didn’t really have room for, or had forgotten to include, or didn’t know how to incorporate it into an applique onto a toddler’s quilt. I was going to put a sea anemone on there, using yarn pieces to float upwards. But, he could pull that off the quilt. Besides, the clown fish were already too big for what I was imagining. So, I added those items in with the quilting. In my haste, I also did not have enough fish swimming in between the fronds of seaweed. So, I added that touch here in the quilting. The trick is to NOT add too much quilting to this. I want it to be soft; the more thread I add the stiffer it will be.

One of my quandaries was how to applique the clown fish. There are orange bodies with black and white pieces. The black would look a little weird if I appliqued it, because I wanted it to look vein-y to show the texture of the fins. I ended up using a fabric marker and drawing the black on.

I wanted the turtles to have shells, but couldn’t find fabric that would work. So, I ended up using a muddy batik and drawing the shell on that. Quilting adds the dimension to it.

Closer view of the top half of the quilt…

Closer view of the bottom half of the quilt…

One of the hazards of quilting is all those loose, runaway threads. When you think you’ve got them all off your quilt, just take a picture, and you will find more! Did you find any?

Dresden Plate with a Jelly Roll

Making a Dresden Plate quilt was on my Bucket List (the mental list of the many, many quilts I want to try before I die). Problem is that I really am trying to use fabric I already have. I’m bad about buying jelly rolls, because I figure I can easily make something without having to cut all those strips. But, they sit in my studio.

So, for this quilt, I decided to use one of my Riley Blake jelly rolls. I don’t know if you can see or not, but there are 20 points on these Dresden Plates. Twenty-two rolls came with the set, but I left 2 of them out, thinking I could use them in the border somewhere. But then I didn’t. Funny how as you are making a quilt, your journey takes you down different paths than you had originally intended. Anyhow, 20 strips… what size ruler do I need? A circle is 360 degrees. Divide 360 by 20 strips, and you will need an 18 degree Dresden ruler or template.

I wanted big blocks, so I extended a bit beyond what the template showed for where I should cut the tip end. I would be folding the strip lengthwise and sewing that top end to make a tip when it’s folded back, so it wouldn’t be missed when it’s tucked to the back. Missouri Star Quilt Company has a tutorial on how to make the plates here.

I finally finished it and tried some different quilting techniques on it. Those who know me, know that I try to make each quilt unique and add special touches. And, I’ve done those all freehand. I do not have a computer for my machine… yet. I am saving my pennies… it’s on my bucket list. 😉 But, I have a couple of the quilting designs on this quilt digitized and available for those who DO have a computer for your quilting machine.

The Crosshatching frame inside the block is available at Legacy Quilting.
The Eyelet Lace border design is also available at Legacy Quilting.

I wasn’t sure what fabric to use for the binding. I love using striped fabric for binding, and my friend, Tina, showed me some striped fabric that would be perfect for this quilt. It picked up that color of blue and the red. But… I ended up just using what I had and repeated that 1/2″ blue border. Saving my pennies…

For those of you who don’t know, I am no longer quilting for hire. The arthritis in my spine won out. So, now I am doing a few other things. One of them is digitizing machine quilting designs. Yes, I can do that for other people’s designs and have done that. My hope is that this will eventually lead me to getting a computer for my machine. Maybe then, I can think about quilting for hire again. I don’t know. That’s a lot of money and a long way off.

A couple of things I’ve done lately is cut my own extension table to fit into my sewing machine table. I ordered an insert 8 months ago, but have not gotten it yet. Yes, I’ve called the shop several times. I finally gave up and made my own. It’s not pretty. I still need to paint it white. But, it feels so much better to be able to spread out the fabric to be sewn without it catching on the edge of my machine.

Not pretty, but it does the job!

Also, Kansas City Regional Quilt Festival was Father’s Day weekend. A quilt that I had quilted for Joan won 2nd place in Viewer’s Choice. It’s a really cute scene of Mom taking care of her baby, so I can see why people liked it. The pattern is called “Love from Above” by Charley Harper. You can buy it here.

I was surprised at the quilting. I thought I hadn’t done a good job on it, but time passing gives you a new view – it wasn’t as bad as I’d thought. But then, the lighting was very complimentary to the quilting great as it bounced off the trees and tall grasses that were stitched into her quilt.

No photo description available.

What was really cool is that both Joan and I got a ribbon for her quilt.

Yay! Thank you, Voters!

The next Kansas City Regional Quilt Festival will be in 2021. Their website is http://kcrqf.com. This year they did an awesome job meeting the needs of so many quilters. Check out their site and try to make it next time!

Forest Galorest

I loved this pattern from Java House Quilts the first time I saw it.  If you love it as well, you can purchase it yourself here.  I started working on this quilt back in September.  The applique would be needle-turned, meaning by hand.  The edges would be turned under and stitched down by hand vs fusing down a raw edge applique onto the background and machine finishing the edges (a tedious, but much quicker method).  I figured it would take me about 2 years to finish; a nice project for me to work on in the evenings before bedtime.  My daughter was going to start “trying” to get pregnant soon.  Maybe this would make a nice baby quilt.  If she never conceived, I could keep this quilt for myself (trying not to get my hopes up).  Her older sister took several years of trying to conceive naturally and then several attempts of in vitro before getting pregnant.  So, 2 years… I would have plenty of time to casually work on this quilt.

Then, in October, she told me she was pregnant.  Or, was it late September?  She was due June 2nd.  I was shocked, floored.  Surely, it was too soon to know for sure… a false positive…  I admit it.  One of my first thoughts was about this quilt.  How on earth would I get it done in time?  It has plenty of big pieces but also LOTS of tiny pieces.  I figured I’d better get busy.  As I got farther and farther into this quilt, I was kicking myself for not machine appliqueing it.  It is what it is.  And, I am done now.  I’m late for the arrival, but I am done.  He’s about a week old now and a cutie patooty!

The question once I finished it was how to quilt it.  The more quilting you do on a quilt, the more thread you add to that quilt and the heavier and stiffer it gets.  This was for a baby, so I wanted it to be soft… or at least as soft as I could make it and still add details to it.  You will notice there are plenty of gaps in the quilting where it seems like there should be more quilting.  That was intentional to prevent the quilt from becoming too stiff and heavy.  I stitched down enough to give the effect of what I wanted and then let the rest go.  Sometimes you’ve just gotta “let it go.” 😉  My desired effect was playful, yet polished.

Simple swirls were stitched inside the appliqued blocks around the animals and flowers.  My instinct was to put something formal on the outside edges of the pieced blocks, but I ended up putting animal paws there instead.  They are not perfect, by any stretch of the imagination, but it’s okay (Let it go!).  The way you make these animal paws is to stitch a curvy triangle with 2 ovals going up one side and 2 ovals going back down the other side, all as a continuous path with no starts and stops.


What should I do with those outside odd blocks along the border?  I could have added nature scenes, but that would involve intense stitching.  It needed to be open and flowing.  So, I opted for something formal and polished in those areas; feathers and curved cross-hatching.  Traditional feathers would be nice, but I chose bumpy ones to mimic butterfly wings.

I did sneak some playfulness into some of those areas.


As for the borders, I started at the bottom and stitched a very loose fern to mimic a grassy look.

Moving up the sides, I stitched pine trees on the left by the raccoons and bear.  My pine trees got worse as I stitched more and more of them (Let it go!) up towards the owl.

On the right, I transitioned the ferns into leafy vines to meet the squirrels at the top.

At the top I transitioned the leafy vines to meet the rays of whatever that circle thing is around the owl’s head.  It could be the moon.  Or, it could be the sun.  Whatever your imagination sees is what it is.

A couple of notes… as far as the binding goes, I had a hard time deciding which fabric to choose.  I finally decided that I wanted to see that darker blue repeated somewhere in the quilt.  It’s one of my funny idiosyncrasies; I believe you need to repeat fabrics in a quilt to make it look more polished or professional.  So, I chose that darker blue for the border and had intended to make a piping of the pale blue stripes that you see very little of in the quilt.  The pale blue stripes are around the little square blocks where I stitched curved cross-hatching and also in the corners of the border.  To get that effect, you create a faux piping within the binding.  Here’s a tutorial by Margo Clabo from “The Quilt Show” of how to create that.  For whatever reason, I decided I wanted to go with 1/4″ piping, so I cut my strips at 1 3/4 inch for the pale blue stripes and 1 1/4 inch for the solid blue – after stitching the strips together and then folding that wider pieced strip, I’d have a 1/4″ piping instead of 1/8″ inch piping.  That was a mistake.  It turned out to be a flange.  There’s nothing wrong with a flange, but I was worried about it flapping around.  So, I stitched it down.  I’m okay with that.  It still looks fine (Let it go!), and I still get to see both of those fabrics along the border.

Also, if you are wondering how I place appliques on their blocks, I draw out the original design onto a piece of plastic first.  This particular piece is one of those pieces of plastic that hold papers together with a strip of hard colored plastic, while the clear plastic acts like a folder for the papers.  I use a vis-a-vis marker which stays on there until I run water across it.  I don’t know whether or not a dry erase marker would work.  If you have tried that and it does, please speak up in the comments.

My goal is to teach you something new with my posts, if I can.  So, I hope you learned something today!


Welcome Back!

I am giving up my website and coming back to this blog site.  I have no idea how this will work with the new Net Neutrality rules, but I’m okay with that.  I no longer quilt for others, but you will be seeing posts whenever I get a chance to quilt for myself.  This particular post will be full of tips, because I haven’t been quilting on a regular basis and just got back into the game – I’ve realized how many tips I’d taken for granted.  So, I will share them with you today.  Please forgive me if they seem to basic to you!

I just put this quilt on the frame and the first thing I did was make a straight stitching line to butt my quilt top up against so that my quilt will be straight and hopefully square – I don’t know if you can see that or not.  I also use a laser square to check as I go along, making sure any stitch lines going across or down are straight as well.

As I go along, I use a “centering” measuring tape across the quilt to make sure each side matches the original measurements.  At this point, I am near the bottom of the quilt and have decided to go ahead and stitch my straight line across the bottom of the batting and backing sandwich.  I’ll butt the bottom of the quilt up to that stitching line.

To make sure the sides are where they need to be, I put a pin where the measuring tape has hit along the sides to keep it square.


Then, I’ll pin it and baste it down along that straight stitching line.

I’m not the best quilt top maker in the world, which is why I prefer the quilting part of the process.  I can fix some of my problem areas.

Before

After… I just took the bulk and spread it along the side before basting it down.

I am not done with this quilt yet.  I’ll save finished pictures for another post.  But, I wanted to throw a couple more tips in here.  I have trouble with glare… a LOT of trouble with glare, which is why I created the quilting rulers in my shop.  Take a look at this picture.  I need to thread the needle.  Can you see the eye of the needle?  I can’t.

But, if I move the needle over onto some fabric, I’ve removed the glare from the bottom of the machine and, voila!  I can see the eye of the needle.

One final tip before I go.  For those of you who send your quilts to a quilter… if your quilter asks for 8 inches of extra backing fabric on each side of your quilt, this is the reason why.  That plastic thing is the base that fits on the bottom of my machine.  I thought I had the measuring tape showing in this picture so you could see for sure that I have 8 extra inches of backing fabric.  My needle sits in the middle of that square hole in the plastic base.  Do you see where it is on the quilt top?  It’s not even reaching the edge of the quilt top.  If I’m using that base, which I do on custom quilting (and for this quilt; quilting around the applique pieces), the base is going to hit those clamps and cause me to make mistakes along the edges.  So, PLEASE, if your quilter asks for 8 extra inches of backing fabric on all sides, make sure your backing has that much or more. You will be doing yourself and your quilter a huge favor!

P.S. If you’re wondering about this quilt, you can find the pattern, “Forest Galorest,” by Java House Quilts here.


Square Peg in a Round Hole

Reposted from my other site.

Susan inherited this quilt top from her dad and step-mom. You can obviously see that the design flows into kind of a “sweep”.  But, to me, it looked like it could have been a Native American design.  The design is merely different colored squares sewn together into an interesting design.

IMG_0354

Susan already had the PERFECT thread for this quilt.  The colors matched perfectly. When I got it home and threaded the machine and put the first stitch into the quilt, I realized it was thicker than any thread I’ve used.  And, I was worried.  It took some coaxing to get the thread to go through the quilt layers, but once I got it going it worked like a charm…and didn’t break, not once!

I’m glad Susan decided on a Native American quilting design.  And, you know what?  That thick thread REALLY showed off the design in the light-colored border.  And, the batik border fabric is a wonderful companion to the quilting design and Susan’s thread.   Edge-to-Edge quilting used the wavy lines and the stepping stones under the sun in the border design.

I don’t remember ever getting the chance to quilt a Native American design into a quilt, so this was a lot of fun to do.  If you’re wondering where to find the border design, I took one of Meadowlyon Designs’ pantographs (named Modern Southwest) that you can find here.  Their pantograph is 10 1/2″ tall, but the border of Susan’s quilt was 7 inches, I think.  So, what I did was make a smaller copy of one repetition in the pantograph.  I then traced it onto Golden Threads Quilting Paper (you can buy it from their website and other stores) and pinned it to the quilt top.  I wanted a cornerstone, so I took the bird , enlarged it in different sizes to find the size that worked best and then traced it onto the quilting paper as well and then stitched through the quilting paper. In the past, I’ve used vellum, tracing paper, Press ‘n Seal, etc for marking quilts.  But, I had this on hand and it was just sitting on the shelf, so I thought I’d try it.  I actually really like it.  The paper is a soft yellow, which blends with lots of colors, believe it or not.  When you pull the paper off, it doesn’t leave as much paper behind, and the paper isn’t a bright white.  Judge for yourself if the end product (quilting shown in the pictures above) turned out okay.

I said earlier that Susan inherited this quilt top from her dad and step-mom.  Well, here’s something you don’t realize you need or would like to have until you get it.  They left their quilt tops in “kits” with batting, thread, and backing included on many of the quilts; ready to be quilted.  And, check out this batting!  I was floored.  How cool is that! The batting is marked so I know which way to load it (you need more from roller to roller than you do side to side, because the rollers will use more batting – you can read more about that in my blog post “Oops! Please Add More Batting!“).

I have a tip for loading quilt backing.  I like to load backing fabric so the selvages attach to the rollers. The reason I like to do that is because the width (weft) of the fabric has a little more stretch than the length (warp) of the fabric.  When I load the backing fabric to the canvas of the rollers, the fabric will stretch some.  It stretches even more if I load the quilt with the width going side to side rather than roller to roller – that produces a “waistline”, as I call it, on the backing fabric.  See how the top of the fabric in this picture is stretched more?  That’s because it is attached to the roller canvas.  The rest is not attached to anything yet.  I lay batting on top of the backing fabric and then stitch a straight line across the top of the batting so that I can get the edge of the quilt top straight.  I then baste the top down.  After that, I will check to make sure the sides of the quilt top are straight and will stitch it down.  AFTER it’s stitched down, I attach stretchy clamps to the sides of the backing fabric to hold it taut – that’s what helps keep wrinkles out of the backing fabric, where you can’t see it as you roll the quilt.  So, what will happen is the backing fabric will have more of an “hourglass figure” if I load the backing with the width (weft) of the fabric going side to side than it will if I load the backing with the length (warp) of the fabric going side to side.  And, the selvages have the extra thickness in its weave, so that adds to the strength where it’s attached to the roller canvas.  The difference it makes for the quilt maker is that if there’s a seam down the back, it might not end up straight.


20170109_153424

One of the best parts of my job is the variety of quilt tops and quilting designs that I get to work with each day.  I learn something new with each one.  I had a lot of fun with this one.

To the Moon and Back

Reposted from my other site

This is another quilt I should have put up on my design wall before quilting it, because the colors and the pattern are striking.

This image has an empty alt attribute; its file name is img_0388-640x616-1-1.jpg

Kathy called this her Universe quilt.  It has the 4 quadrants in colors.  Do you see the circles of color in the blues down in the lower left?  Those look like planets, too, and all the mottled batiks in the borders look, to me, like an Aurora Borealis.  So, how would you quilt this?

This image has an empty alt attribute; its file name is img_0391.jpg

The colors are so magnificent, that it’s hard to see the quilting, but I decided to stitch a sun into the upper right hand (yellow) corner with the 9 planets circling around it.  The orbiting circles are anything but perfect.  I hand drew them on with chalk and then stitched following the chalk lines.

In the purple down in the lower right is where I put Earth and its circling moon.  Can you see it?  The moon’s orbit is elliptical, so maybe if you find that semi-sideways oval, you’ll see the big circle inside, which is Earth.  I also drew the Big and Little Dipper with the North Star to the lower left of Earth.  Of course, my ADD brain struggled with which way to put those stars (they’re not in correct proportion anyway)…as I am looking at them on the quilt?  Or as I would look at them if I were on Earth?  I also put shooting stars and meteors in the quilt, but you can’t see them here.  The backing on the quilt did a good job of hiding them, too, which I’m always glad for, because my pea brain talks smack to me about my quilting abilities.

This image has an empty alt attribute; its file name is img_0393.jpg

This particular quilt was a good example of some of the strategies I used for getting a quilt squared up as it rolls on the frame for the quilting machine.  And, since you can’t see the quilting too much, I thought I’d add some tips here.

First off, this quilt has lots of straight lines.  I use those lines to guide me to getting the quilt straight.  I’ll explain the tape measure in a bit, but for now, take a look at the lower edge of the picture.  That’s where the lower roller bar lies.  I use the lines in the quilt to help me gauge whether or not the quilt is straight going across.

This image has an empty alt attribute; its file name is img_0382.jpg


I’m sure I’ve showed you before the laser level I use to make sure the lines are straight as well.

This image has an empty alt attribute; its file name is img_0384.jpg

I used to use these white clips on the rear roller bar to help me with placement of blocks and borders as I quilted, but, unless you find a way to make them stay put, they roll and move.  By the way, if you look closely at the edges of the quilt top, you will see a line of basting on the batting.  There are 3 roller bars on my machine’s frame.  The backing fabric is attached to 2 rollers; one at the bottom and one above this black roller you see in the picture below.  That roller is used to keep the fabric in place at it rolls. So, first, I attach the backing fabric to the canvases that are attached to those 2 rollers.  Then, I lay the batting on top of the backing fabric.  I use my channel locks to stitch a straight line across the top of the batting – it helps to have a dark thread for this so you can see it better.  That is my guide for where to butt the quilt top fabric up against.  I then pin the quilt top fabric in place and then stitch it down about 1/4 inch along the edge.  I’d like to make it 1/8 inch, but I’m just not that good.

This image has an empty alt attribute; its file name is img_0385.jpg

As for the tape measure, I use that as a guide for where to stitch the sides in place.  When I get the top stitched down, I use my laser level to tell me where to butt the sides up to and then stitch the sides down to about 12 inches from the top.  Then I see where the sides hit the tape measure and write those numbers down.  I use those numbers for placement of the rest of the quilt along the sides.

This image has an empty alt attribute; its file name is img_0386.jpg

A machine quilter’s job involves a lot more than just quilting.  The above tips are just a sampling of the many things we do when we work on your quilt.

A Woodland Christmas… by Joan

I figured I’d better get this on here while I’ve got the chance.  I’ve been busy lately working on things for my booth at the Kansas City Regional Quilt Festival, which starts next Friday, by the way.  And, I will continue being busy working on more stuff for the next week.  This was the last customer quilt I was able to work on before the quilt show.  Joan always lets me play and put whatever I want on her quilts.  It’s a very dangerous tactic, you know.

So, let’s show you a full shot of the quilt first before I get into the details of the quilting.

IMG_2511

Now, how on earth would YOU quilt this?  My first concern was the border, because that’s where I start.  The cornerstones were easy – Joan had an applique star in the upper right hand corner, so I just copied that into the other corners.

IMG_2527

As for the borders, I couldn’t come up with something creative enough (for me) that would go with this quilt, so I ended up doing something simple with holly leaves.  It would need to be able to work play well with the applique in the borders.  Just now, looking at these pictures, I wish I had added piano keys on the outside of the swags.

IMG_2515 IMG_2517

Along the lower border were 2 bears, but they needed a mama bear so I added her in the back of them.

IMG_2523

Joan asked how I got the bear to look just like the others.  Well, I cheated, and here is a tutorial showing you how I did it.  But… it shows what I did with the trees at the top of the quilt instead of the bear; I did the same technique.  I found myself going back and forth on this quilt, adding a bit here and a bit there.  It seemed to me that I was doing a lot of the same things, so in that big open space in the tree farm, I decided to add more trees.  I have a roll of vellum or onion skin (I can’t remember which I’d bought) for tracing designs. So, to add more trees, I simply traced the applique trees already there and added more trees around them.  This would be my quilting design.  If you look closely at the corners of the paper, you will see where I have straight pins holding the paper in place.  I just stick them straight down without trying to weave them into the fabric.  When I do that, it just turns out worse.

IMG_2502 IMG_2503

After I had the trees drawn out, I then hold my left hand on the paper and move the machine around with my right hand (if you are left handed, hold the paper with your right hand and move the machine with your left hand).  If you don’t already know this, a longarm quilting machine floats or hovers above the fabric and has no feed dogs (those gritty teeth things on the bottom/bobbin plate of a domestic sewing machine) to keep it steady and in place.  It doesn’t have to be perfect.  Unless someone shows you what I just did, you will never know if “I meant to do that” or not.

IMG_2504 IMG_2505

And, here is the result after I tore the paper off.

IMG_2507  IMG_2514

I tried to give each of the houses a different roof top, but some of them are repeated. If you go back and take a second look at the border pictures, you can see more houses in those shots.

IMG_2526 IMG_2522

Most of the houses in this quilt reminded me of the Victorian houses in the Colorado mountains.  This trio, however, could have been cabins, if I had thought about it long enough.  But, they turned out okay as Victorian houses as well.

IMG_2519

The final picture is of the star on top of the “town tree” shining down for its audience to “ooh” and “ahh”.

IMG_2520

All in all, this was a fun quilt to “quilt.”  I hope you enjoyed the show and learned something, too!  Merry Christmas in June!