Rotary Ruler Cutter Review

You may or may not remember that I will be vending at the Kansas City Regional Quilt Festival in June over Father’s Day weekend.  I had planned for a year now to get things made for the quilt festival but haven’t had much luck at all in finding time to do that.  Plus, my daughter is pregnant and due June 2nd.  The doctors have decided that they will not let her go past her due date.  She has Gestational Diabetes and they figure the baby’s size if 1 week ahead of schedule.  So, the baby may come early.  In any case, I have that coming up to worry think about as well.  I haven’t had time to make any baby quilts or anything else for the baby or my daughter, let alone make anything for the quilt festival.

Well… I guess I could just hand out business cards and flyers about my quilting business…  What I finally figured out, though, is that I don’t have to MAKE stuff to sell.  I could sell retail stuff, so that is mainly what I will be doing.  I’m still going to try to get some home decor made (wall decorations that look like buttons – in case you didn’t know, I also dabble in woodworking), but we will see how that goes with everything else going on this next month.  Oh, I almost forgot!  I created a couple of ruler templates for use with a longarm quilting machine.  I imagine it could also be used with sit-down machines, but I haven’t tried that yet.  The rulers should be ready sometime this next week.  I plan on selling those at the quilt festival as well.

For now, I’d like to share with you 2 of the products I will be selling.  They are both Rotary Ruler Cutters, but they are made by different companies.  The one on the left is made by Fiskars (note the orange handle), and the one on the right is made by Havel’s.  They look like paper cutters for scrap booking, don’t they?  But, these are for fabric… unless someone in your household mistakenly uses them for paper.  The good news is that you can swap the blade out for a new one.

IMG_2459

At first I was drawn to the one made by Havel’s because of the color of the handle.  I figured they were both the same, so why not go for purple?  Well, if you look closely at the rulers, you will see the markings for measurements are a little different.  Which one do you like better so far?  They both have good qualities.

Then there are the way the blades go on and come off.  The Fiskars has a screw nut on it like most of my other rotary rulers; I don’t know if you have that or not.  But, for me, it is familiar.

IMG_2461

Havel’s has a white cover that has a turn dial for you to remove to get to the blade.  This is a nice safety feature, but it took me awhile to figure out how to work it, even after reading the instructions.

IMG_2465   IMG_2466

Fiskar’s safety feature comes in the form of a separate blade changer, which costs extra.  I’m guessing it is optional,  but it’s a nice feature to have.  The picture on the left is the blade changer.  You can see how to use it on the back of the package and also on the back of the box of the rotary ruler combo.

IMG_2463        IMG_2464

Another nice feature of the Fiskar’s is that it has a carrying handle – I like that.


IMG_2469

Let’s go back to the original picture and look at the one on the right made by Havel’s in the picture below.  If you notice, Fiskars ruler is all plastic, while Havel’s has a metal strip along the short end where you can hang it up.  They both have holes for hanging, but the metal strip under the hanging hole of Havel’s cutter is kind of nice, and it has smooth, safe edges.  Let’s talk about length.  Havel’s says their ruler is 6″ wide x 27 1/2″ in length to cover an entire width of a fabric bolt – it’s nice that the ruler runs over the ends of the fabric you are cutting.  Fiskar’s says their ruler is 6″ x 24″, but I think that is for the actual measuring part.  If you look closely you will see that the Fiskar’s ruler is almost the same length of the Havel’s and Havel’s ruler is 24″ long.

IMG_2459

Both rulers are good for either right-handed folks or for left-handed folks with numbers going both ways, and they both use 45 mm rotary blades.

I think the best part of both of these rulers is the no-slip grip strip along the side of ruler that the blade runs along.  Look along the bottom of the metal edge of the Fiskar’s rotary ruler combo, just above the plastic ruler.  Do you see that dark strip?  Both rulers have this, and I LOVE it, because as you are pushing down on the handle above the rotary blade, it runs right along that strip, making it hug to the fabric.

IMG_2462

And, as you can see from the before and after pictures below, you get a nice, smooth cut.

IMG_2468  IMG_2470

Now for prices… Havel’s rotary ruler combo sells for $71.43.  Fiskar’s sells for $59.99.  Fiskar’s also has one of these in a square size (12 in. x 12 in.) that sells for $54.99.  It cuts on one side just like the longer ruler.  I haven’t seen it in use yet, so I don’t know what to make of the benefit of the square other than it is wider, which is nice.  Fiskar’s separate Blade Changer comes with 5 new blades and has the ability to store up to 6 dull blades.  It costs $29.99.

I have 2 Fiskar’s rotary ruler combos and 2 Havel’s rotary ruler combos for a total of 4 rotary ruler combos, and I have one Fiskar’s blade changer; all of which I will have for sale in my booth (#436) at Kansas City Regional Quilt Festival.   Whatever I don’t sell will be on my website after the quilt festival.  I will also have a rotary mat and some fabric there so customers can try each of these rotary rulers out for themselves.  I think it’s a great tool for those of us with Carpal Tunnel Syndrome, Arthritis and other wrist, arm, and hand issues.  You don’t have to buy one; you are welcome to just try them out.

I will have a lot of other goodies for sale in my booth.  I will try to get a picture of some of the items soon and post a picture for you.  Most of the stuff will be gift items and hard-to-find notions such as Rebecca Barker Quiltscapes and Sister Quilter greeting cards, wall stickers for quilters, car decals for quilters, Laurel Burch bags, pins with numbers (to put on your stacks of pieces to help you keep track of what order to sew – I’ll have to get a good picture of that to share with you later), a few Creative Grids rulers, woolies curlers, walnut shells for making pincushions, etc.

I hope you’ll be in the neighborhood Father’s Day weekend.  I’d love for you to stop by so I can meet you.


It’s spring time at Wilma’s

Wilma has 2 quilts that I’ve done for her in the past few months – you will soon see why it’s spring time at Wilma’s.  She’s a quick quilt-maker.  This lady has a talent for putting together colors like nobody I’ve seen before.  The first quilt I’d like to share is what I called “Wilma’s Mums.”

IMG_2266

Can you see the mums in the quilt blocks?

IMG_2267     IMG_2268

I tried to put leaves all over the black and green areas, but I hid mums in the quilt blocks behind the “fabric” mums.

IMG_2261  IMG_2263

And, along the borders, I changed it up a bit by quilting spider mums.  I’m not sure I got the exact essence of the flowers because I was only going with my imagination and the pictures in the fabric.  Spider mums are one of my favorite flowers, so I knew the petals needed to be short in the middle and long on the outer edge.  But, I wasn’t sure how to stitch that out so it would look more 3-D.

IMG_2264

Another cool thing about the backing on this quilt is that the fabric is very soft.  And, if you look very closely, you can see green owls in the fabric… watching over the garden.  🙂


This next quilt of Wilma’s is the latest one I’ve quilted.

IMG_2476

As you can see from this next picture, what looks like applique blocks are actually fabric panels.  This is great for those of us who love the look of applique but don’t have the time to do it ourselves.  I think it looks real enough.  Don’t you?

IMG_2487

Wilma wanted the faux applique outlined and feathers everywhere else.  So, feathers, we did!

IMG_2483    IMG_2484

I could have done any number of variations of feather styles on Wilma’s quilt, but I liked the way the feathers in the picture below cradled the bouquets of flowers.  I thought they complimented the pieced blocks nicely.

IMG_2485

And, here’s the back side.

IMG_2481

IMG_2480  IMG_2479

What do you think?  Does it have enough feathers?  I think the pictures of the back side makes it look bouffant or like divinity candy or something like it.  I don’t know how to describe it.  But, I love it!


Raggedy Ann and Andy

Barbara and the ladies at her church have been hard at work making quilts.  If I understand it correctly, they either raffle or auction them off to make money for their church.  What is really cute about this quilt is that, although it is a Raggedy Ann and Andy quilt, there are hand made dolls to go with it.  Unfortunately, I don’t have a picture of them to share with you so you could see how cute the quilt looks with them.  However, I do have pictures of the quilt.

Here’s a full shot.  Simple, but imagine it with a Raggedy Ann and a Raggedy Andy sitting on it.

IMG_2448

And, here is what I added to the blocks.  There are plenty of things I could have done with this, but I really wanted it to be playful and I was hoping the ladies at Barbara’s church would be okay with it.  Do you think it’s okay and “fits” the quilt?

IMG_2443   IMG_2445

I have another picture of the third row of blocks, but I cannot get it to upload here, so I guess I will just have to show you the back. Maybe you can get an idea from this.  Just imagine it reversed.

IMG_2442

If you are interested in this quilt, you will have to be real nice to the ladies at Queen of the Holy Rosary Wea Catholic Church in Bucyrus, Kansas.  Maybe you can get in on the fun!  😉

Claudia’s BIG quilt aka the King and Queen Quilt

…But not known as Clifford, the Big Red Dog Quilt…  Actually it didn’t have a name so I called it Claudia’s King and Queen quilt for several reasons.  It’s for a King sized bed that her husband made; a king in the rest of our minds.  I mean, how many people can build and make a bed???  And, a king-sized bed at that!  So, her husband is the king and she is the queen who made the quilt for their bed.  Fitting, don’t you think?  😉

This first picture shows (well, sort of) how big the quilt really is.  It was hanging off my design wall.  You can’t see the full picture here.  Why, I don’t know.  But, the side borders go well beyond the sides of this picture.

IMG_2432 (2)

And, this one is a little closer, but not much.

IMG_2432 (2)

For Claudia’s quilt, I did pretty much the same kind of quilting I did with Judy’s family quilt.  It’s an inexpensive and fun design; a way to do some allover Edge-to-Edge quilting and still sprinkle some feathers in.

IMG_2423

I snuck a couple of butterflies in to her quilt. The long strips between the blocks on the front have butterflies in them, so I thought I’d add a “king” butterfly and a “queen” butterfly.  Can you guess which is which?  😉

IMG_2424 IMG_2425

And, here are some shots of the front.  Really, quilting doesn’t show up as much as we think it will, and, for that, I am glad.  I really am okay with that, because I think the quilting should be complimentary and not overpowering.

IMG_2428 IMG_2426

See the butterflies in the long strips between the blocks?

If you want to see this one in person, you’re going to have to become a friend of Claudia’s.  😉


Marian’s Spring Bouquet

If you’ve ever heard of Edyta Sitar from Laundry Basket Quilts, you know she creates masterpieces from scraps.  Marian recently made a quilt from Edyta’s pattern “Spring Bouquet.”  If you like what you see in this post, you can find the pattern at Laundry Basket Quilts here.

Let’s start out with a full shot, so you can really start drooling.

IMG_2408

As you can see, there are what looks to me like a gazillion pieces, many of them tiny.  I know this must have taken some time for Marian to complete.

Before I get on to the close-ups of Marian’s quilt, I want to show you a trick I use when quilting.  I have a couple of laser lights for making sure I get things square.  I have a laser square that I use for blocking quilts.  You can see how I use that here. Yes, it’s a tool you can find at your local hardware store; a place I get several other tools for my quilting work.  But, for when I don’t have the room for the laser square such as when I’m working on my quilting machine’s frame, I use another laser tool like this in the lower right of the picture below.  These can also be used for making sure you hang pictures straight across a wall.  I use it to line up seams and borders as I am moving along the quilt.  I can run my fingers along that laser line and nudge the top this way or that if it needs it.

IMG_2391

So, let’s take a look at some quilting I did along the borders so you can see what I did with Marian’s quilt.

IMG_2405 IMG_2404

And, then we’ll move a little inside the borders.

IMG_2403

I know Marian didn’t want any stitching inside the applique (some people do, some people don’t), but see those daisy looking flowers on the right in the picture below?  I couldn’t control myself and had to tack that center down.  It was trying to fly off the quilt.  Honestly, I usually try very hard to give the customer what he or she wants, but, since she was putting this in a show, I thought it might detract from the beauty of Marian’s work.  So, I stitched it down. <big breath>

IMG_2398

IMG_2417

Until we get to the middle…

IMG_2397

If you would like to drool on see this quilt in person, Marian has entered it into the Kansas City Regional Quilt Festival held at the Overland Park Convention Center next month…June 19 – 21.  For more information on the quilt festival, check them out here.


Stephenson’s Family Quilt 2015

I am really behind on sharing my customers’ quilts, so I am going to try to get as many of them posted today as possible.  I apologize up front for bombarding you with all the eye candy.  😉

Judy’s family reunion is later this month, I think.  I cannot believe how much Judy has gotten done this past year.  She has been our quilt guild’s boutique chairperson for the booth the guild is having at the Kansas City Regional Quilt Festival in June.  You can find out more about the quilt festival here.  They’ve got a really cute cinch bag for sale for only $8!  You can find that here.  Anyhow, I digress… Judy has been working on 1,000 kits for guild members to make stuff from to sell in the booth.  She’s come up with tons of ideas for little and big items and has been cutting, gathering, arranging, distributing over and over again amidst all the other things she’s had going on in her life  I have no idea how she’s survived this past year.  I don’t ever want to have to follow in her footsteps!

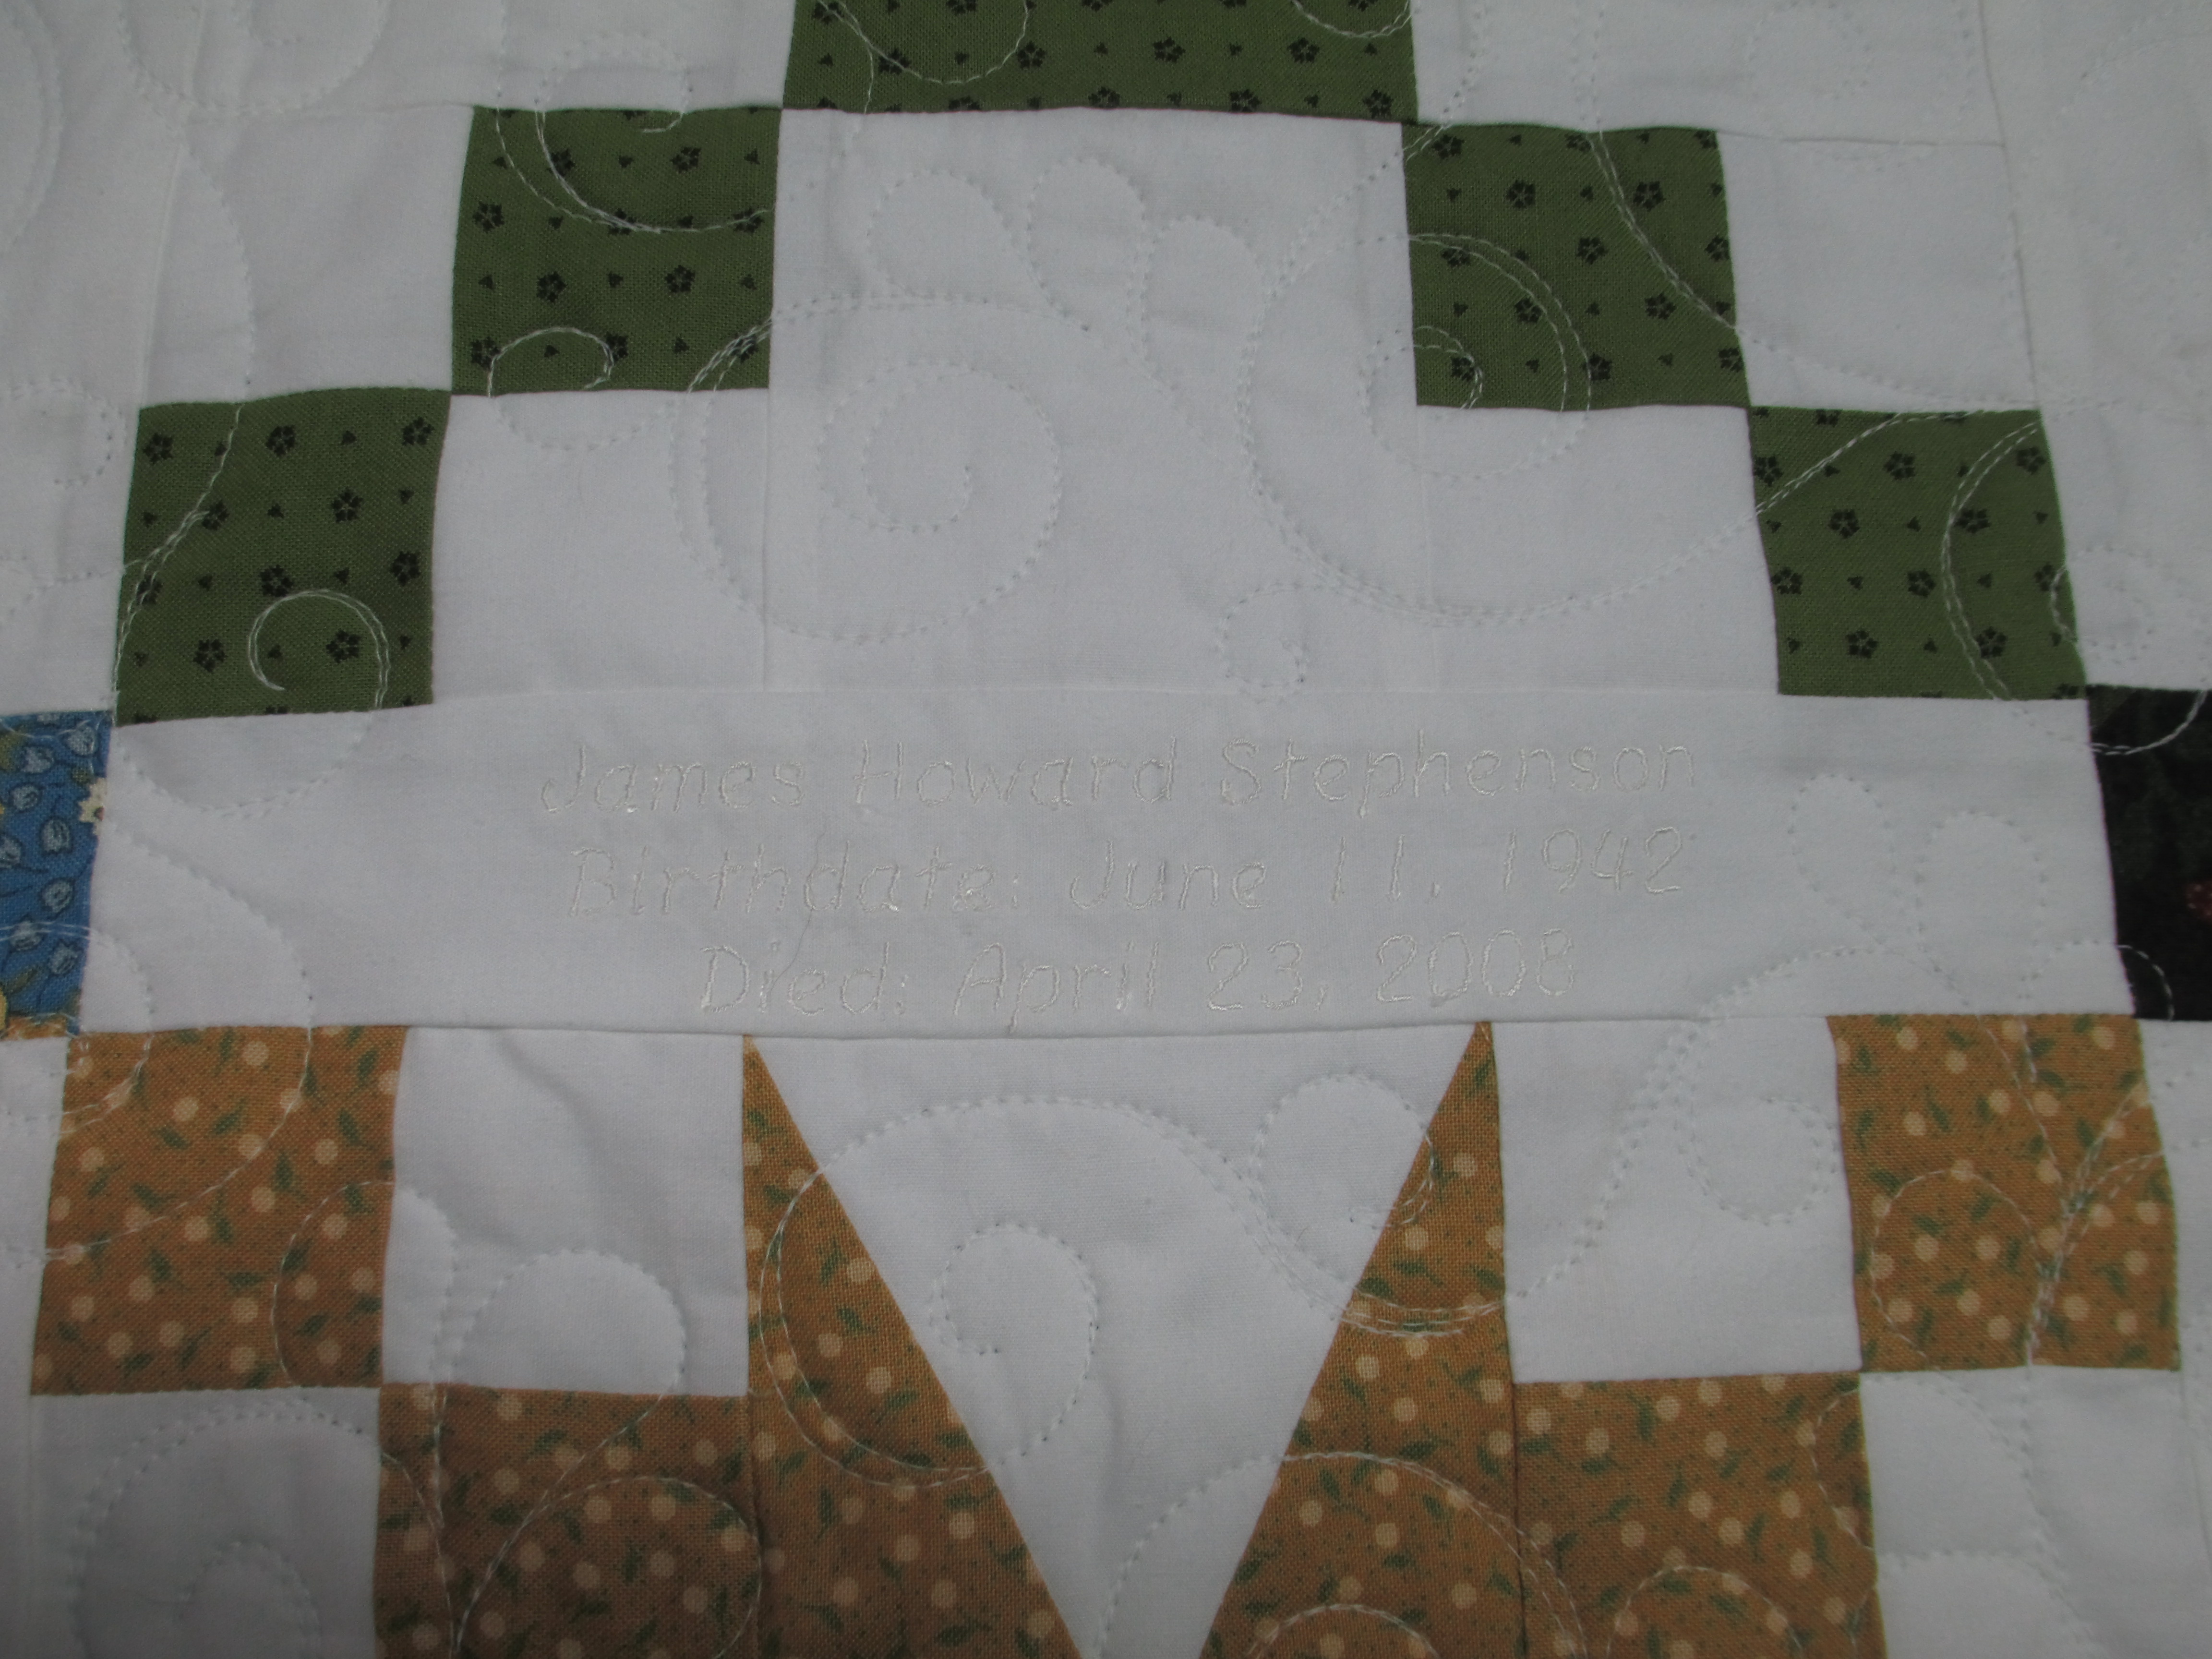
On top of all that, she managed to get the family quilt done.  She auctions the quilts off at the family reunion to raise money for family members in need.  Isn’t that awesome?  And, to add to her stress, I started something baaaaad when I quilted her family quilt last year.  I stitched names and dates into it.  So, this year, she machine embroidered names and dates into nearly all the blocks, I think.  She said it took her for. ever!  And, I believe it!

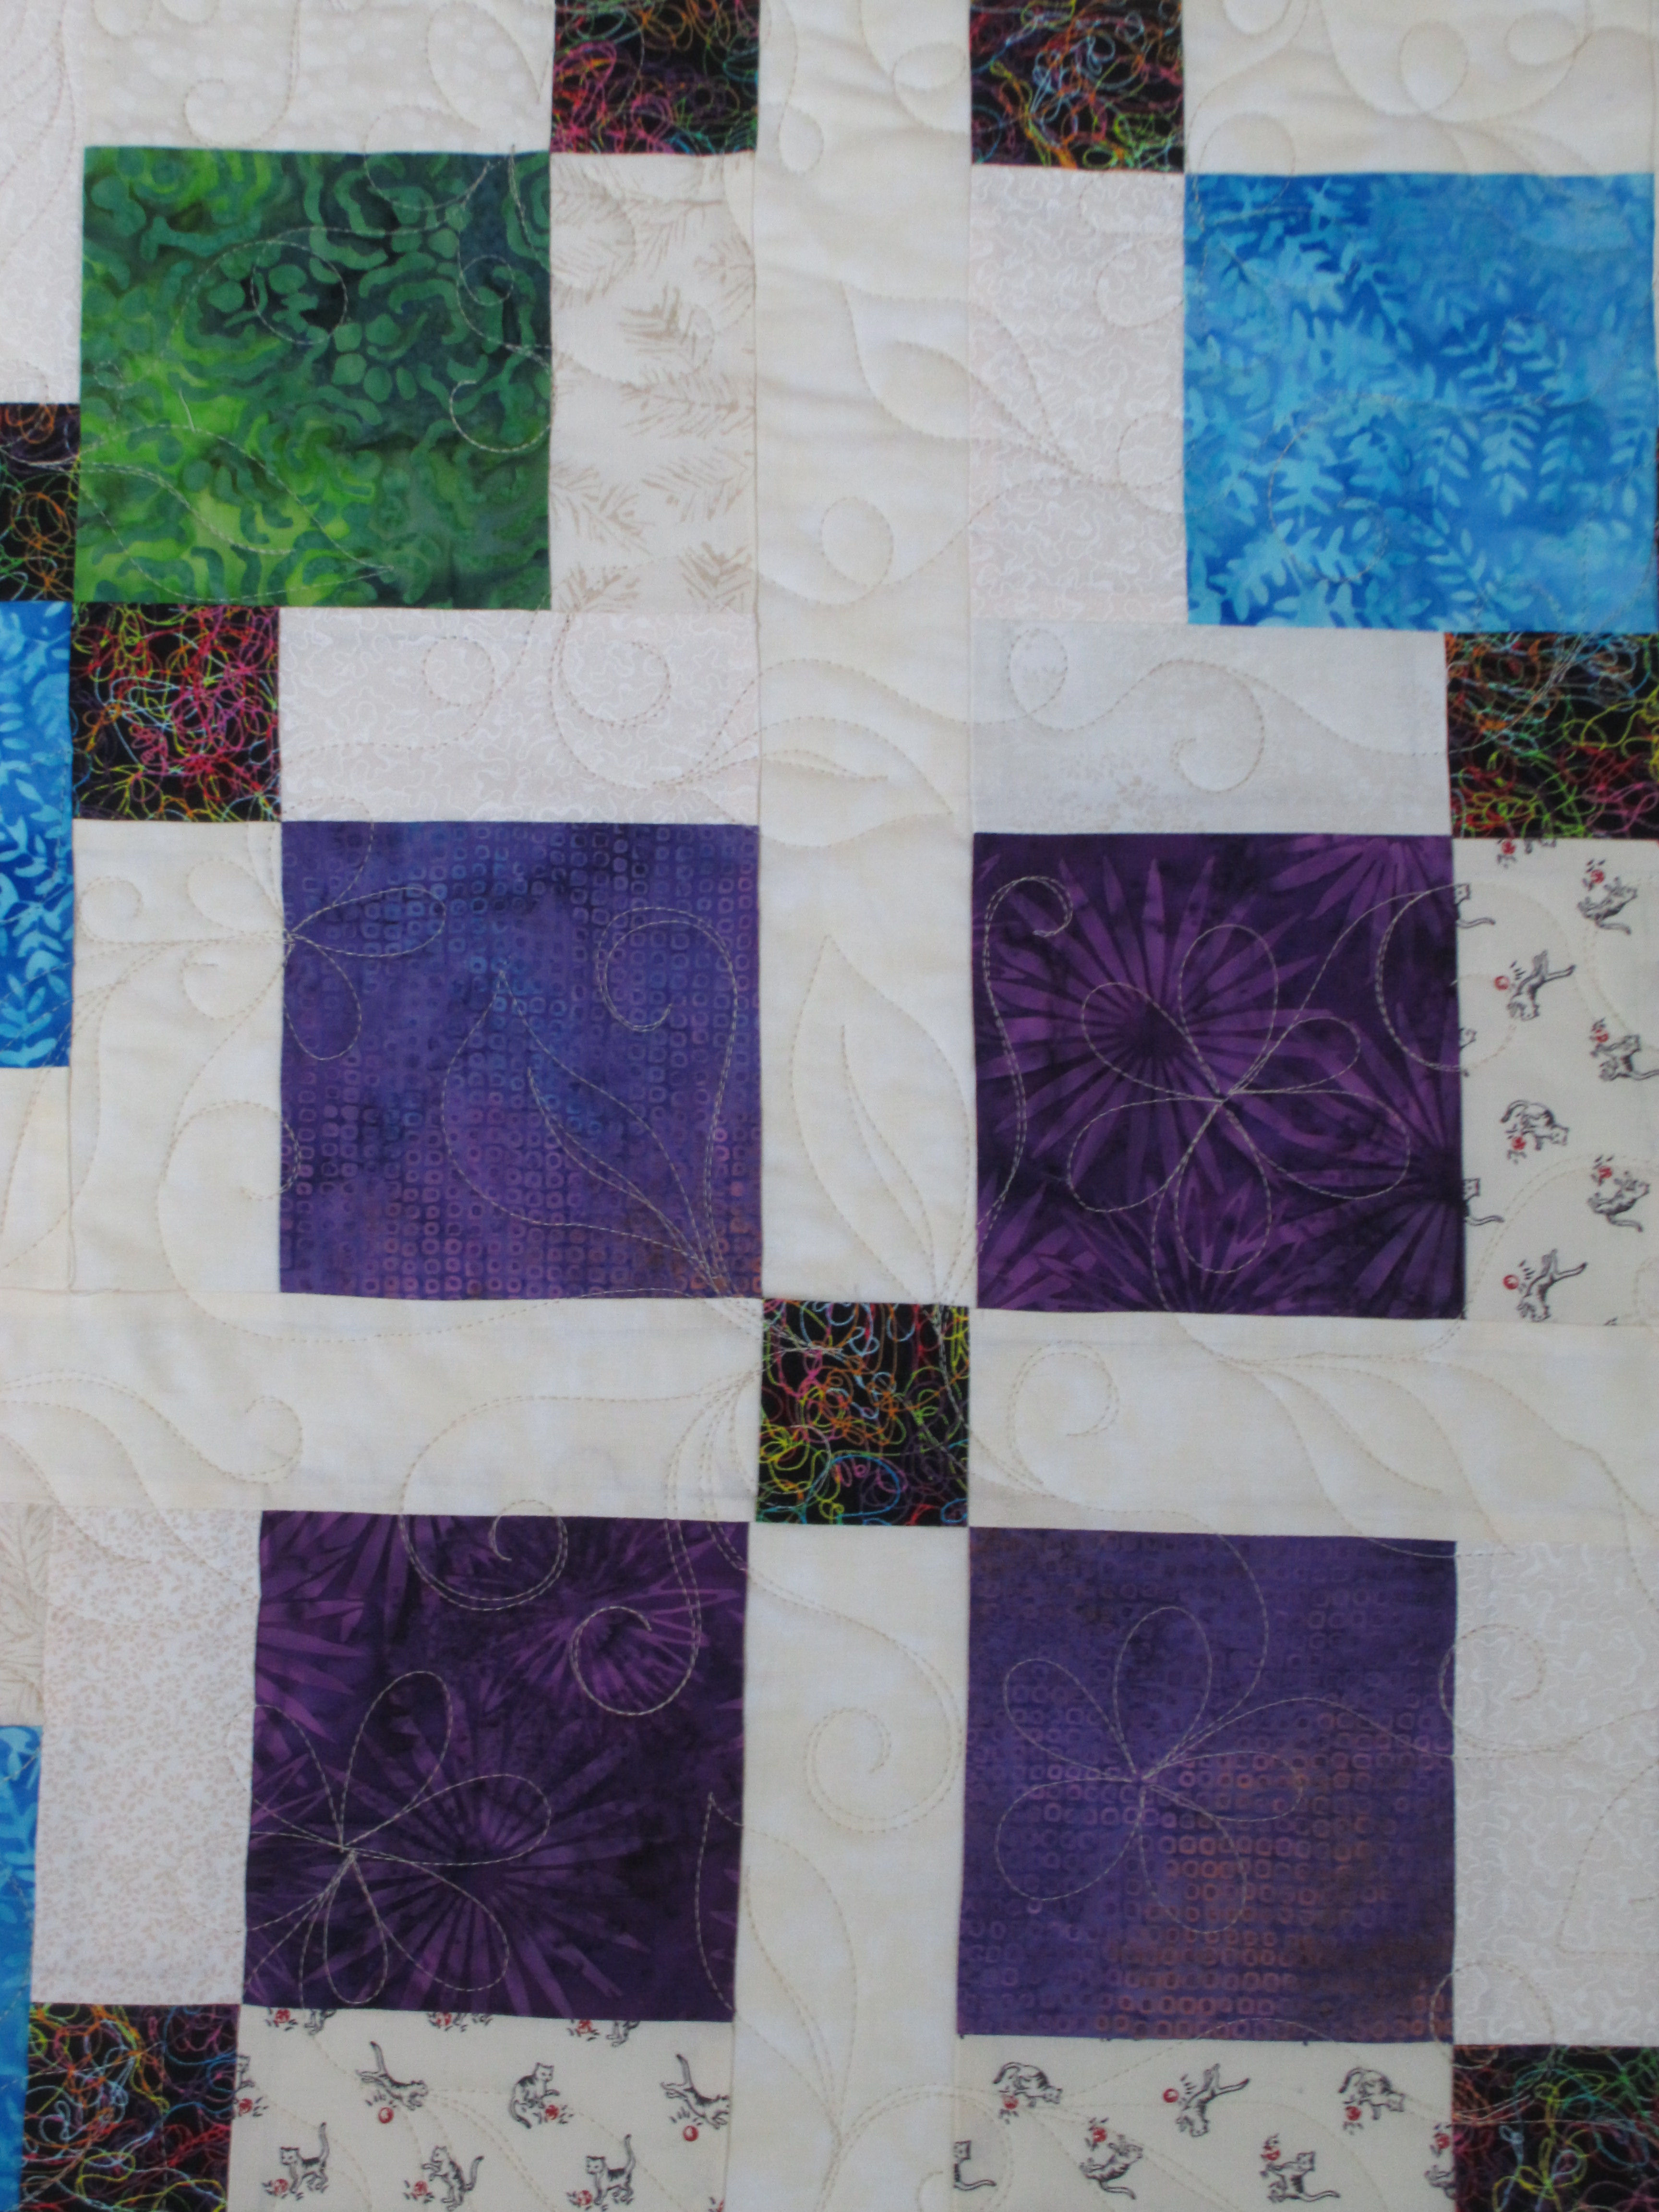
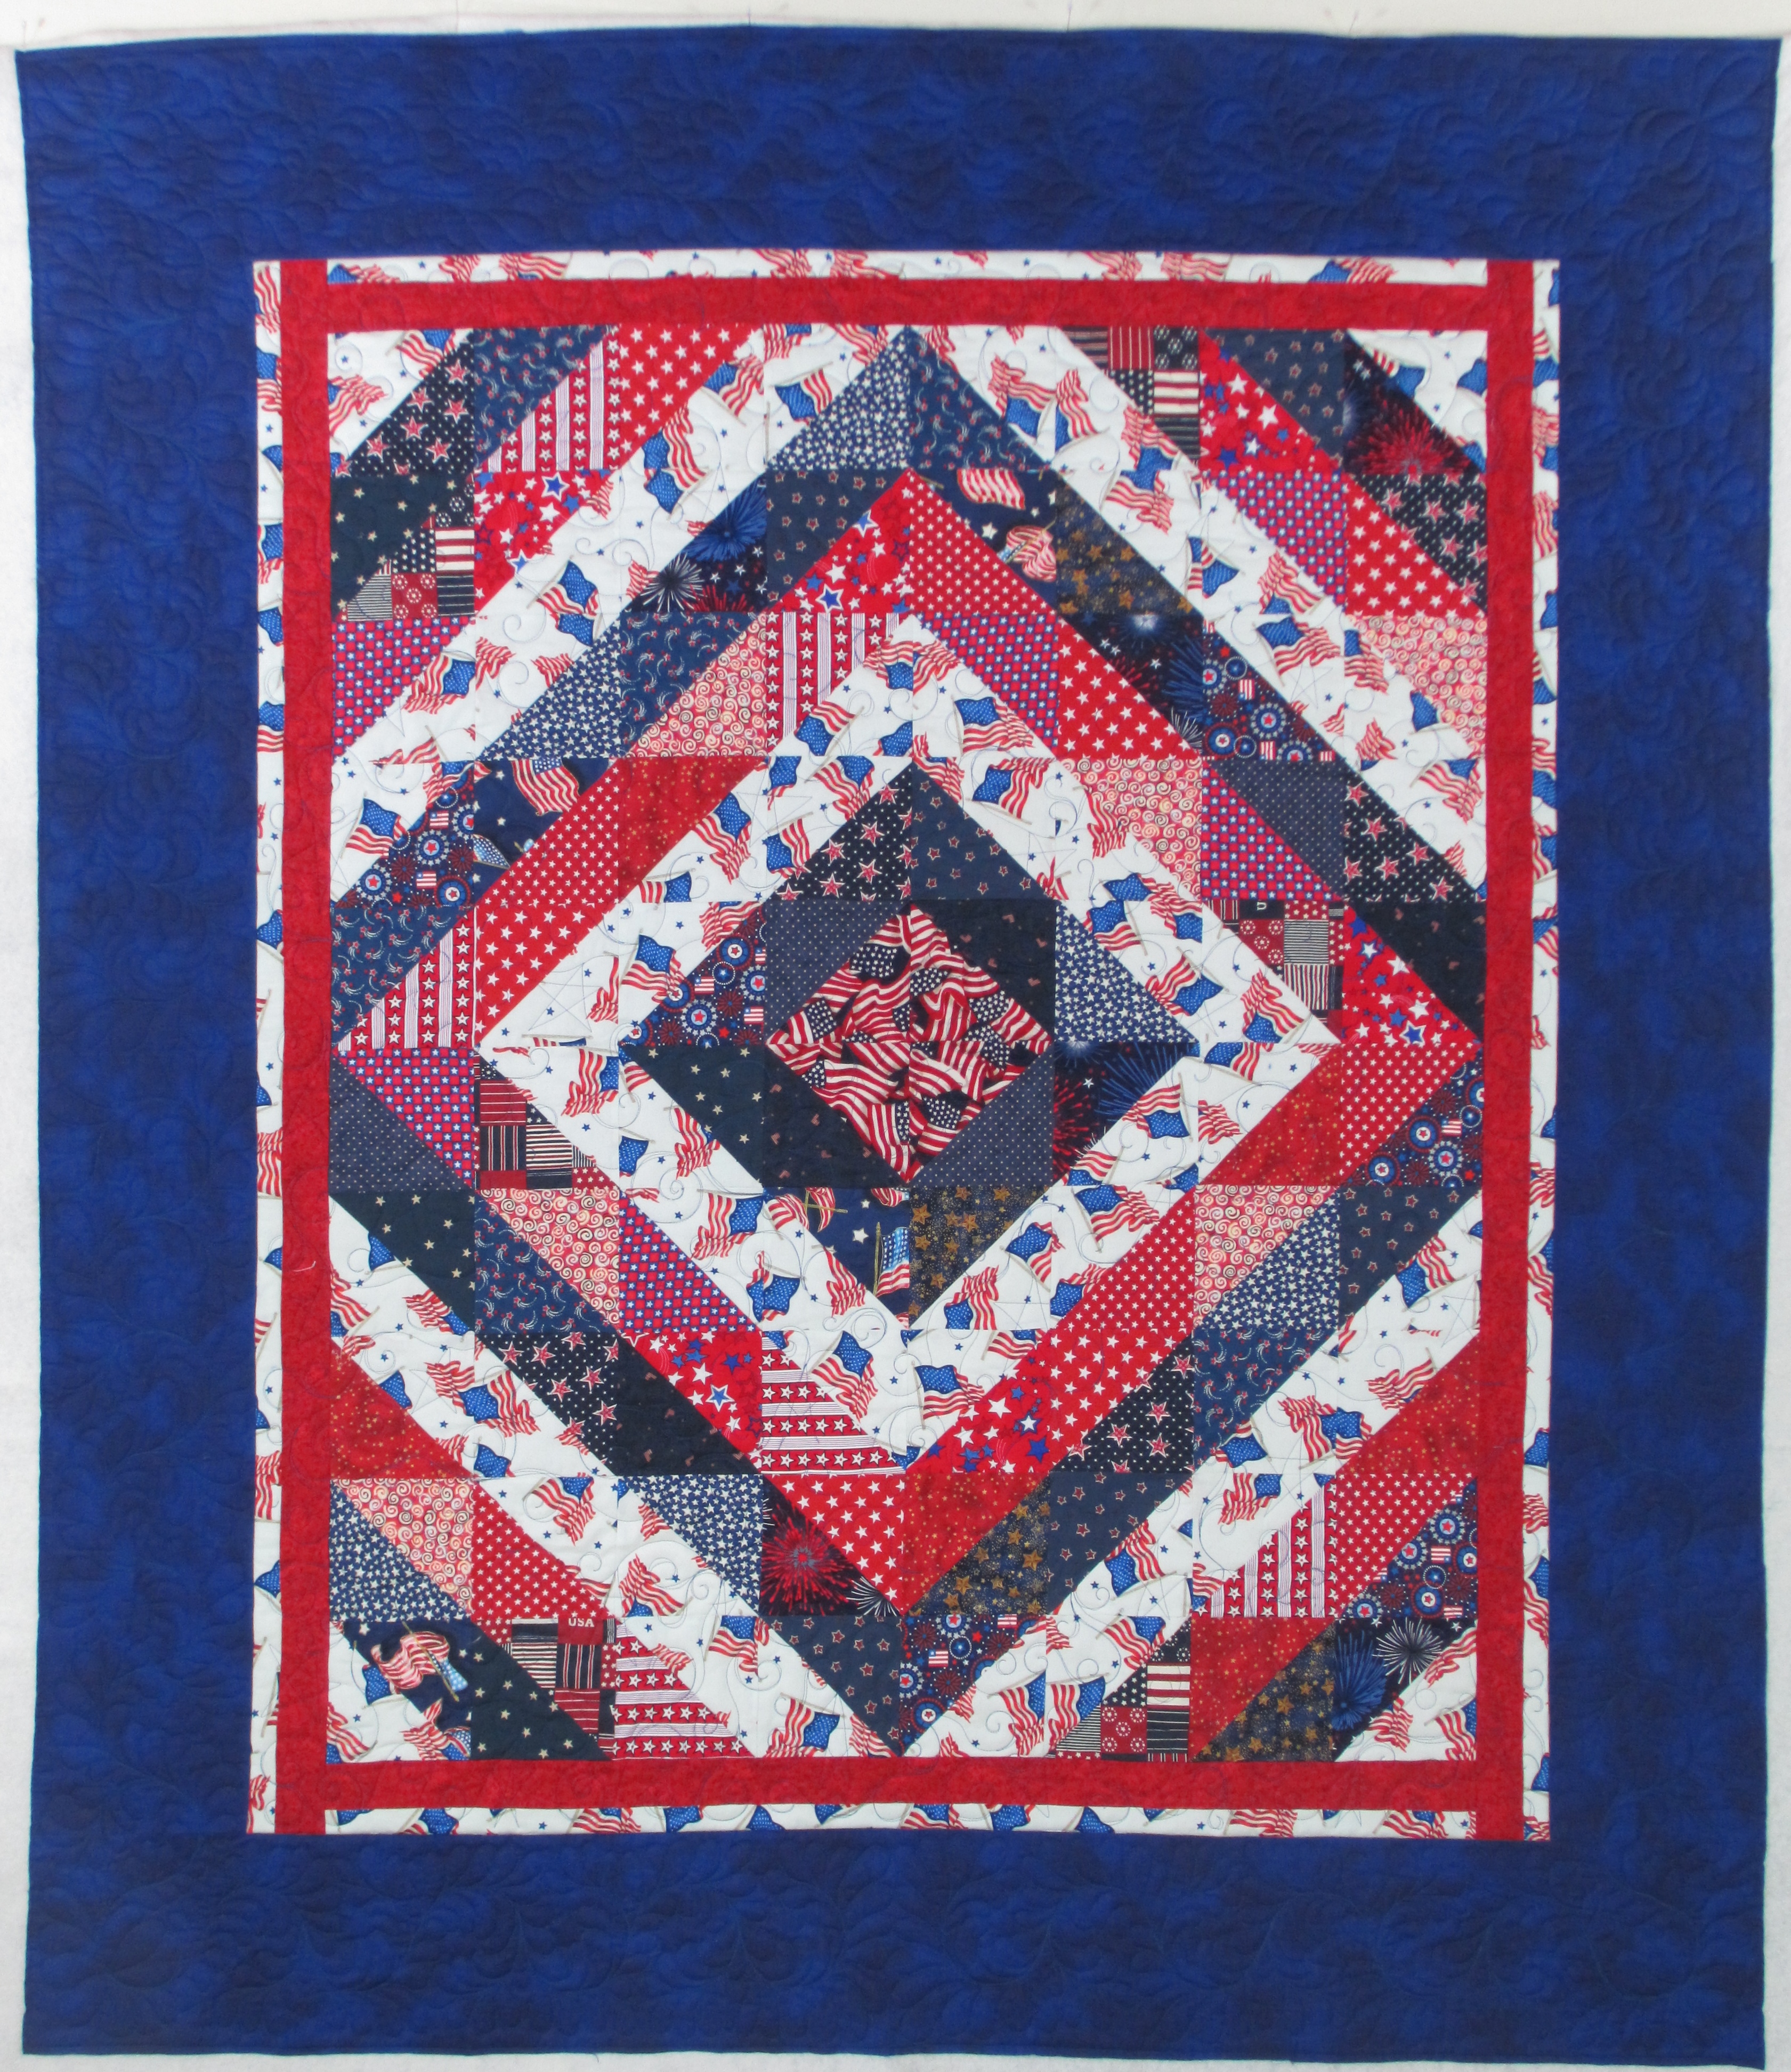
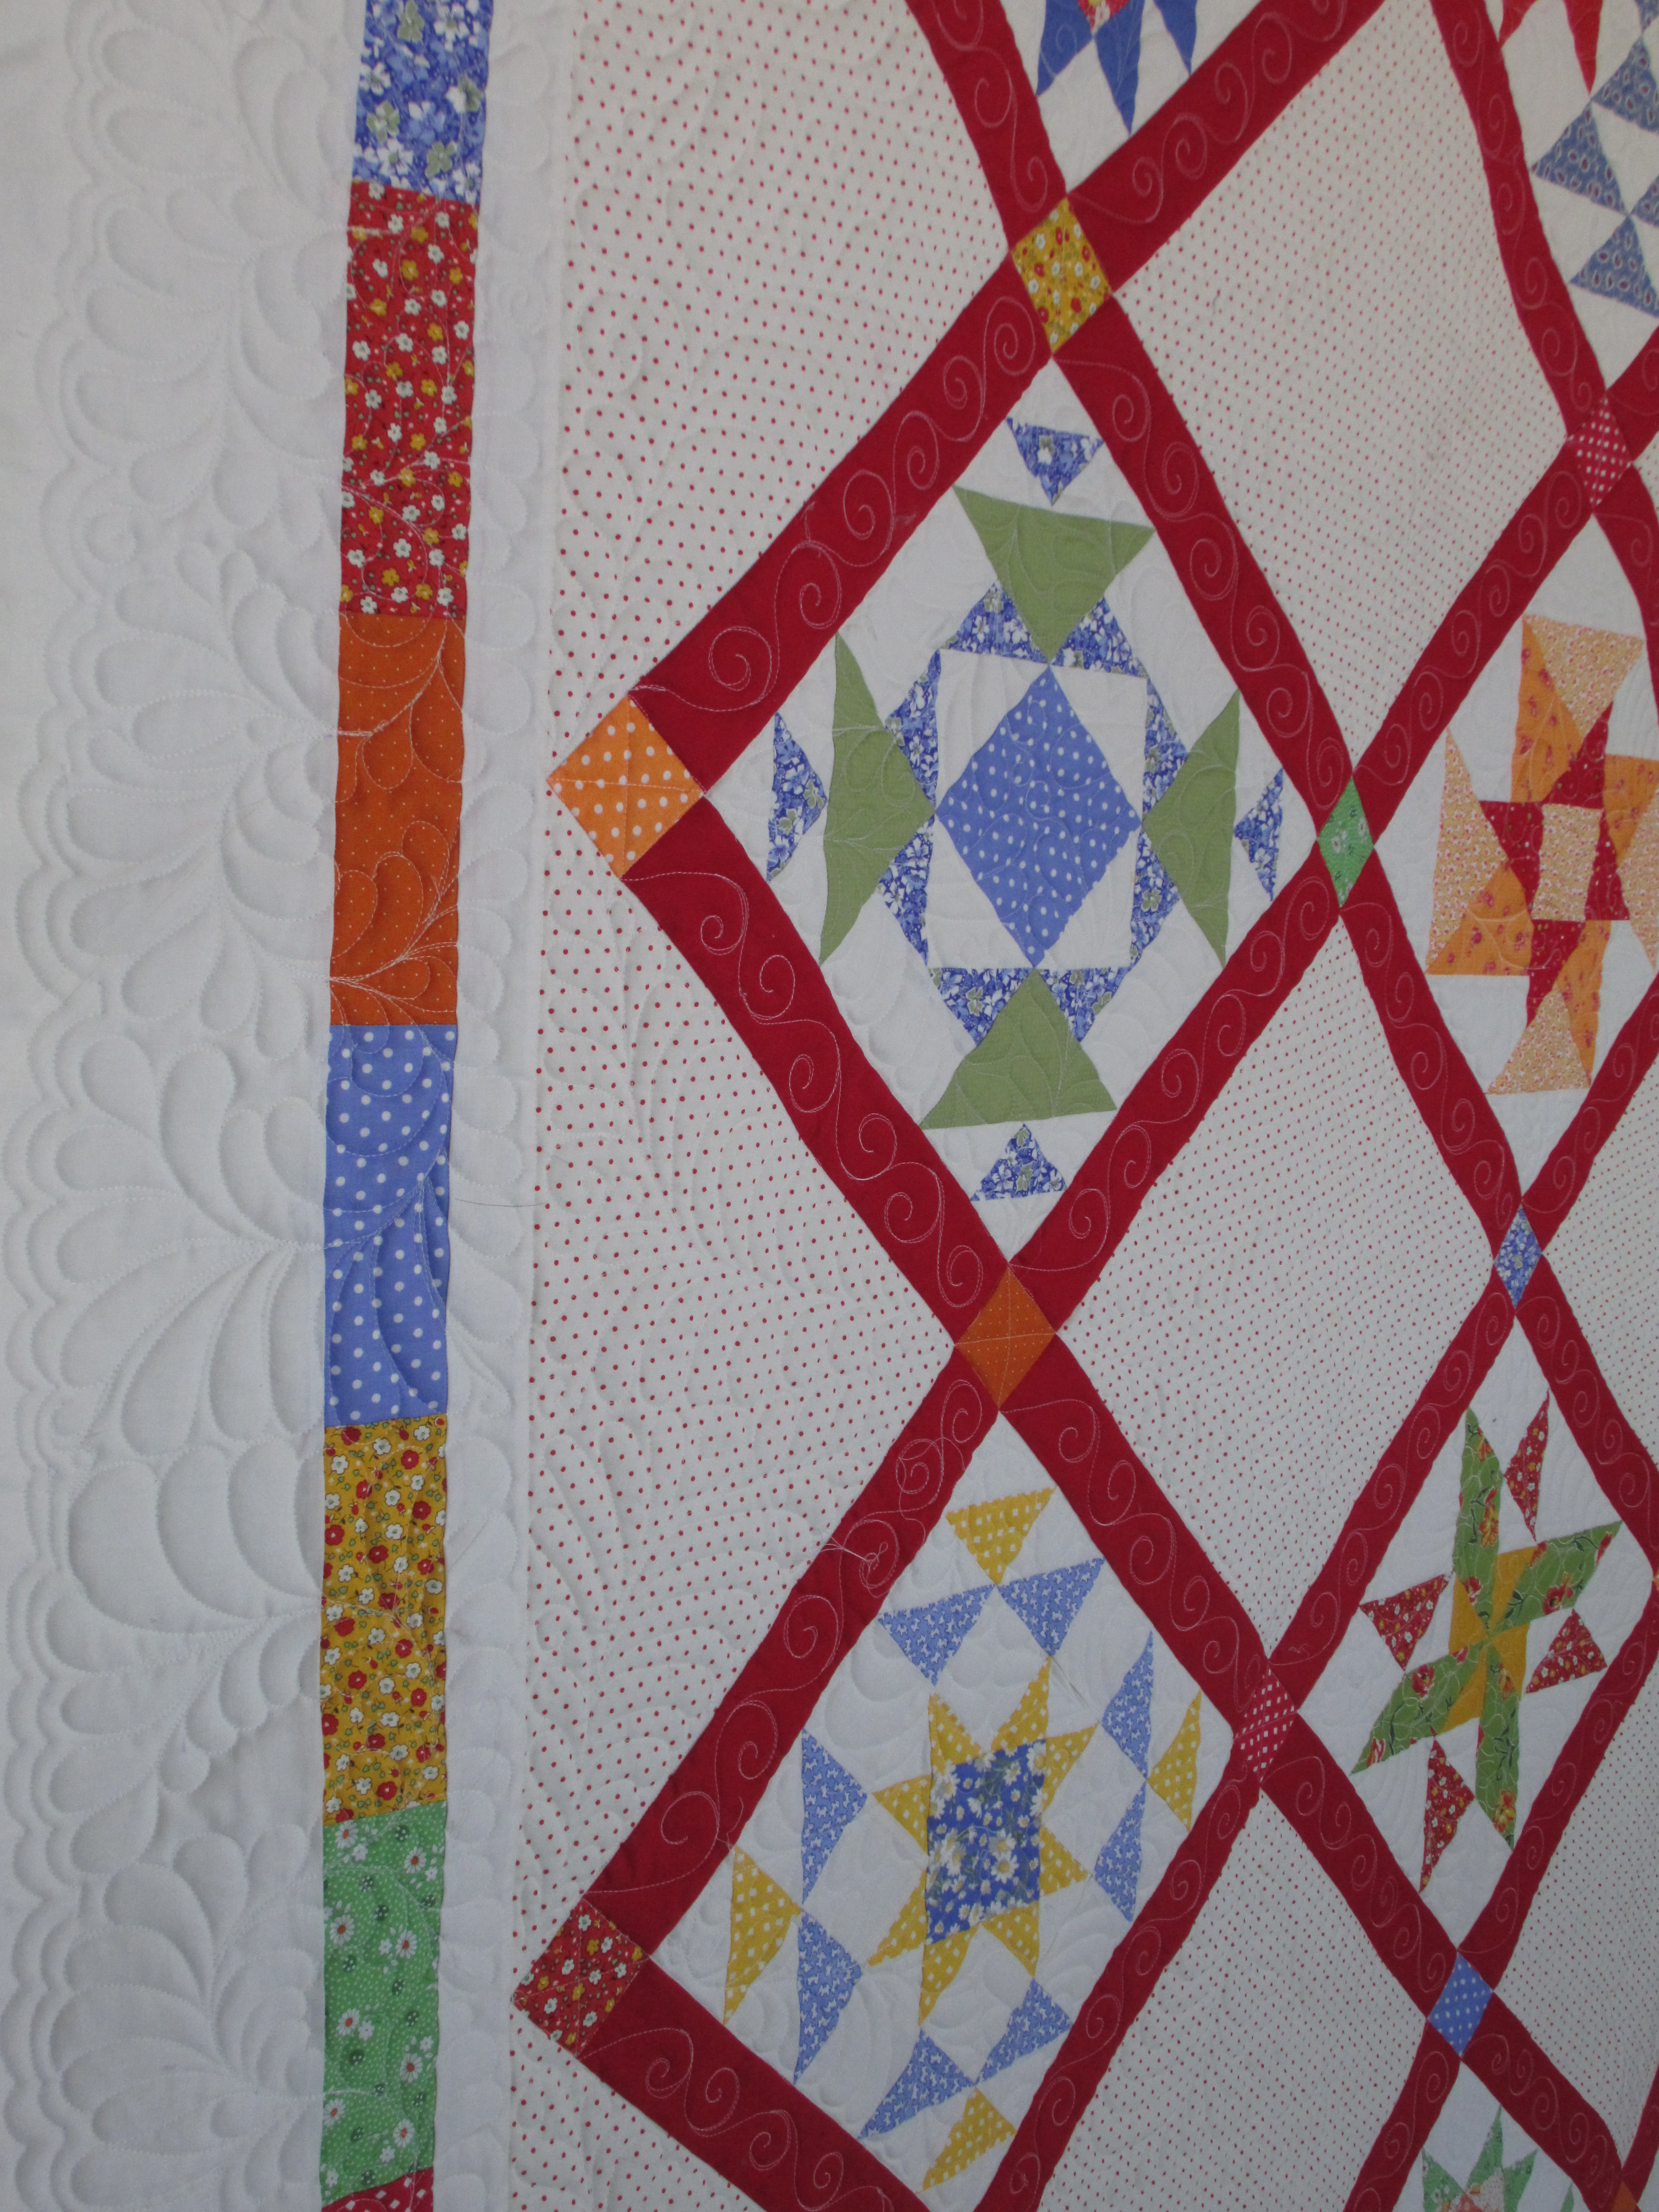
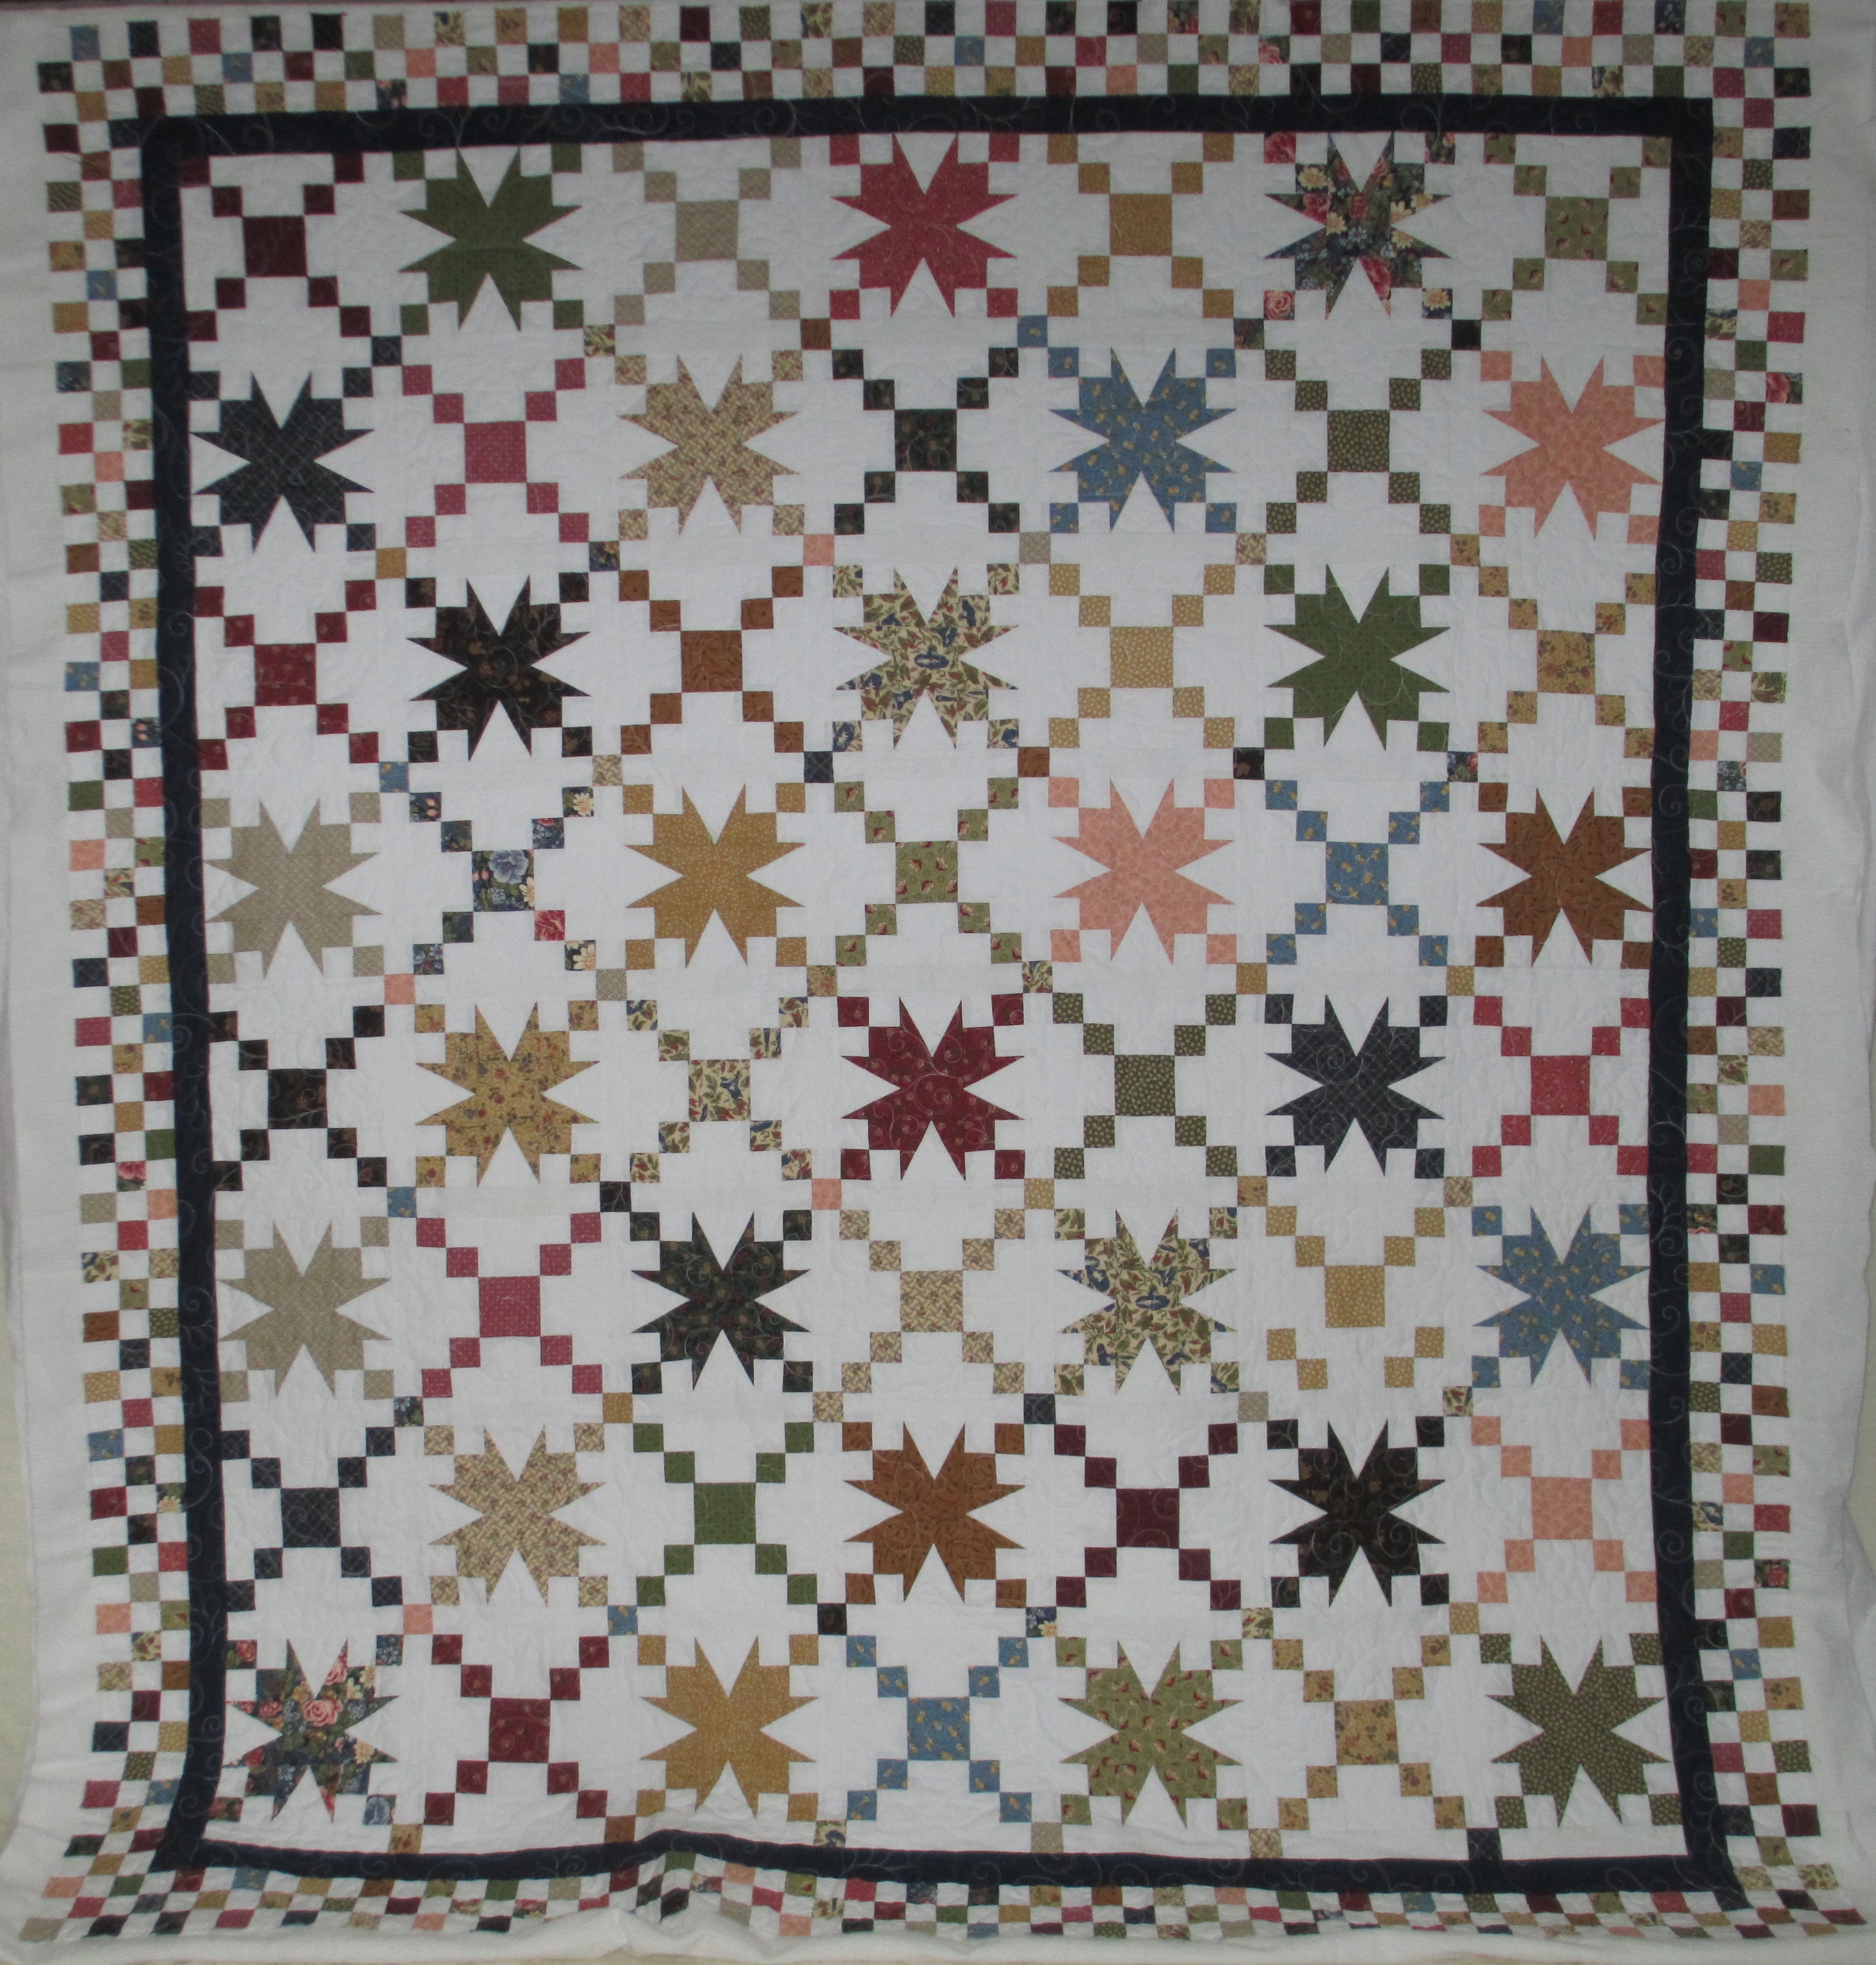
First off, let’s look at the whole quilt.  I LOVE how Judy made this a scrappy quilt with all the different colors and fabrics, yet she pulled the colors together in each of the blocks and then, “pow!”, added them out into the checkerboard border.  She really pulled this off well, in my humble opinion.

IMG_2384

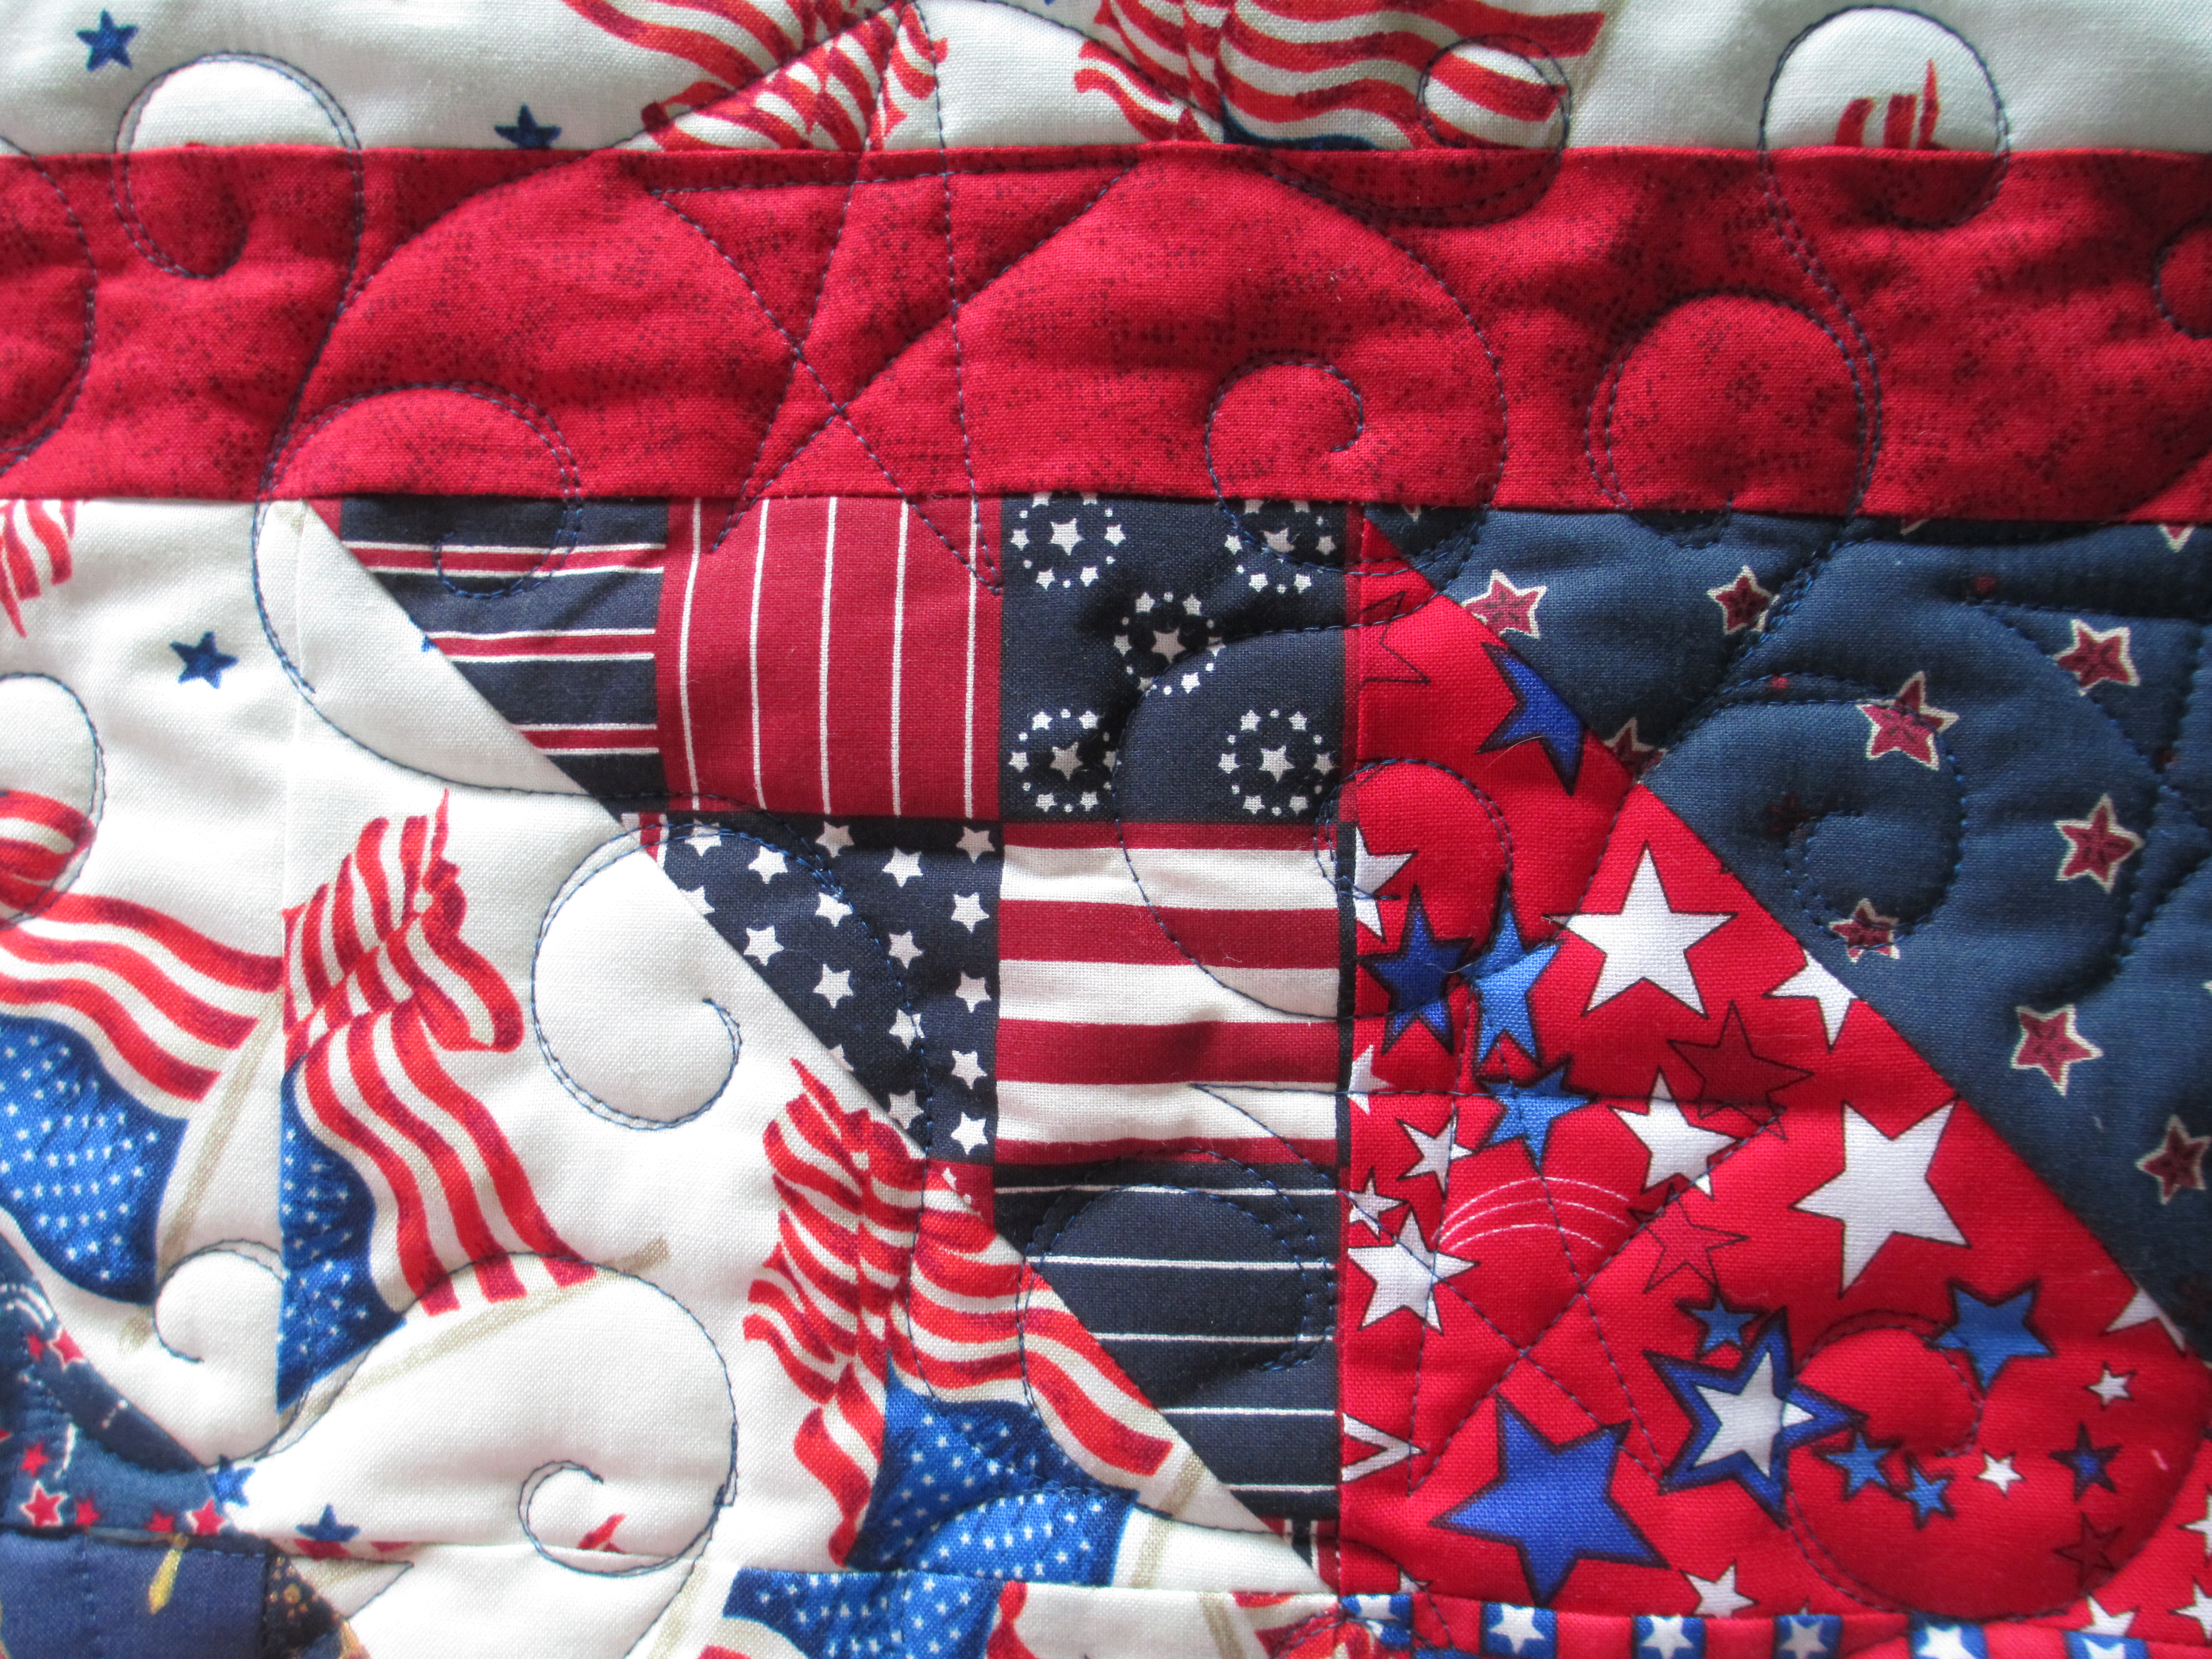
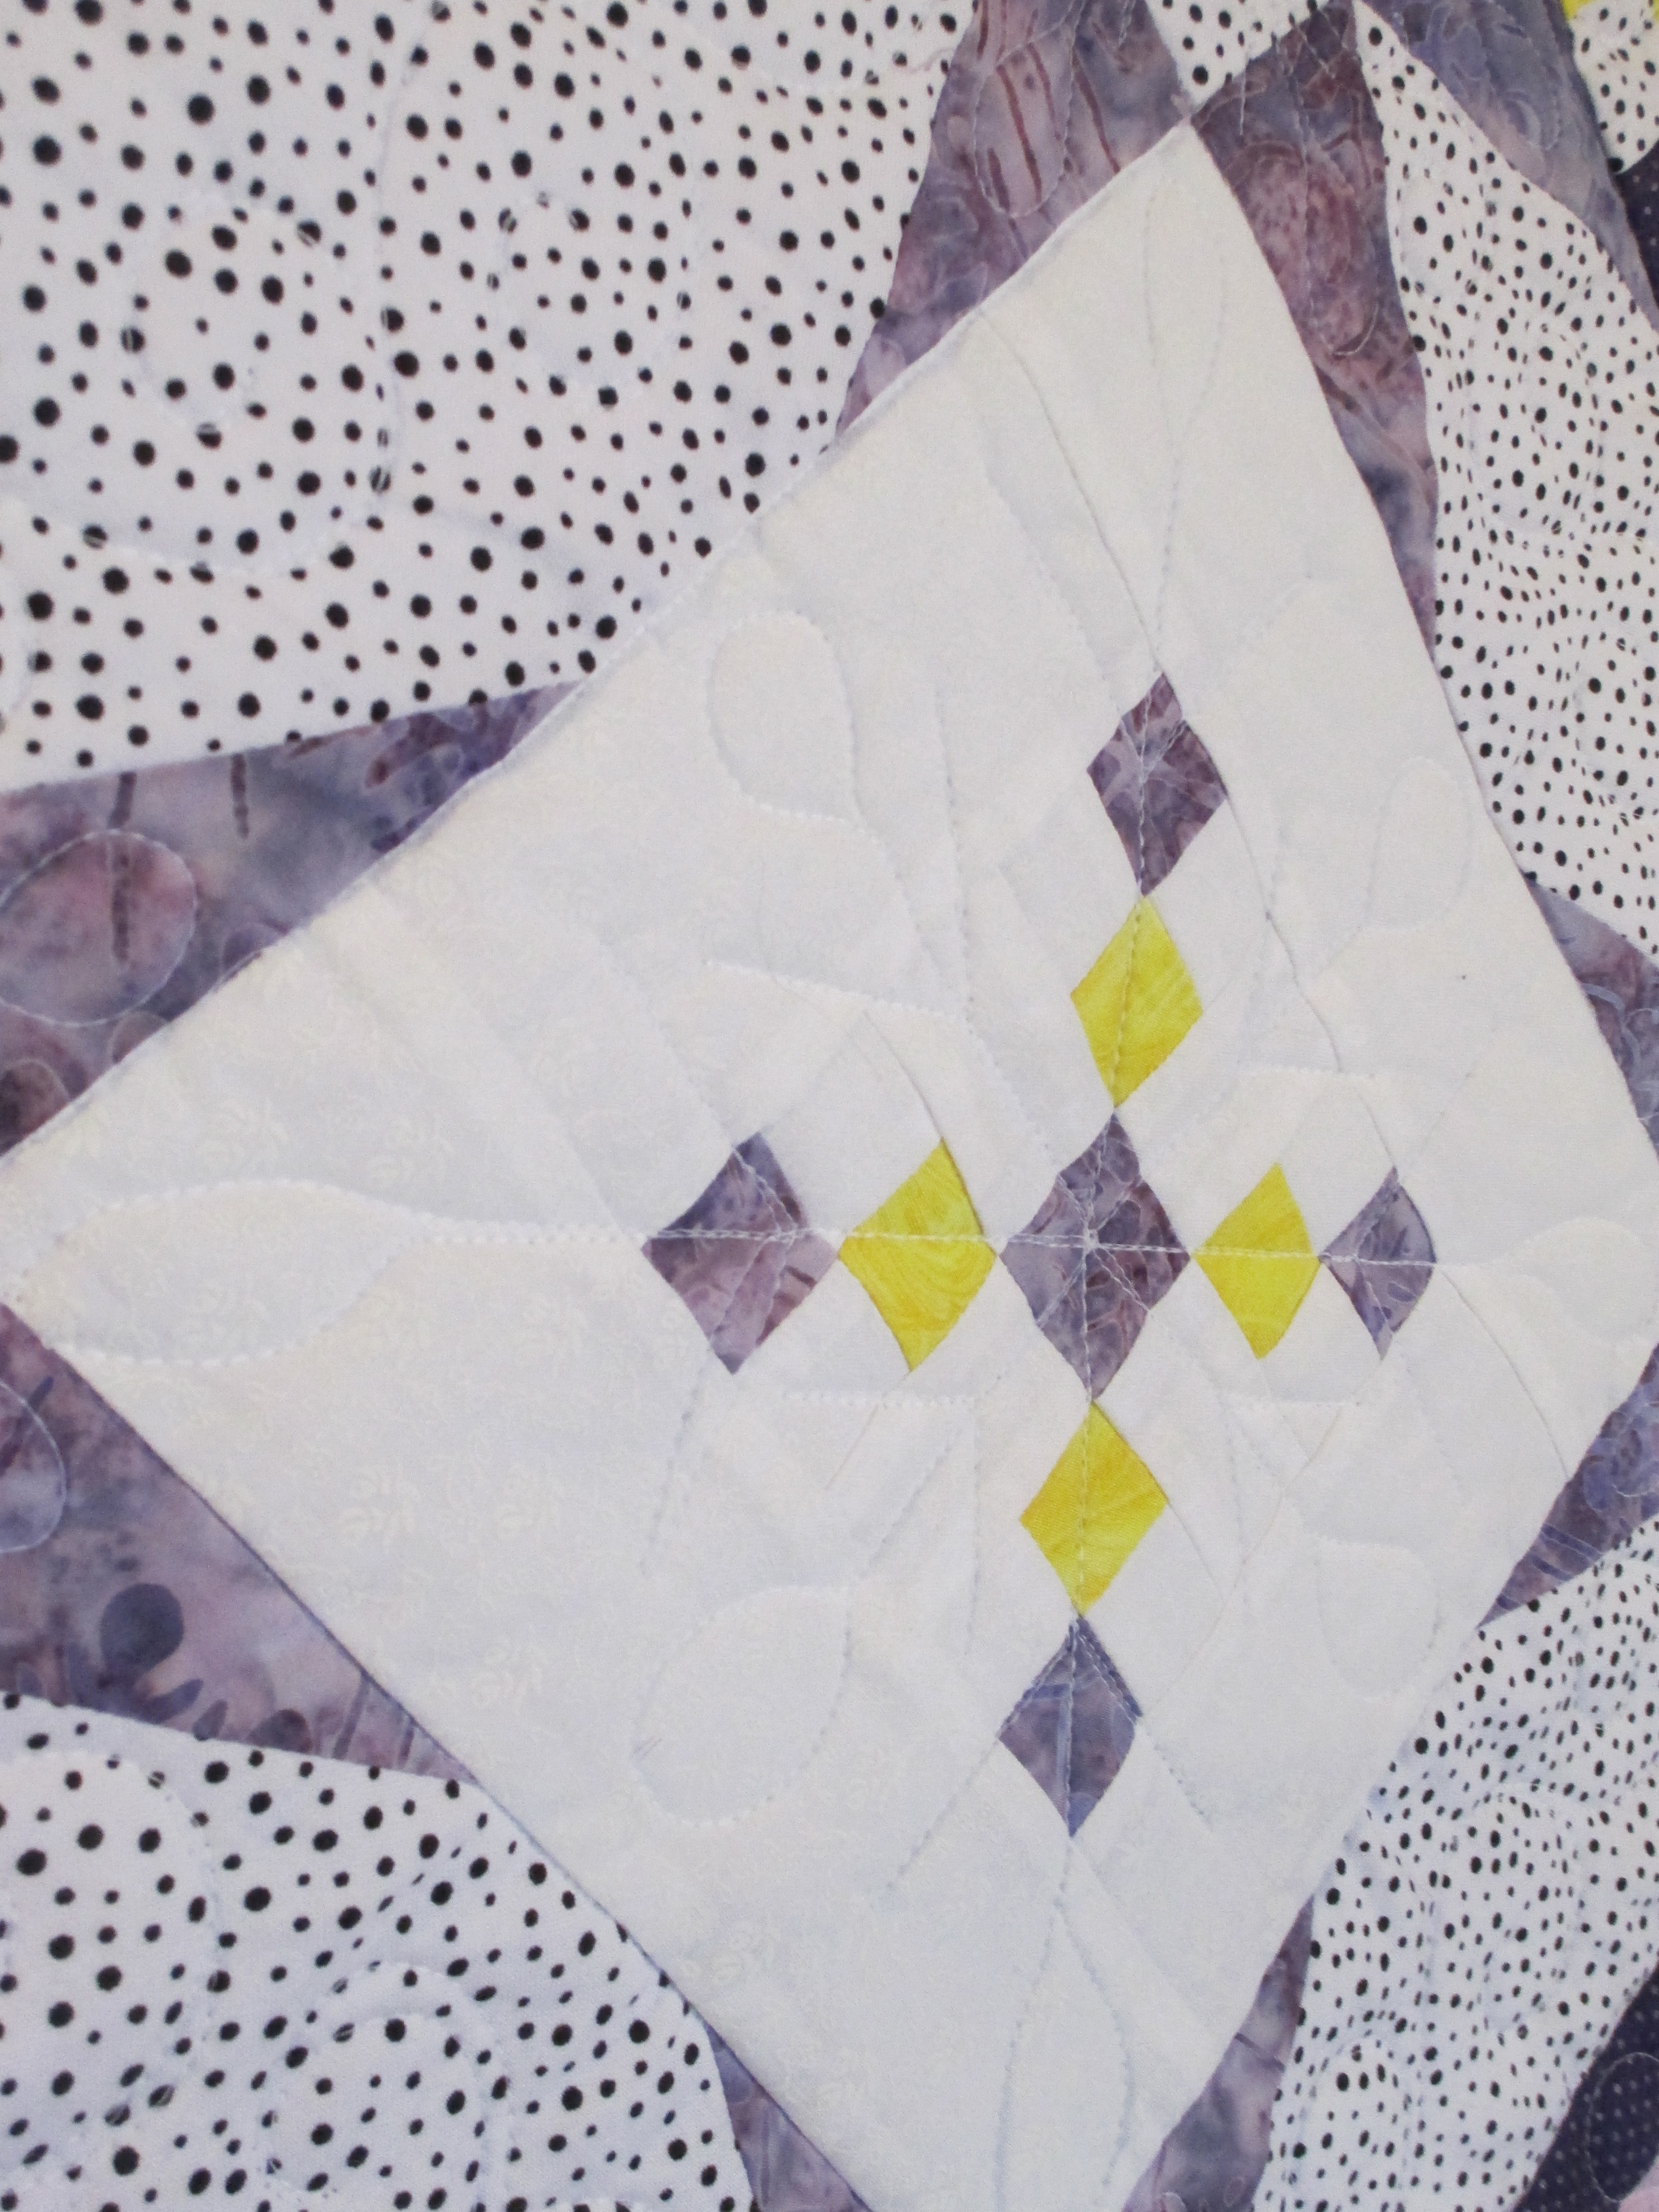
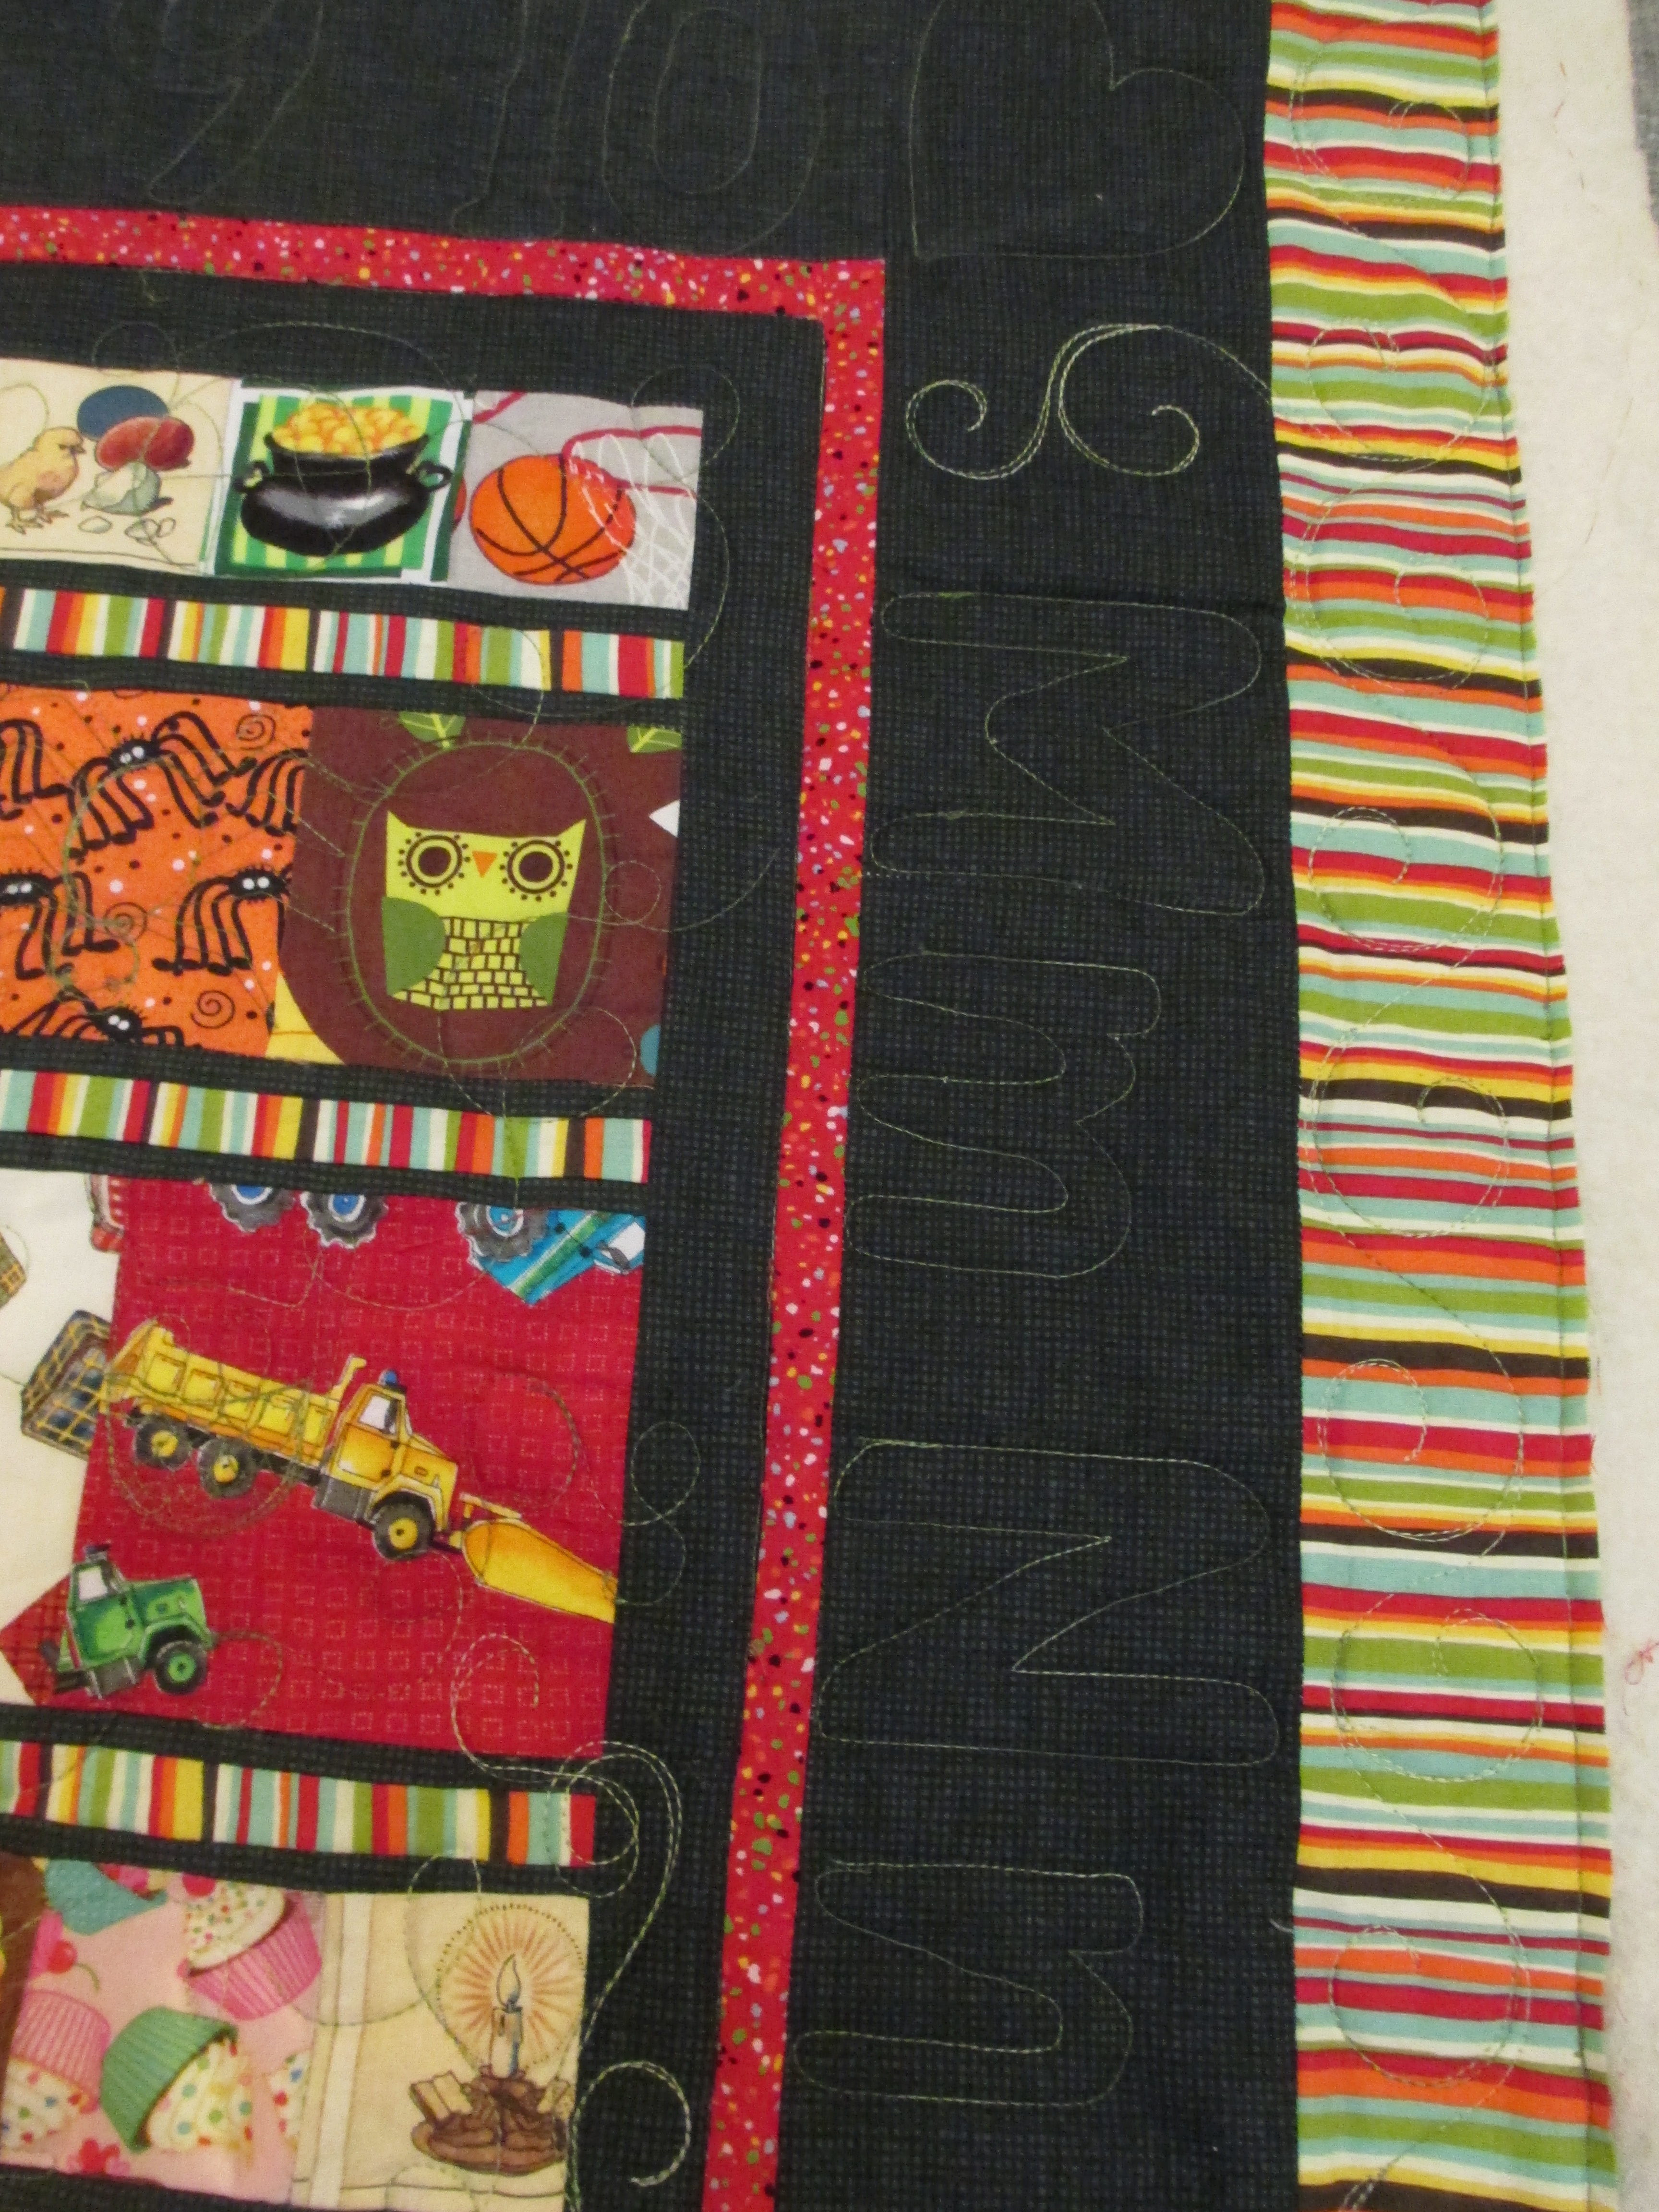
Now, as you look at the picture above, I want to show you the parts where she embroidered the names and dates.  Here’s a close-up of the embroidery – it’s in white, so it is subtle and doesn’t over power the rest of the quilt.  Do you see it in the strip across the middle of this picture below?

IMG_2372

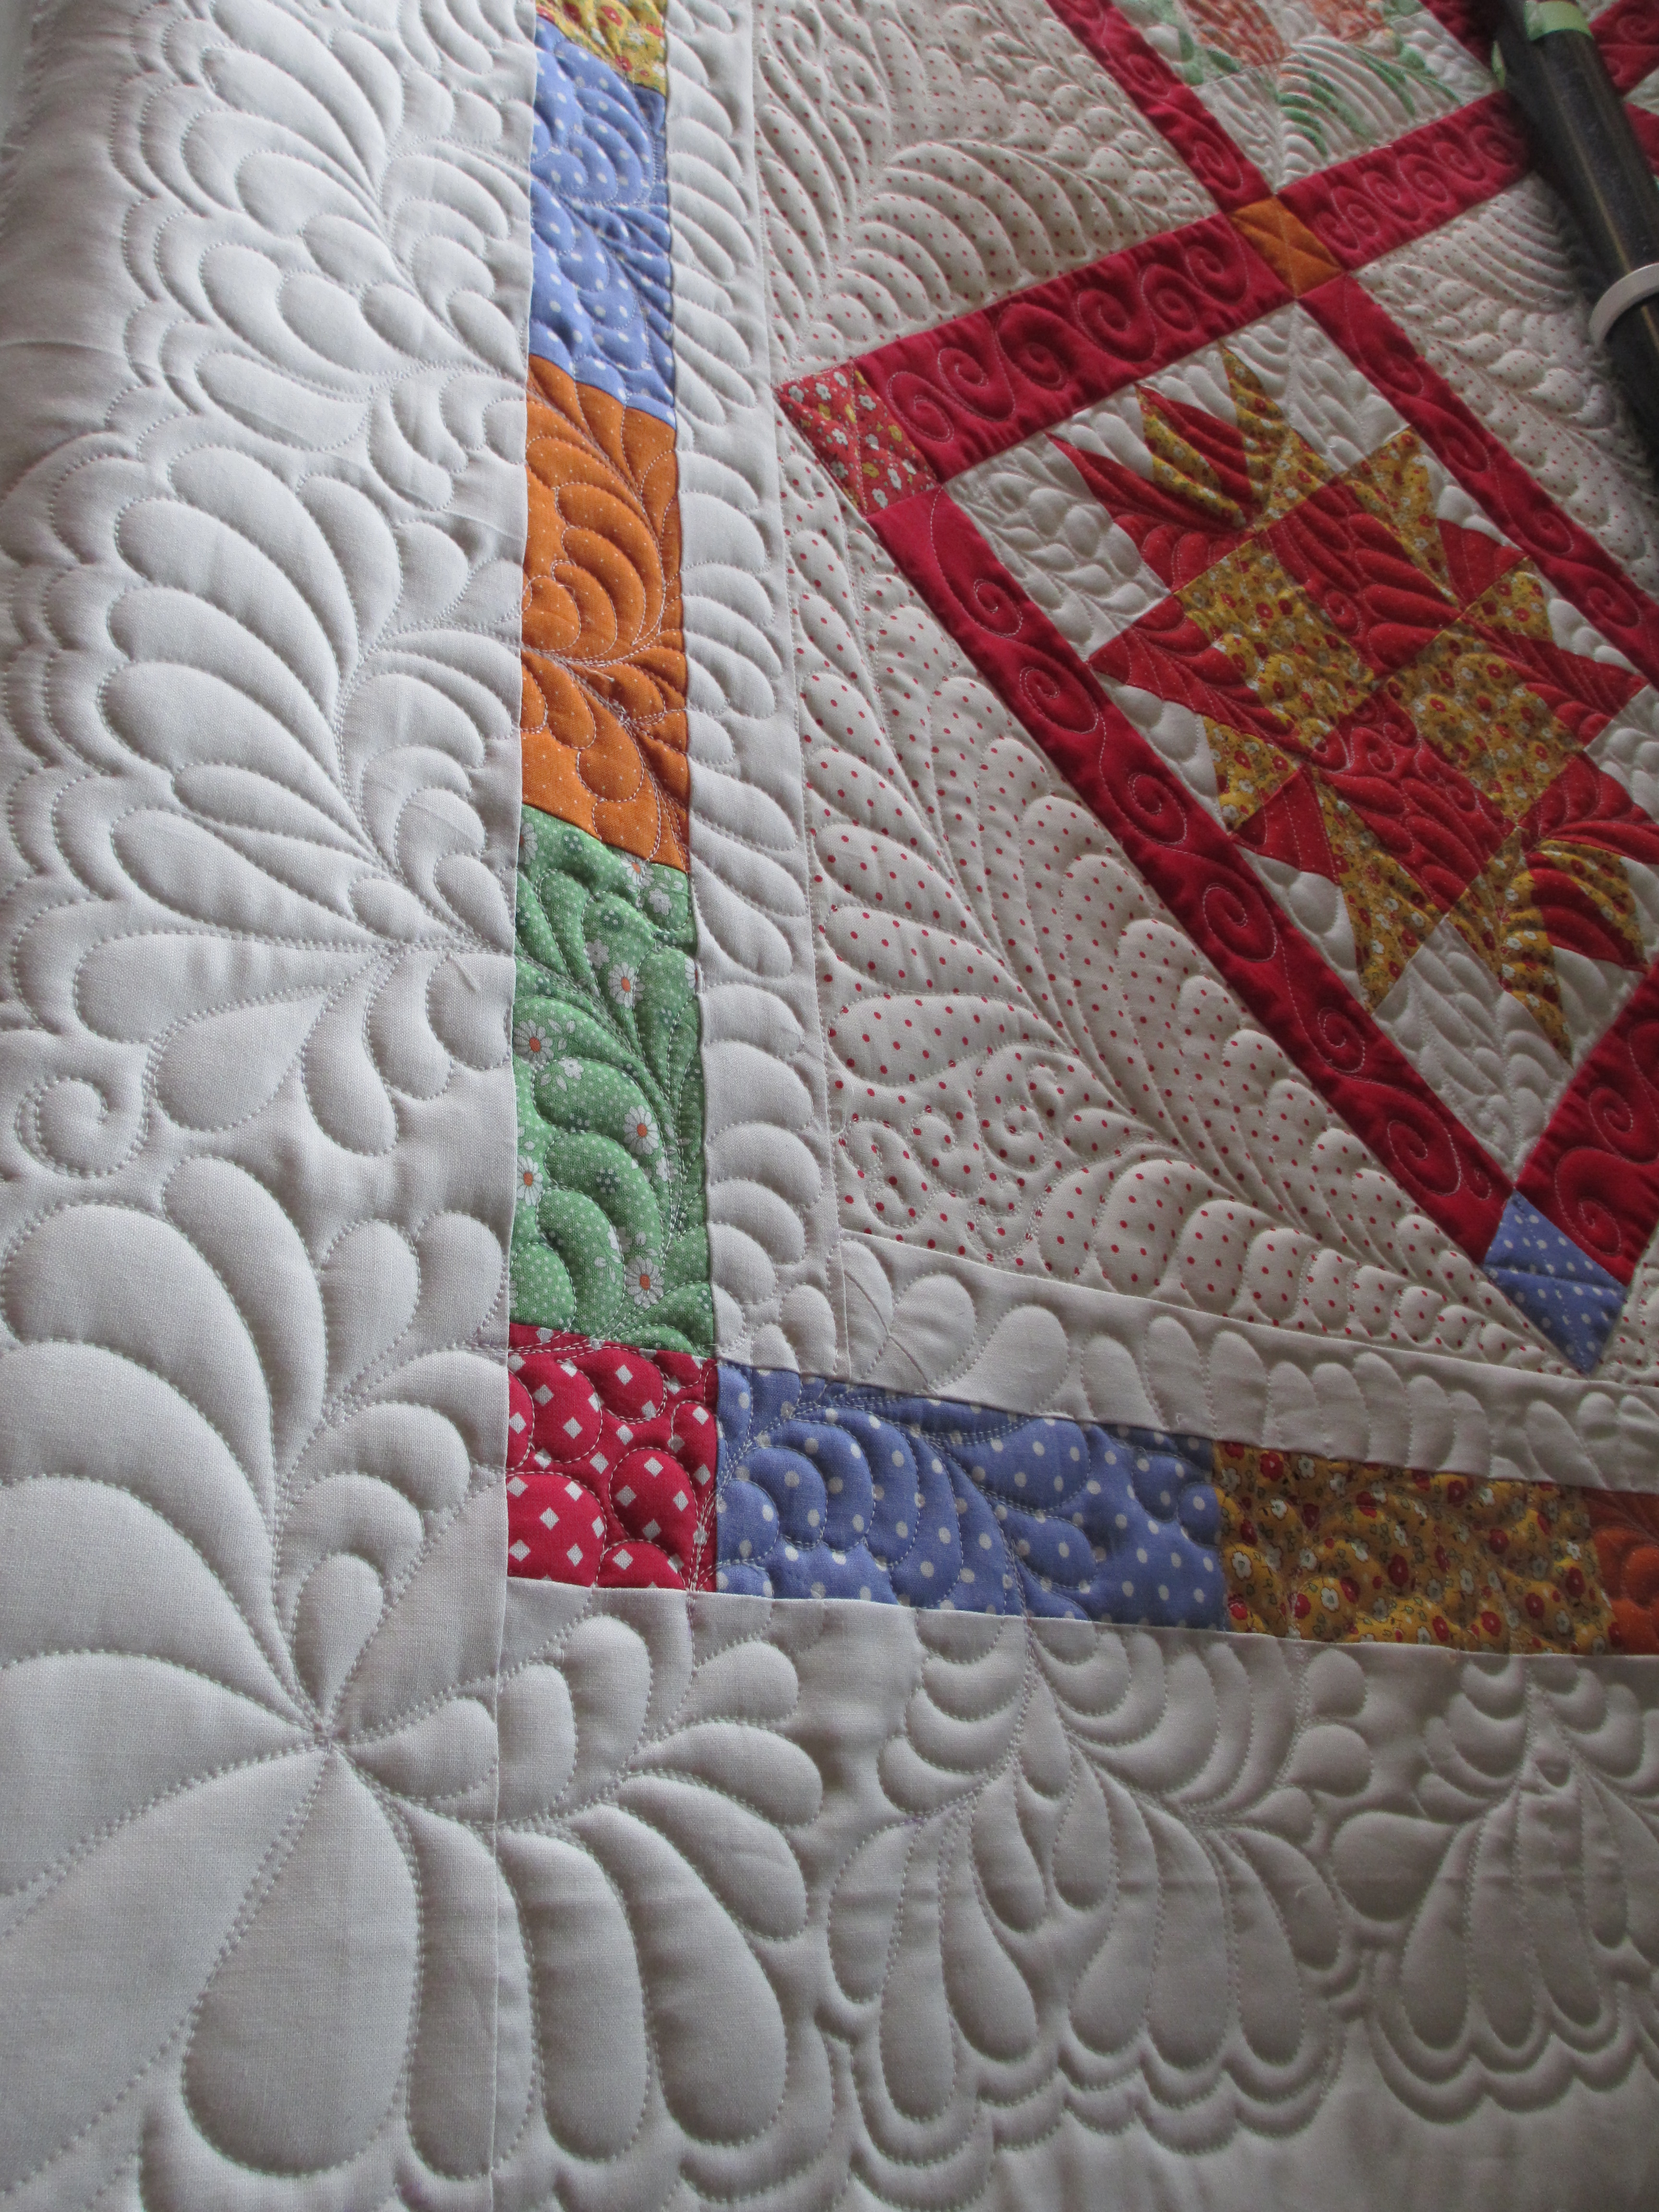
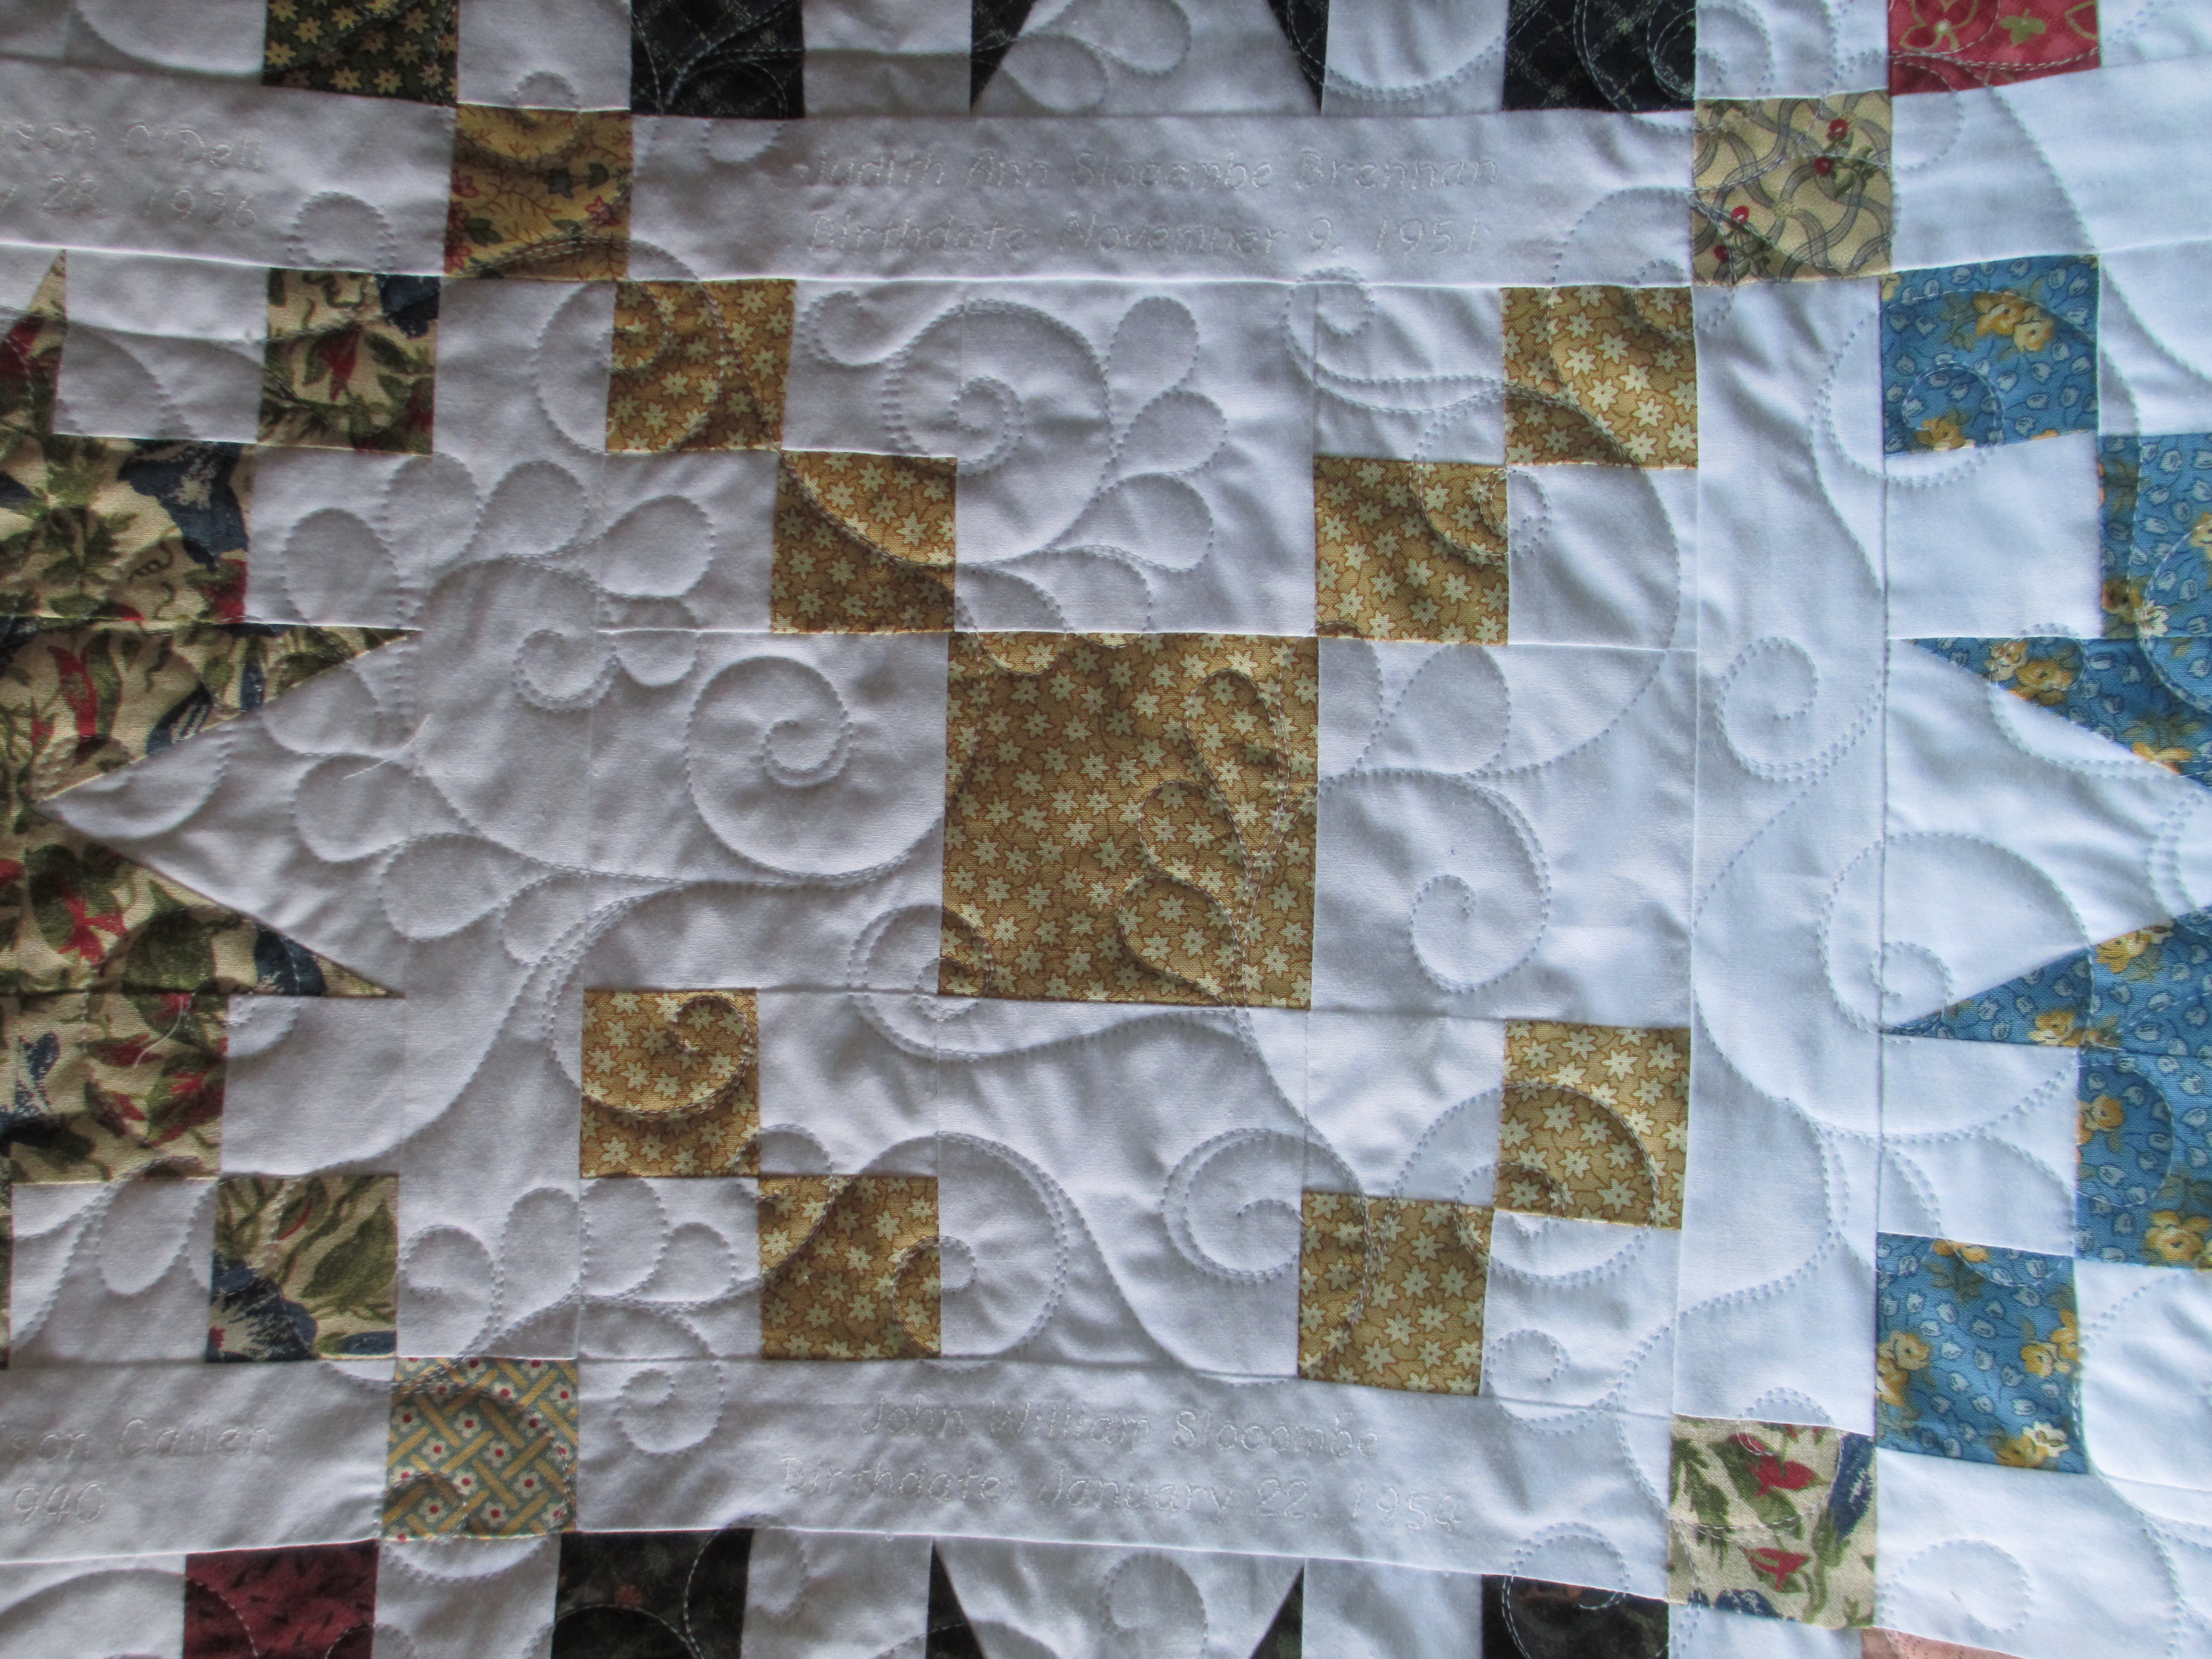
Here’s another view where you can see the embroidered strips above and below each block.

IMG_2378

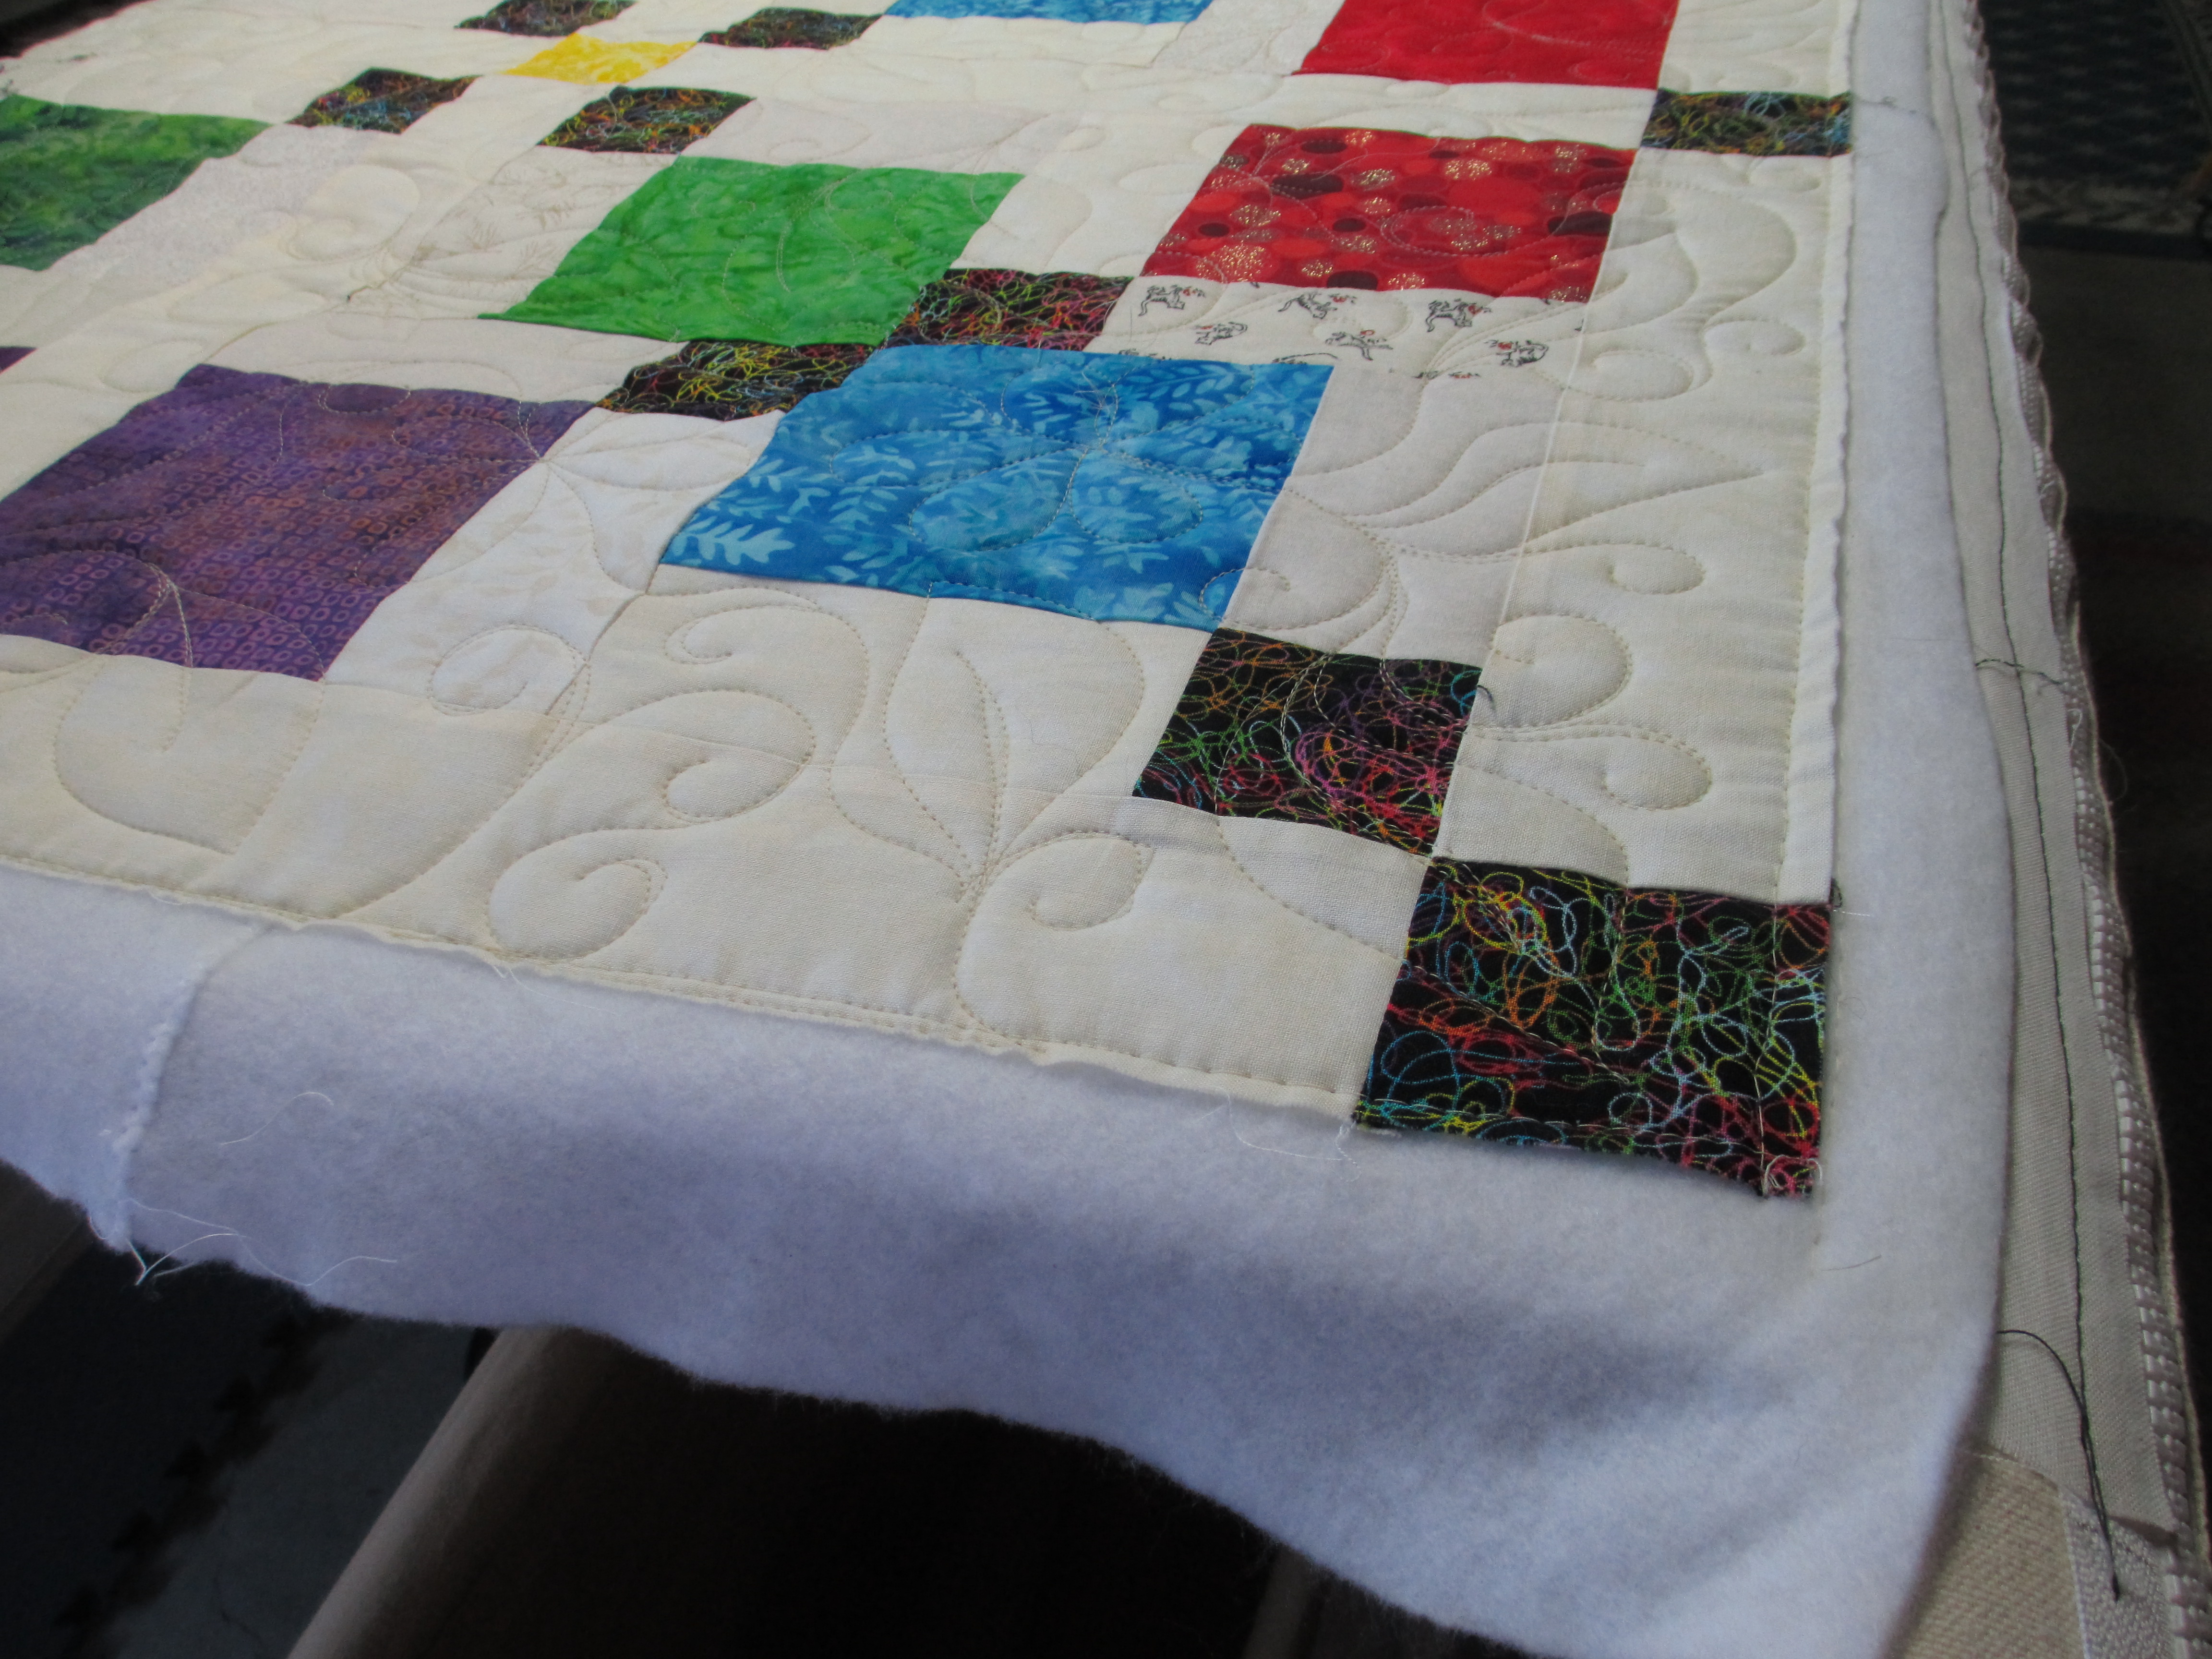
And, to put it all into perspective, here is a shot of it draped across my quilting machine’s frame.  Now, go back up to the top of this post and look at the full view of the quilt.  Impressive, huh?  Each time I look at it, I am amazed that Judy was able to pull together all she has this year.  I think the colors, the stars, the Irish Chain and the checkerboard border are all symbolic of this past year for Judy.  She’s had some jewels in her life, it’s been colorful and sometimes probably drastic and dramatic, she’s had some chains, she’s kept them in her reign (with the solid strip between the blocks and the border) while dealing with the stepping stones (checkerboard border) around her life.

IMG_2374

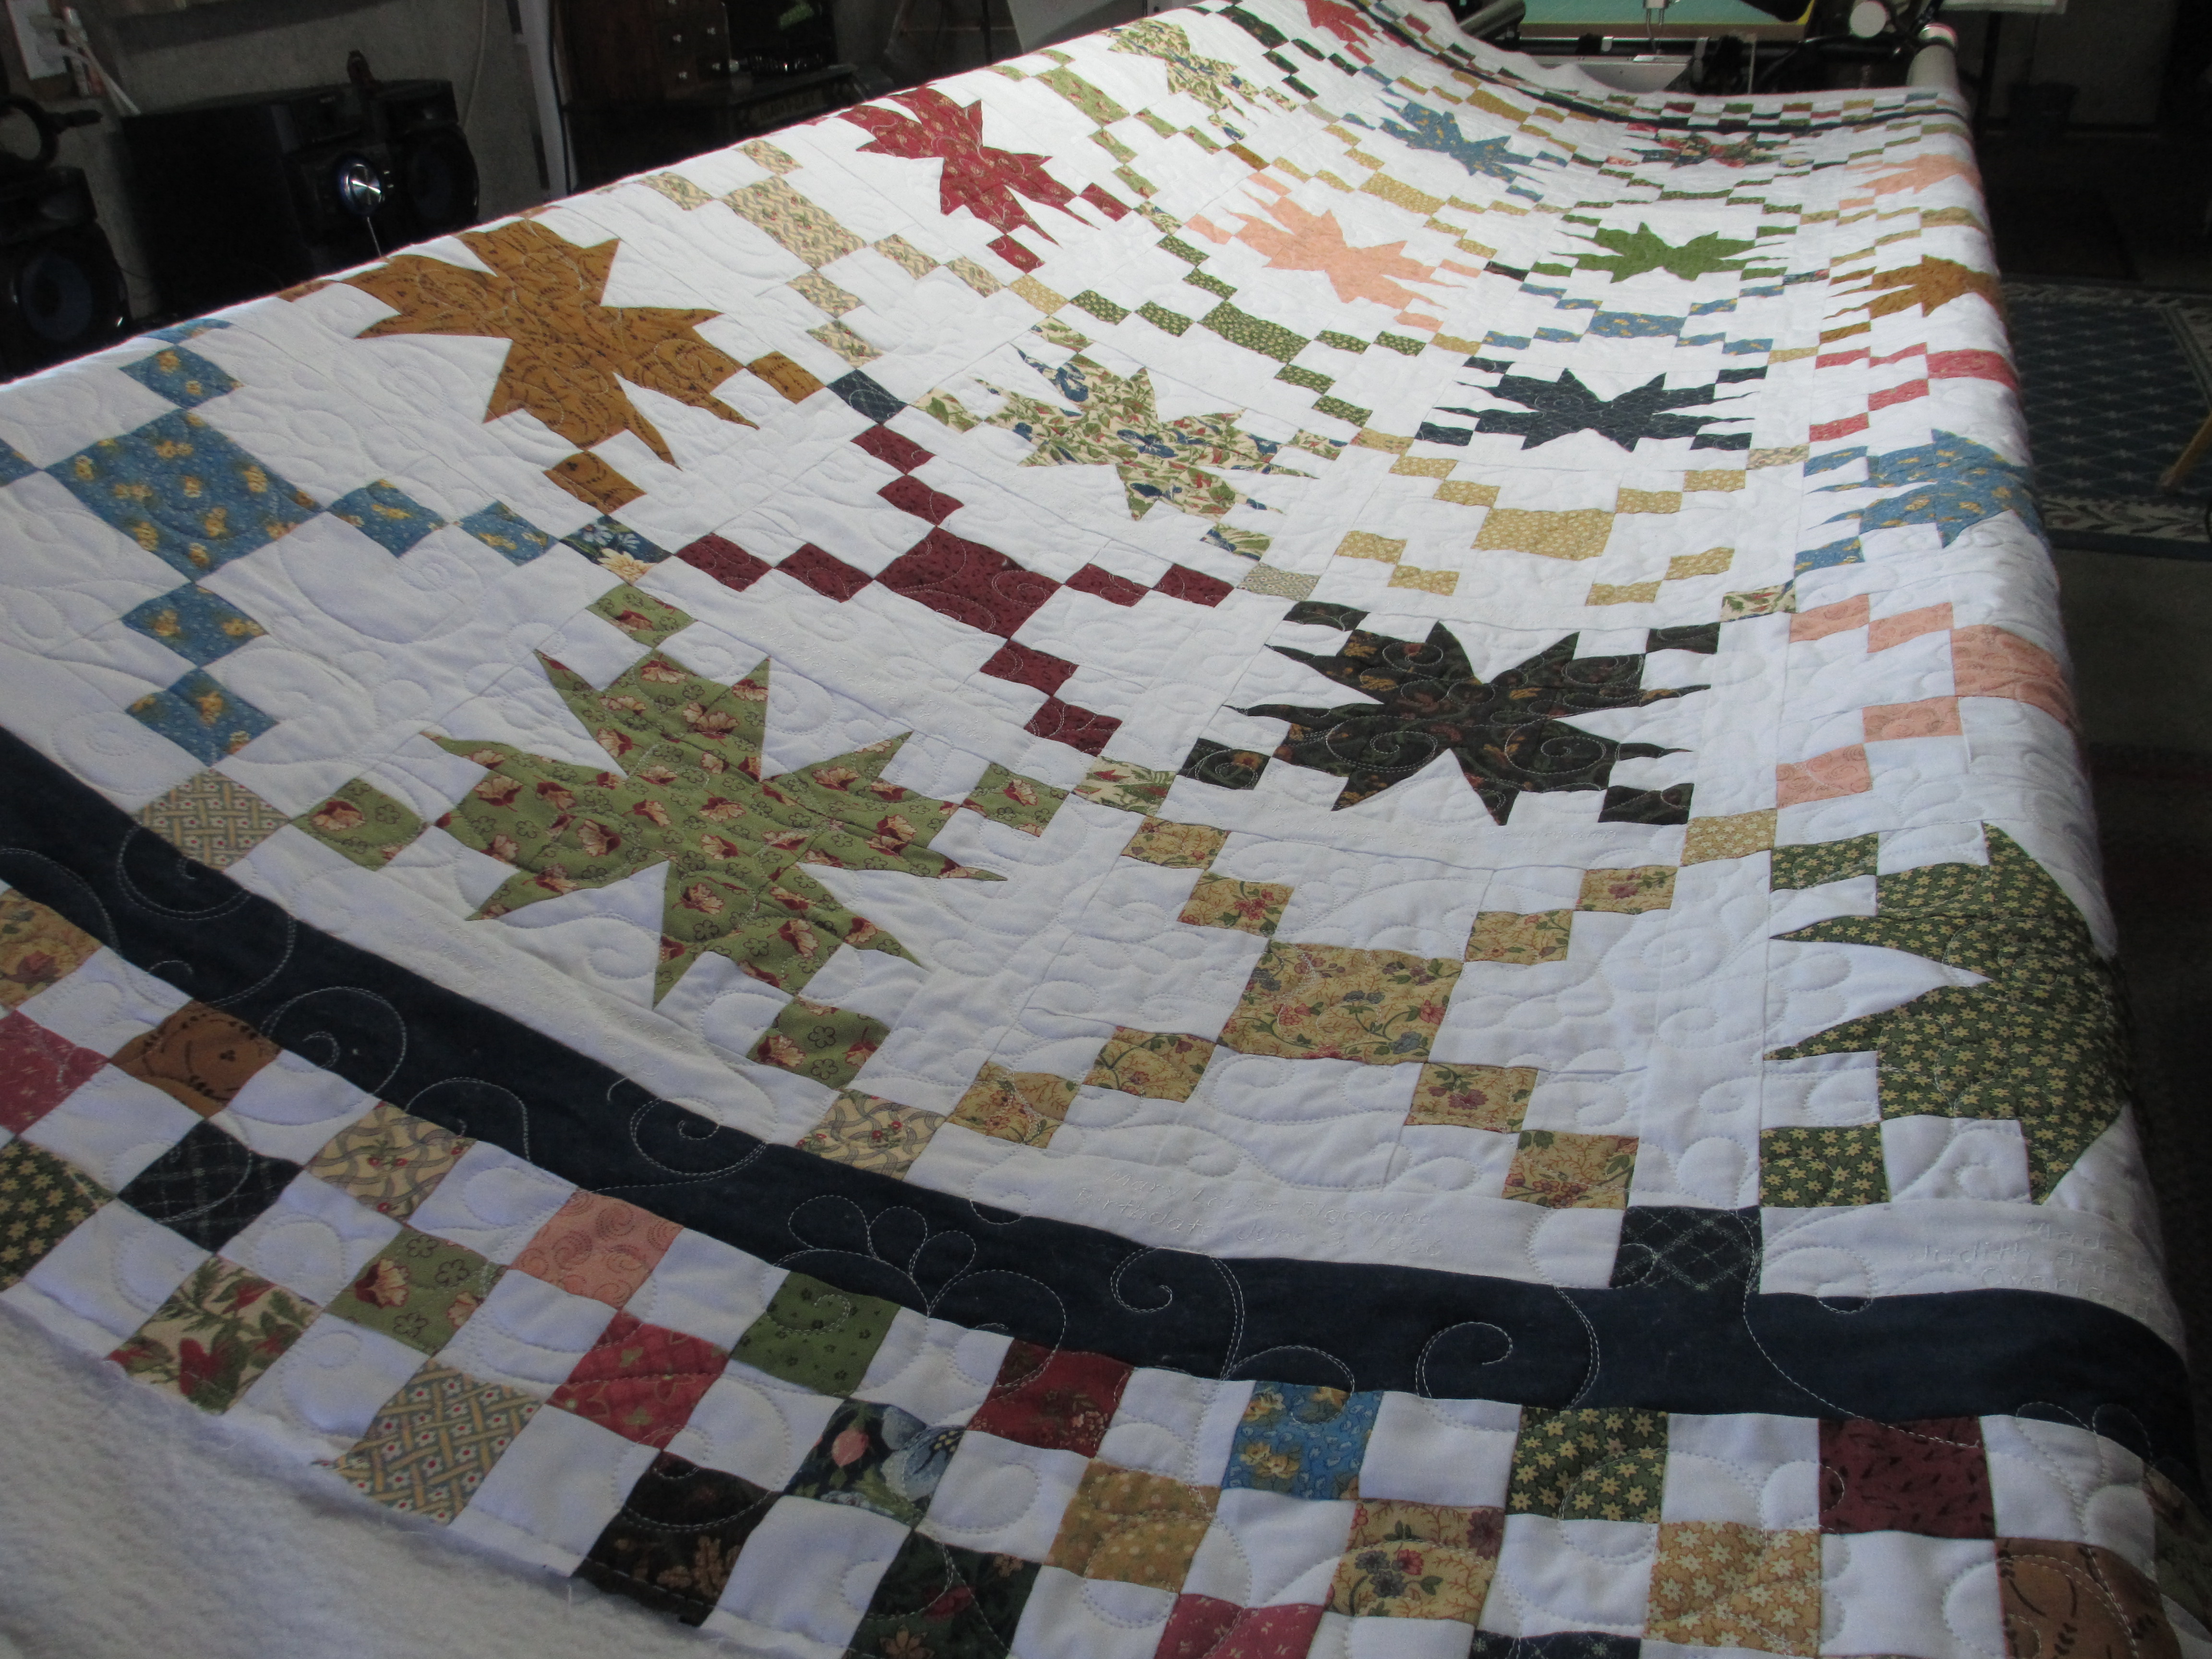
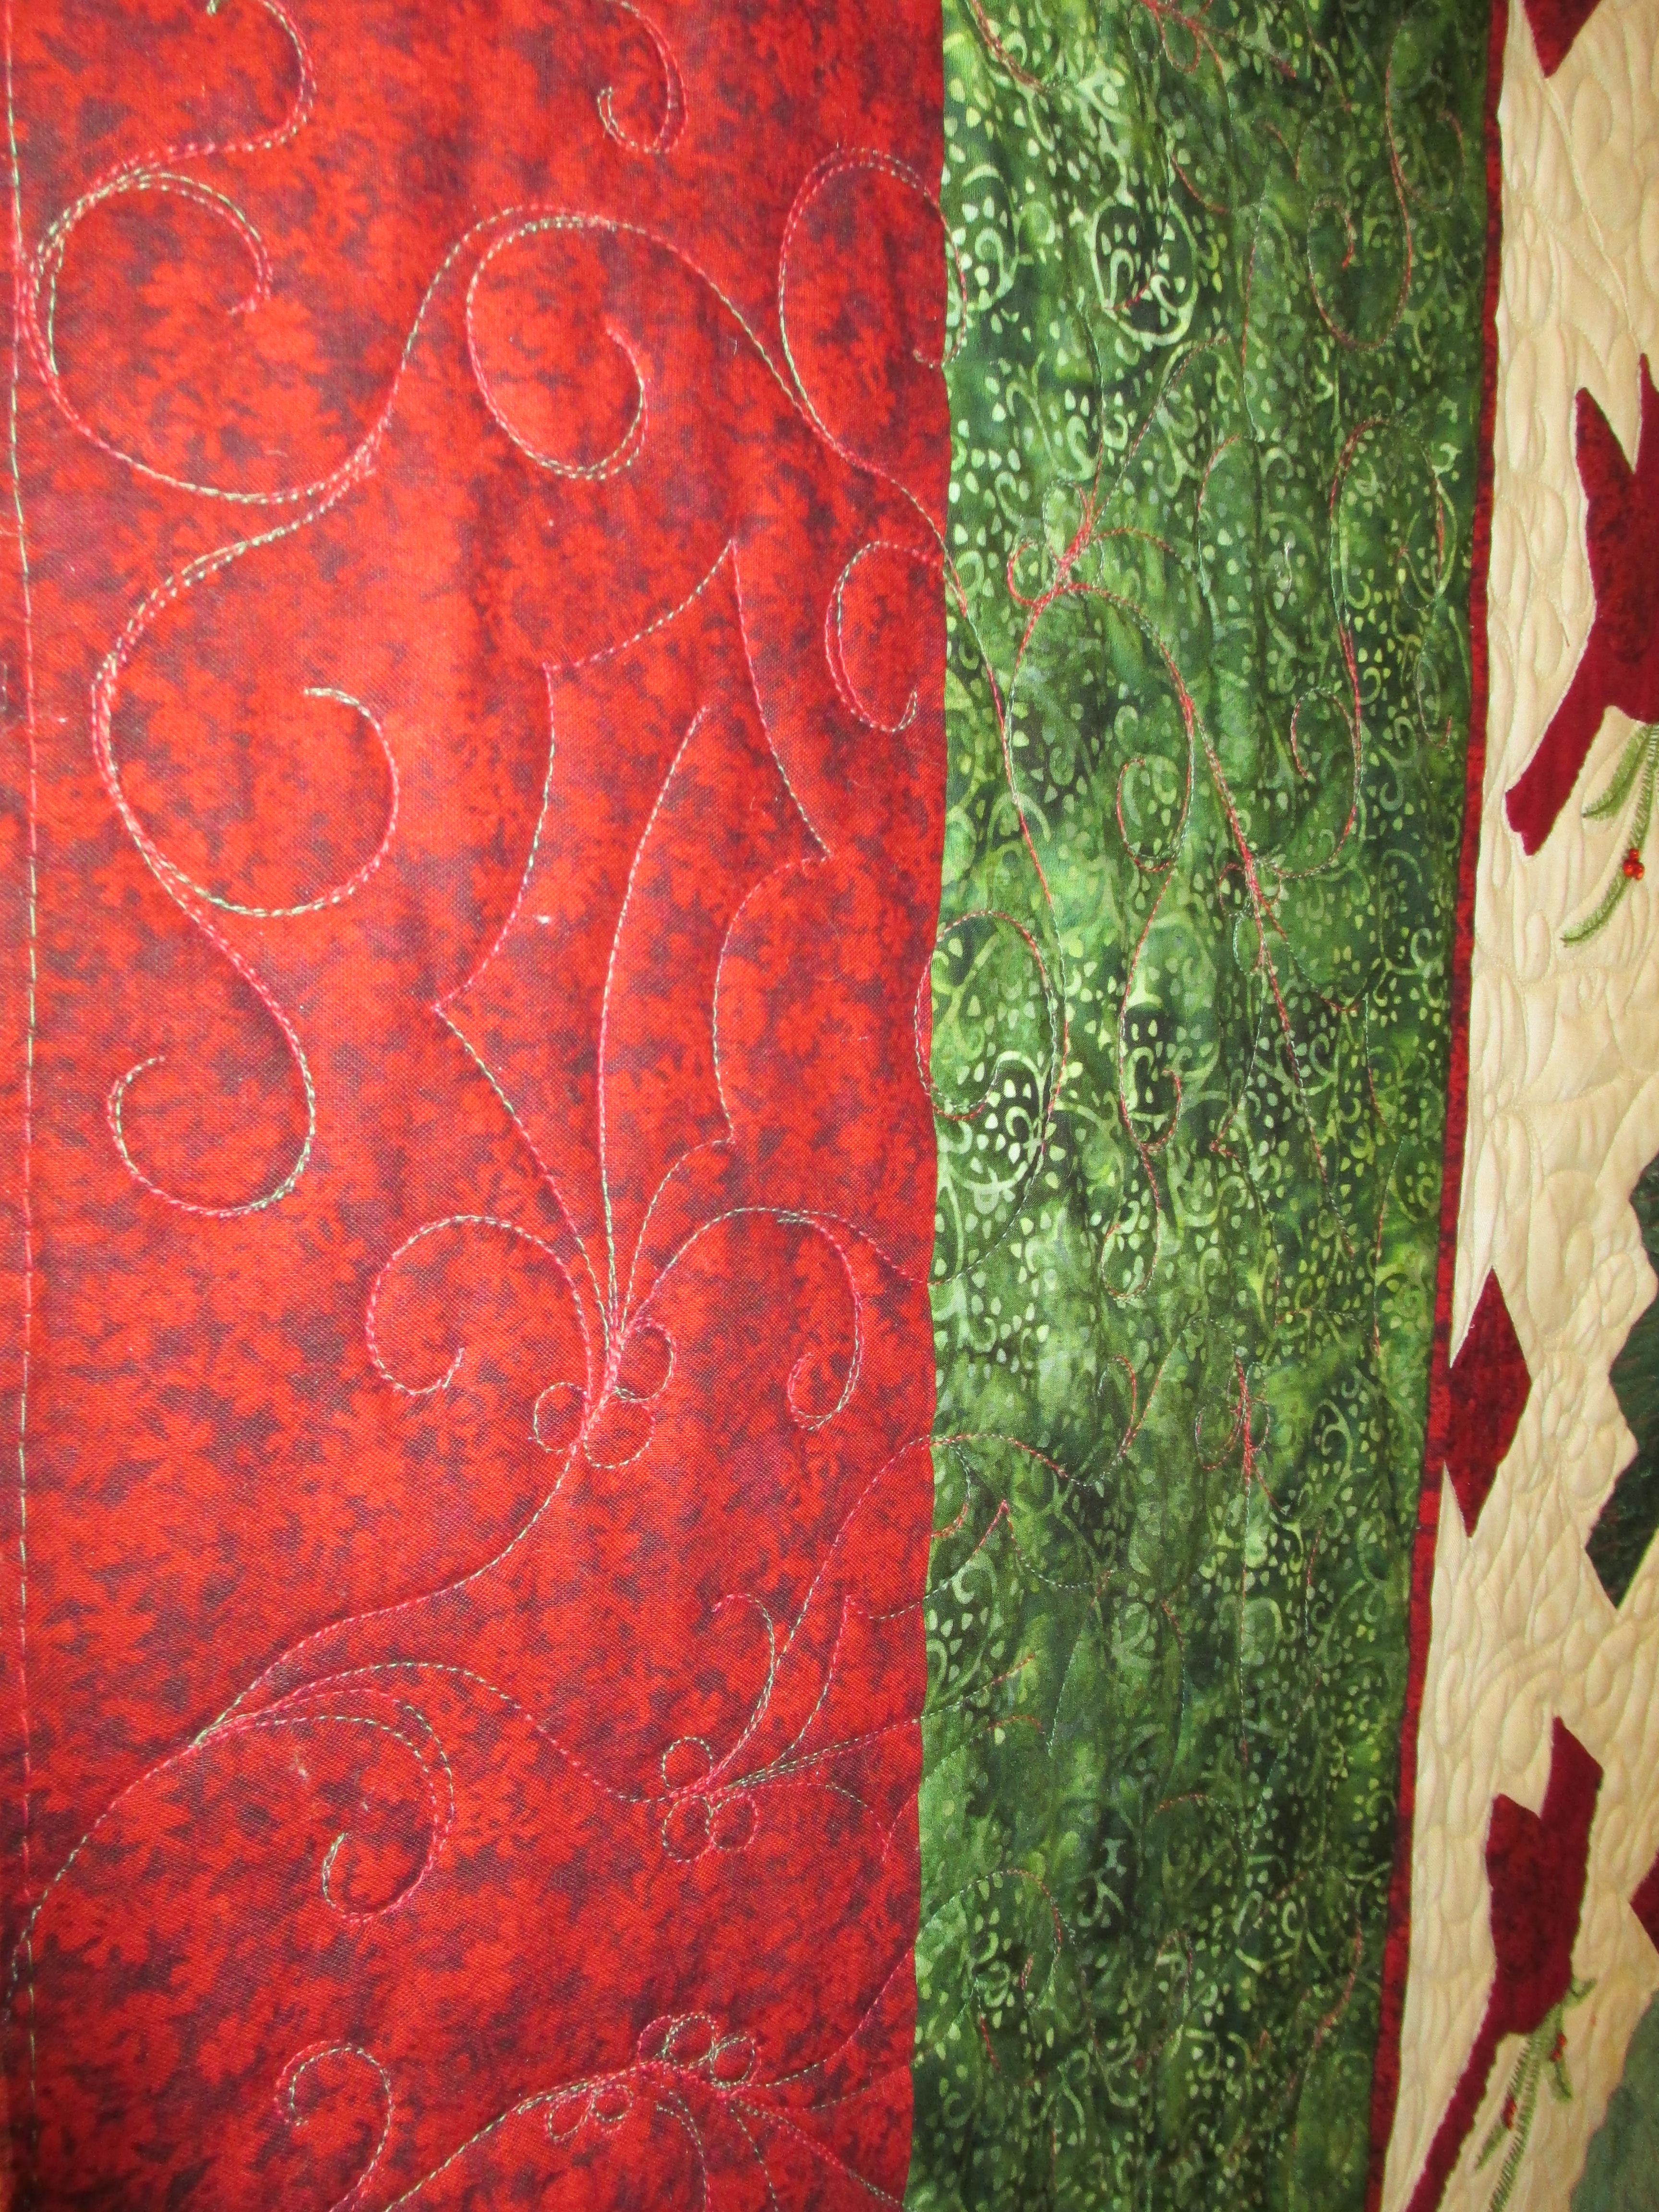
Okay, so after all that, this is what I contributed, trying to give it some elegance while staying out of the way… don’t expect much.  LOL!

IMG_2367 IMG_2366

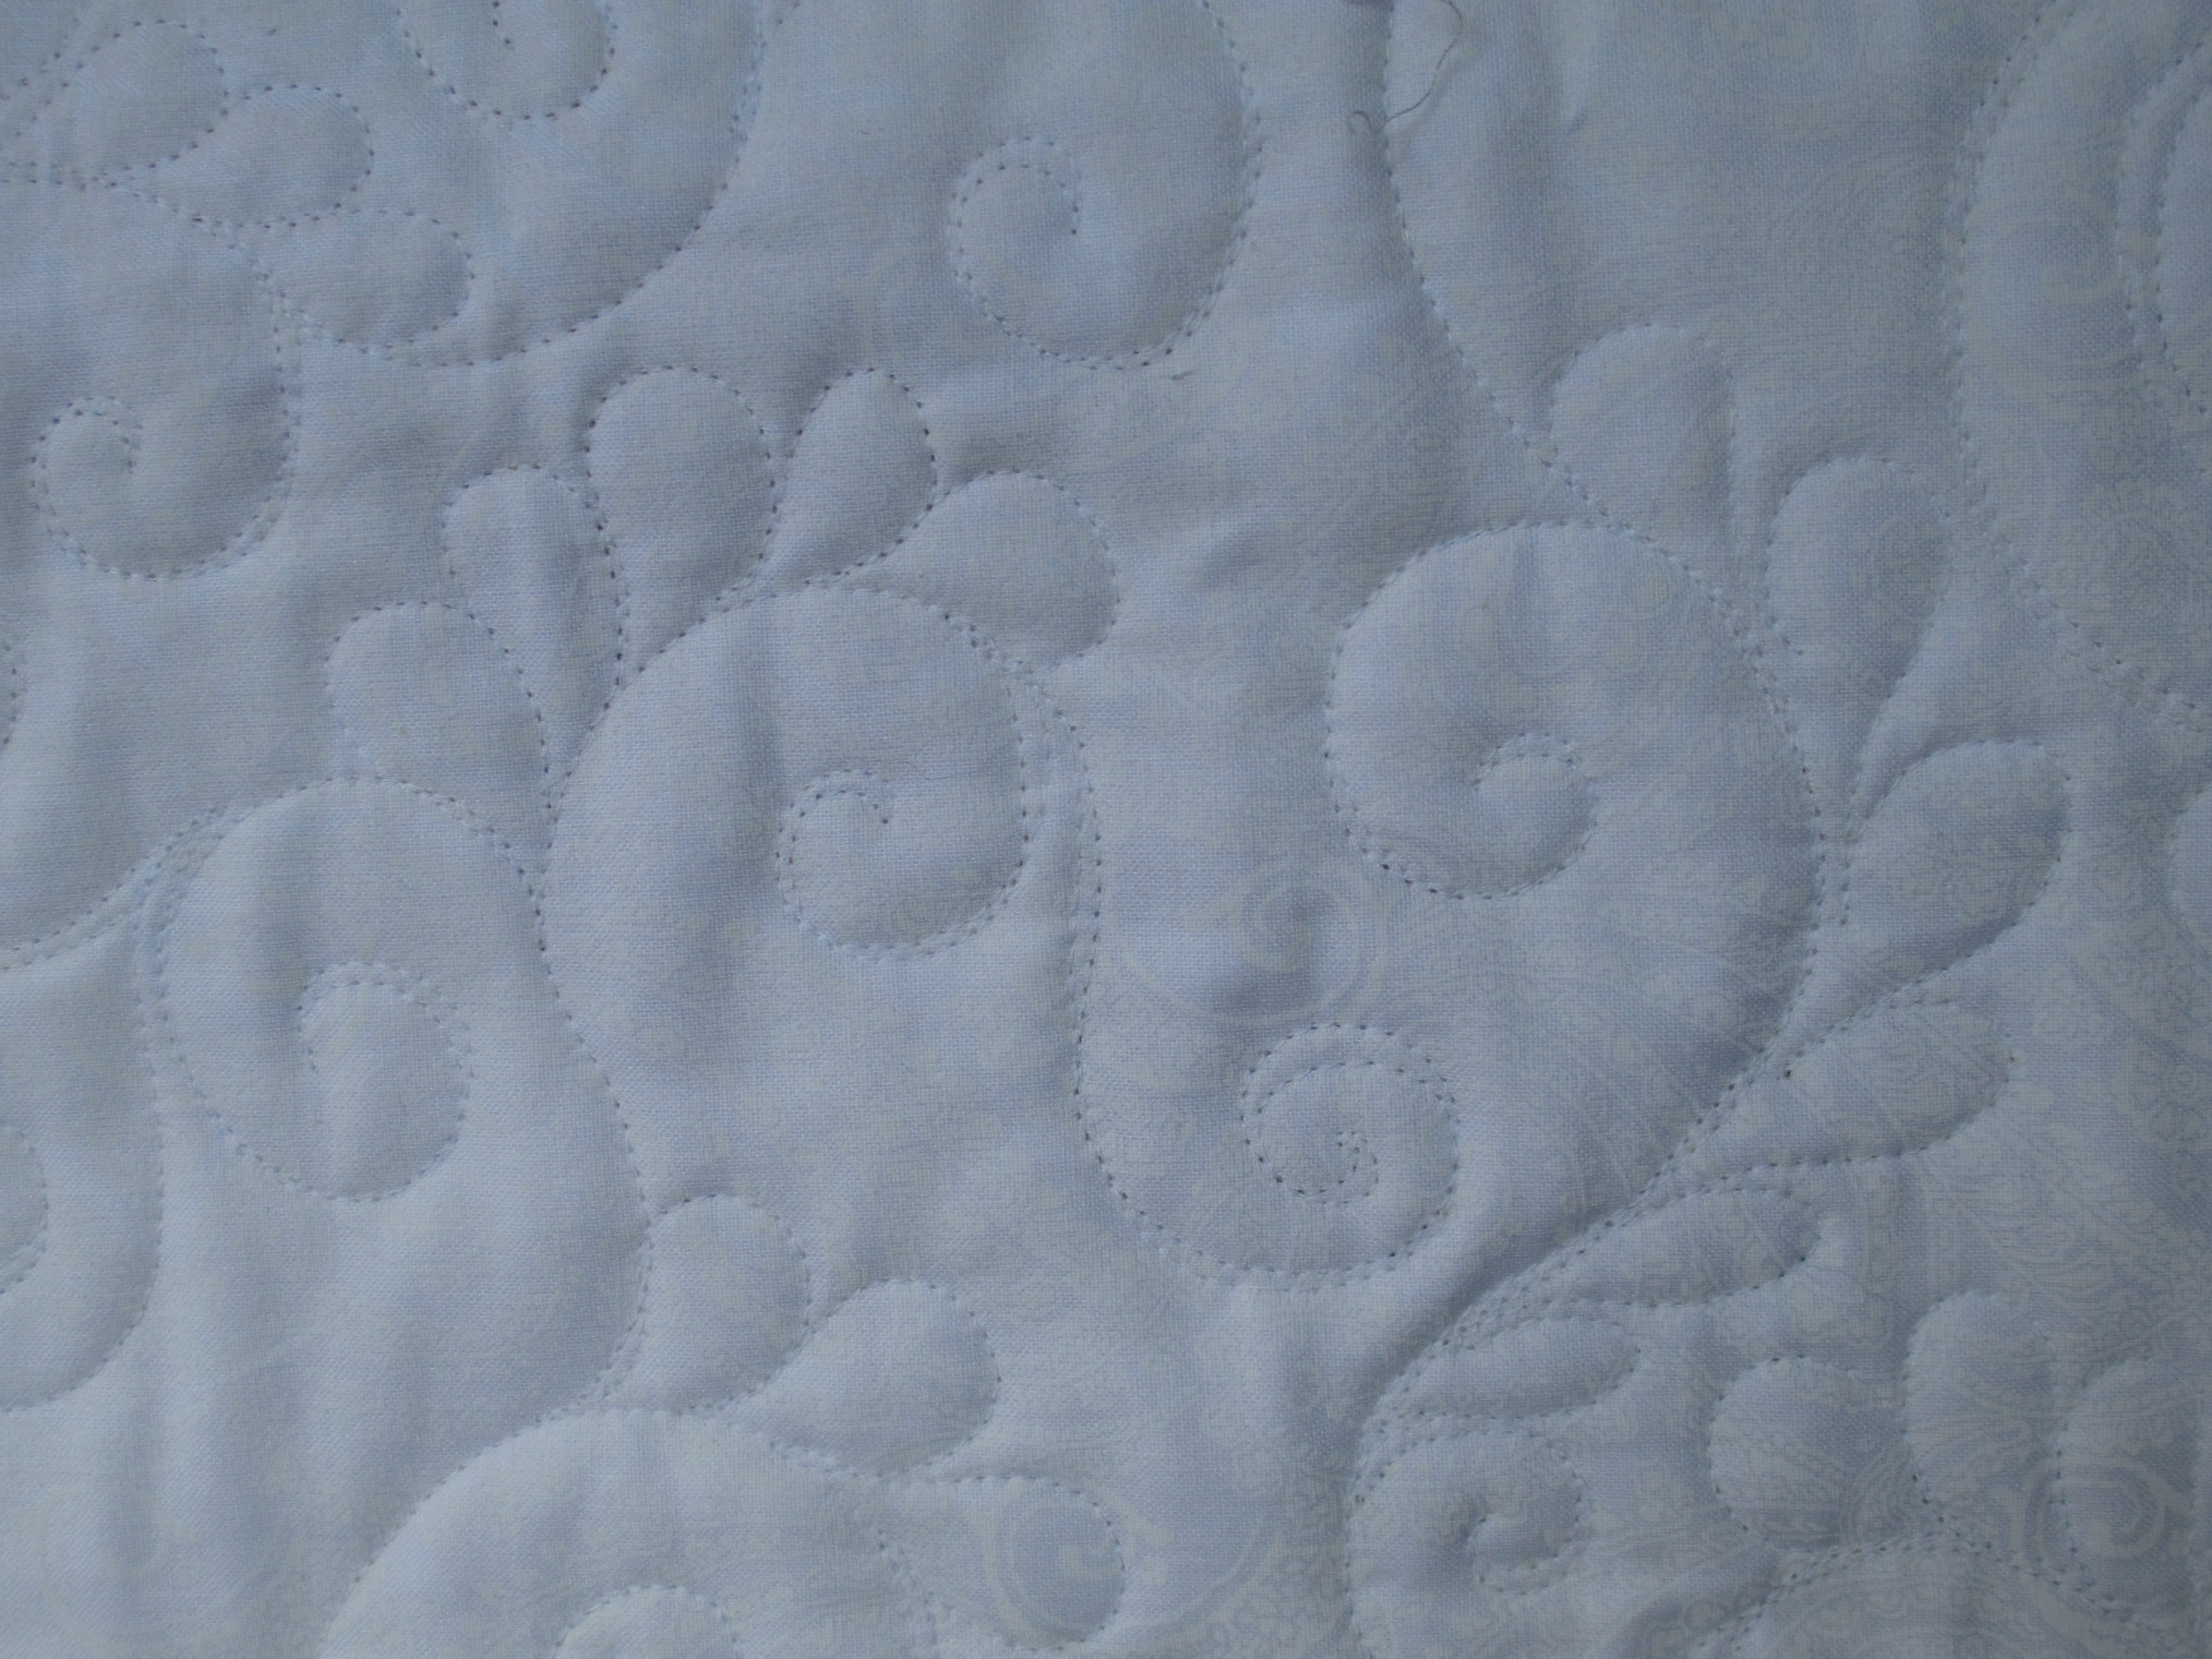
Well… it kind of goes with the paisley backing of the quilt.  <laughing again>

Blessings Come in Strange Packages

I started this post 2 months ago and never got it finished.  It needs to be put out there for those of you with or without disabilities and for those of you who struggle with wanting your life to be better… but it’s not.
For those of you who know me, you also know that I am legally blind in my left eye – I’ve posted about it before here.  I get to go to different eye doctors on a regular basis; my regular eye doctor who prescribes my glasses and watches for more cataracts, my glaucoma doctor, and my retina doctor.  I suspect one reason my business took so long to pick up was because people wondered how or if I could see.  I joke about it and tell them that when my bad eye bothers me, I just close it; something they can relate to, because they know they can see with one eye.  One of the reasons for this post is because I want those of you out there who are going through hard times or have something you think you need in order to survive to know that it really is not the end of the world.  It feels like it is when it first happens.  You hit the panic mode and you are just sure this is the end of the world.
Actually, I have been very busy working on customer quilts lately.  Yes, they continue to watch my other eye along with my “bad” eye.  The bad eye has a section where the retina will never lay flat against the side of the eyeball.  And, I recently had a lot of problems with my eye pressure.  The Glaucoma doctor thought he was going to have to go back in and mess with that tube shunt.  But, they got the pressure under control and it’s all good.  As for my other eye, it plays tricks on me to scare me, I think.  My retina doctor has told me that if I suspect even the tiniest bit that I have a problem to come in and get it checked out – I have learned my lesson.
As for being blind, while I was laying there on my side, I tried to hand sew using just my hands and touch.  Your sense of touch heightens when your eyesight is in jeopardy.  My retina doctor didn’t even want me to do that, and I suspect it is because of trying to thread a needle.  I honestly do not know how I ever get a needle threaded anymore, but I do!  A trick I’ve learned is to put my finger behind the hole of the needle to help me along.  I don’t know how that helps me other than it gives me confidence in being able to thread the needle.  I’ve bought needle threaders, too, but you need to be able to see the hole to get those threaders through.  I think what got me through my ordeal was finding out about Diane Rose, the Amazing Quilter, who is blind in both eyes.  You can see a YouTube video of her here: https://www.youtube.com/watch?v=7lfaSmDxVZQ.

As for my quilting machine, I am saving my pennies to buy a computer for it.  They are so expensive and I love, love, love doing freehand quilting.  But, I don’t know what the future will bring, so I am trying to plan for it.  I am also looking at creating different ergonomic (for the eyes, etc) notions for quilters.  Bad things happen, but there was nothing I could do about it in my case, so I (finally) decided to just make the best of it; live with it and not complain.  And, I also want people to believe that they can accomplish things beyond what they believe they are capable.  I hope you know you can!

 I remember trying to figure out why this happened to me; what the purpose was.  One day I was feeling sorry for myself, because my depth perception was messed up due to having such low vision in one eye (it’s 20/400; I can see the big honking E and that’s about it, so that makes me legally blind) and I thought my mom was lucky because she didn’t have to deal with that – she ended up completely blind in one eye.  And, then I laughed at myself, because I’m betting my mom would have traded with me to be able to see anything at all (blurred shadows) out of her blind eye.  So, that is when I started thinking I was the lucky one.  The weird thing about the messed up depth perception is that it makes the texture of my quilting pop out at me while I am quilting.  For whatever reason, I can see well enough to quilt.  And, in some ways, I think it makes it better for me.  Maybe that was the plan God had for me, I don’t know.  I DO hope my blog posts help other people.  That’s the whole idea.  And, I think that may have been a part of the bigger plan all along, too.

As for Diane Rose, she was what got me through the whole ordeal.  The day I watched that video was the day I changed my attitude.  If she could sew and make quilts being blind in both eyes, I needed to suck it up and stop feeling sorry for myself.

Moral of the story… everyone has an issue, whether or not they admit it.  The grass is not always greener on the other side.  We can overcome many things; I think the secret is to maintain a positive attitude.  Hang in there, folks!  One day you will look back and see the lessons in whatever is your current cry-sis.

Kansas City Regional Quilt Festival

Are you going to be in the Kansas City area the weekend of Father’s Day?  If so, I would love to meet you!  I will be vending at the Kansas City Regional Quilt Festival that weekend in booth 436.  I’m not selling much, just quilting and sewing gift items and some hard to find notions.  But, please stop by and say “hi!”  In the meantime, check out this video clip for KCRQF: https://www.youtube.com/watch?v=QmEcoNmk-nY

Elaine’s quilt

I can’t think of what this quilt reminds me of, other than a vintage French type of quilt, probably because of the fabric.  Unfortunately, I could not get any good pictures of her quilt.  It’s a beautiful quilt, but the lighting wouldn’t cooperate or something.

IMG_2355

Elaine sent me this quilt with an idea of what she wanted quilted, which was custom quilting, but we decided on another design.  Elaine likes simple lines and designs, so we went with piano keys in the border, a design with marquise shapes in the triangle blocks around the border and an allover design in the blocks.

IMG_2350 IMG_2354

You can barely see the quilting in any of these pictures.  The thread was a ivory/bone color to match the background fabric of the triangles, and it doesn’t seem to show up (to me) on the other fabrics.  In the following picture, I quilted an allover design that looks similar to a Fleur-de-lis.

IMG_2352

Can you see it at all?  We probably could have done an allover, edge-to-edge design on this quilt and saved Elaine some money.  I should have suggested it, but I didn’t think of it until just now, while looking at these pictures.  What do you think?

*note: I just finished up another quilt, but I need to check with the customer to see if it is okay to post it first.  She made it as a raffle quilt for a family reunion.  And, tomorrow I start on yet another quilt.  Hopefully I will get to those other 2 blog posts that I started awhile back.  We’ll see what this week brings.  Happy Spring!