Marking a Quilt

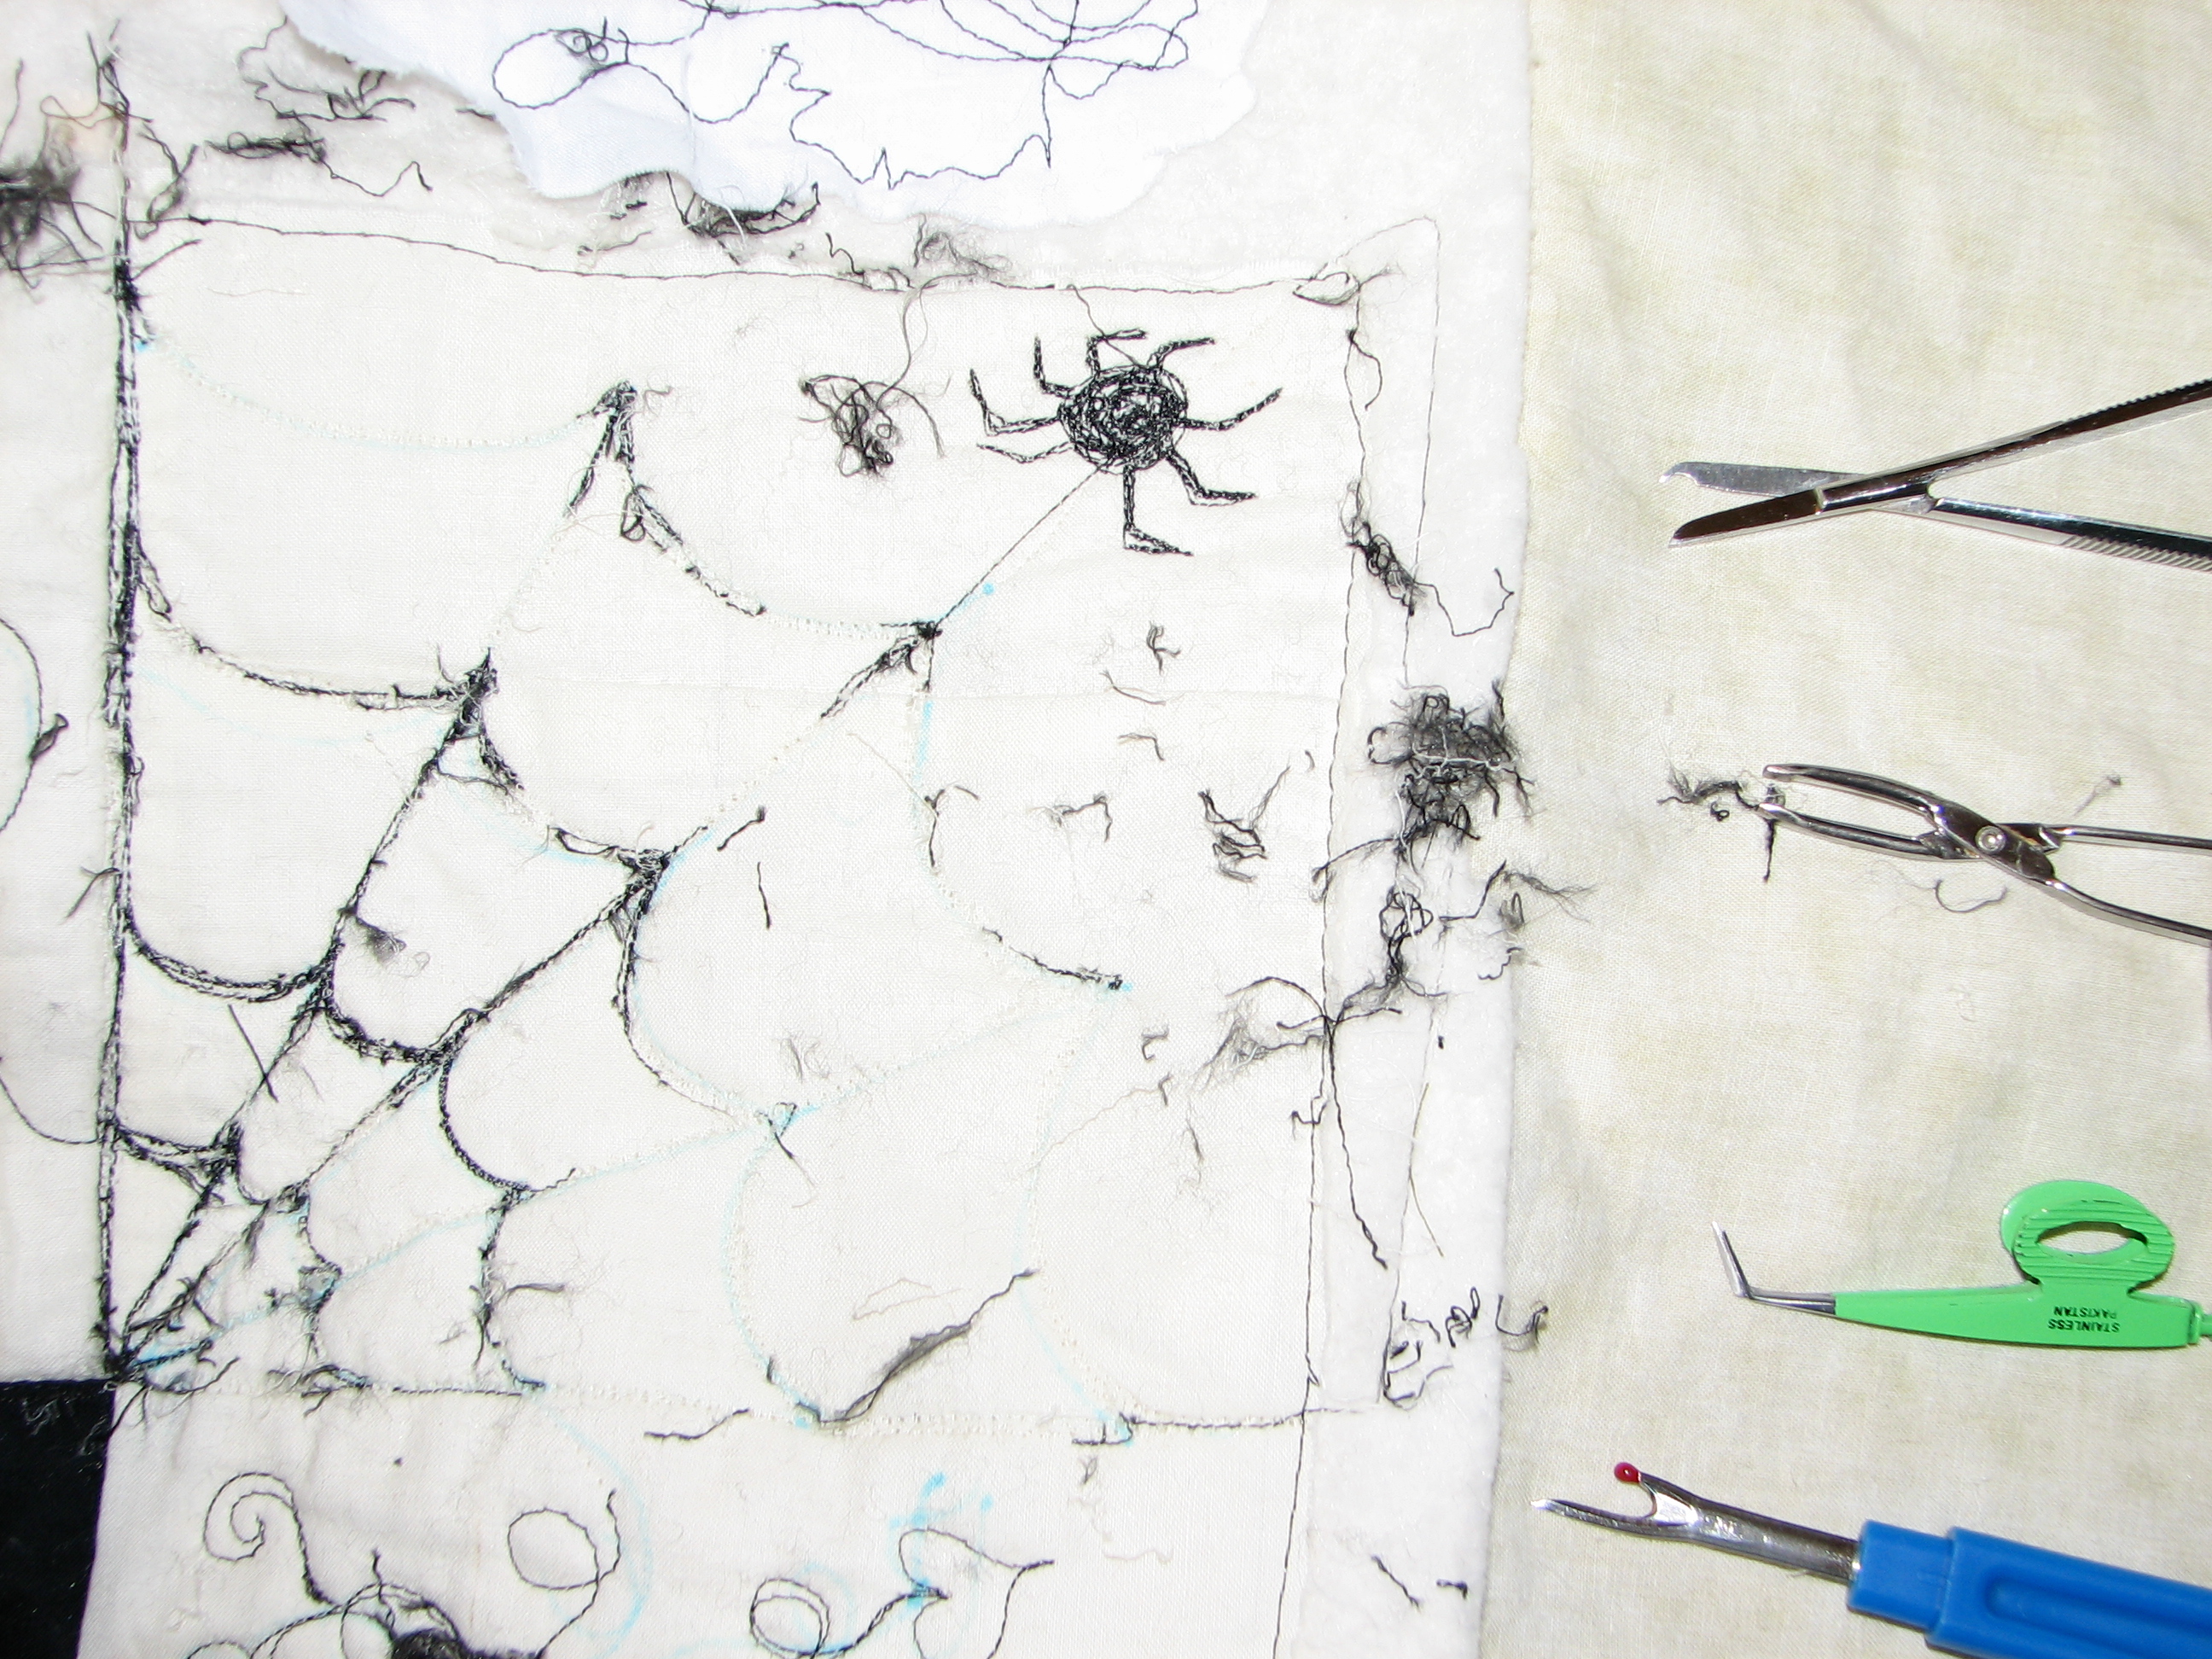
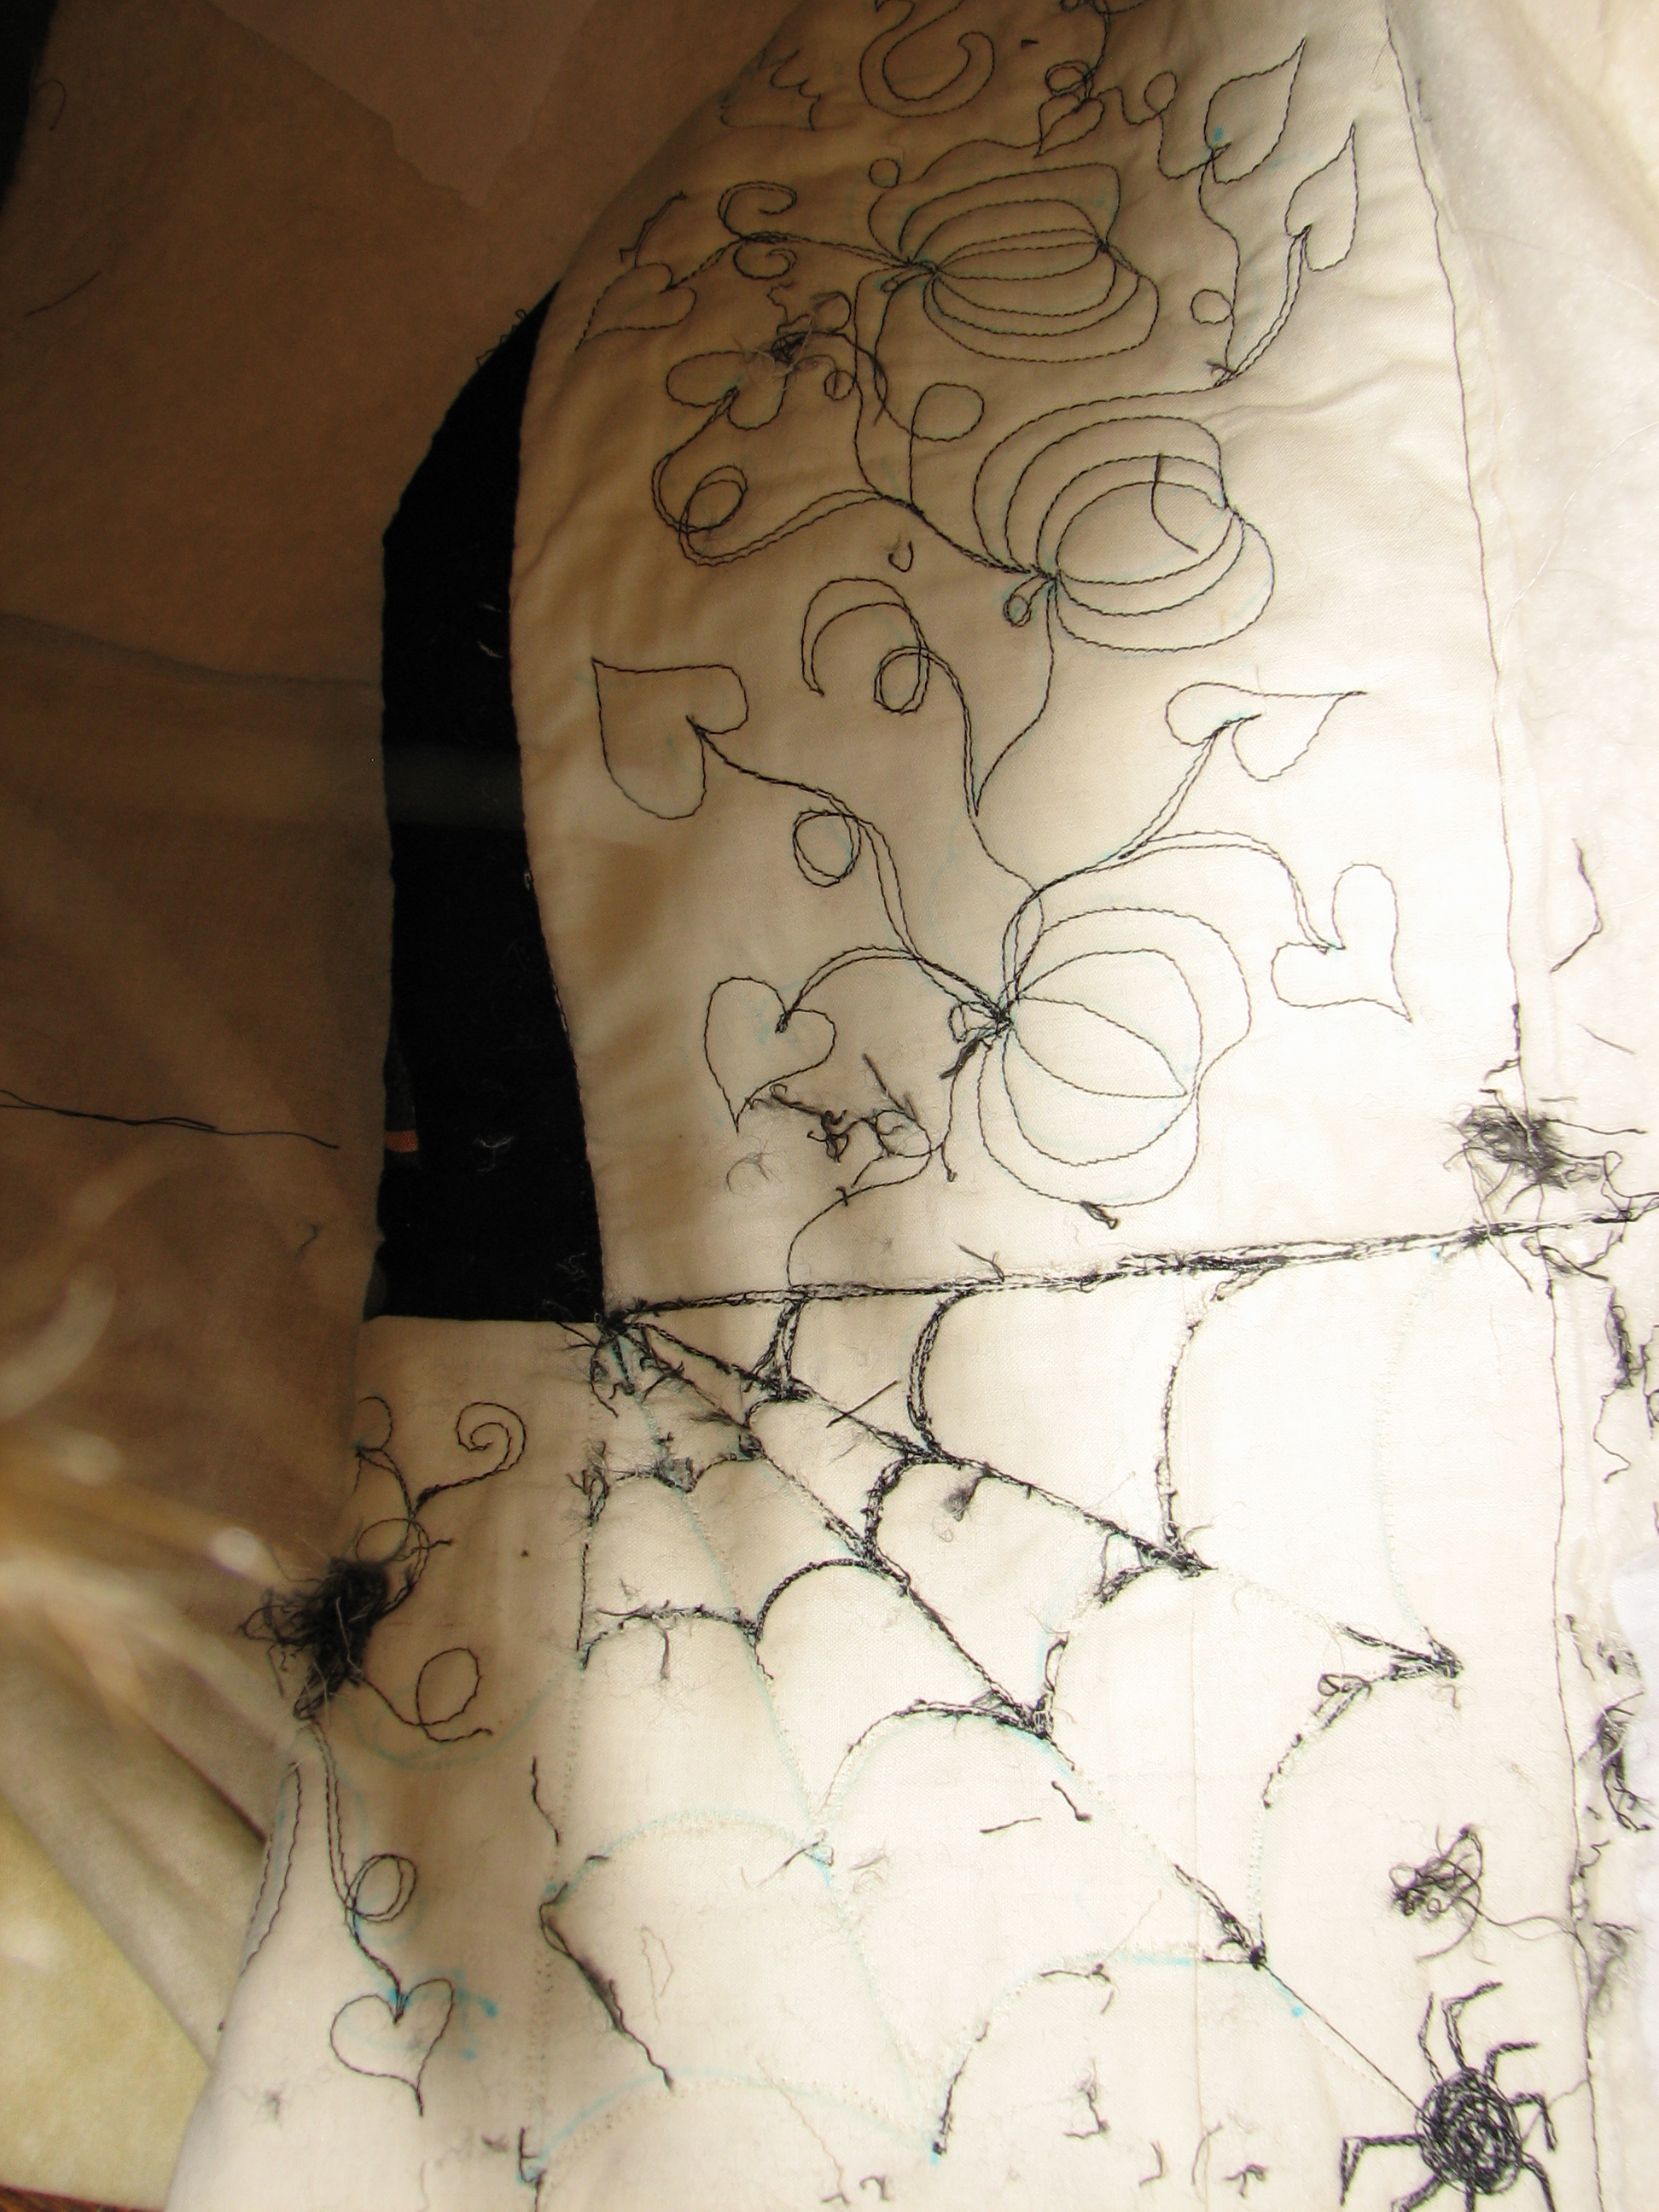
I know most quilters mark designs onto quilts, and I mark my own quilts all the time.  But, I am always afraid to mark on customers’ quilts.  So, I have been trying to find alternate methods of getting a design onto a quilt.   Remember the Press ‘n Seal method?  You have probably already tried the following strategies.  I have, too, but it’s been awhile since I’ve tried them, so they are new to me yet again.  One strategy I tried on Mickey’s quilt last week was to bring my laser light to the front of my machine instead of using it in the back for pantographs.  You can see how I drew her dog onto the quilt.  On the left is the picture of her dog in black and white.  I took a green highlighter and marked on the paper what I wanted to draw onto the quilt.  Can you see the little red dot under the dog’s paw?  That’s the laser light that is attached to the front of the machine.  When I move the laser light along where I highlighted, I will be drawing with thread onto the quilt.  You can see the finished product on the right.

MD quilt 001      MD quilt 002

It’s not perfect, but it is one way for me to avoid marking on a quilt.

With the quilt I am working on right now, I am trying onion skin paper.  I’ve tried tracing paper and vellum.  Today I used the onion skin paper.  I bought a roll of this from Du-All Art & Drafting Supplies.  It’s 50 yards long, so hopefully it will last awhile.  The cost, with shipping, was about $32.

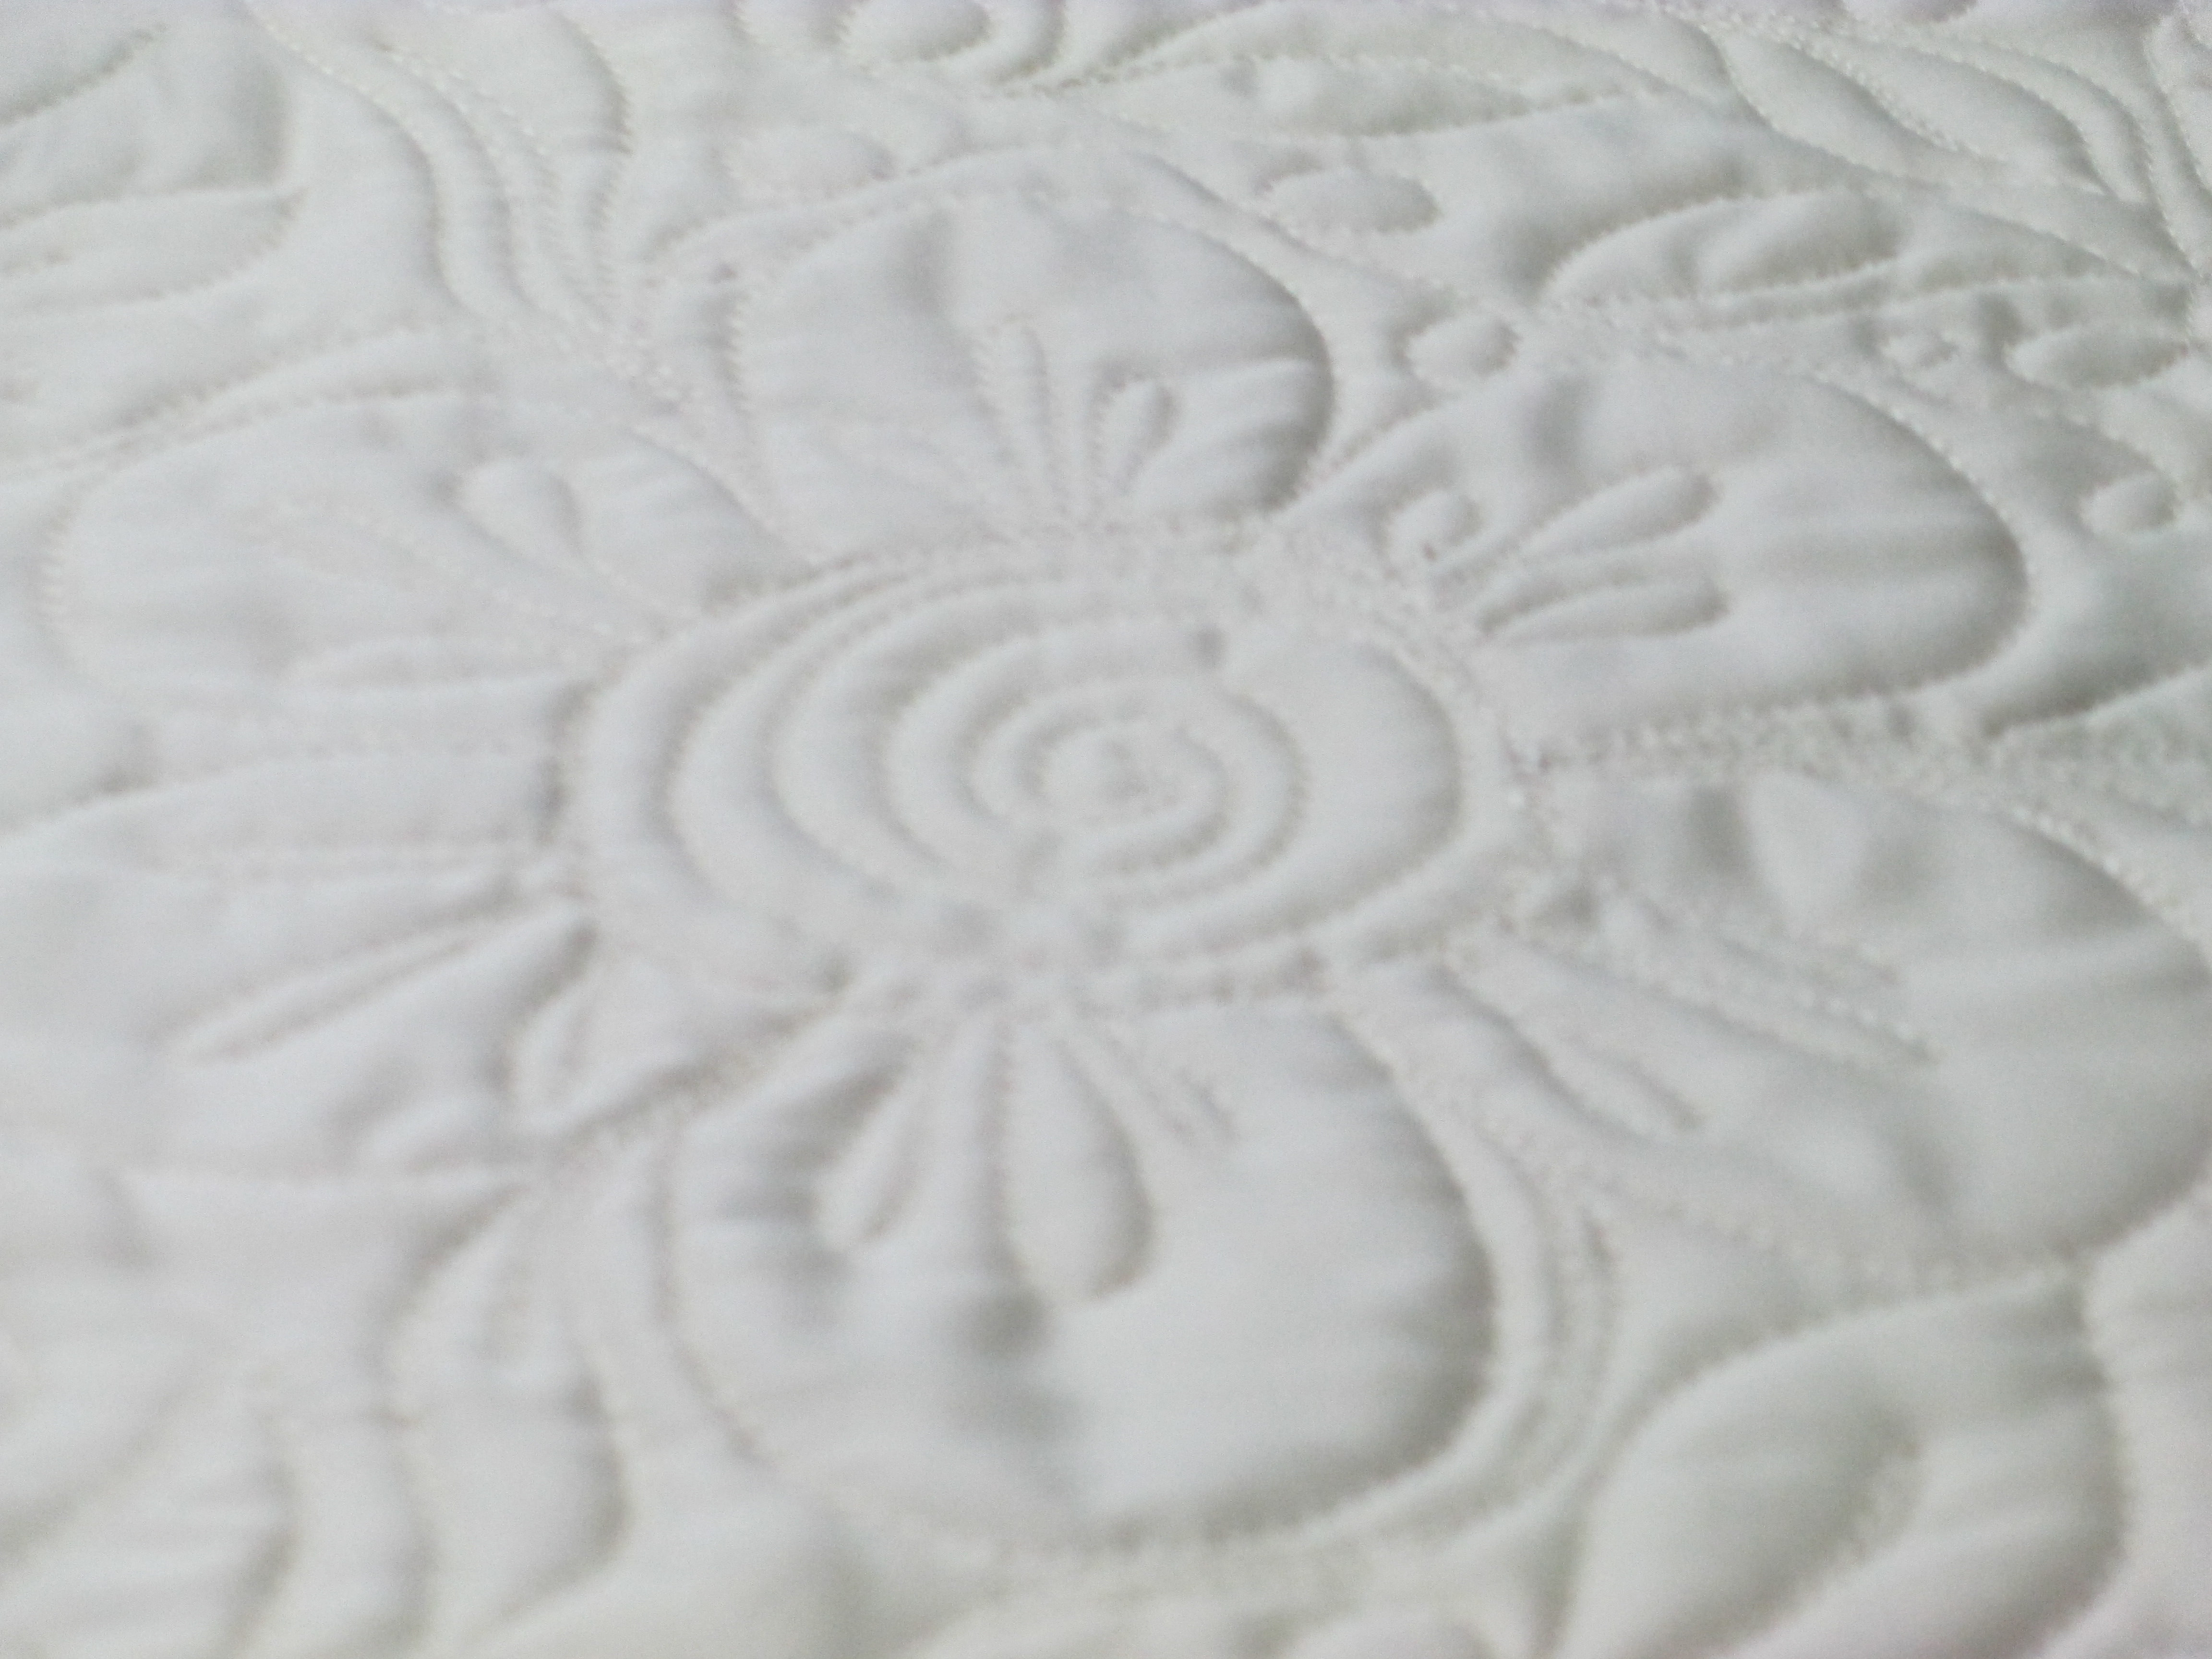
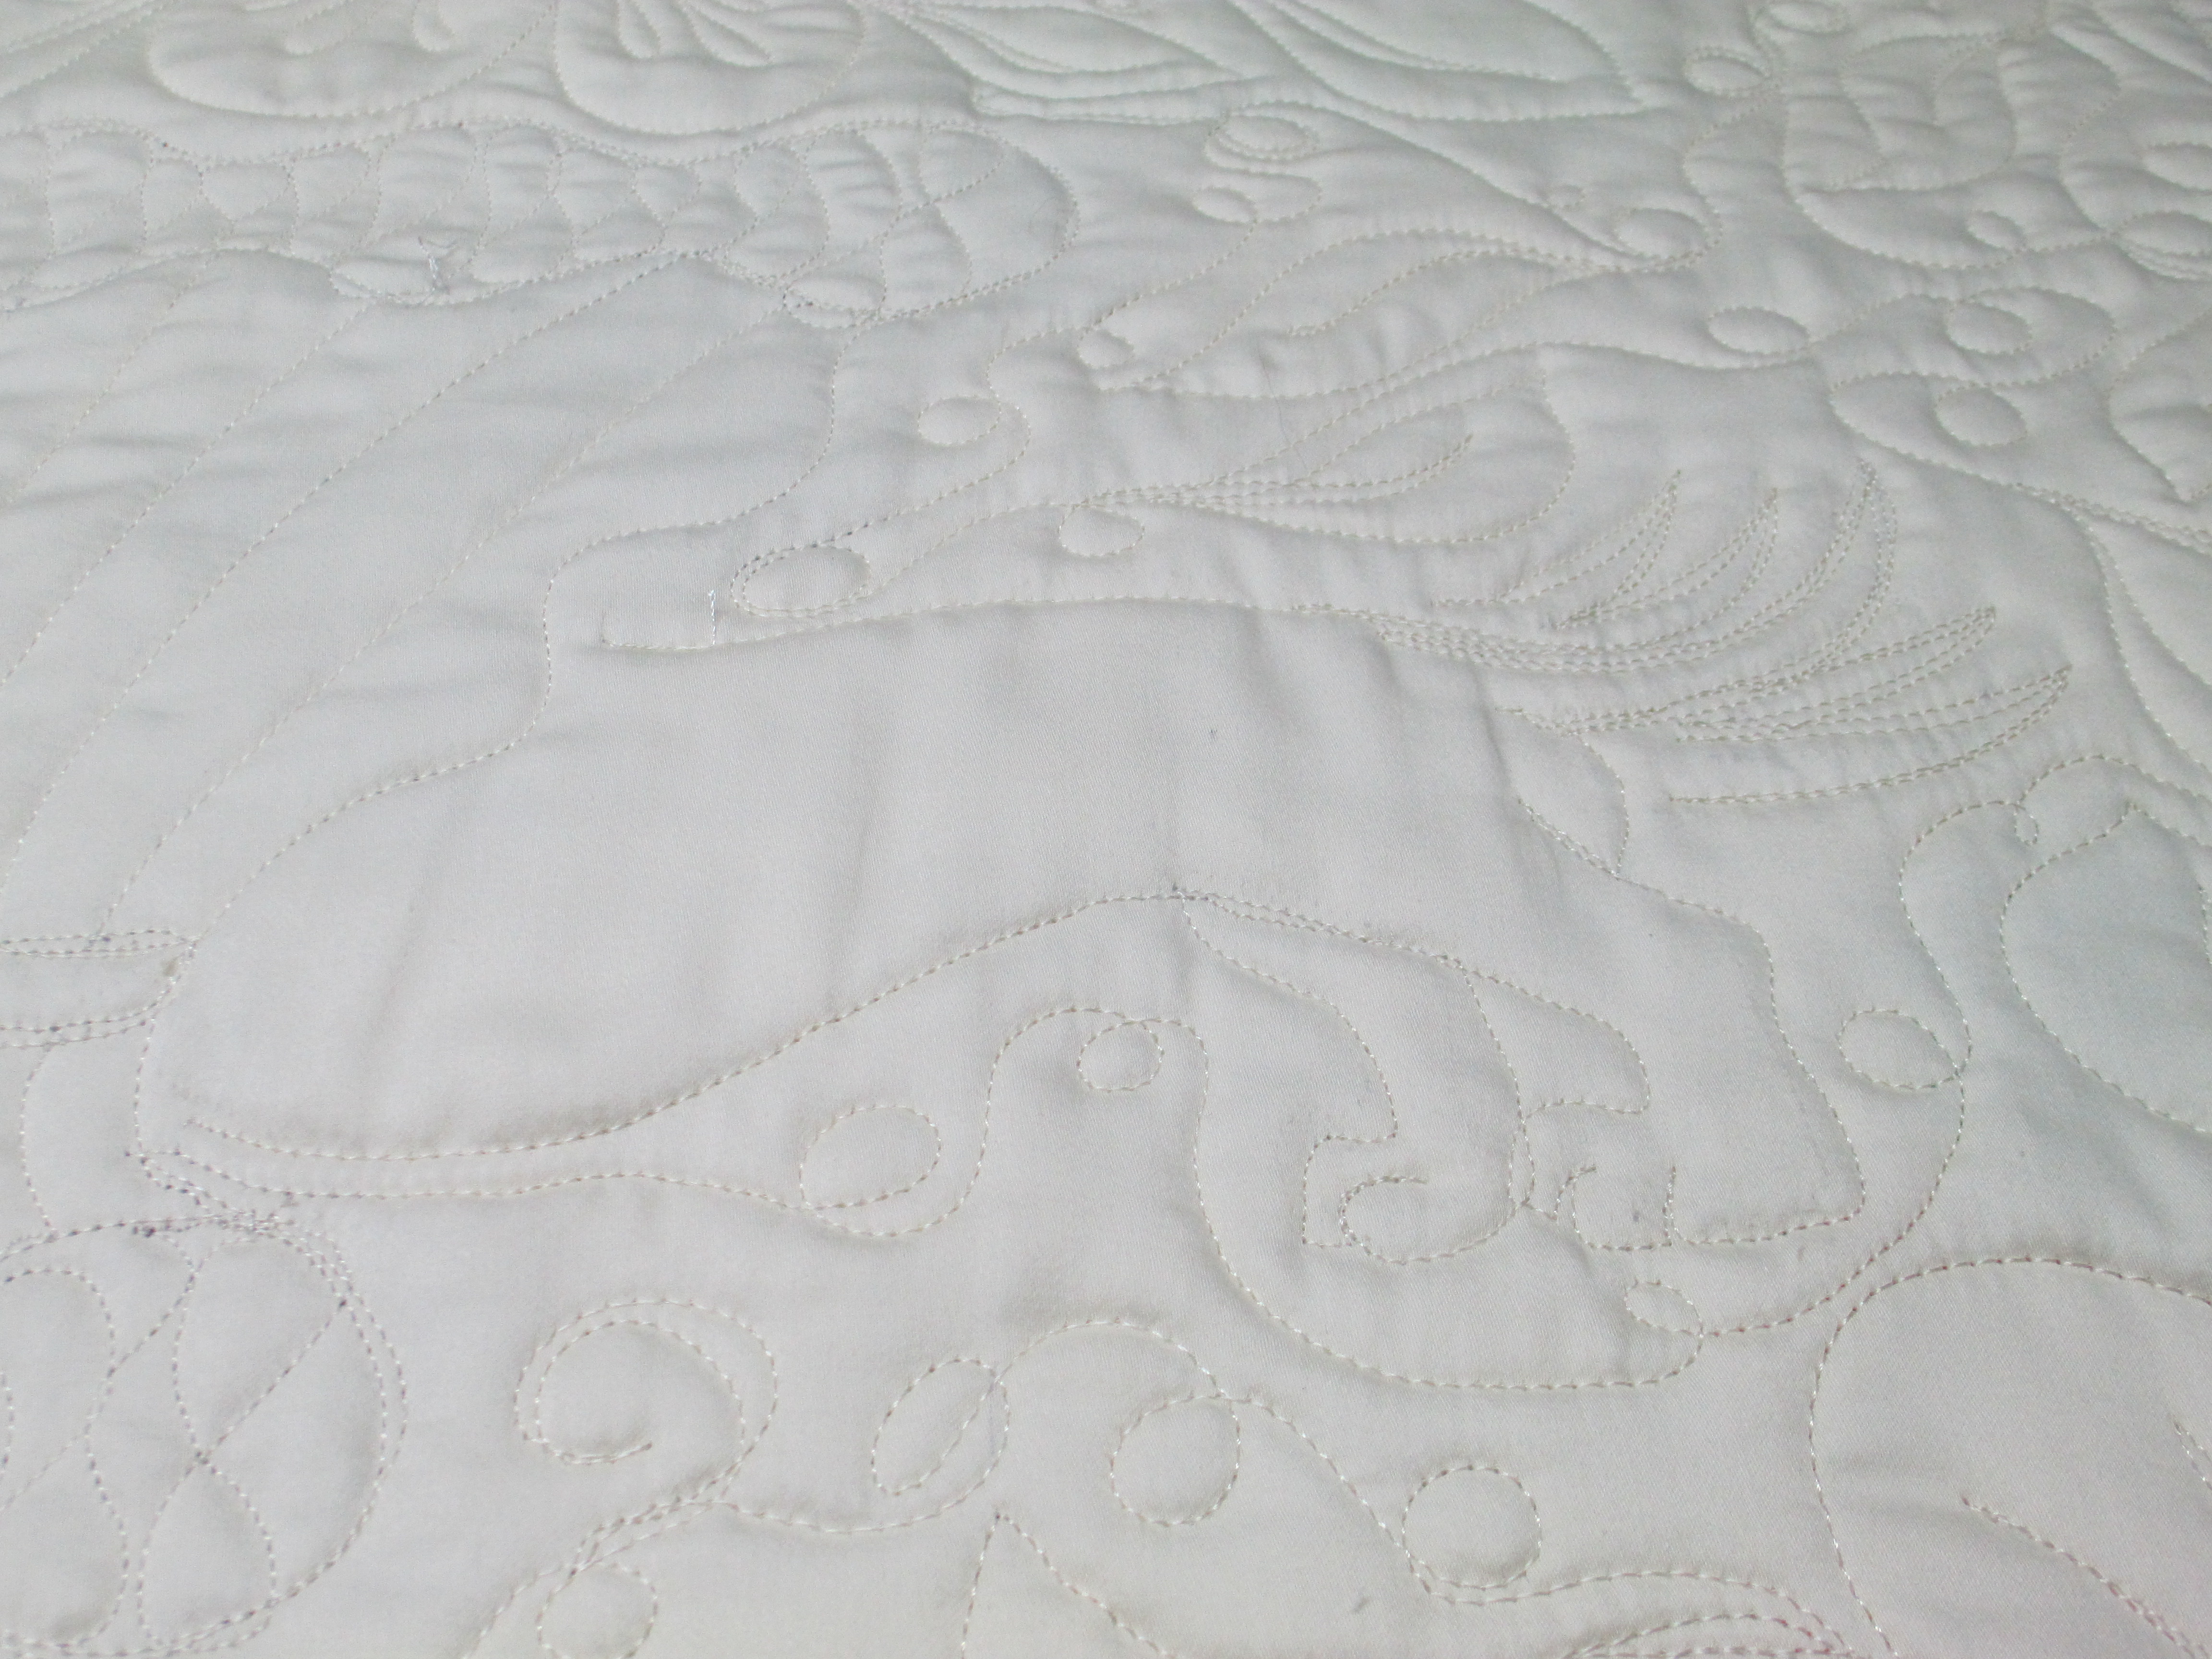
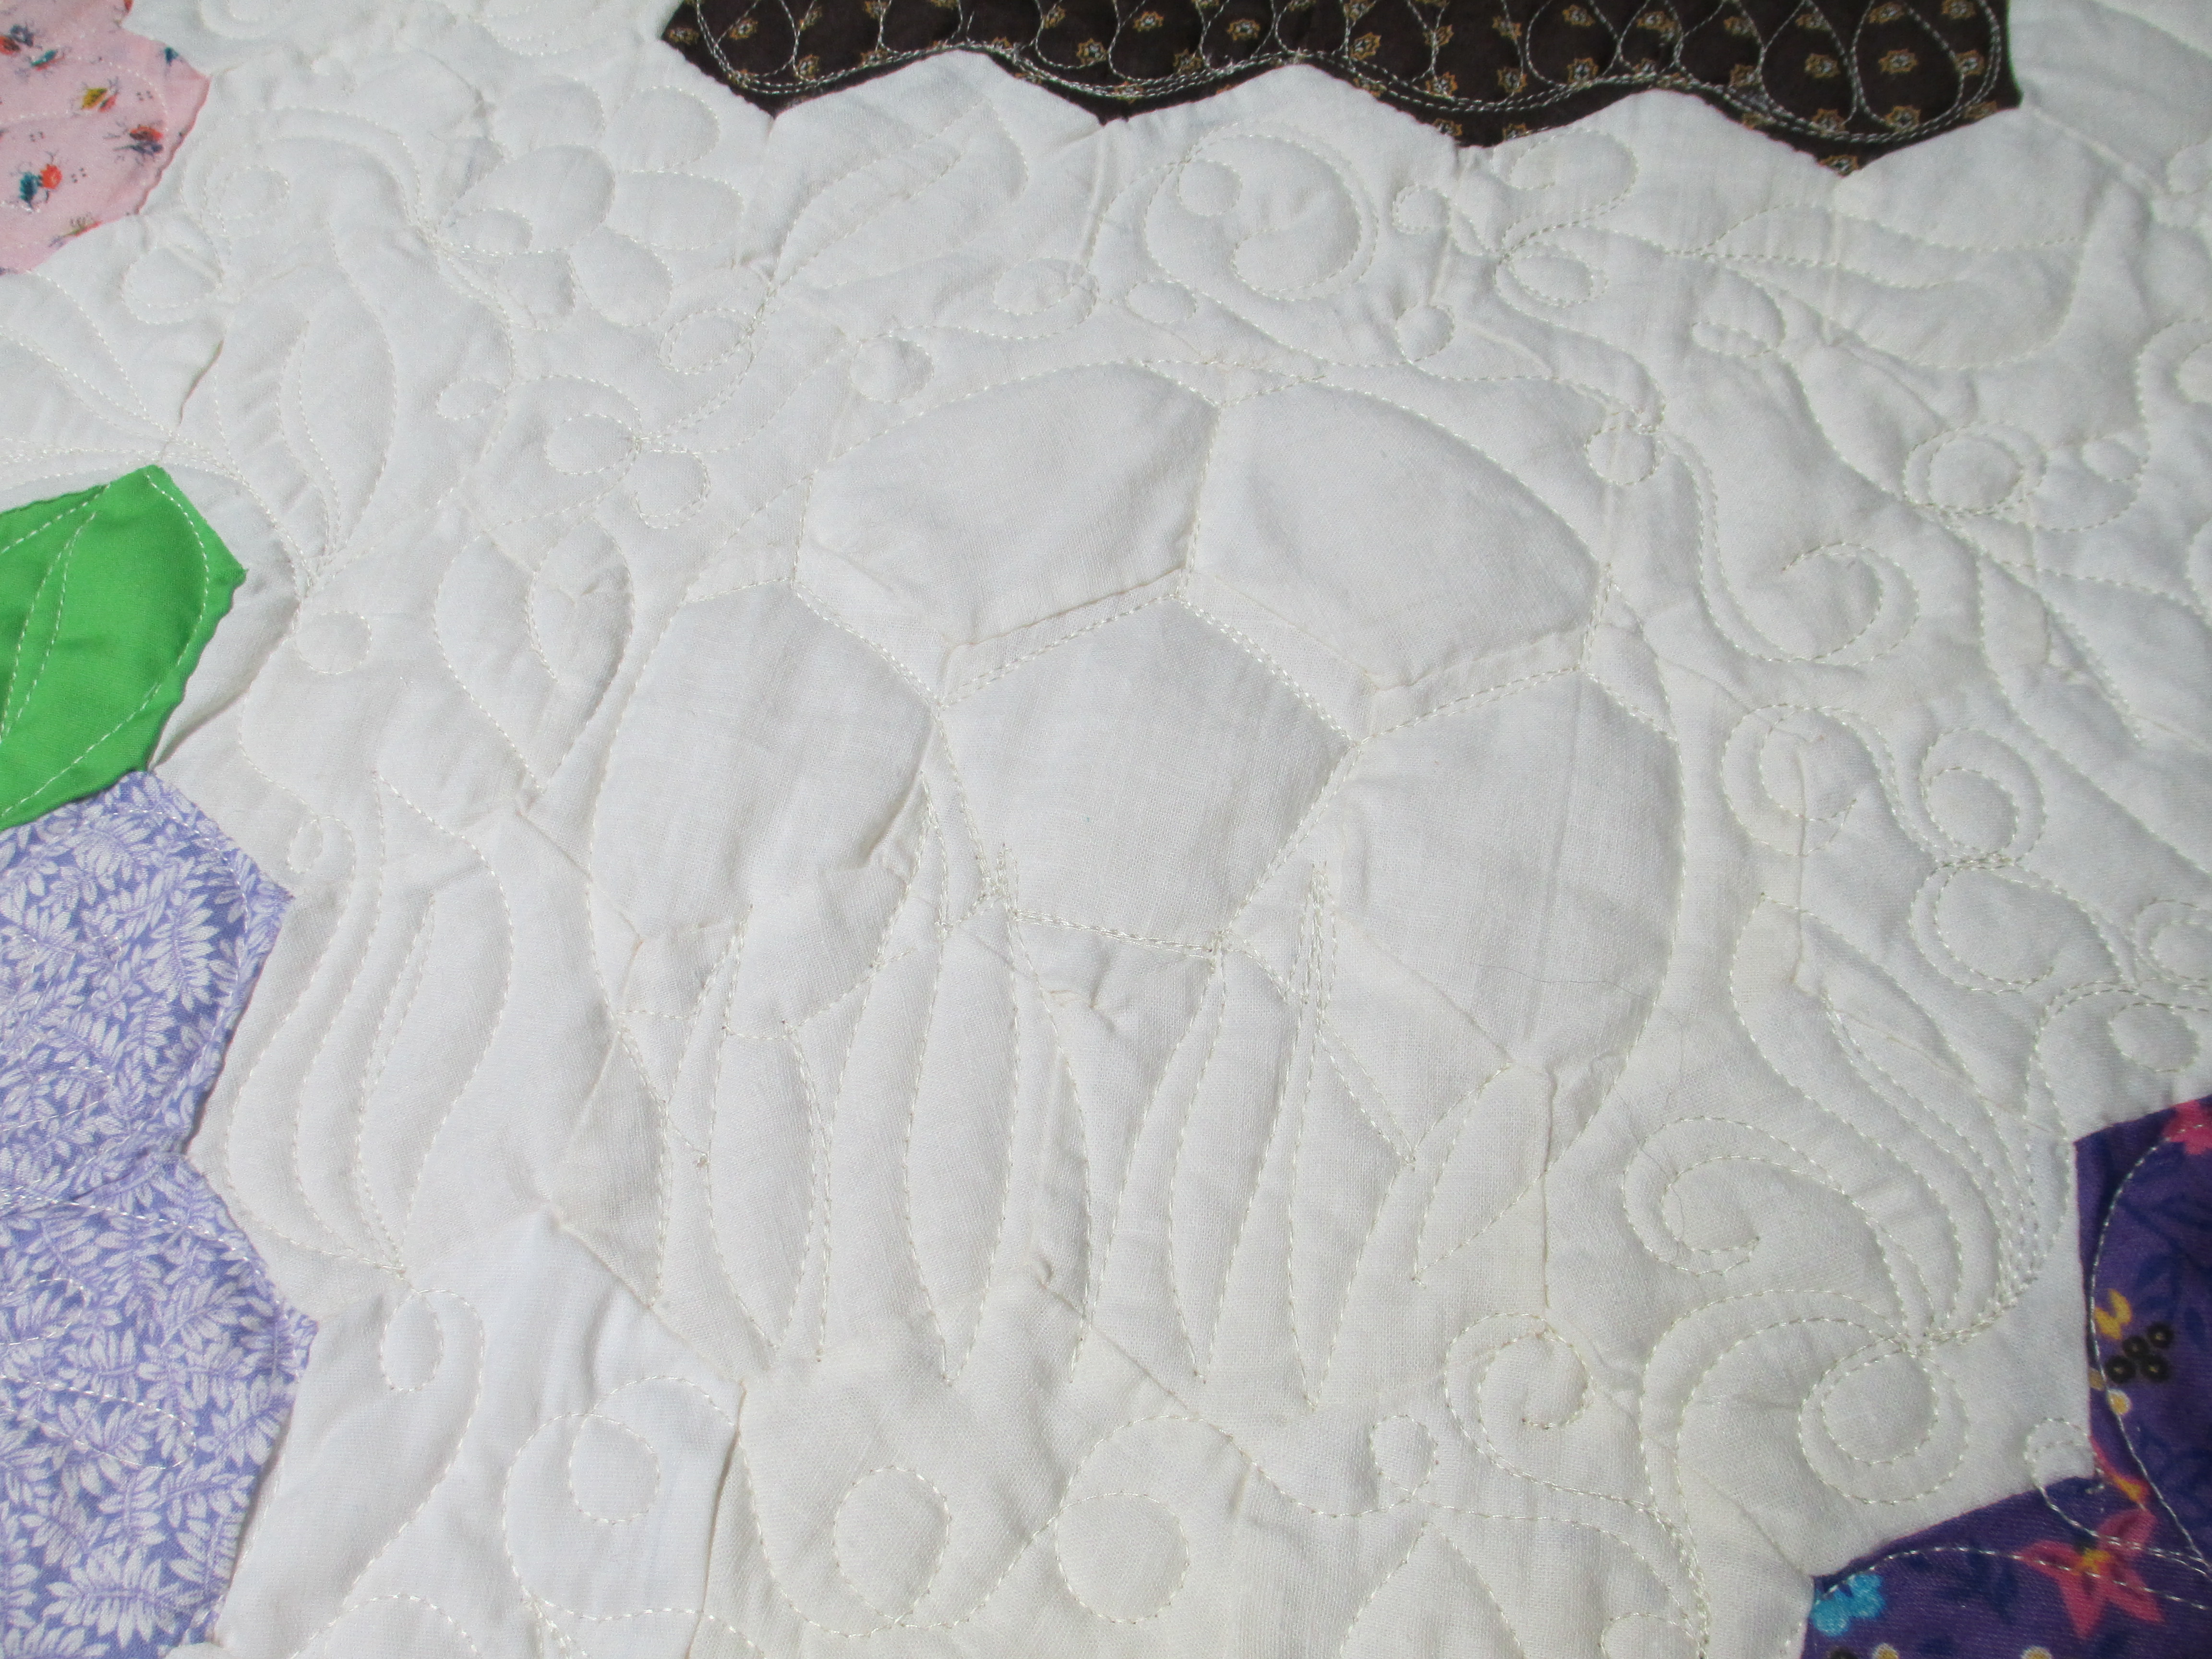
The artist for this quilt wanted her applique to shine.  She had twisted vines along 2 corners, leaving the opposite 2 corners blank.  I could have quilted anything in there.  A lot of people would have put feathers in there.  Personally, I think feathers are sometimes over done.  I love them, but I also love to see variety in quilting.  So, I decided to use this quilter’s applique as the basis for the quilting motif along the blank corners.  I figured that would better show off her applique.  First I traced her design onto the onion skin paper.

marking quilts 001

Then, I adapted her design to fit into the empty corners, by folding the paper and creating new curls in the vines.

marking quilts 002 marking quilts 003

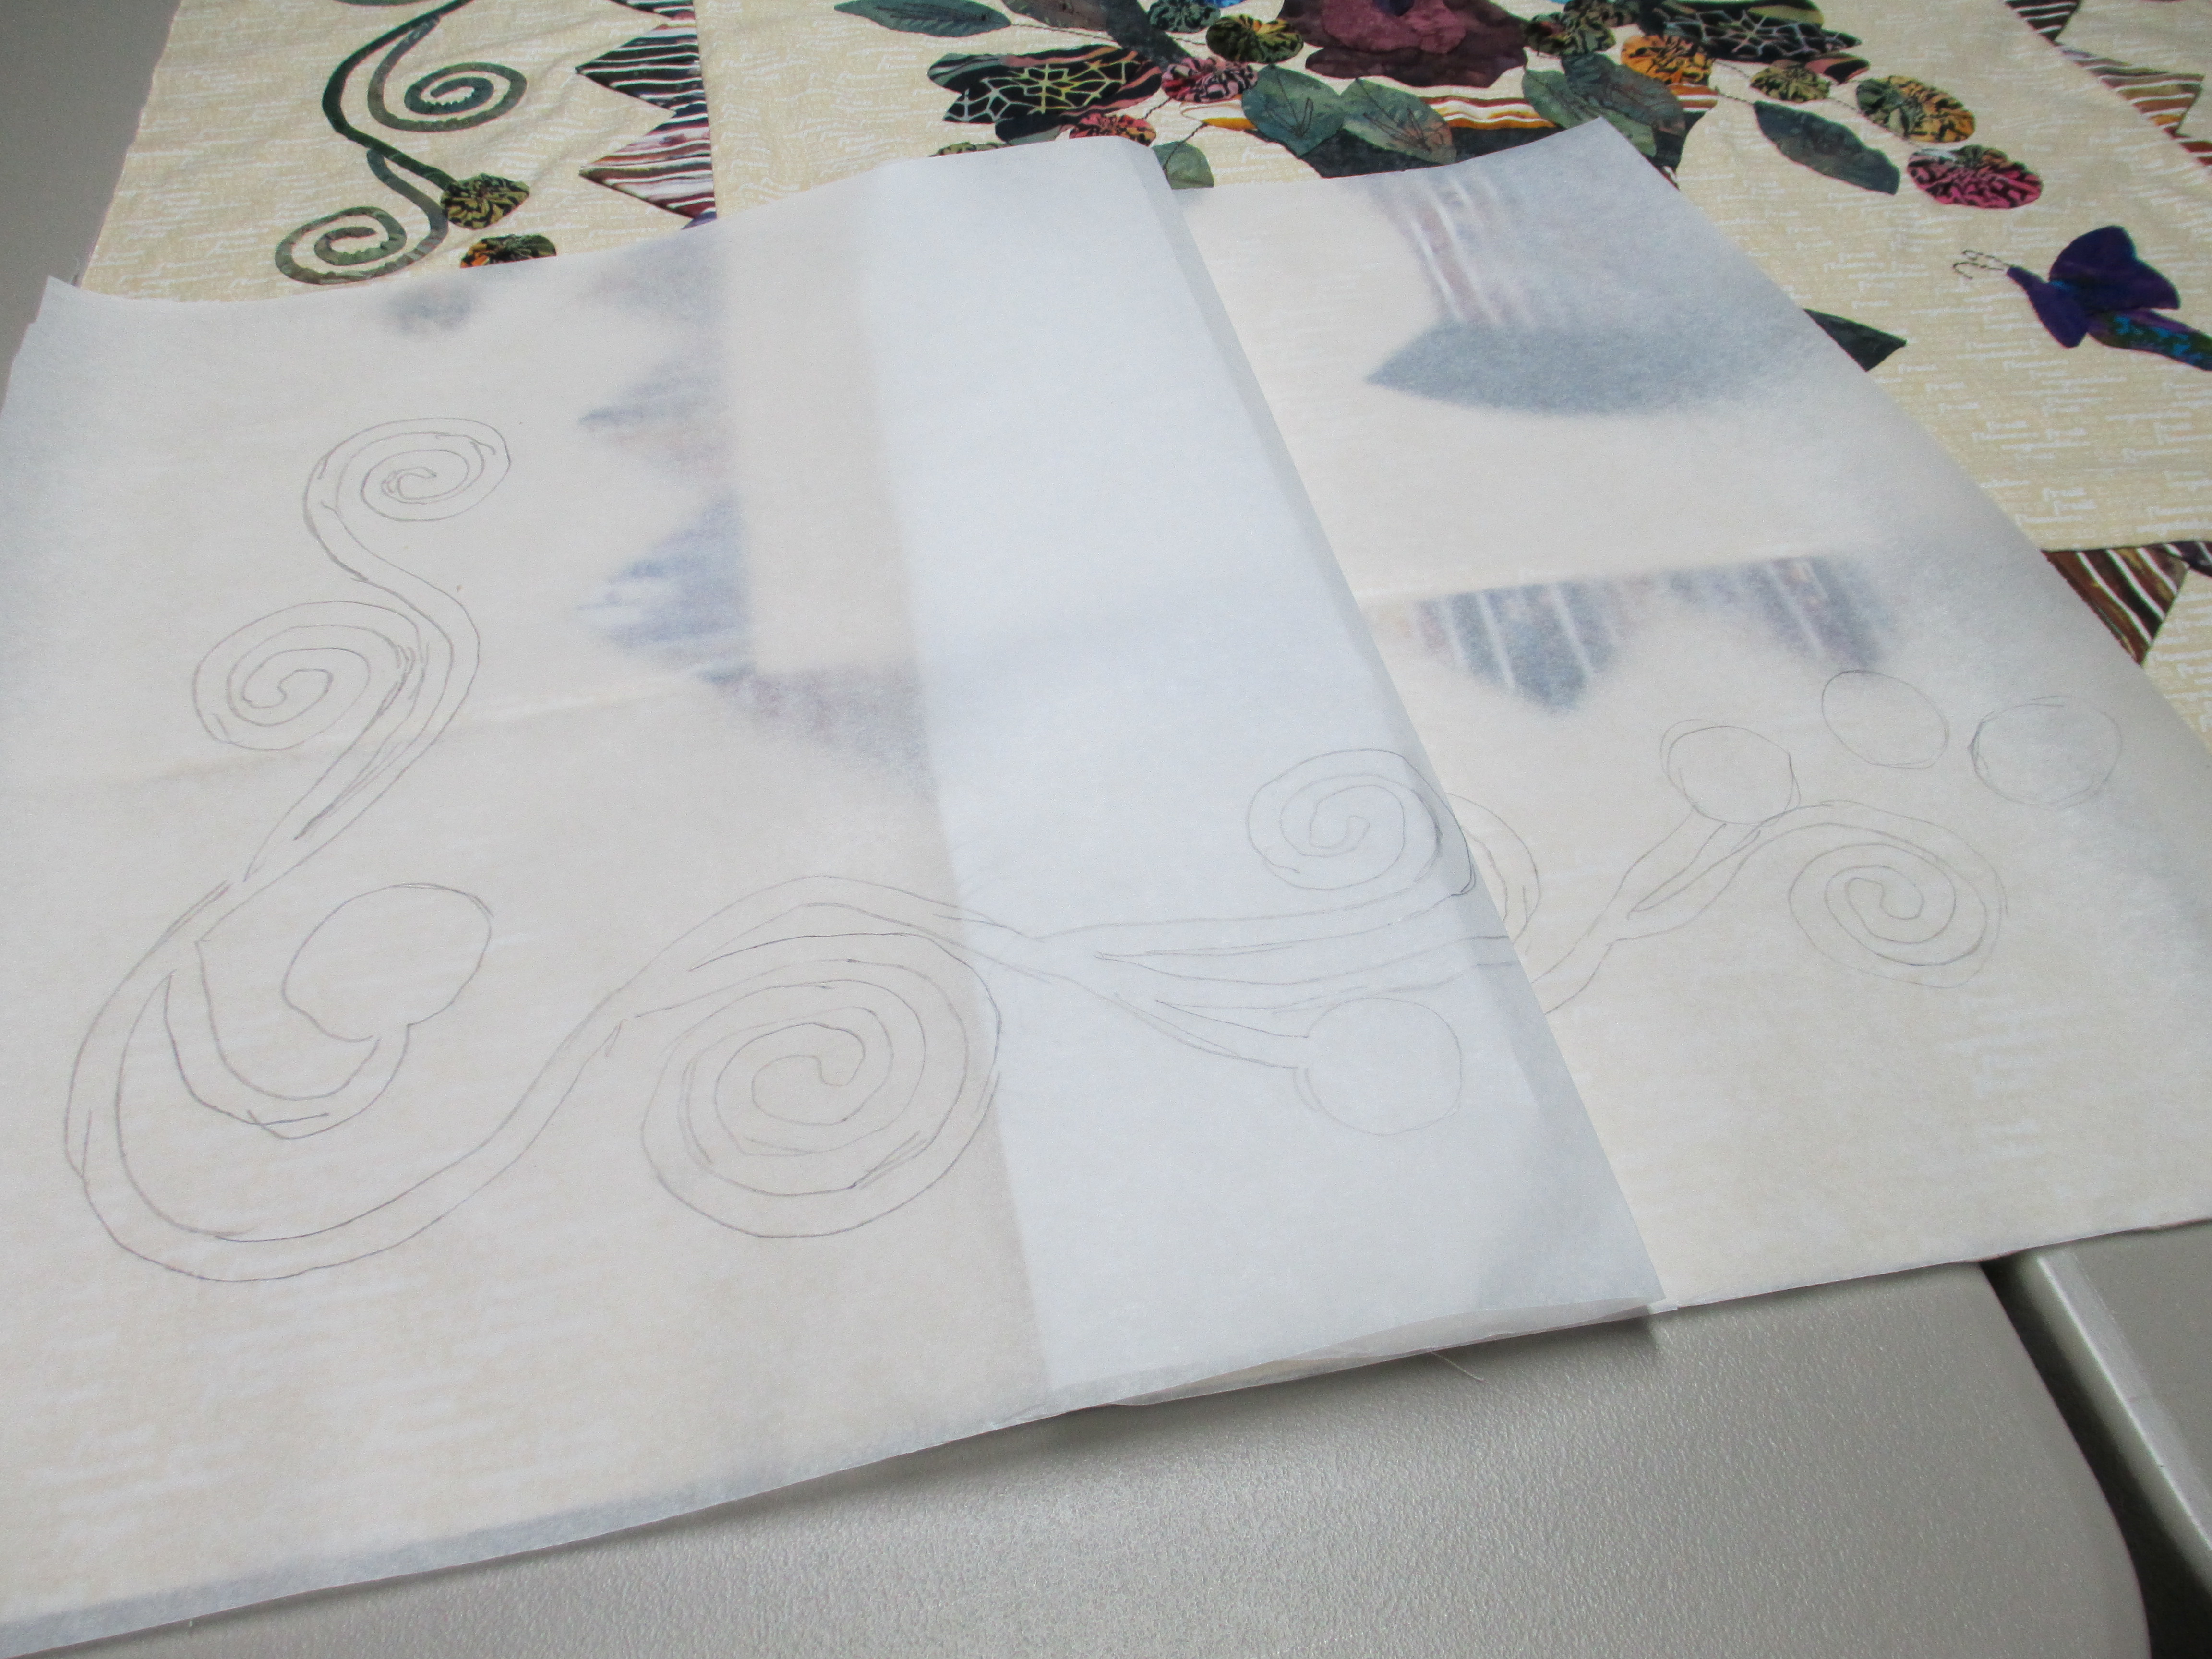
You can see here that the design is too long, so I will just take the vine from that curved corner and stretch it around to meet her appliqued vine (the area between my fingers).

marking quilts 005

Now I have the 2 corner vines drawn onto new paper and ready for quilting.

marking quilts 007

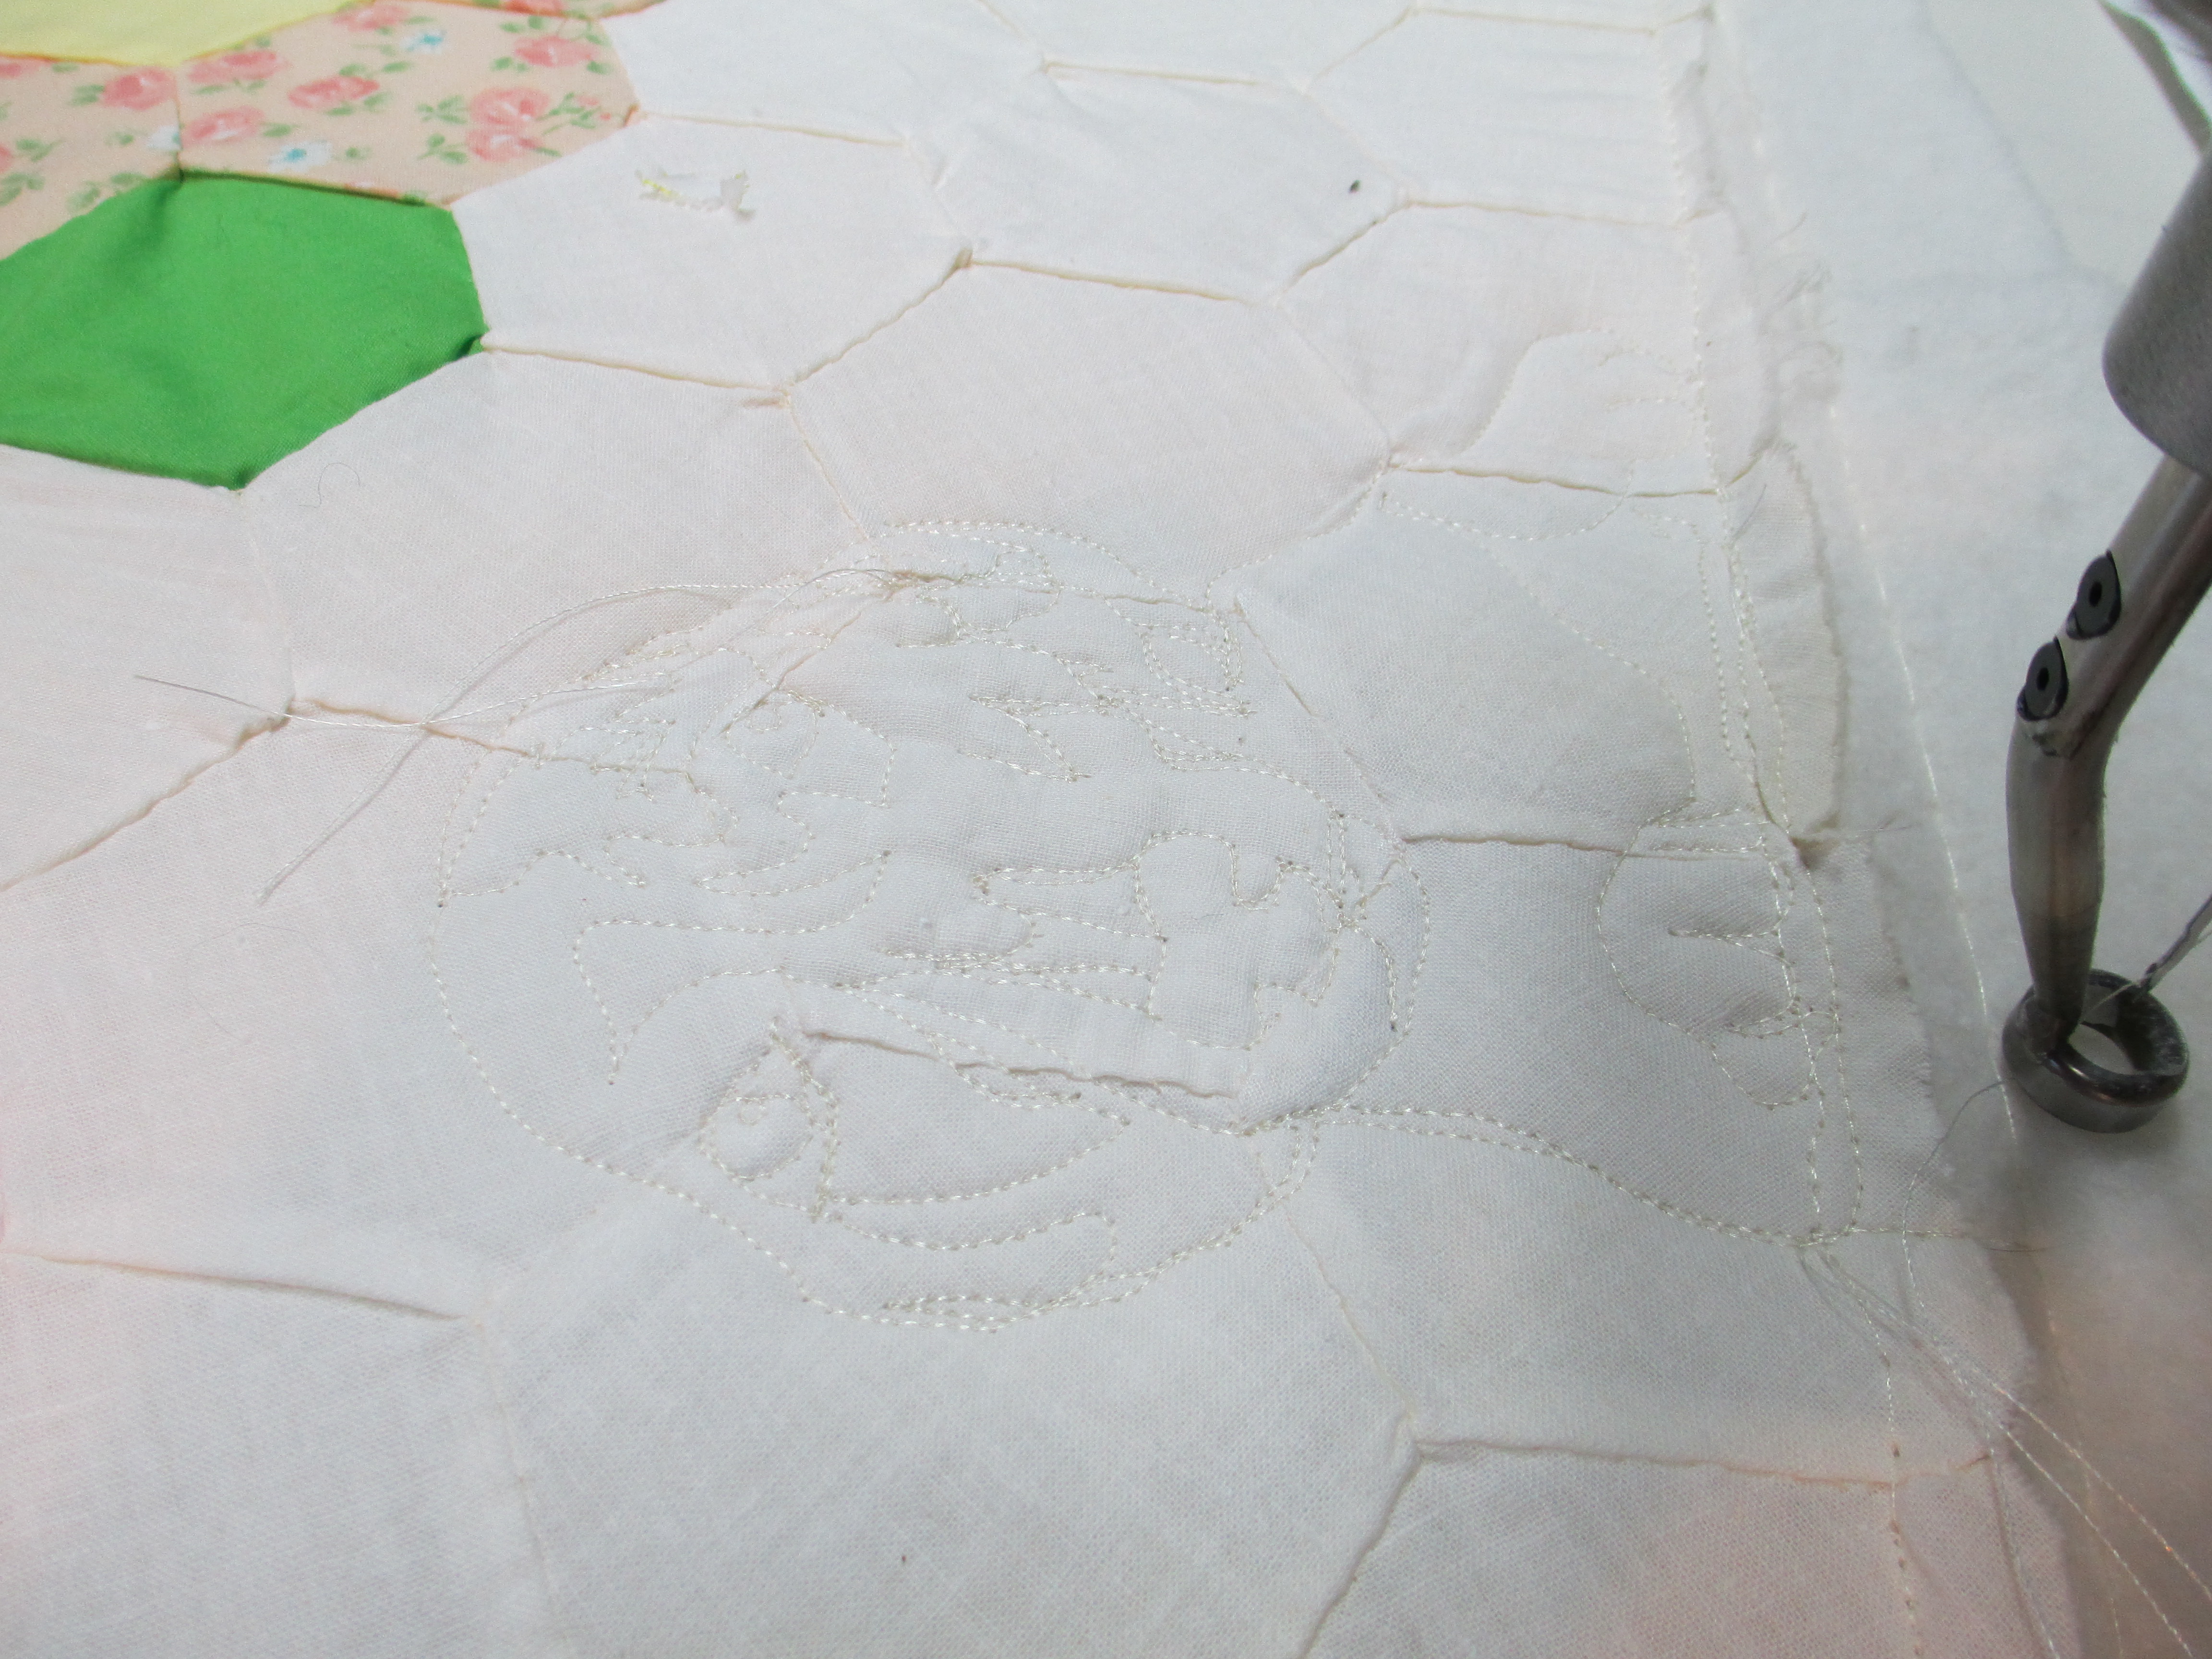
I’ve got it pinned onto the quilt and am ready to stitch-in-the-ditch (SID) around her appliqued vines and will stitch through the onion skin paper onto the quilt.

marking quilts 008

After I quilted through the paper and quilt sandwich, I ripped the paper off.  It snapped off cleaner than both tracing paper and vellum.  I like it!  So, I think my preference between tracing paper, vellum, and onion skin paper would have to be the onion skin paper.  Good thing I’ve got a 50 yard roll, because I’m sure I’ll be using it for future projects.

Stay tuned for pictures of the finished product in the near future!  I’ll be filling in the area around the applique with stippling so it will pop!

Hide & Seek in the Hexie Garden

I’ve been working on a quilt for Mickey Depre.  You may or may not know her as the author of

.

You can find Mickey on Facebook at www.facebook.com/PiecedHexiesWithMickeyDepre.  She also has a website at www.mdquilts.com and her blog is at www.itsafiberlife.blogspot.com.  Mickey has a very creative mind that often goes in overdrive, so she has been very busy lately.  Just this week she was working on taping videos for Craftsy and she is currently in the process of writing her next pieced hexies book as well.

So, she asked me to help her out a bit with this (what I call “vintage”) quilt top she got from ebay.   She needed it quilted and she gave me full range on what I thought should be done with it.  You know, that can be lethal, for some people.  Well, I sure didn’t want to mess it up, and, honestly, I wondered why on earth she would choose me to quilt for her.  So, I was going to do my best with what I’ve got.

mdquilt 002

And, what I’ve got is the ability to draw from pictures using thread.  Would that make me a thread artist then?  I LOVE whimsy and fun things, so I knew I wanted to draw stuff like that on her quilt… if she was okay with that.  And, she was!  For whatever reason, in my mind I pictured her dog peeking around the baskets and playing in this garden of hexie flowers.  So, although I was going to quilt the flowers to look like flowers, there were 2 side borders that needed to be filled with <something>.  I extended flowers and leaves into those borders, added a few baskets of flowers and put a couple of dogs out in that negative space as well.

Here is a shot of flowers in the baskets.

Mickey's final quilt 014

The backing fabric is 100% combed cotton.  I thought it was polished cotton and bought it because some friends said the feel of that polished cotton on the backs of quilts is scrumptious.   When I got it home and took it out of its protective wrap, it looked like cotton sateen.  Okay, I think I can live with that.  But, I was almost horrified when I took the quilt off the machine after quilting this quilt and looked at the back.  Most great quilters I know like to quilt with solid colored fabric and, even better, they like to quilt with unusual fabrics, mostly to show off the quilting.  You can’t see the quilting too well on the front sides of quilts, but if you have a solid color backing, you can see it there.  And, you can “really” see it well if it is on shiny fabric.  This is where my horror lay.  It looked like satin on the back of this down-to-earth and “functional” quilt.  Not only that, but you could REALLY see my quilting!  My eyes bulged and I lost my breath (and not in a good way).  You see, I am still a little insecure about my quilting abilities and am not sure I’m ready to have my thread art screaming to the world, “Look at me!  Look at me!”

I tried to get some good shots so you could see the “sheen” of this backing fabric.  Here is one of the flowers.

Mickey's final quilt 005

Do you see the dog wagging its tail?

Mickey's final quilt 008

Here’s one of the dog’s face.

Mickey's final quilt 007

Here’s a few of the front side.   Mickey and her husband are hockey fans, I believe, so it would have been nice to add that to the quilt for one more personal touch.  But, how do you get that to fit in a spring garden?  Well, soccer is *kind of* like hockey, right?  So, I put a soccer ball in the garden for their dog to play with.

Mickey's final quilt 013

Their dog looking at the soccer ball…

Mickey's final quilt 021

Here is one of the wonky baskets of flowers I quilted into the side borders.

Mickey's final quilt 018

And, finally, before I was done, I had to add one more picture of their dog in the middle of the bottom of the quilt, peeking out at them.  You might barely be able to make out the “Peek a Boo!” I quilted right above the dog.  The word “Peek” is right under the pink flower on the left.  It’s written at an angle into an arc around the top of the dog.  Can you find it?

I had so much fun quilting this for Mickey.  I hope she will be happy with the quilting and can live with the backing fabric.  O_O

If you haven’t had a chance yet, hop on over to Mickey’s website  and take a look at some of her creative work!

Last Customer Quilt Before Christmas

Whew!  The final customer quilt before Christmas is done!  I had SO much fun working on this quilt.  Barbara chose hot pink thread, and it looks so stunning on this quilt.  I hope the person who receives it as a Christmas gift will be as excited as Barbara and I were when we looked at the finished product.

Christmas quilts 002

Close-ups of “Christmas 2012” written at the bottom of the quilt.  The rest may look like scribbles, but they are actually loops and leaves.

Christmas quilts 004 Christmas quilts 008

See how the hot pink pops on the variegated blue backing?  I think she made a good choice with the hot pink thread.  But then, I think all her colors work very well together.

Christmas quilts 011

If you know anything at all about me, by now you have figured out that I like to sneak little surprises into my quilting.  Leaves need bugs, so I added a couple of them on the leaves.  This is a “regular” old bug, but I put a lucky ladybug by Barbara’s name.  You can also see where I put the family members’ names into the quilting.

Christmas quilts 010

Fun, fun, fun!  I love to draw with thread!  If you haven’t tried drawing with thread yet, ya gotta try it!  Now I’d better get to work on decorating the house for Christmas and all the other stuff that goes with it.  😦

Stack ‘n Whack

Finally got this customer quilt finished after a dryer crisis and being sick 2 days last week…  Beth made this Stack ‘n Whack quilt and is giving it to her brother for Christmas.  She wanted feathers (for those of you who are not quilters, they are the paisley/heart/half-heart shaped designs stitched into the quilt) all over it with the background filled in with stippling, which is a tight meander.  What do you think?

Beth's quilt 010

This is the “before.”

Dryer and Beth Matthews 003

And, this is after I turned the quilt on the frame and did some quilting.

Beth's quilt 001

Here’s another angle so you can see more.

Beth's quilt 003

And, a close-up of one of the Stack ‘n Whack blocks… Stack ‘n Whack is basically fussy cutting fabric so that those triangles all look the same.  You stack the fabric so that the copies are all on top of one another and then whack (cut) it.  Or… you can do it other ways which I will let you research on your own…

Beth's quilt 004

Quilting between the “stacks”

Beth's quilt 006

I think Beth did a superb job of picking out the color of thread.  You can’t tell it here, but she chose a sage green to “pop” off the background sueded blue fabric, and it also went well with her stacks, borders, and backing fabric.  I was really impressed that she knew exactly what she wanted when we first discussed this quilt.   I think she did a great job on it and hope she likes the quilting I’ve done for her.

Latest works

So, this is what I have been busy with lately.  Mary made this quilt for her brother-in-law who needs a kidney transplant but, through a long and drawn-out process already, cannot seem to find a suitable donor.  If any of you are willing to give up a kidney to help him, please contact me and I forward your information on to her.   Mary chose straight line quilting for her modern quilt.  I learned a ton from working on her quilt.  The first problem I encountered was puckers in her flannel backing.  The puckers ran along the seam lines of the quilt top.  Well, I can’t have puckers, so I ripped those stitches out and chatted with a fellow quilter about what to do about those puckers.  She said to raise the hopping foot on my longarm machine when working with flannel, thick batting, etc.  Duh!  If your hopping foot is smashing the layers as you try to travel along the quilt, it is only going to drag, warp, and pucker the fabric… AND your thread will constantly break, which happened to me.  When it was all done, I was so glad to be able to quilt with flannel.  I love the feel of it and think it makes a very comforting quilt, especially as a gift.  Some people refuse to quilt with it, I found out, but I think I am going to go buy some flannel for my own quilts now.  My whole idea of quilts and quilting is comfort; comfort for sleeping, comfort for your emotions and spirit, and warmth as you wrap your quilt around you in a hug.

The other issue I had was that I had ordered a cross-hatching ruler online and was waiting for it to arrive.  I had tried using the other various rulers I have, and they worked fine, but, let me tell you, they did not work nearly as well as this one.  I was surprised at how quickly the rest of the quilting went when I had this crosshatching ruler from Quilters Rule.

If you look closely, you will see the base of the ruler pushed against the roller bar on the left side of the picture.  The ruler attaches to the base for straight line quilting.  Now, it’s called a cross hatch ruler, but for modern quilts with straight lines, this is the perfect tool for the job and worth every penny.  Believe me, this simplified the job of stitching at an angle on a longarm so much!  If you don’t already have one for your quilting business, I highly recommend buying one!  Check them out at: http://www.quiltersrule.com/template/mqt-chr.html

The other quilt I’ve been working on was made by Barbara with jelly roll fabric.  She is giving it as a gift to her daughter-in-law for Christmas and wanted the family names and personal notes written on it.  Can you see the writing in this picture?


Even her backing fabric is cute and goes well with the chartreuse thread she chose.


So, now that I’ve got those done, it’s back to the Opportunity Quilt that I need to finish.  I am working at our guild’s quilt show later this week, so I’d better get busy.


Longarm Quilting Challenges

Quilters Newsletter offers free videos, with a new one each week. Check out this video on longarm quilting challenges. It will be current until Friday, Sept. 14th.
http://www.quiltersnewsletter.com/videos/index.html
So, if you bring a quilt to a longarmer, please do not baste the layers together or finish the edges. This video shows us some strategies for dealing with this when customers bring their quilts to us this way.

Blocking… the final frontier

The quilting is done and all I need to do now is add the binding before sending this quilt back to its owner.  But, before I do the binding, I want to “block” it to make sure it will lay flat and square.  I’ve heard that once you block a quilt, it will always be square, but I don’t know about that.  Have any of you heard that?

So, here goes the blocking and how I do it.  There are many strategies for blocking, but I’ve found that using a laser square is the easiest for me.  First I lay out the quilt onto a surface that I can pin into – that would be my design wall placed on the floor.  I forgot to tell you that I get the quilt wet first and run it through the spin cycle in the washing machine and then air fluff it so that it’s not soaking wet; just damp enough to nudge the fibers around.

I start at opposite corners and try to make sure those corners are fairly square and then do the other 2 opposite corners.  This is just to get them in the ball park area, because you are going to be doing some nudging and things will shift.  I then work from the middle out – I start with the middle blocks and make sure they are as square as possible, putting a few pins in there to hold the blocks in place while I work outward.

Image

You can barely see the orange beam of light along the blocks’ edges, but you can see where the laser square is on the right side of the picture.  Look for a horizontal beam and a vertical beam.

Sometimes as I am working along a seam line, the beam gets blocked by a pin or the quilt sticking up a bit in an area.  In that case I run my finger along the beam to help me nudge the fabric into line.

Image

When I’ve got the blocks where I want them, I then start with the inner borders and make sure they are square, sticking more pins along the lines to hold them in place.

Image

And then I move to the inside edge of the outer border.  Yes, more pins!

Image

And then, finally, the outside perimeter of the quilt… I stick the most pins along these edges and will many times I will go back and remove some of the pins that are inside, especially those around the blocks and sashing.  The quilt is where I want it at this point, and it will just be laying there.

Image

When I’ve got it all pinned in place, I finger press down the edges to get it completely flat and then let it dry for a couple of days.  This is a good reason to have a place that will be undisturbed.  Oh, and I have a fan or 2 blowing air on it to help it dry.  Then, it will be ready for binding.

So, if you have a laser square tucked away somewhere in your garage or in your husband’s tools, borrow it some time to see if this strategy is easier for you, too!

Frogging…

So, it’s been a couple of weeks since I’ve posted about my quilting progress.  I’ve barely had time to work on the latest due to being at Machine Quilters Showcase the week of My 12-19th.  Last week I had doctors’ appointments and husband appointments to deal with.  So, here I am ready to finish this quilt and get it back to the owner.  Yesterday I finished all the quilting on it, so all I should have to do now is block it and sew the binding on it and get it back to the customer within the next few days.  I say “should” because as I was stitching on it, a nagging thought crept up in the back of my mind telling me that my stitching was WRONG, that it needed to be fixed, which leads to frogging…

If you don’t know what frogging is, it’s an eeeeevil, naaaaasty, dirty word in the quilting world.  The term derives from a frog croaking “Rip it!  Rip it!” meaning to rip out imperfect stitches.  In my mind, my quilting on customers’ quilts should be to enhance the piecing or applique, not to over power it with my stitching.  However, if it is a show quilt, then by all means, there should be lots of embellished quilting and as some people say, “it should be quilted to death!”

So, there I was quilting along and I got to the corners of the outside border.  Now the quilt itself has blocks in the middle with orange sashing separating the blocks.  It also has an inner, pieced border outlined with solid black thin borders framing the inner border.  The outside border, however, is plain white/cream.  My quilting in the blocks is done with cream colored thread, so as to show off the blocks.  The quilting in the sashing is done with an orange, variegated thread that will enhance the sashing just a bit.  But, that outside border just needed something.  I didn’t feel right quilting it with the same color thread as the fabric itself, so I am basically “drawing” with black thread on it.  I don’t yet feel confident enough with my drawing abilities to make my quilting stand out that much, but I doubt I ever will.  I’m plunging in and doing it anyway.  People keep telling me that I’m better at quilting than I think I am, so I am trying to listen to that and plunge away.

The stitching in the outside border is of cats on a fence, jack-o-lanterns, bats and pumpkins.  I used my new micro handles to help me stitch those.  I stitched spider webs and a spider into the corners.  The problem is that I wasn’t satisfied with how perfect the stitches were (or were not), so I did some thread painting to smooth the rough edges.  Thread painting is basically sketching with thread.  Of course, after I was finished I was mortified.  I thread paint on my own quilts all the time, but how could I do that to a customer’s quilt?  I had to rip it out and put a simple one-line stitching for that spider web.

So, here is the dastardly deed in progress…Image

Notice the “weapons” on the right side of the picture that were used in tackling this project.  I had been working for 3+ hours on just this one corner.  You have to be very careful pulling out those stitches because you don’t want to rip the fabric or pull any of the threads of the fabric in the process.

Here is what the stitching should look like with only one layer of stitching and no thread painting.  This is the border next to that corner – white/cream fabric with black stitching.

Image

And, here is what the other 3 corners look like before “frogging.”

Image

It actually doesn’t look that bad (now that I’m 3+ hours into the task every quilter dreads and looking at several more hours of this… and multiply that by 3 more corners, each taking a day to rip out).  And, the extra stitching actually helps to stabilize the corner stones. Soooo… I have decided that I will leave the other 3 spider webs as they are.  I will continue frogging this particular spider web and will re-stitch it to look like it did and/or the other 3 webs.  If the customer is not happy with it (and I’m very much okay with that!) then I will certainly frog all 4 corners.  At this point, though, I just want to get this quilt to the owners.

Lesson learned!  And, I’ve also learned that I am going to try quilting with the same thread on top and in the bobbin.  Most people do that, but I have been trying to match the bobbin thread with the backing fabric (in this case it is a mottled tan/cream).  The cream colored and orange variegated top threads worked fine with the cream colored bobbin thread. But, for whatever reason, that black thread did not cooperate at all, so it shows through on the back anyhow – drives me nuts.  I worked and worked with it to no avail.  I can certainly see now why others use the same color on top and bottom.

On the frame!

Image

And, here it is on the frame!  It’s exhilarating to be working on this.  I’ve had a lot of fun so far figuring out what to stitch on here.  I’ve got monsters peeking over the edges of the fabric on that middle block.  I wasn’t sure what to put in those corners, so I opted for the monsters.  I think it looks cute.  I am also stitching ghosts, witches, bats, cats, spiders and webs, pumpkins and candy corn all over this.  Right now the stitching in the blocks will be the same color as the background fabric.  The stitching in the sashing will be a variegated orange, and I will finish off the outside border with black stitching against the plain cream-colored border.  I’ll post another picture when I finish it.