A Woodland Christmas… by Joan

I figured I’d better get this on here while I’ve got the chance.  I’ve been busy lately working on things for my booth at the Kansas City Regional Quilt Festival, which starts next Friday, by the way.  And, I will continue being busy working on more stuff for the next week.  This was the last customer quilt I was able to work on before the quilt show.  Joan always lets me play and put whatever I want on her quilts.  It’s a very dangerous tactic, you know.

So, let’s show you a full shot of the quilt first before I get into the details of the quilting.

IMG_2511

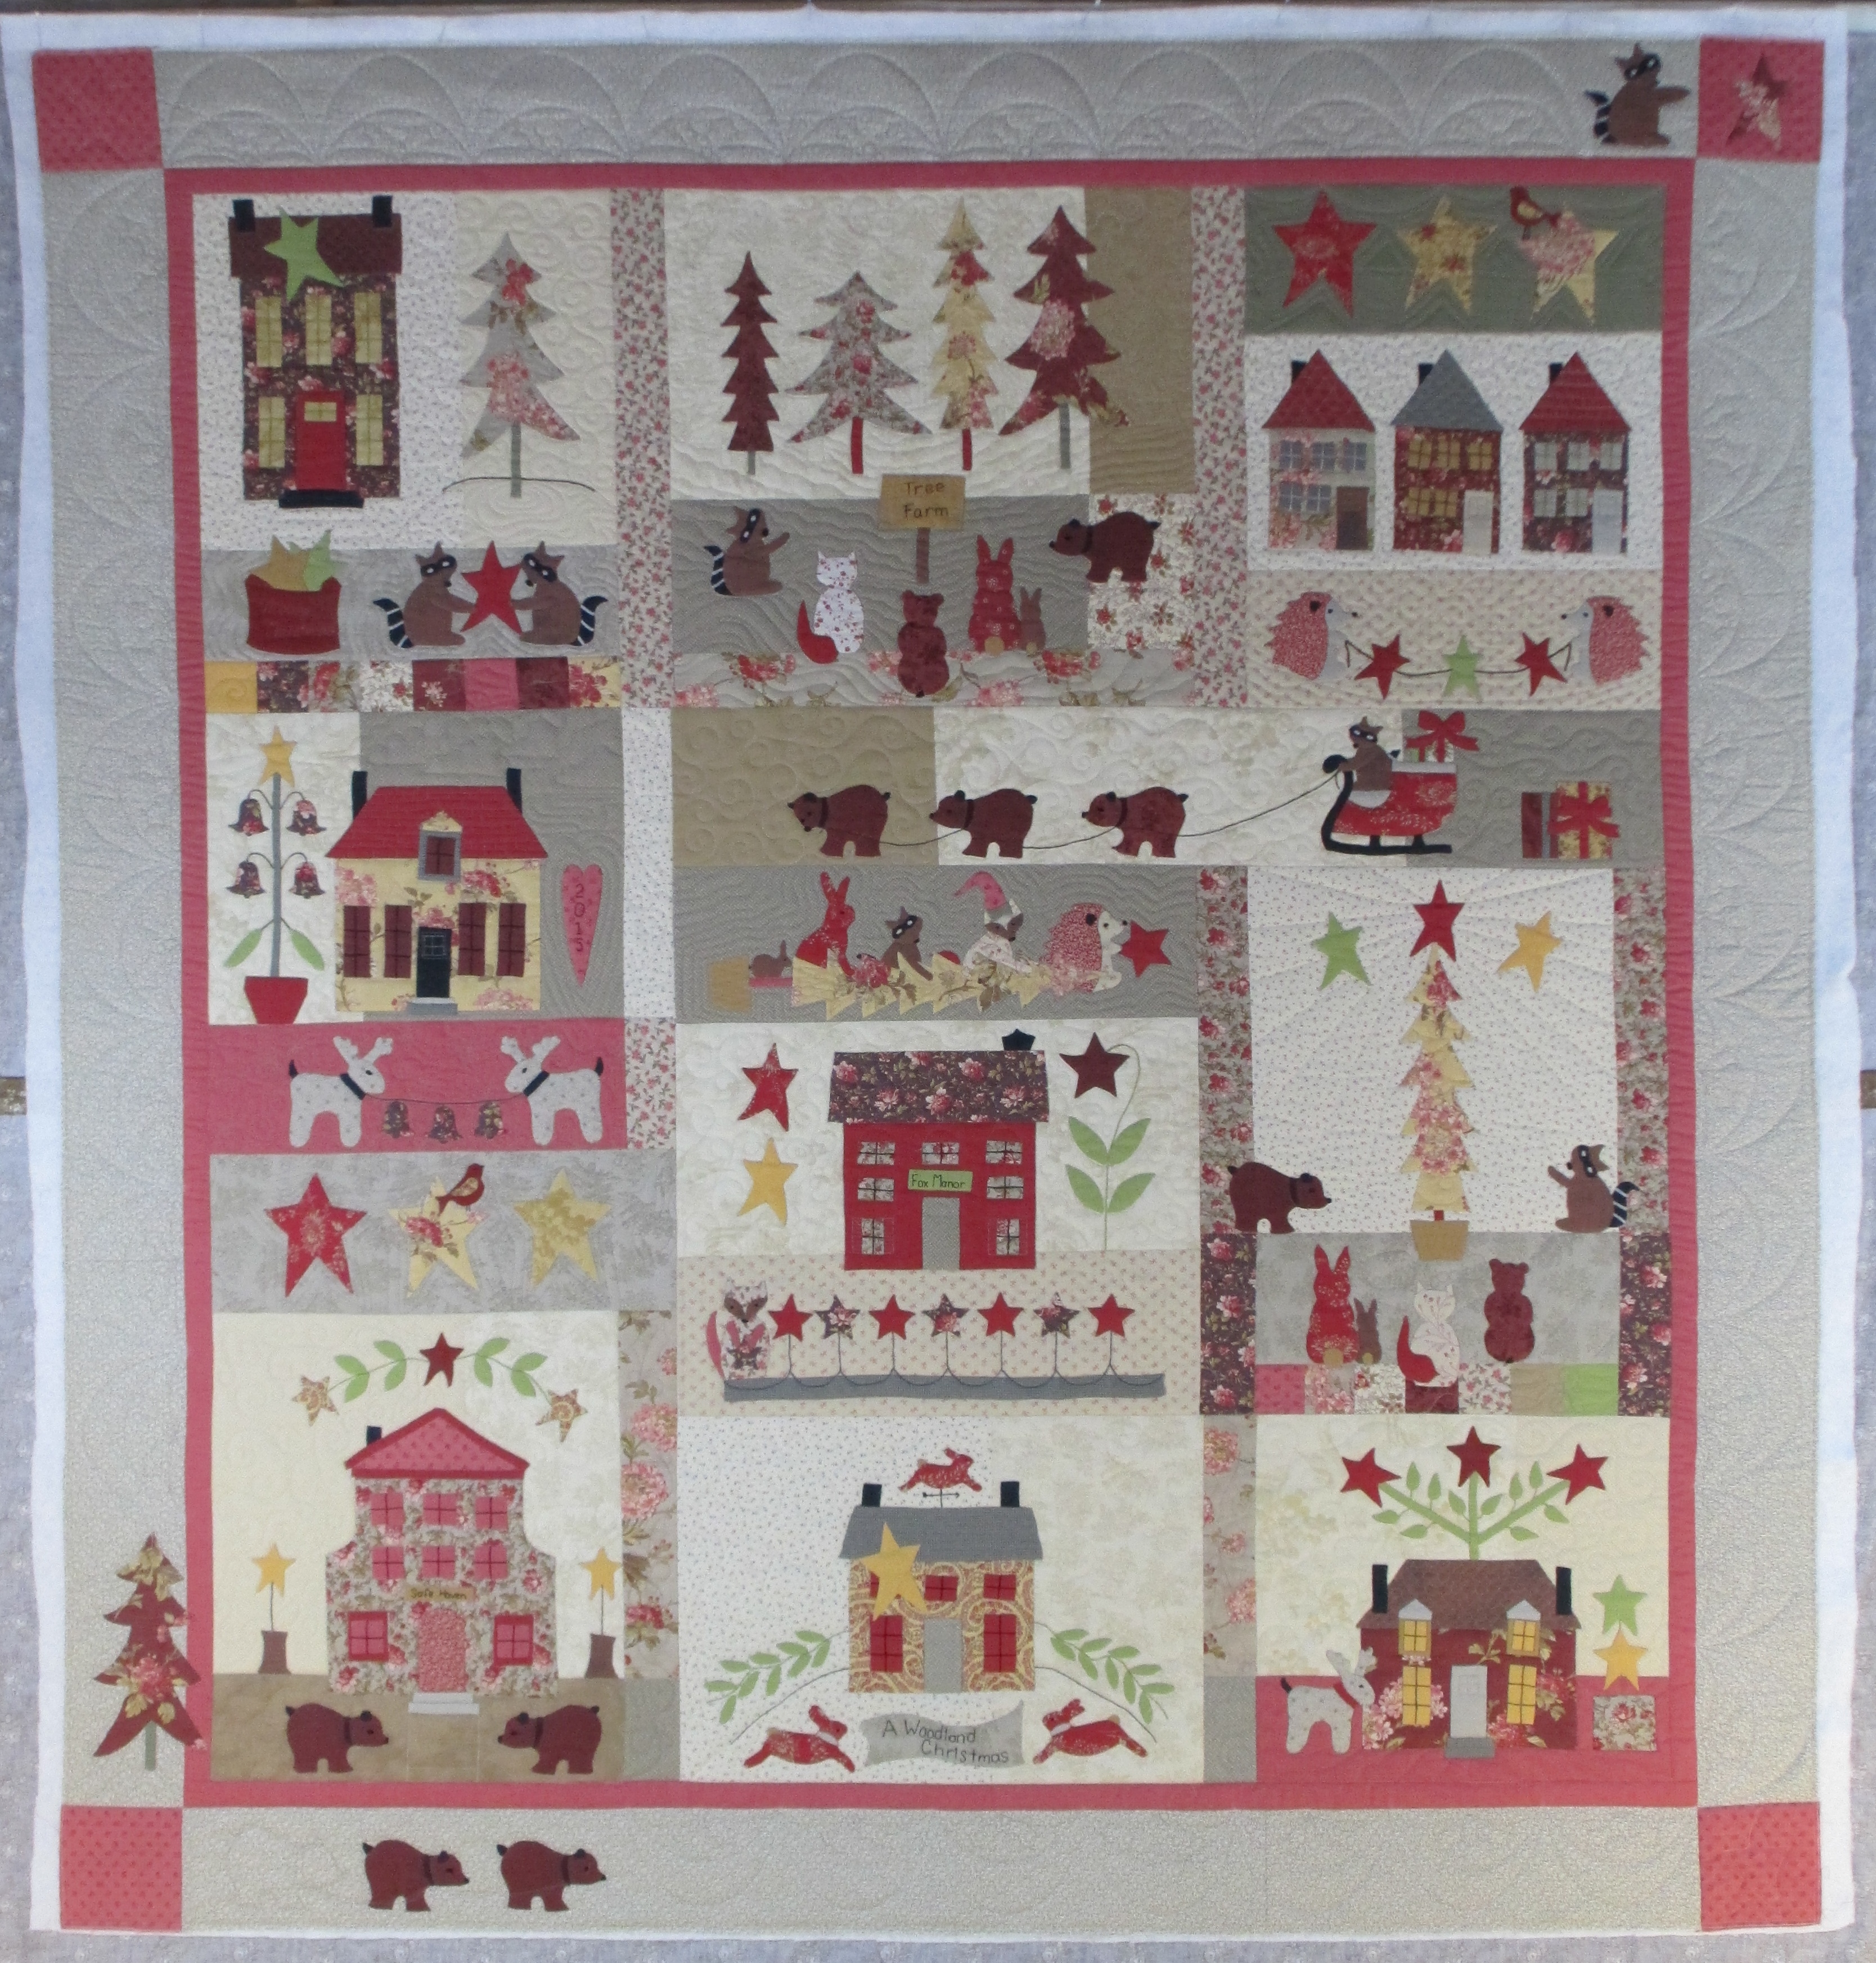
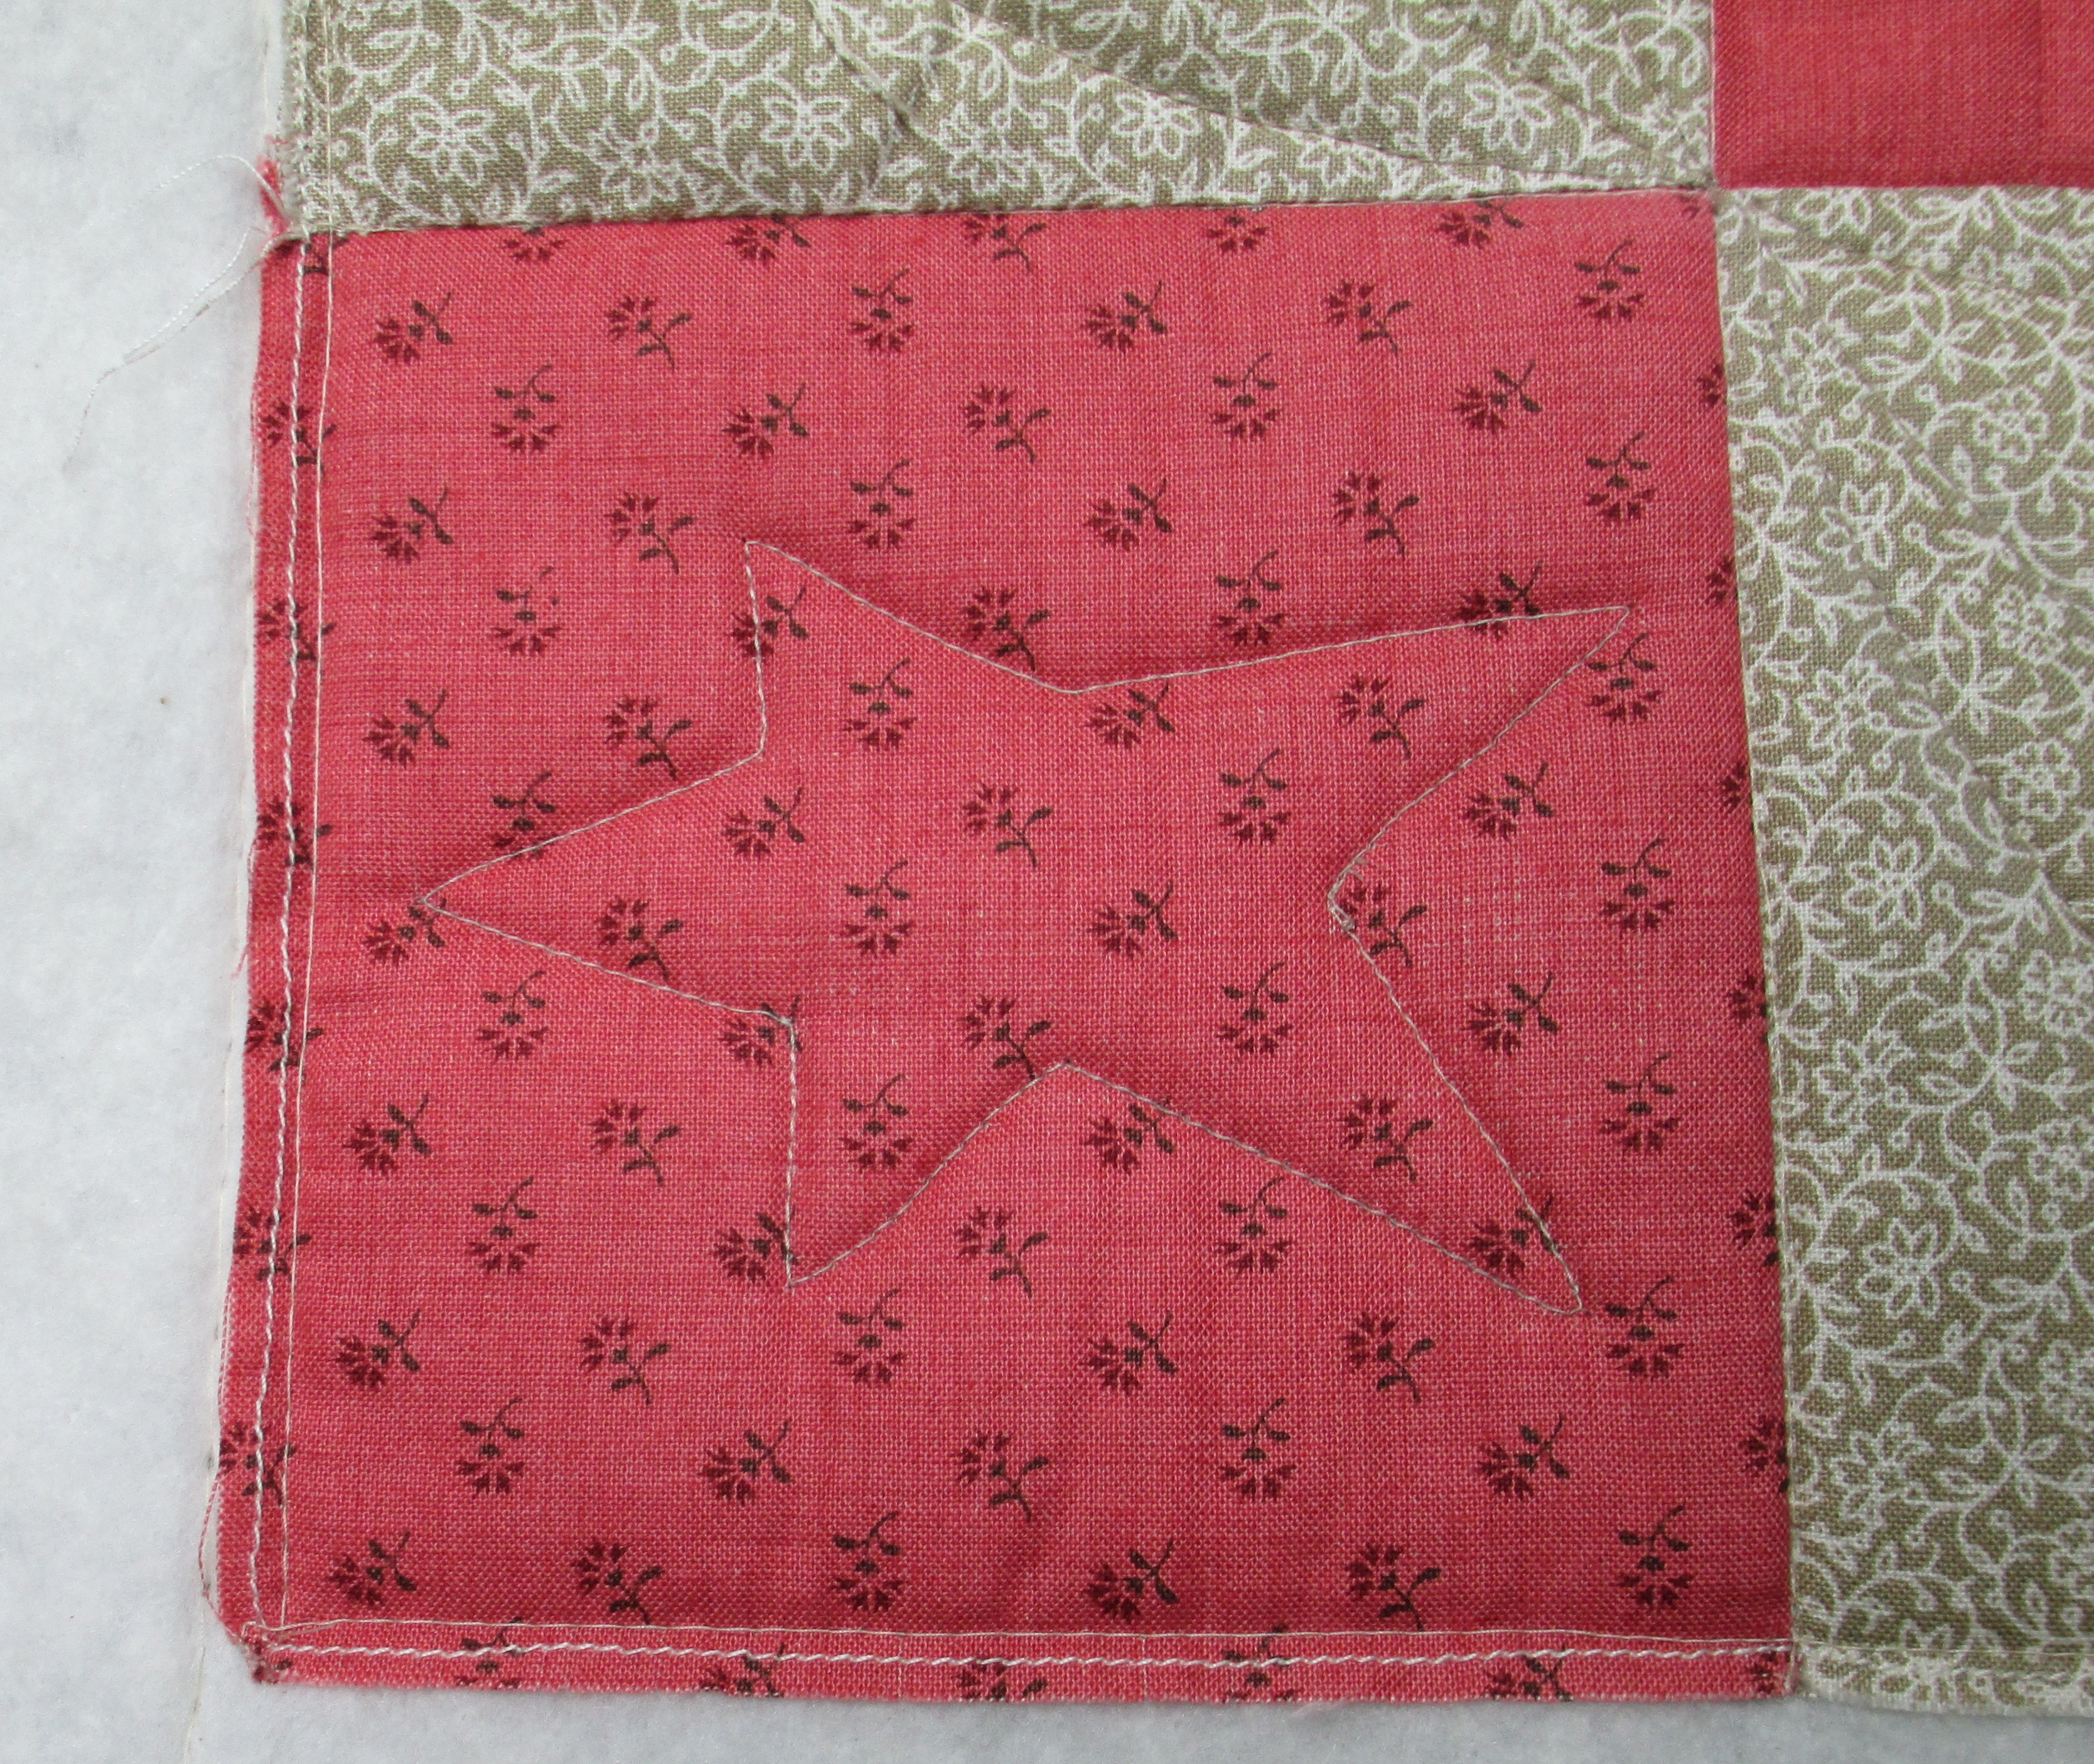
Now, how on earth would YOU quilt this?  My first concern was the border, because that’s where I start.  The cornerstones were easy – Joan had an applique star in the upper right hand corner, so I just copied that into the other corners.

IMG_2527

As for the borders, I couldn’t come up with something creative enough (for me) that would go with this quilt, so I ended up doing something simple with holly leaves.  It would need to be able to work play well with the applique in the borders.  Just now, looking at these pictures, I wish I had added piano keys on the outside of the swags.

IMG_2515 IMG_2517

Along the lower border were 2 bears, but they needed a mama bear so I added her in the back of them.

IMG_2523

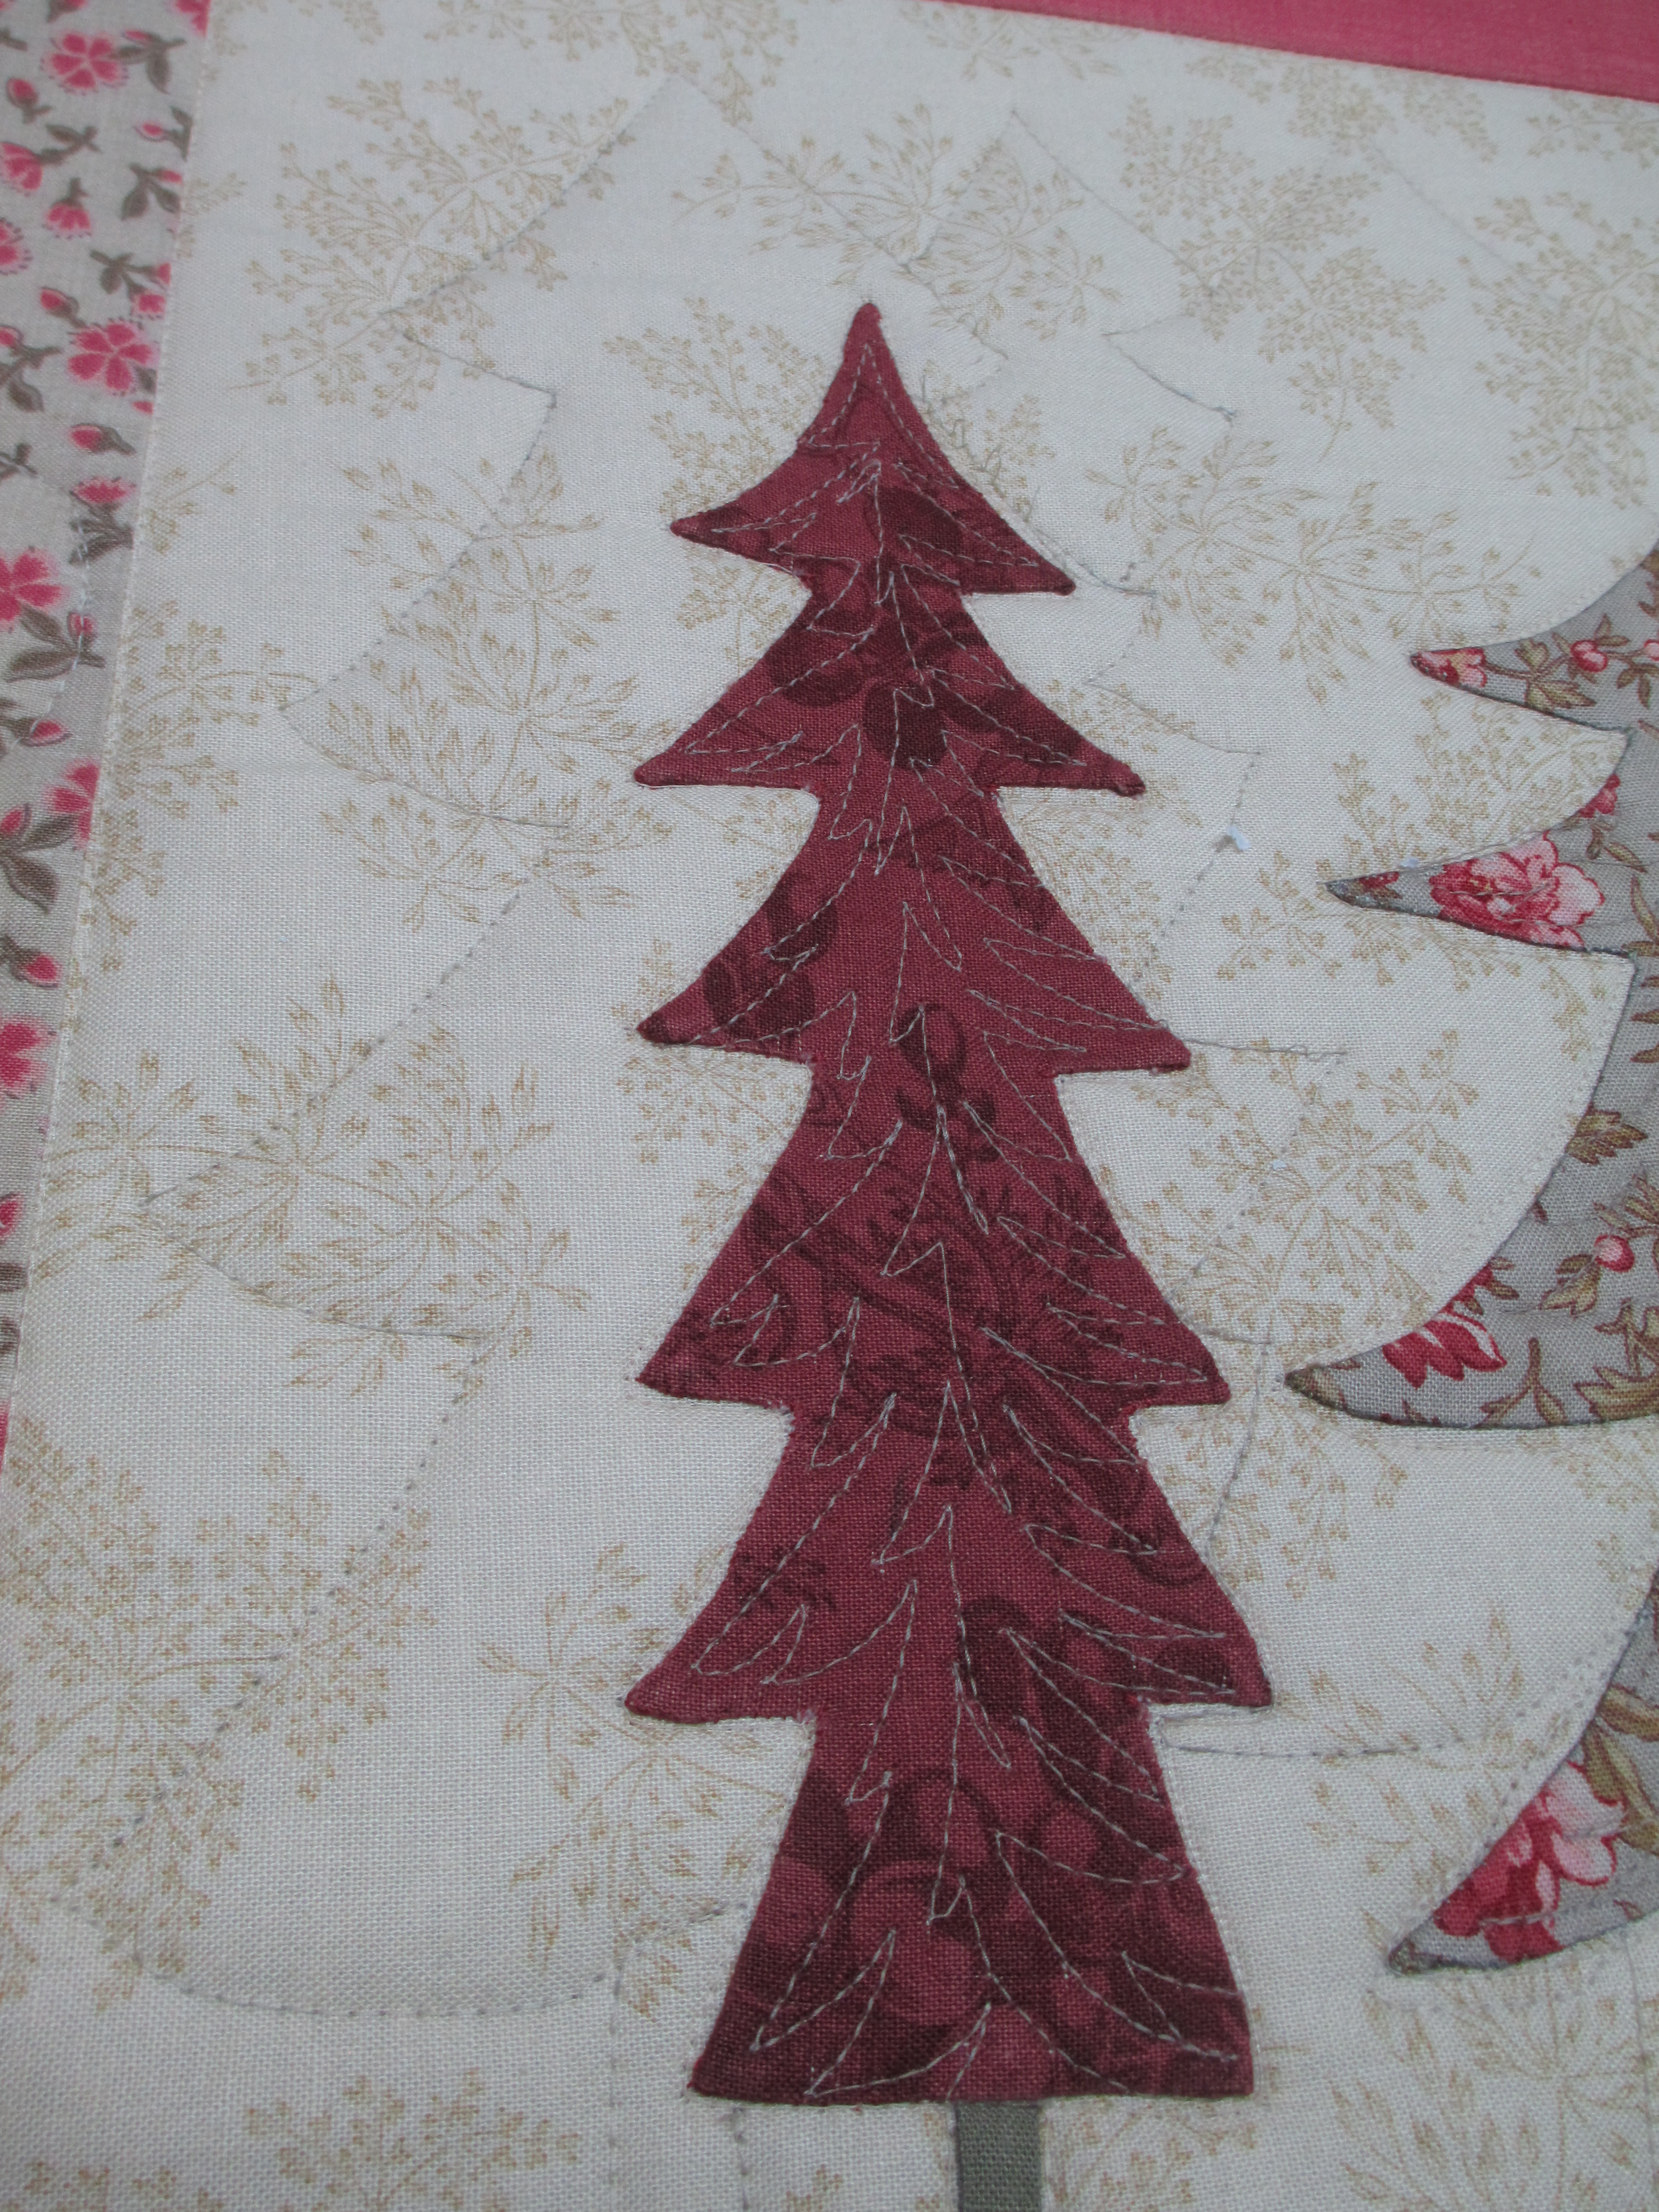
Joan asked how I got the bear to look just like the others.  Well, I cheated, and here is a tutorial showing you how I did it.  But… it shows what I did with the trees at the top of the quilt instead of the bear; I did the same technique.  I found myself going back and forth on this quilt, adding a bit here and a bit there.  It seemed to me that I was doing a lot of the same things, so in that big open space in the tree farm, I decided to add more trees.  I have a roll of vellum or onion skin (I can’t remember which I’d bought) for tracing designs. So, to add more trees, I simply traced the applique trees already there and added more trees around them.  This would be my quilting design.  If you look closely at the corners of the paper, you will see where I have straight pins holding the paper in place.  I just stick them straight down without trying to weave them into the fabric.  When I do that, it just turns out worse.

IMG_2502 IMG_2503

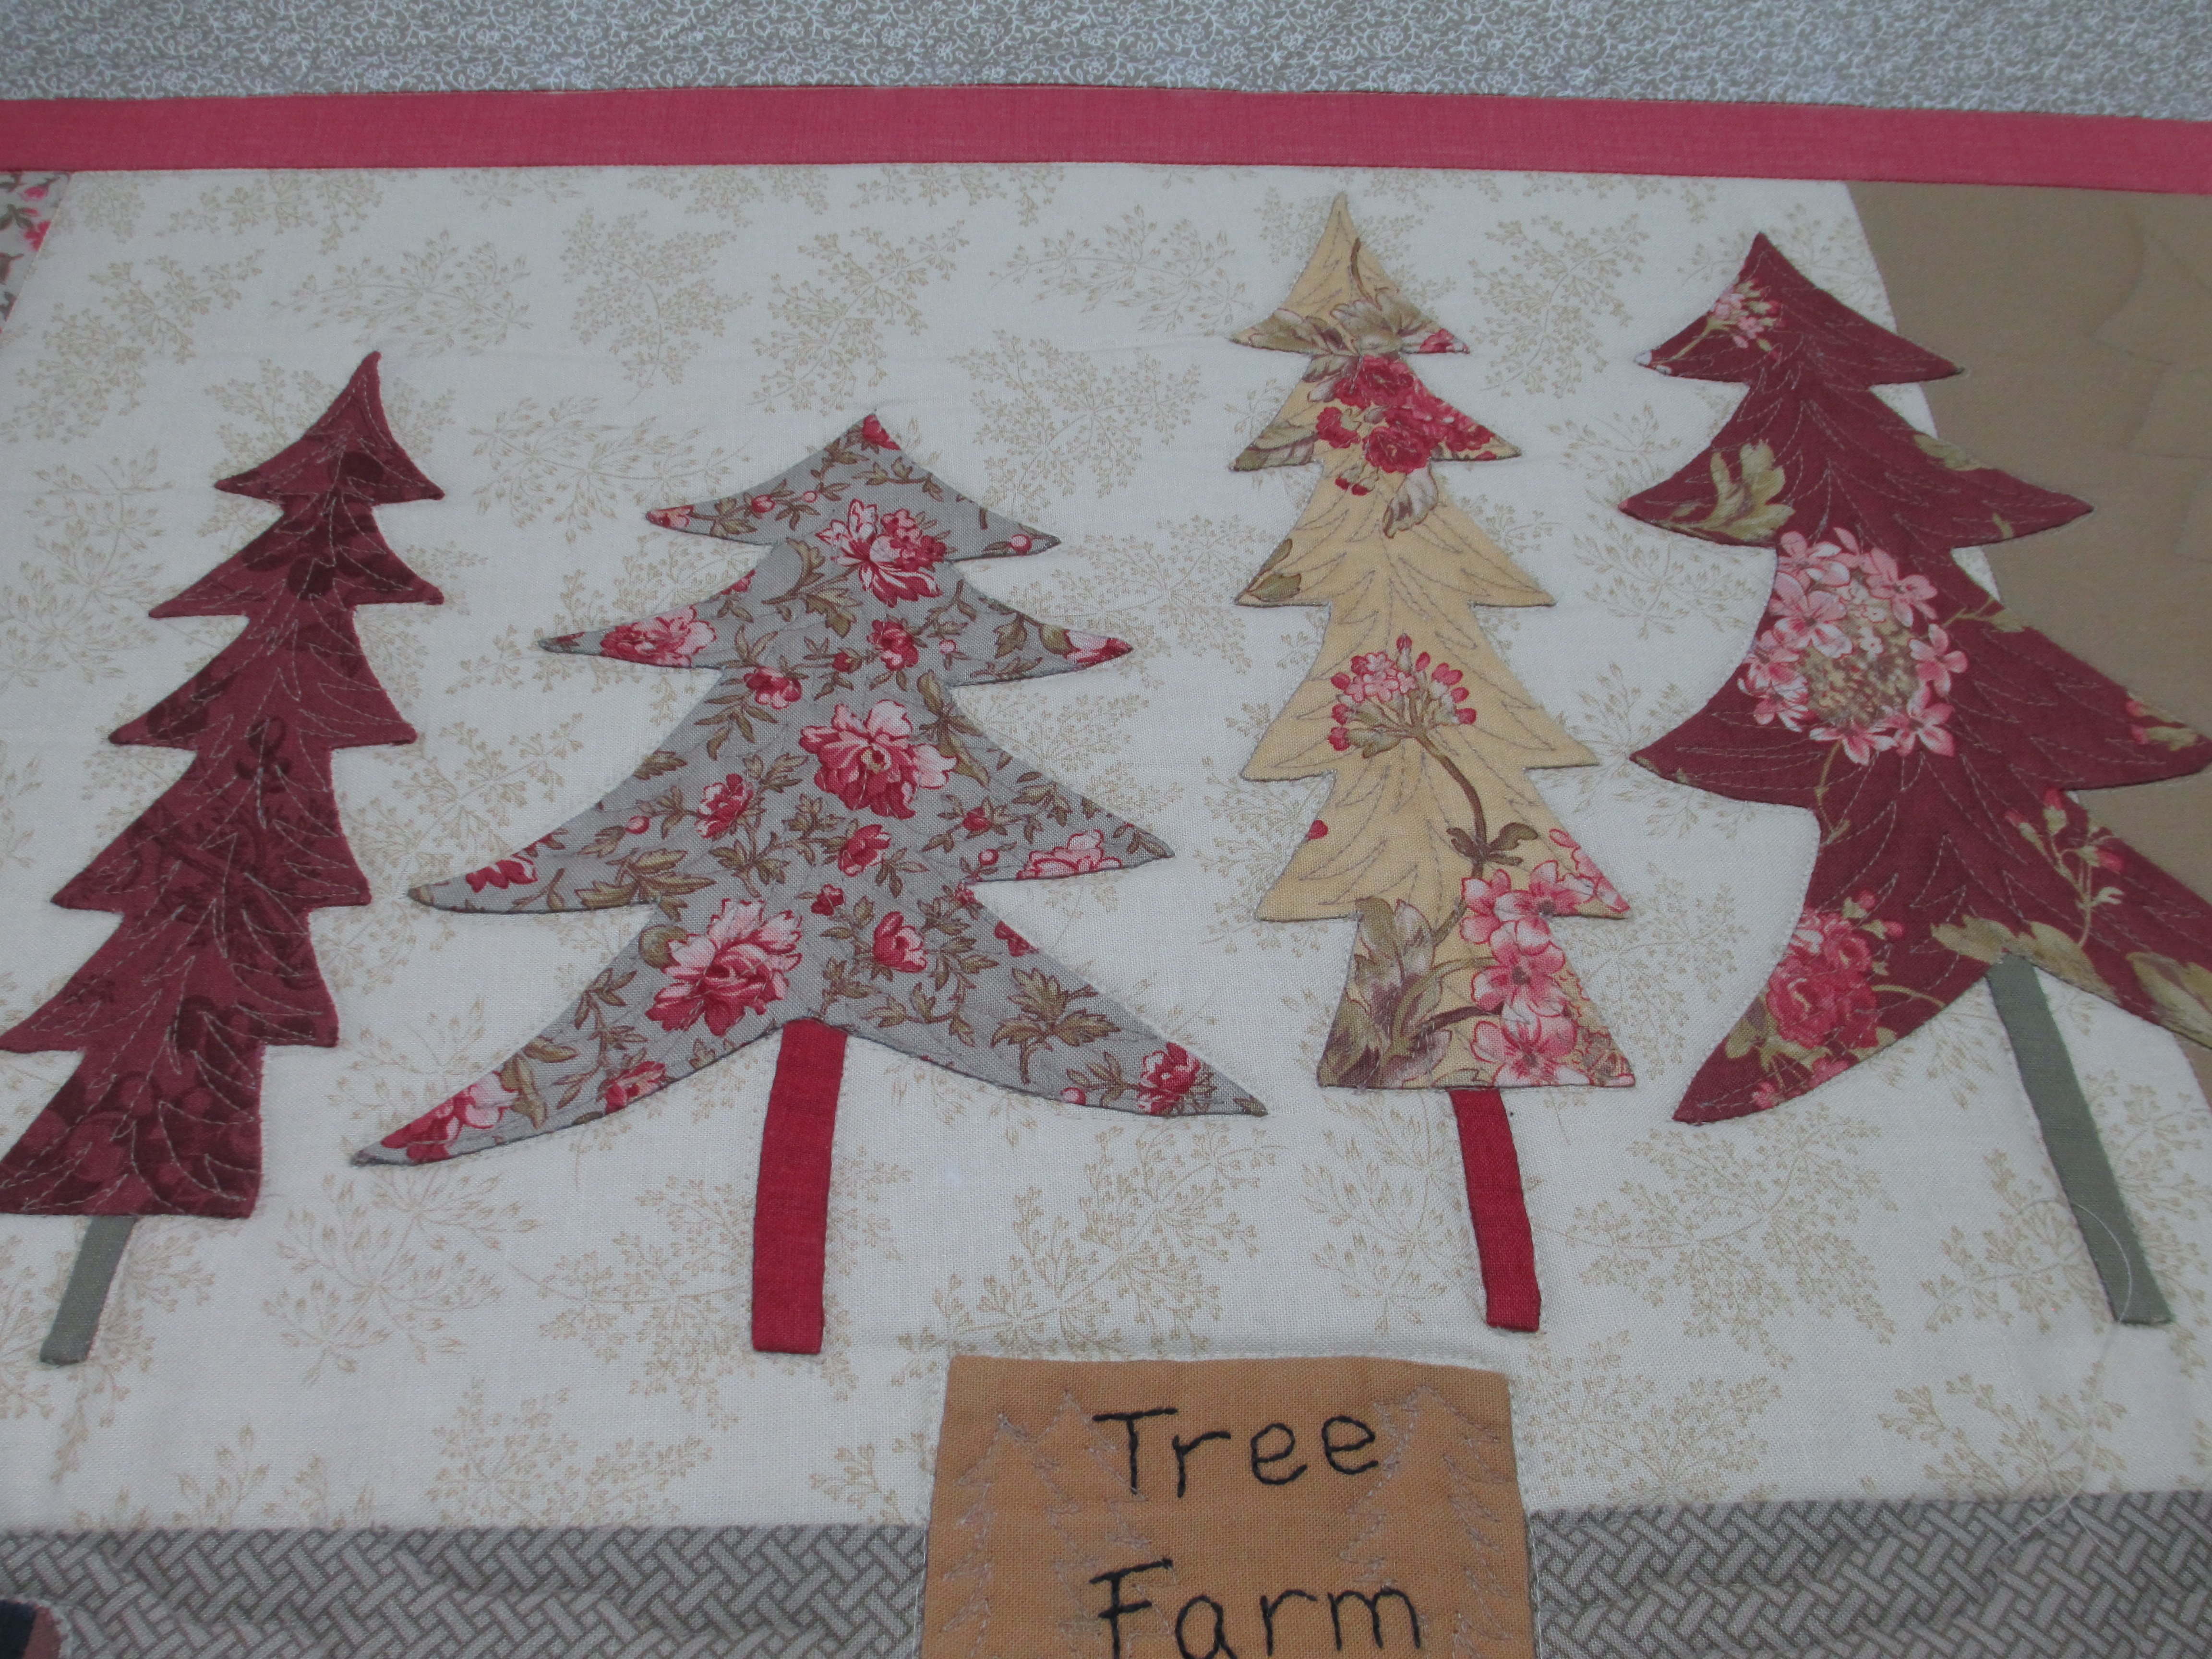
After I had the trees drawn out, I then hold my left hand on the paper and move the machine around with my right hand (if you are left handed, hold the paper with your right hand and move the machine with your left hand).  If you don’t already know this, a longarm quilting machine floats or hovers above the fabric and has no feed dogs (those gritty teeth things on the bottom/bobbin plate of a domestic sewing machine) to keep it steady and in place.  It doesn’t have to be perfect.  Unless someone shows you what I just did, you will never know if “I meant to do that” or not.

IMG_2504 IMG_2505

And, here is the result after I tore the paper off.

IMG_2507  IMG_2514

I tried to give each of the houses a different roof top, but some of them are repeated. If you go back and take a second look at the border pictures, you can see more houses in those shots.

IMG_2526 IMG_2522

Most of the houses in this quilt reminded me of the Victorian houses in the Colorado mountains.  This trio, however, could have been cabins, if I had thought about it long enough.  But, they turned out okay as Victorian houses as well.

IMG_2519

The final picture is of the star on top of the “town tree” shining down for its audience to “ooh” and “ahh”.

IMG_2520

All in all, this was a fun quilt to “quilt.”  I hope you enjoyed the show and learned something, too!  Merry Christmas in June!

Raggedy Ann and Andy

Barbara and the ladies at her church have been hard at work making quilts.  If I understand it correctly, they either raffle or auction them off to make money for their church.  What is really cute about this quilt is that, although it is a Raggedy Ann and Andy quilt, there are hand made dolls to go with it.  Unfortunately, I don’t have a picture of them to share with you so you could see how cute the quilt looks with them.  However, I do have pictures of the quilt.

Here’s a full shot.  Simple, but imagine it with a Raggedy Ann and a Raggedy Andy sitting on it.

IMG_2448

And, here is what I added to the blocks.  There are plenty of things I could have done with this, but I really wanted it to be playful and I was hoping the ladies at Barbara’s church would be okay with it.  Do you think it’s okay and “fits” the quilt?

IMG_2443   IMG_2445

I have another picture of the third row of blocks, but I cannot get it to upload here, so I guess I will just have to show you the back. Maybe you can get an idea from this.  Just imagine it reversed.

IMG_2442

If you are interested in this quilt, you will have to be real nice to the ladies at Queen of the Holy Rosary Wea Catholic Church in Bucyrus, Kansas.  Maybe you can get in on the fun!  😉

I Spy

My final quilt for 2014 was an “I Spy” quilt for Charlotte’s grand-daughter.  What’s an “I Spy” quilt, you ask?  It is a quilt with lots of pictures to look for, using the quilt as a game board, of sorts.  Here’s a shot of the full length of the quilt.  Can you see what I am talking about?

IMG_2072

How about now with these close-ups?  Can you see some of the things you might “spy” with your “little eye?”

IMG_2075 IMG_2076IMG_2074 IMG_2073  IMG_2077 IMG_2078

I doubt you can see much of the quilting, but I added numbers and the letters of the alphabet around the borders.  Inside the borders I just quilted and Edge to Edge (E2E) of assorted drawings of things I saw in the quilt.  I hope Charlotte and her grand-daughter have a lot of fun with this quilt!  I know I did!

Fabric Play

Fabric Play written by Deanne Moore is the perfect book for a beginning quilt-maker.

Martingale - Fabric Play (Print version + eBook bundle)

In her book, Deanne gives you a mock-up drawing of the entire quilt for you to play with different fabrics in creating your own quilt.

Martingale - Fabric Play (Print version + eBook bundle)

She also gives suggestions for using different fabrics with each quilt.

Martingale - Fabric Play (Print version + eBook bundle)

Martingale - Fabric Play (Print version + eBook bundle)

Martingale - Fabric Play (Print version + eBook bundle)

Many thanks to Martingale Press and their photographer for providing the eBooks for these reviews.  You can find more information on this book here.


Charity Quilt

Finally got the charity quilt done that I’ve been working on to be donated to Safehome.

Image

I quilted paws all over it to go with the cat theme.

Image

Image

This quilt is so apropos since Safehome is building a pet shelter. If you are interested, you can help them build the shelter by donating here.   They still need over $10,000 to go before they can build the shelter

3 More Books

Book Review #1…Civil War Legacies II by Carol Hopkins


Martingale - Civil War Legacies II (Print version + eBook bundle)

Carol Hopkins wrote Civil War Legacies, and this is the follow-up to that best-selling book.  Although she uses 1860s reproduction fabrices, this would be a great book for using up those scraps. Carol gives tips on selecting fabric for these projects. Many of the blocks are great for beginning quilters to learn, and the small scale make them perfect for gifts, wall hangings, doll quilts, table toppers, etc.

Martingale - Civil War Legacies II (Print version + eBook bundle)

The red quilt below would make a great table mat for a tea or coffee bar, imho.  And, the one on the right has true primitive colors… kind of looks like the sun peeking through the night.

Martingale - Civil War Legacies II (Print version + eBook bundle)     Martingale - Civil War Legacies II (Print version + eBook bundle)


Book Review #2…Stack, Shuffle, and Slide by Karla Alexander

Martingale - Stack, Shuffle, and Slide (Print version + eBook bundle)

If you’ve heard of Stack the Deck type quilt blocks or Stack, Cut, and Shuffle quilt blocks, you will find Karla Alexander’s latest book as another twist on those block cutting models. Karla takes the fear out of color combinations by showing you  how place the different values of the colors within the blocks.  She includes patterns for the different levels of quilters, so there is something for everyone.  Many of her quilts are made with the modern and carefree look.  The quilt below on the left (the darker one)  is for a beginner quilt maker (believe it or not! – it all has to do with color and value placement) and the one below on the right with the triangle flags is for an intermediate level quilt maker.

Martingale - Stack, Shuffle, and Slide (Print version + eBook bundle)Martingale - Stack, Shuffle, and Slide (Print version + eBook bundle)

Book Review #3… Fabulously Fast Quilts by Amy Smart

Martingale - Fabulously Fast Quilts (Print version + eBook bundle)

Amy Smart is a blogger who is having a blog hop this week.  She and her blogger friends are sharing tips and techniques for making the quilt process go quicker and smoother.  If you’ve got time, head over to her blog here.  If not, you will still find pleny of tips and techniques in her book.  You can find her book on Amazon or at the Martingale shop site.  If you’d like a signed copy of her book, go here to order one from her shop.  In her book, you will find 12 quilt designs with lots of movement and that will work with a variety of fabric styles.  Many of the patterns use precuts and scraps.

I thought this one looked interesting – I could use up one or more of my jelly rolls on this quilt, I think.


Martingale - Fabulously Fast Quilts (Print version + eBook bundle)

I thought this quilt below gave a new twist on the chevron quilt we’ve seen so many of.  This one is made with strips, though, instead of triangles.  Could be a Quilts of Valor quilt, a boy’s quilt, a Fourth of July quilt, etc….

Martingale - Fabulously Fast Quilts (Print version + eBook bundle)

Many thanks to Martingale for providing the above books and to their photographer, Brent Kane, for providing these pictures!  You can find any of the above books at Amazon or directly from the Martingale shop.

As a side note, I did not get the following book to review, but I thought some of the quilts in it were cute, so I wanted to share some of them with you.  I don’t have any little kids to make these quilts for, but I find the NEED to buy this book.  😉

Martingale - Animal Parade  Martingale - Animal Parade

Martingale - Animal ParadeMartingale - Animal ParadeMartingale - Animal ParadeMartingale - Animal ParadeMartingale - Animal ParadeMartingale - Animal Parade

Best Laid Plans… to be continued

The past 2 weeks have been crazy.  I even checked this past week to see if there was a full moon, but it’s not until Valentine’s Day.  Two weeks ago I was working on a client’s quilt and also working on a pattern to make a purse.  I was asked to teach how to make a quilted purse, so I came up with a pattern and then needed to make it up so I could tell how easy or difficult it would be for the students.

Then, one of my husband’s 2 favorite aunts died.  My husband was to be a Pall Bearer, so we needed to drive to Ft. Worth, Texas for the funeral… a 10 hour trip on a good day.  We hurriedly packed up and drove down to temperatures in the 70s.  I thought weather changes were pretty dramatic in Kansas City and Denver, but we found that it is so much more dramatic in northern Texas and Oklahoma.  We came back home Sunday.  We knew the drive home would be “iffy” when it came to the weather, but we figured we had it planned between snow and ice fronts.  Well, we were wrong – that was between 2 weather fronts in the Kansas City area.  Sunday morning before we headed back home, we checked the weather and the road conditions and chose the highway that looked like it was in better weather and traffic conditions.  What a long day that turned out to be!  There were cars, buses, and trucks off in the ditch and paralyzed on the highway pretty much the whole way through Oklahoma.   I guess they don’t “expect” snow and ice???  Because they sure weren’t prepared for it!

TX and Oklahoma 011

Anyhow, to make a long story short, this was the beginning of the “wrench” put into my best laid plans of getting customer quilts done.  And, that’s the way it seems to go for me – my life is either feast or famine (crazy busy or nothing going on).  Aside from our Snowmagedden here in Kansas City this week, and my husband being home from work because of it until Thursday, the phone’s been ringing off the wall this week.  Everyone seems to have an issue that needs my help.

But, enough about that…  I was determined to put a big dent in this quilt yesterday – it’s been on my quilting frame for almost 2 weeks now.  I am almost done.  I just need to do some work on the borders and then go back and do a once over check.  I will take another picture of it full length after I finish it and will post it later.

wilma 6 007

Oh… one more thing.  My friend, Trisch Price has a new book that just   came out through My Stars, the modern division of the Kansas City Star Quilts books.

AtN-front-cover

If you go to this site http://mystarsblog.com/2014/02/06/qa-and-book-giveaway-accentuate-the-negative/ you can see one of her quilts that I quilted for her.  It’s one of 18 quilts that are in her book.

String of Pearls

Also, they are having a give away.  If you leave a comment on their blog, you just might win her book!  So, please go check it out!

Wide backings for quilts are the way to go!

I have always been a proponent of using wide backings for quilts.  In fact, I have LOTS of 118″ wide fabric and some 108″ wide fabric in stock for my customers’ quilts.  Attempting to sew through multiple layers of seams can wreak havoc on my longarm quilting machine, so these wide backs make my job a lot easier and does less damage to my machine.  I just read this article on another blog that I thought was worth sharing.  She mentions how it really is cheaper (and it is, trust me!) to use wide backs than it is to buy regular width fabric and then piece it.  She even has measurements of how much fabric you will need.  I have to disagree with her on the amount, though, as I cannot get a quilt backing with only 1 inch.  I need a minimum of 4 inches extra on EACH side – see the tab above marked “Batting and Backing.”  Check out her blog post here.

Quilt Retreat

One of the guilds I belong to had a quilt retreat this past Saturday.  It was my very first quilting retreat EVER!  I thought to myself, “What on earth am I going to do for almost 12 hours at a quilting retreat?”  I mostly have longarm quilting to catch up on, so I had to really think about what to bring.   A friend suggested I bring something I hadn’t been able to work on in quite some time, some of my UFOs.  Well, I have a couple of those, so I took along plenty of stuff, sure I’d finish each and every one of the 4 items in my bag.  As it turns out, there is a LOT of socializing at these retreats and not as much work gets done as you might expect.  Actually, in my case, it was AVOIDANCE.  I started this quilt over a year ago and, after volunteering on the board of 2 separate quilt guilds and in between all the eye surgeries, this project got pushed aside, balled up, messed up, and out of the way on so many occasions that I had forgotten about it.  At this point, I was afraid that I wouldn’t be able to finish even what I did on Saturday and this project would be pushed to the back burner again and again.  And, it probably will, because I just have too many ideas floating around in my pea brain, demanding my attention.  It can get really frustrating, and I try to avoid quilting challenges, because that just sets my mind awhirl once again.  But, I am SOOO happy that I got this portion of the quilt done.  It will be the foundation for future dabblings to add to the quilt.  So, here is a sneak peek of what I worked on Saturday.


And, here are some pictures of folks who also attended the retreat.


If you are a quilter and haven’t yet attended a retreat yet, you should try it!  Even if you walk away with only one thing completed, you will feel like you’ve accomplished a lot!

She’s a handy girly whirly

My husband does not have a handy bone in his body, but I do.  The way my siblings and I were raised, we learned to live with what we had and to fix things.  My husband, on the other hand, is a super chef (at home, not as a career), and I am not.  I cook out of necessity, not because I enjoy it.  My husband has a knack for flavors and creating some of the most scrumptious dishes.  As for me, I sew and fix things.  What more could a husband ask for?  And, when I do fix things, my husband says, “She’s a handy girly whirly!”  He acts like he is amazed at the things I fix.  Of course, I am amazed at the things he can cook!  So, anyhow, this is my latest project.

As you can see, we are in the basement – I call it the dungeon.  That is where my longarm quilting machine resides.  I never seem to have enough counter space, so I built this countertop to sit on top of my 2 cubicle bookshelves.  It serves a double purpose as a work desk for me, as I have a drafters chair that rolls right into place in the middle.

Since the bookshelves are 36 inch square, I took a piece of plywood and had it cut at the hardware store to 3 ft x 6 ft.  I then added trim along the sides that would extend a bit along the bottom of the counter to hold it in place on top of the bookshelves. When I added that trim, I left about 1/8 of an inch lip on the top to insert my cutting mats to hold them in place as well.  I then added some measuring tape sticky note tape stuff along the edge that I bought from JoAnn Fabrics and Crafts.

It serves its purpose fairly well, but I still don’t feel like I have enough counter space.  I am planning on and saving up to finish the dungeon and have added power tools and hardware gift cards to my Christmas wish list.    Others might think I’m weird for wishing for power tools, but I don’t want to feel like I’m in a dungeon while I work and create.  And, I know my husband isn’t going to finish it, nor do we have the $$$ to hire it out.  So, it’ll be me, on my own.  I think I will line 2 of the walls with low bookshelves or cabinets.  Not only will that provide storage, but it will also provide that much needed counter space.  I can also hang shelves on the wall when it’s finished, and there will be a ledge that will run along the corner, so all of that will help.

My dream is to have a small kitchenette and bathroom down here.  The kitchenette would be a great place for me to dye fabrics.  And, of course, the bathroom would be handy for this handy girly whirly.  But… I don’t have a clue how to do that nor the muscles for doing plumbing.  Anyone know someone who would be willing to do plumbing for charity?  😉

As for my latest quilting project, I wanted to work on curved crosshatching.  For whatever reason (I guess it’s the freedom that comes with it), I love quilting charity quilts.  The fabric can be some of the most God-awful stuff and it may not be perfect, but it’s a cheap way for me to practice, practice, practice.  After I got in to quilting this a bit and realizing how much time it was taking up, not to mention the fact that this would probably go to a male child, I realized that curved crosshatching is not the thing to put on charity quilts.  Ever!  I didn’t want to rip it out, so I continued on my merry way.  This was a beautifully pieced quilt, and I could have done so much more and better with it.  But, lesson learned!  And, as I like to say, “It’s all (life) a learning process.”  We make mistakes and hopefully learn from them, and in the mean time, it’s not as bad as we think.  As for this one, if I hadn’t done custom quilting on it like this, I probably would have just done an edge-2-edge, which would have done nothing to add to the piecing on this quilt.  But, then, I’m not sure this did, either.