It’s spring time at Wilma’s

Wilma has 2 quilts that I’ve done for her in the past few months – you will soon see why it’s spring time at Wilma’s.  She’s a quick quilt-maker.  This lady has a talent for putting together colors like nobody I’ve seen before.  The first quilt I’d like to share is what I called “Wilma’s Mums.”

IMG_2266

Can you see the mums in the quilt blocks?

IMG_2267     IMG_2268

I tried to put leaves all over the black and green areas, but I hid mums in the quilt blocks behind the “fabric” mums.

IMG_2261  IMG_2263

And, along the borders, I changed it up a bit by quilting spider mums.  I’m not sure I got the exact essence of the flowers because I was only going with my imagination and the pictures in the fabric.  Spider mums are one of my favorite flowers, so I knew the petals needed to be short in the middle and long on the outer edge.  But, I wasn’t sure how to stitch that out so it would look more 3-D.

IMG_2264

Another cool thing about the backing on this quilt is that the fabric is very soft.  And, if you look very closely, you can see green owls in the fabric… watching over the garden.  🙂


This next quilt of Wilma’s is the latest one I’ve quilted.

IMG_2476

As you can see from this next picture, what looks like applique blocks are actually fabric panels.  This is great for those of us who love the look of applique but don’t have the time to do it ourselves.  I think it looks real enough.  Don’t you?

IMG_2487

Wilma wanted the faux applique outlined and feathers everywhere else.  So, feathers, we did!

IMG_2483    IMG_2484

I could have done any number of variations of feather styles on Wilma’s quilt, but I liked the way the feathers in the picture below cradled the bouquets of flowers.  I thought they complimented the pieced blocks nicely.

IMG_2485

And, here’s the back side.

IMG_2481

IMG_2480  IMG_2479

What do you think?  Does it have enough feathers?  I think the pictures of the back side makes it look bouffant or like divinity candy or something like it.  I don’t know how to describe it.  But, I love it!


Claudia’s BIG quilt aka the King and Queen Quilt

…But not known as Clifford, the Big Red Dog Quilt…  Actually it didn’t have a name so I called it Claudia’s King and Queen quilt for several reasons.  It’s for a King sized bed that her husband made; a king in the rest of our minds.  I mean, how many people can build and make a bed???  And, a king-sized bed at that!  So, her husband is the king and she is the queen who made the quilt for their bed.  Fitting, don’t you think?  😉

This first picture shows (well, sort of) how big the quilt really is.  It was hanging off my design wall.  You can’t see the full picture here.  Why, I don’t know.  But, the side borders go well beyond the sides of this picture.

IMG_2432 (2)

And, this one is a little closer, but not much.

IMG_2432 (2)

For Claudia’s quilt, I did pretty much the same kind of quilting I did with Judy’s family quilt.  It’s an inexpensive and fun design; a way to do some allover Edge-to-Edge quilting and still sprinkle some feathers in.

IMG_2423

I snuck a couple of butterflies in to her quilt. The long strips between the blocks on the front have butterflies in them, so I thought I’d add a “king” butterfly and a “queen” butterfly.  Can you guess which is which?  😉

IMG_2424 IMG_2425

And, here are some shots of the front.  Really, quilting doesn’t show up as much as we think it will, and, for that, I am glad.  I really am okay with that, because I think the quilting should be complimentary and not overpowering.

IMG_2428 IMG_2426

See the butterflies in the long strips between the blocks?

If you want to see this one in person, you’re going to have to become a friend of Claudia’s.  😉


Elaine’s quilt

I can’t think of what this quilt reminds me of, other than a vintage French type of quilt, probably because of the fabric.  Unfortunately, I could not get any good pictures of her quilt.  It’s a beautiful quilt, but the lighting wouldn’t cooperate or something.

IMG_2355

Elaine sent me this quilt with an idea of what she wanted quilted, which was custom quilting, but we decided on another design.  Elaine likes simple lines and designs, so we went with piano keys in the border, a design with marquise shapes in the triangle blocks around the border and an allover design in the blocks.

IMG_2350 IMG_2354

You can barely see the quilting in any of these pictures.  The thread was a ivory/bone color to match the background fabric of the triangles, and it doesn’t seem to show up (to me) on the other fabrics.  In the following picture, I quilted an allover design that looks similar to a Fleur-de-lis.

IMG_2352

Can you see it at all?  We probably could have done an allover, edge-to-edge design on this quilt and saved Elaine some money.  I should have suggested it, but I didn’t think of it until just now, while looking at these pictures.  What do you think?

*note: I just finished up another quilt, but I need to check with the customer to see if it is okay to post it first.  She made it as a raffle quilt for a family reunion.  And, tomorrow I start on yet another quilt.  Hopefully I will get to those other 2 blog posts that I started awhile back.  We’ll see what this week brings.  Happy Spring!


Vintage Red

Claudia hasn’t told me the name of her quilt yet, and I’m not sure if she has even named it.  But, I’m calling it Vintage Red.  You will see why when you see the pictures.  I LOVE this shade of red, and I love the white with red pin dot fabric that goes so well with it.  I’ll post a full shot first, so you can see why it looks vintage to me.

IMG_2231

And, here’s a shot of that white with red pin-dot fabric that looks white in the above picture: it is what is in the plain blocks.

IMG_2232 IMG_2233

One of the coolest things that Claudia does is this.  She adds a line of stitching at the end of her seams along the outside edge of her quilt top.  I’ve never seen that done before.  Nor have I ever heard of it, but, let me tell you, it’s genius!  I love the fact that she does this.  it keeps the ends from opening up, especially since those seams get stretched on the long-arm machine’s frame.  Have you ever heard of this being done before?  it’s pretty cool, imho.

IMG_2197

Claudia chose feathers and swirls for her quilt, so she got some swirls and she got a ton of feathers on this quilt.  The swirls were done in the sashing and interspersed into the feathers as well, but the bulk of the quilt has feathers galore, for what I call a “bouffant” look.  🙂  There are triangular feathers in each block and twirly swirly feathers in the border.

IMG_2226 IMG_2223 IMG_2221 IMG_2216 IMG_2220

I hope she likes it!  She hasn’t seen it in person yet.

Does it look “bouffant” to you, too?  Or can you think of another “feathery” word to describe it?

Waving at you!

Hello charity quilt that I’ve been avoiding for months now!  In fact, it’s been about 4 months since I took you home to quilt.  Yes, I’ve been busy with customer quilts, the raffle quilt, my birthday, my anniversary, Christmas, etc. but I finally did get to you.  I’ve been avoiding you because I knew there would be issues with quilting you, and I wasn’t sure I could handle it, to be honest.  Plus, with all the sampler blocks, I wasn’t sure just how I wanted to quilt you.  I know, I know.  Charity quilts are a GREAT way to practice and learn new skills.  From the look of the next 2 pictures, I would say that some one was learning how to piece blocks.  But, maybe not.  Maybe the pen lines are there because that’s just how this person pieces together the blocks with more accuracy.  Look closely and you will see lines marked on the blocks.

Christmas 2012 012

Christmas 2012 011

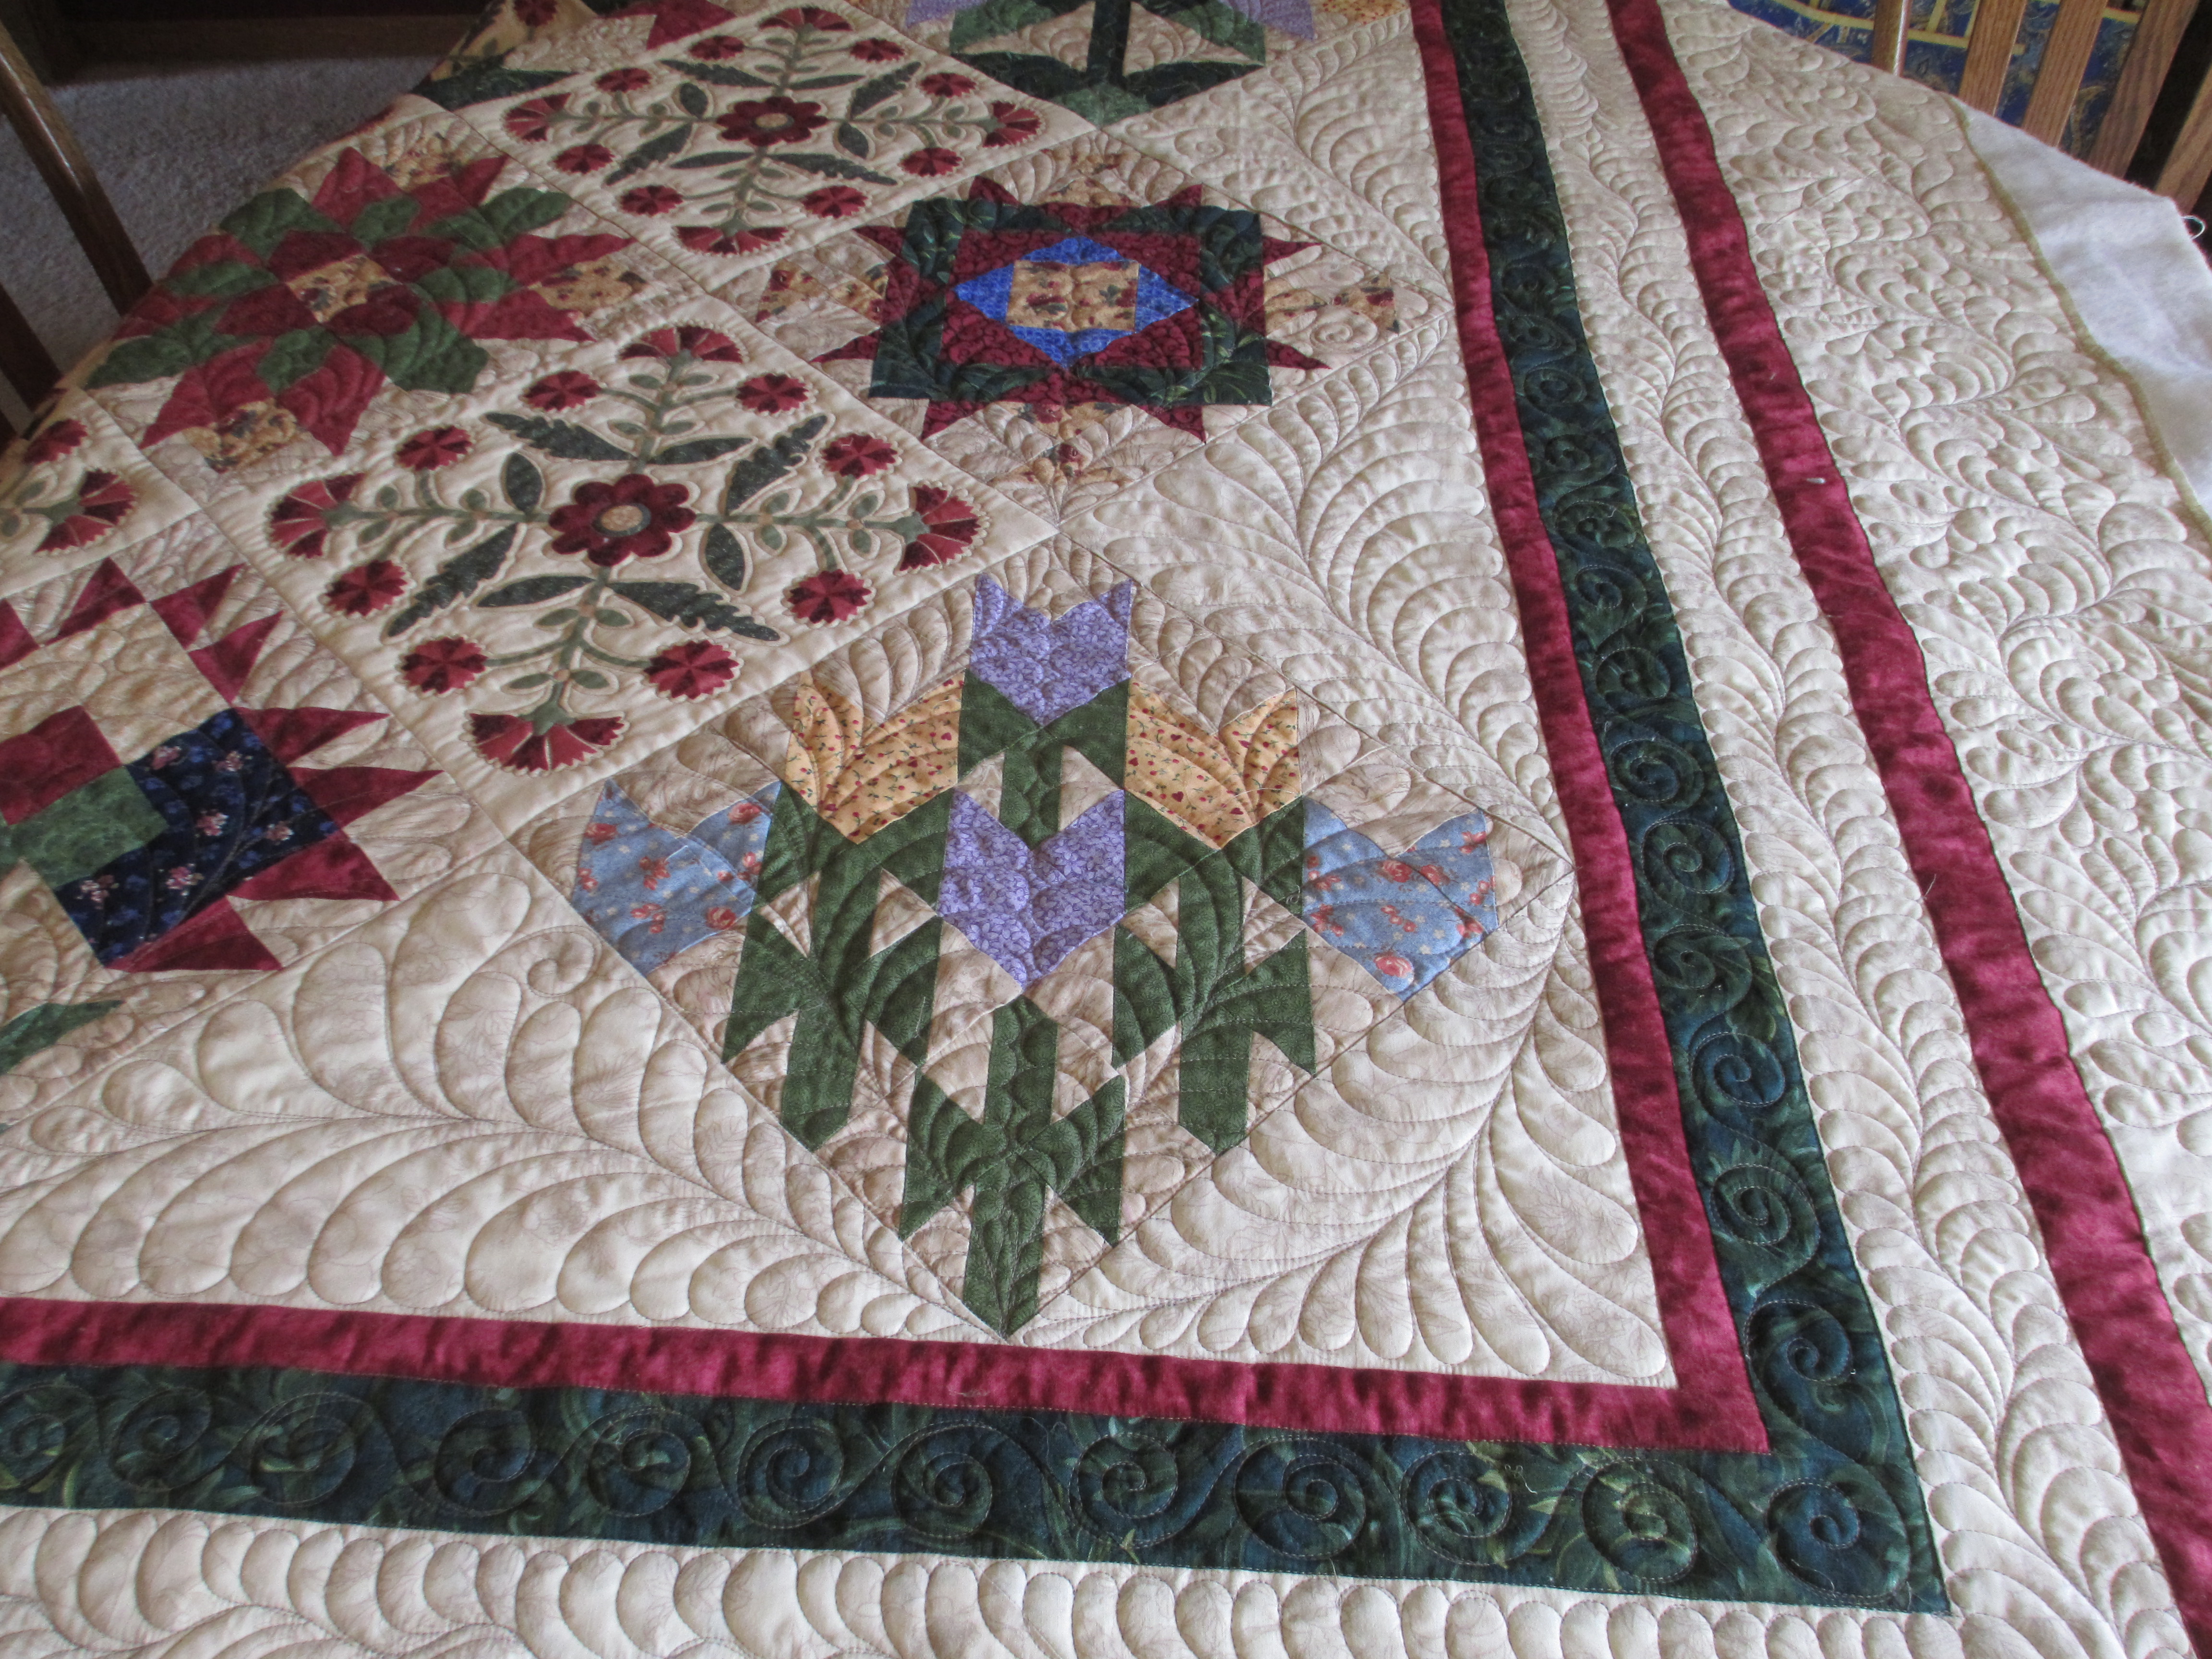
Charity quilts are typically made from fabric that is donated, so we don’t see too much quality fabric in charity quilts.  That’s sad, too, because the charity quilts I typically quilt go to a shelter for abused women.  They need something sturdy, yet soft, to hug them through their struggles.  Most of the fabric in this quilt is fairly thin.  The backing looks and feels like an old worn out bed sheet and is pieced in several places, but the seams are strong because they are serged.  Problem is, this creates a bigger issue for the Longarm quilter.  Not only does it mess with the hopping foot as it moves around to stitch, but it creates issues with how it lays on the quilting frame.  You can see that from this next picture.  See how the far end border kind of waves?  That block in the upper left of the picture is called an “A” or “B” cup block (bra cup size).  It will affect everything from the border to the rest of the quilt if it is not taken care of right away.  That is the reason this row of blocks got quilted first.

Christmas 2012 006

Another angle so you can see it better.  In this case, it’s not just the block (now shown in the upper right of the picture), but it is also the border.  If you measure the border to fit the measurements of a wonky block, the borders are going to be wonky as well.  Best practices for fixing this is to follow my tutorial on adding a border at https://cowtownquilts.wordpress.com/adding-borders-to-a-quilt-top-2/

Christmas 2012 004

As you can see, I quilted out the wavy border.

Christmas 2012 007

But then I got done with that row and rolled the quilt forward and found even more waves.

Christmas 2012 009

Yep, I quilted that out, too.

Christmas 2012 010

I thought I had it all under control.  The wavy borders were now straight.  Then, I got to the last row of blocks and…

charity quilt 006

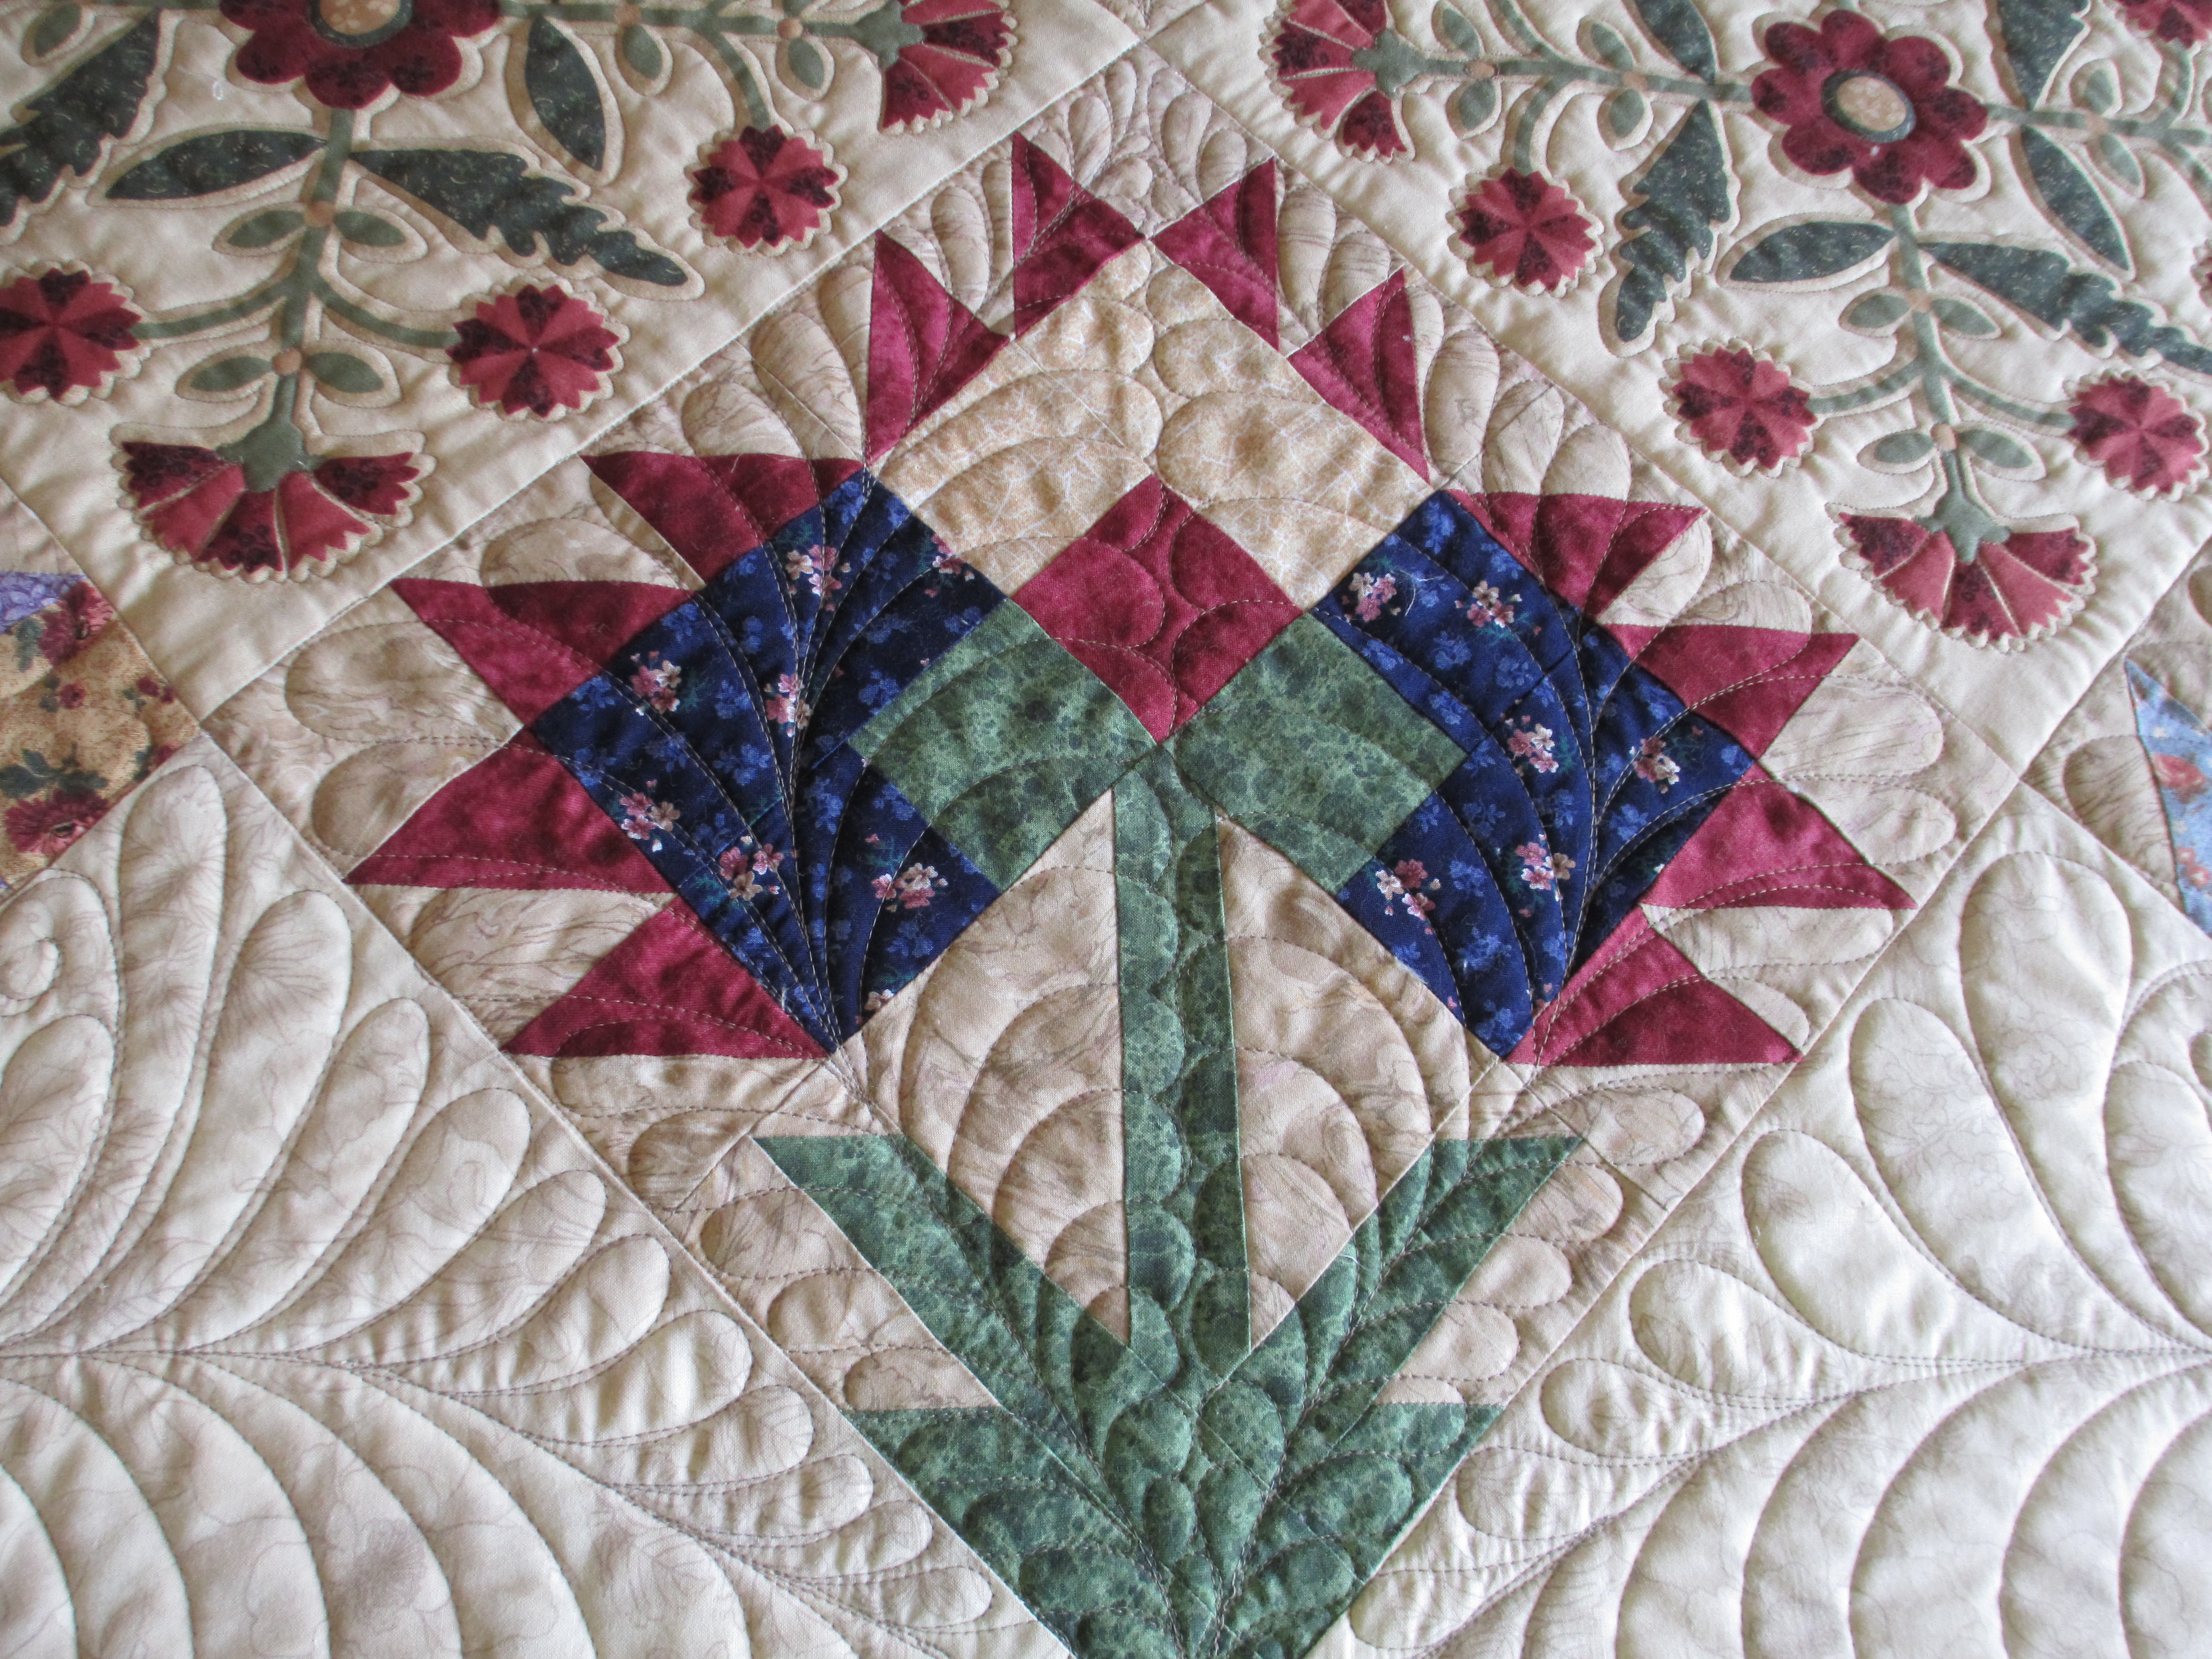
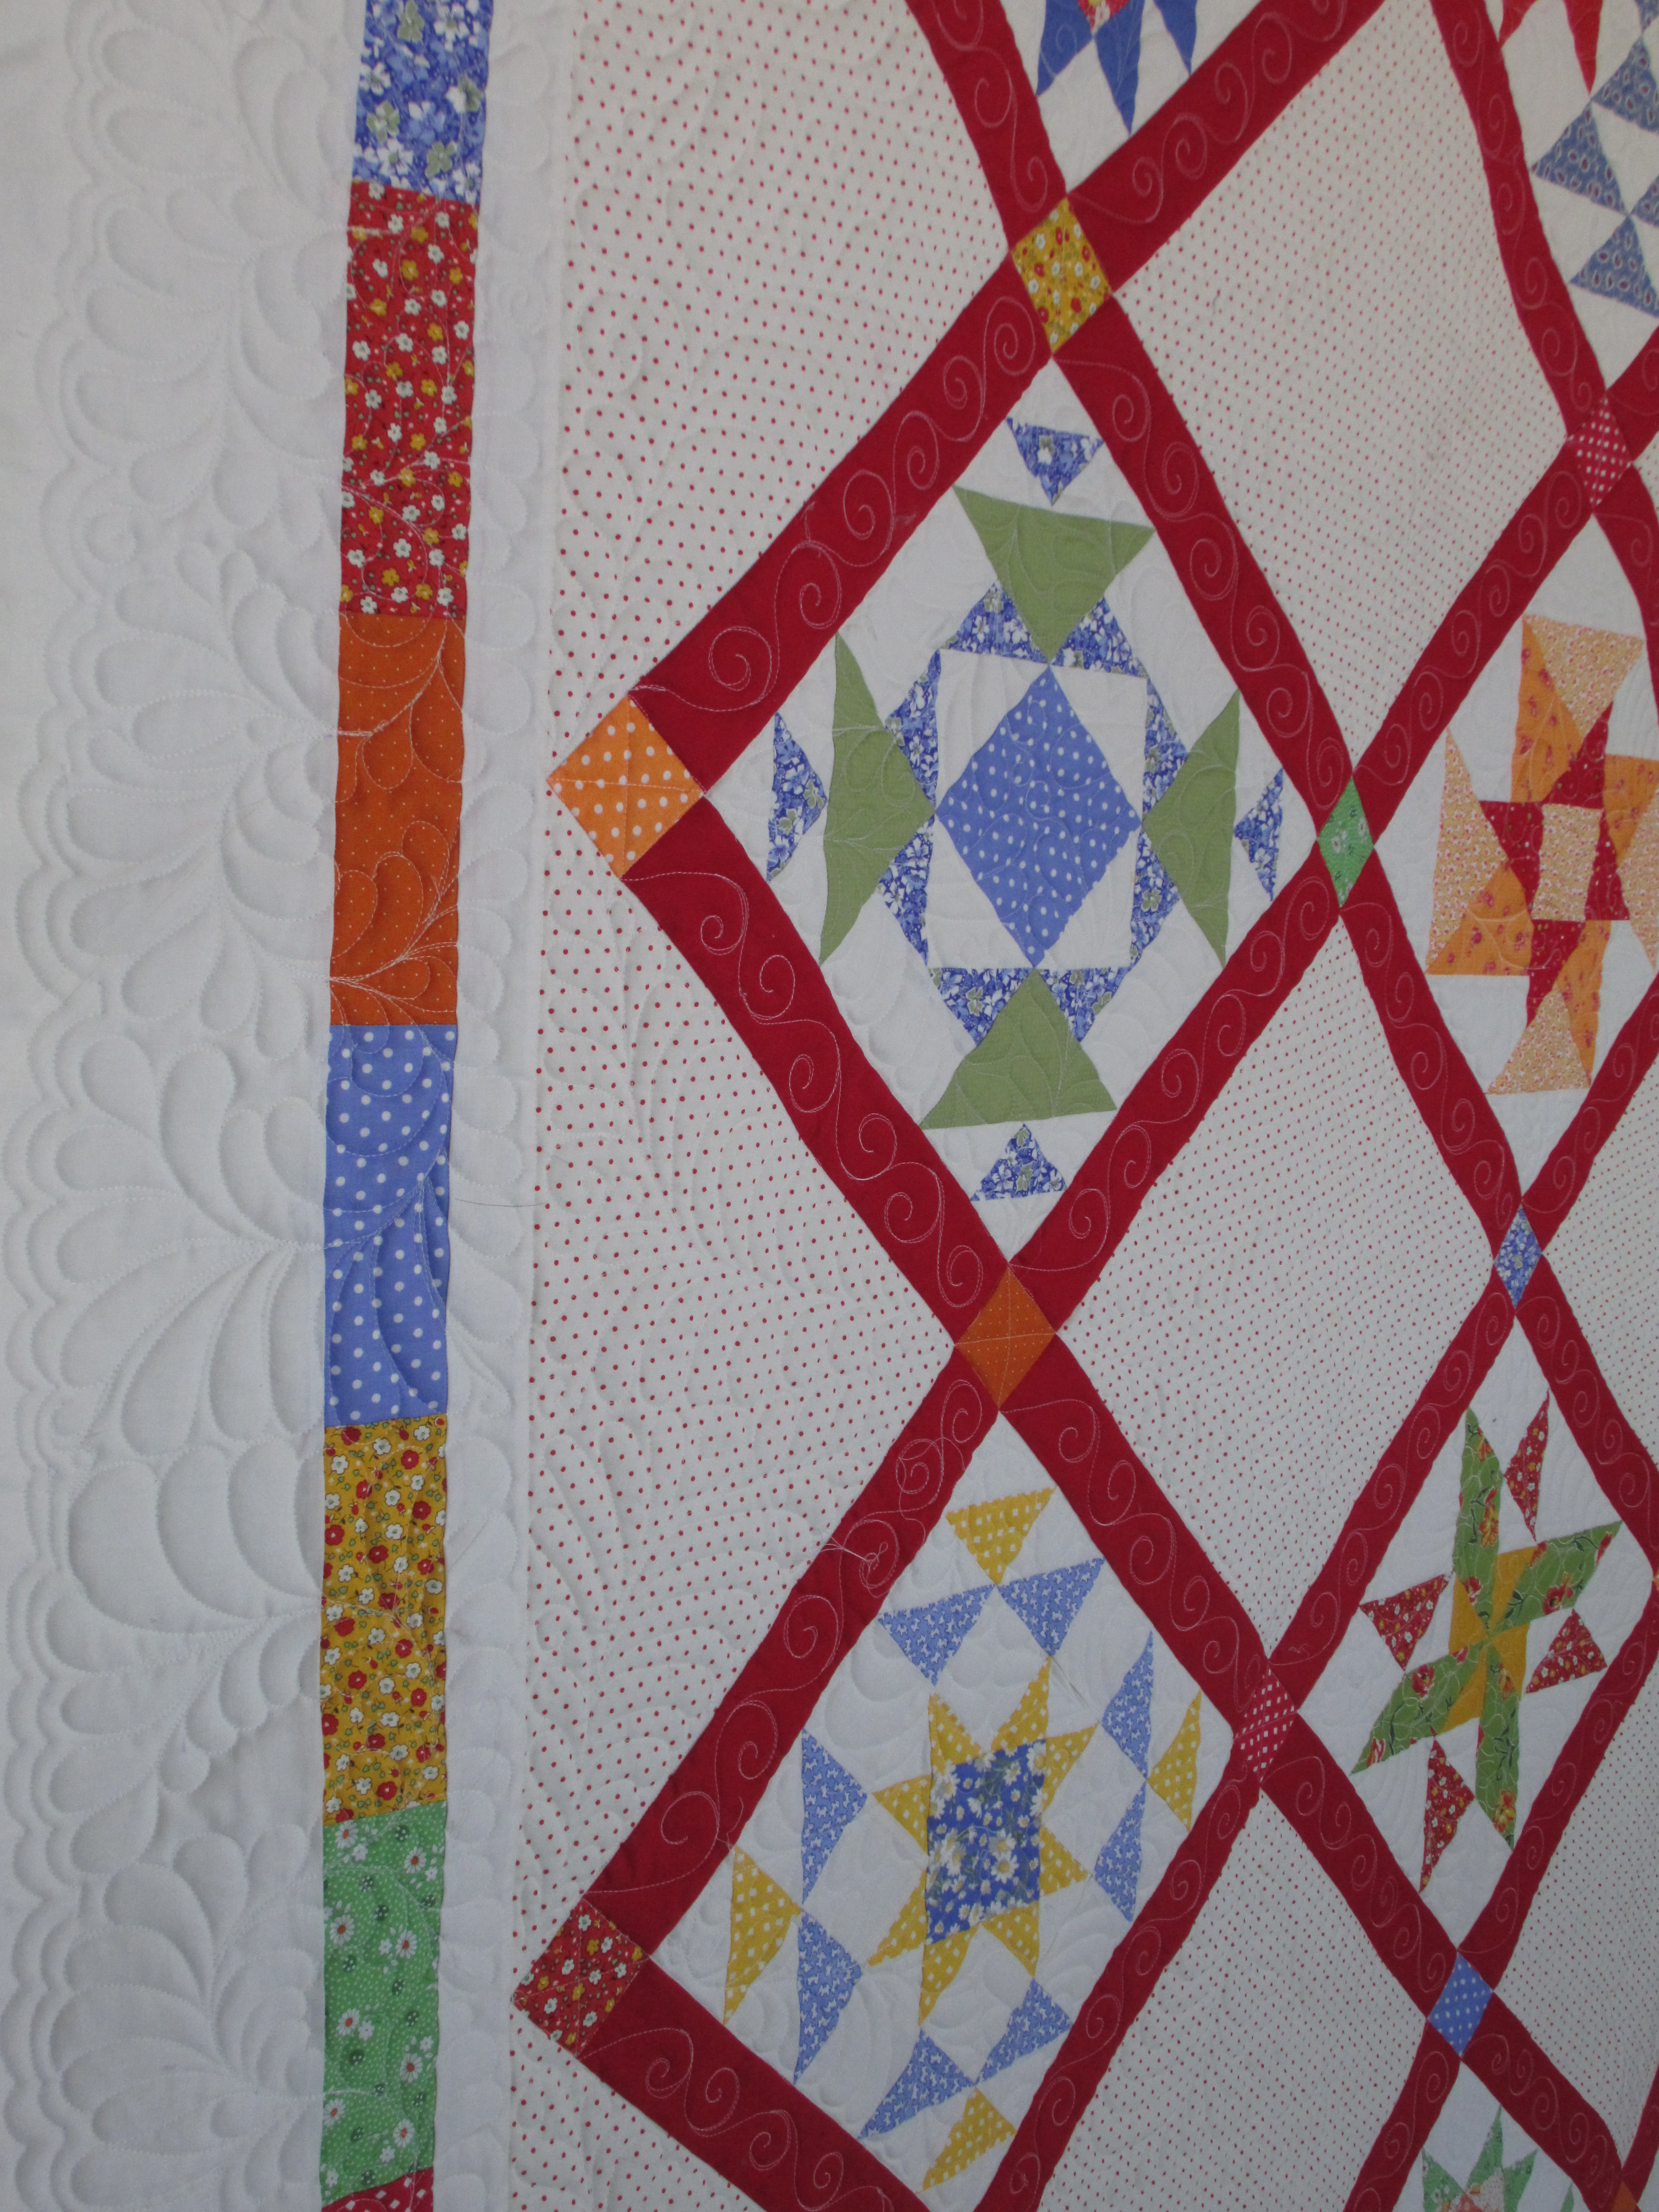
If you look closely at the above picture, you will see that the grain line of  blue and yellow fabric are at an angle, so the stretchy sides are attached to the sashing and borders.  This is why it’s important to try to keep the straight of grain of the fabric next to the sashing and/or border.  Of course, the problem floated down to the corner of the quilt.  So, we’re not done with that wavy border, like we had thought.

charity quilt 011

A tip that I learned from Kim Brunner (www.kimmyquilt.com) was to stitch a straight line across the batting and backing at the top and the bottom of your quilt.  Then, push the edge of the quilt top and bottom next to that line and baste a running stitch across to anchor it down straight.  I do this at the top when I first start and at the bottom after I’ve quilted to the point where I can lift the fabric at the bottom of the quilt   You can see the running stitch on the batting of this next picture.  I’ll pin the top to match that line and will then stitch across it.

charity quilt 013

But, to make sure it is square at the corners (I don’t want the bottom to be wider than the top), I use a couple of strategies to square it up before I stitch the top down.  In the picture below, you can see a right angle ruler at the corner of the quilt.  I’ve got that stitching line to line up the ruler along the bottom.  Since there’s not too much on the side of this one, I eyeball it to make sure the sides are straight.

charity quilt 018

You can see from the above picture that I’ve got another wavy border along the bottom.  If you try to just stitch through it, you may end up with puckers so I pin as many pins as I need to make it lay flat.

charity quilt 019

And, I will make the top fabric a little more taut by “bending” it along the way.

charity quilt 020

If that’s not enough to “stretch” the fabric flat as I sew, I may put my fingers on both side of the base of my machine and will remove the pins as I go.

charity quilt 021\

Voila!  The edge is no longer wavy.

charity quilt 022

But, I’ve still got that “B cup” blue and yellow block…

charity quilt 026

Okay.  I’ll make sure my inner border is as straight as I can get it by Stitching in the Ditch (SID) along both sides.  I have several tools to help me stitch in the ditch, but my personal favorite is Janet Lee’s Other Favorite Ruler.  Little does she know, it’s my favorite, too!  It’s wide enough for my big hands to fit around (3″) and long enough (12″) that I can aim it along a seam to straighten it out and stitch continuously longer than I can with other tools.

charity quilt 027

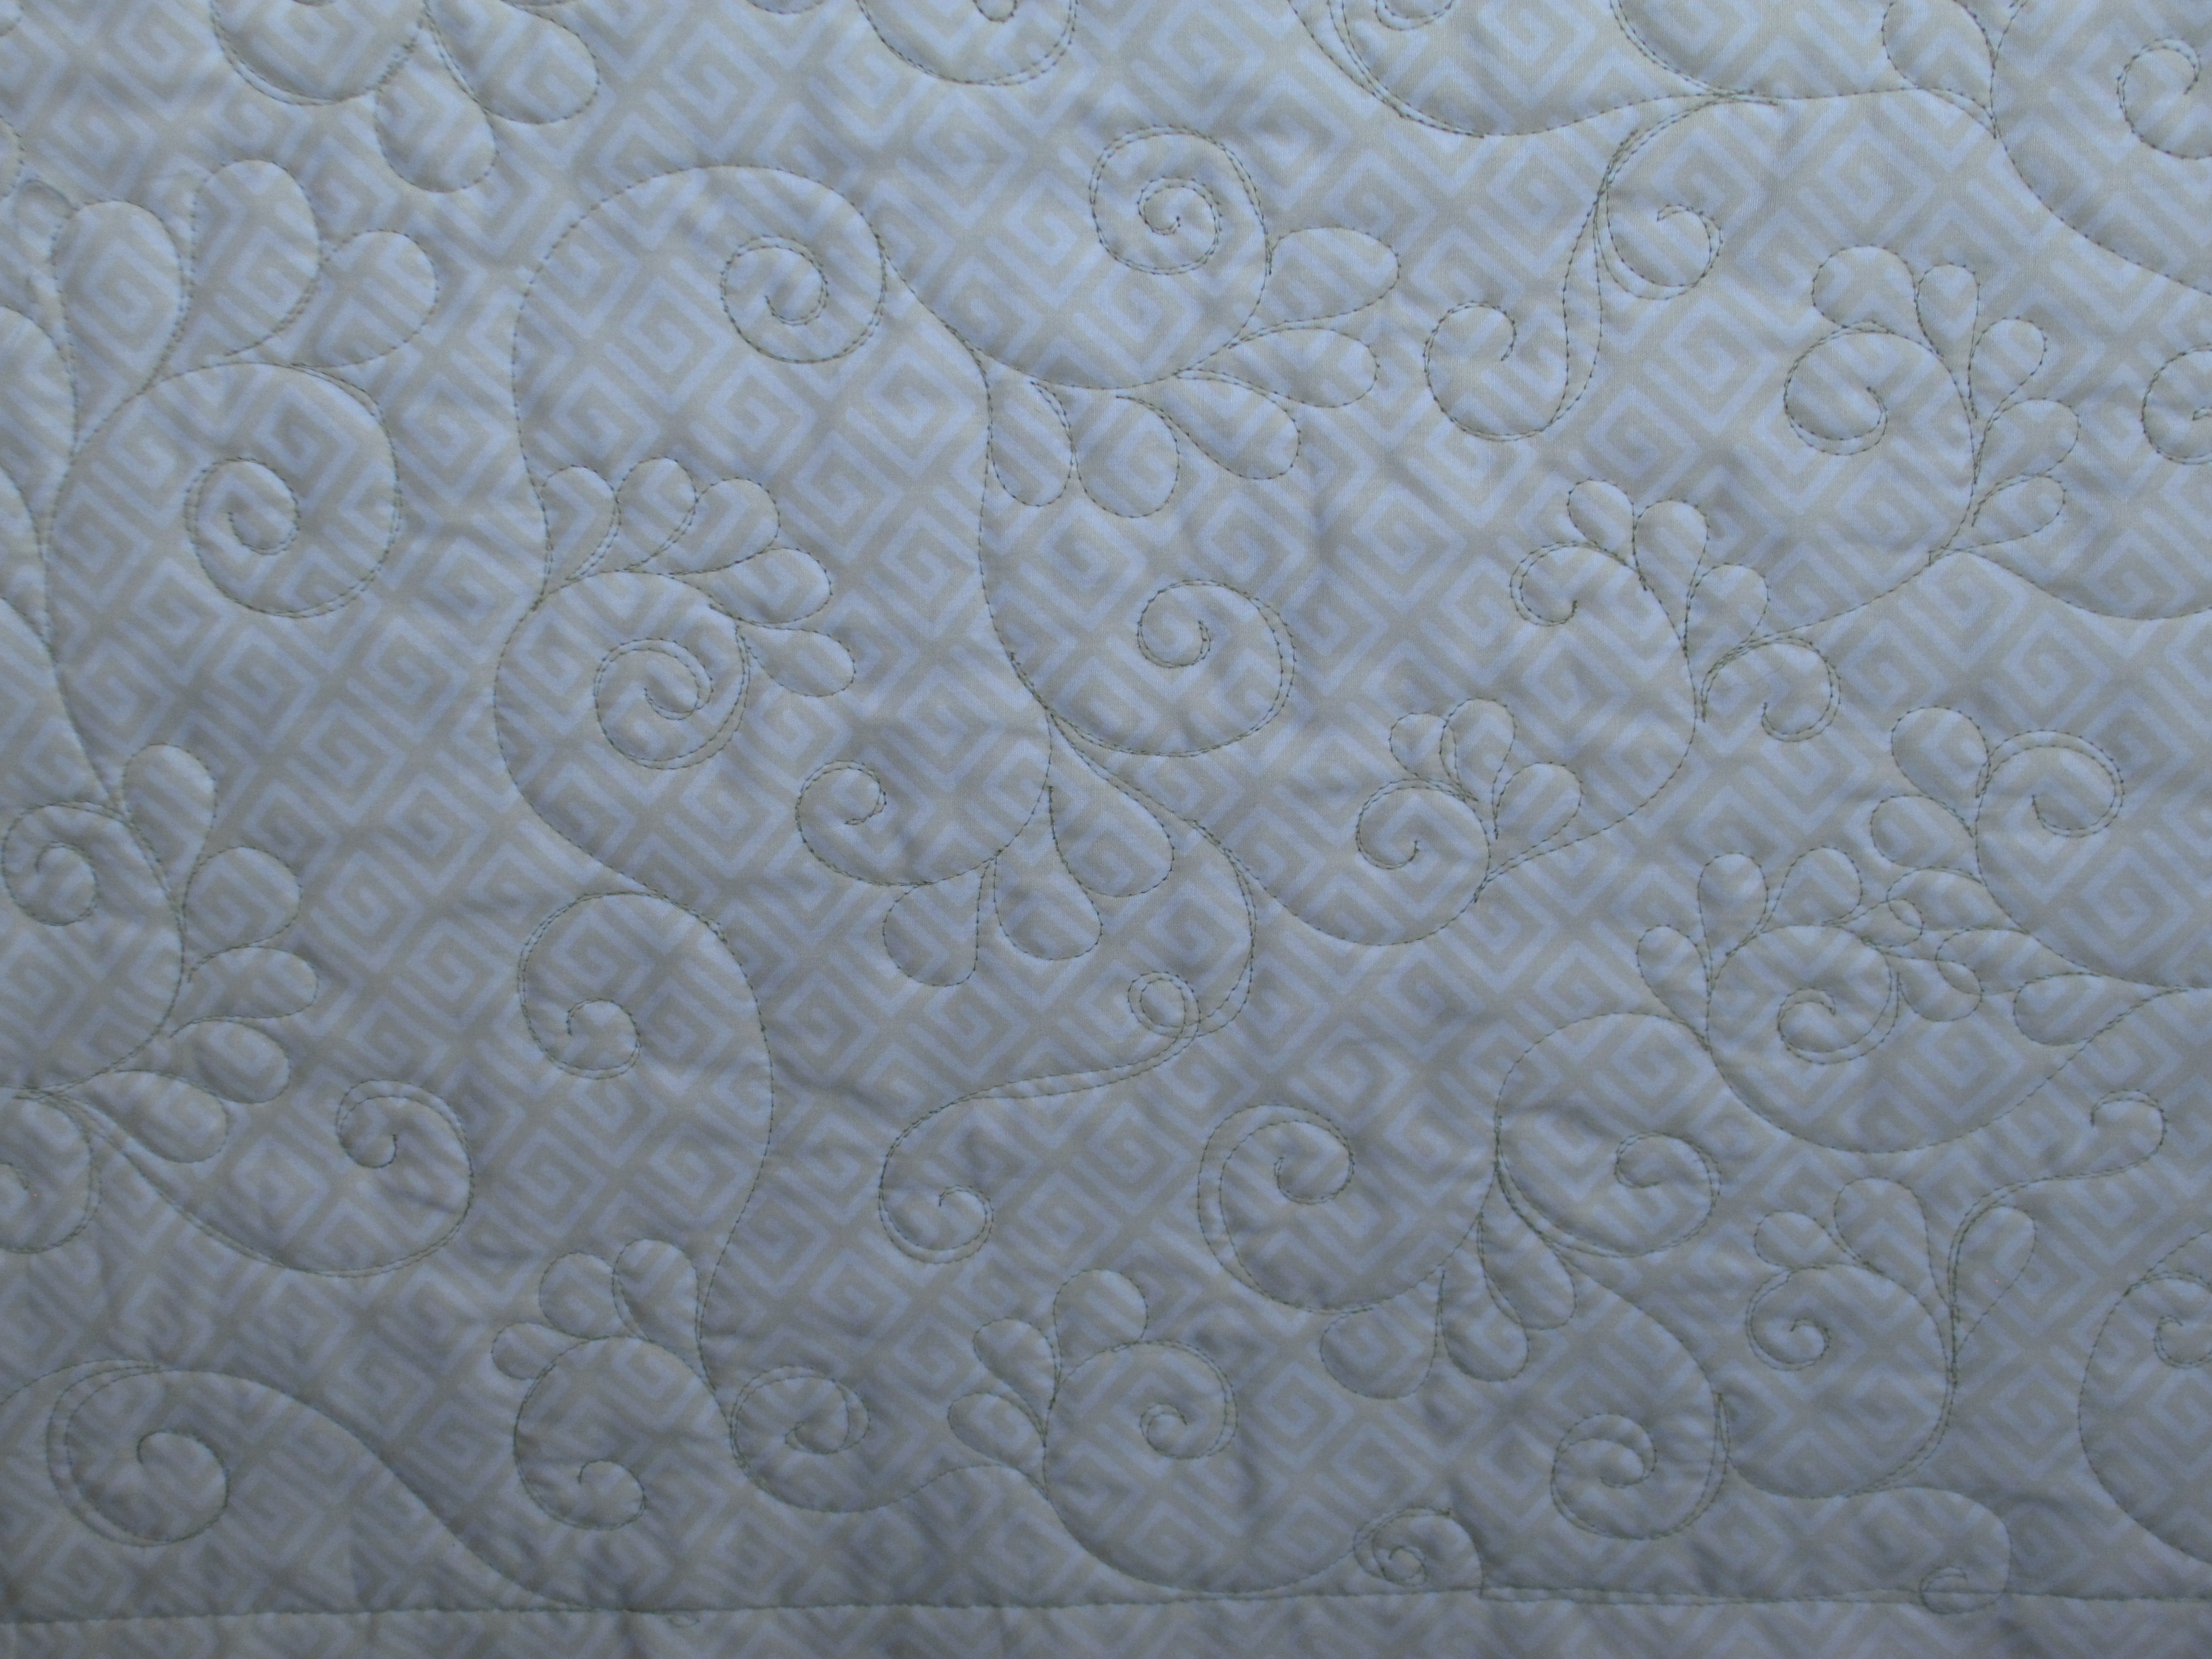
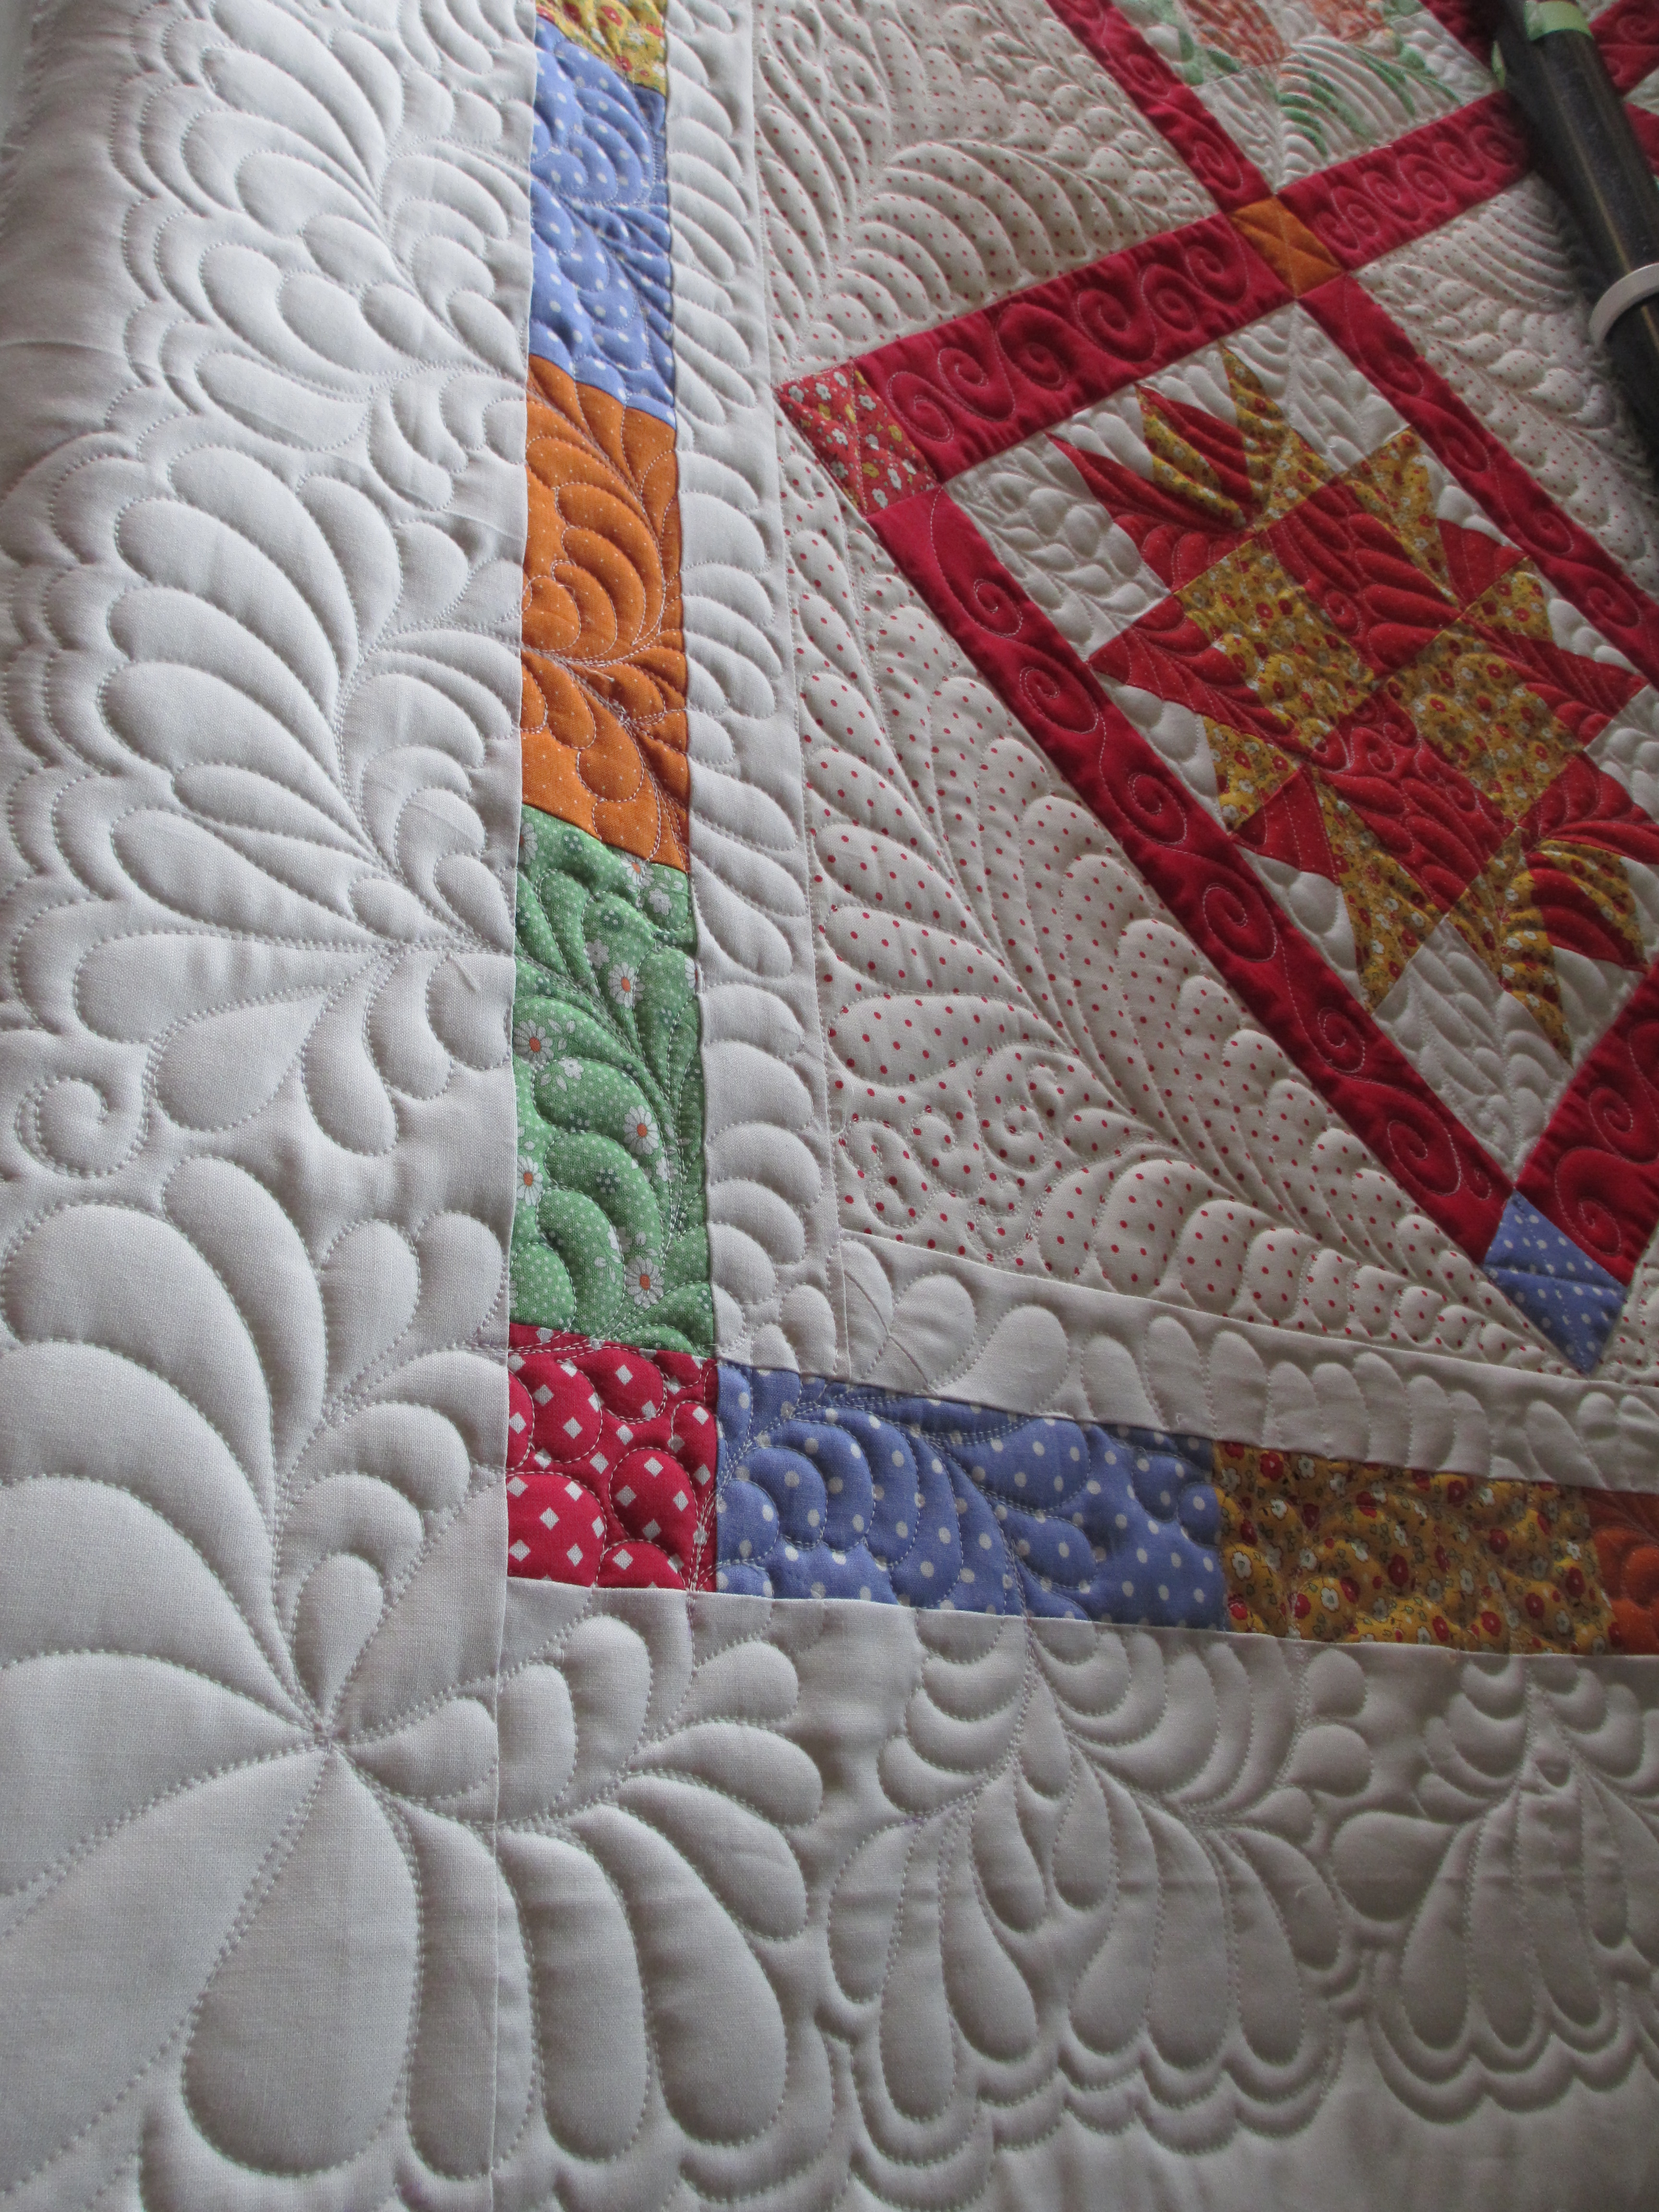
And, here is the rose colored border.  I love how Brandy Lee (owner of The Quilting Place)  does those swirly things in her borders and sashings, so I thought I would try it.  I’ve got a lot of practice before I ace these!  Go check out her work on Facebook at www.facebook.com/pages/The-Quilting-PlaceWhere-Quilts-Happen/108563672527385).  Or go to her website at www.thequiltingplace.com.  Like I said, I’ve got a long way to go before I’m as good as she is.

charity quilt 037

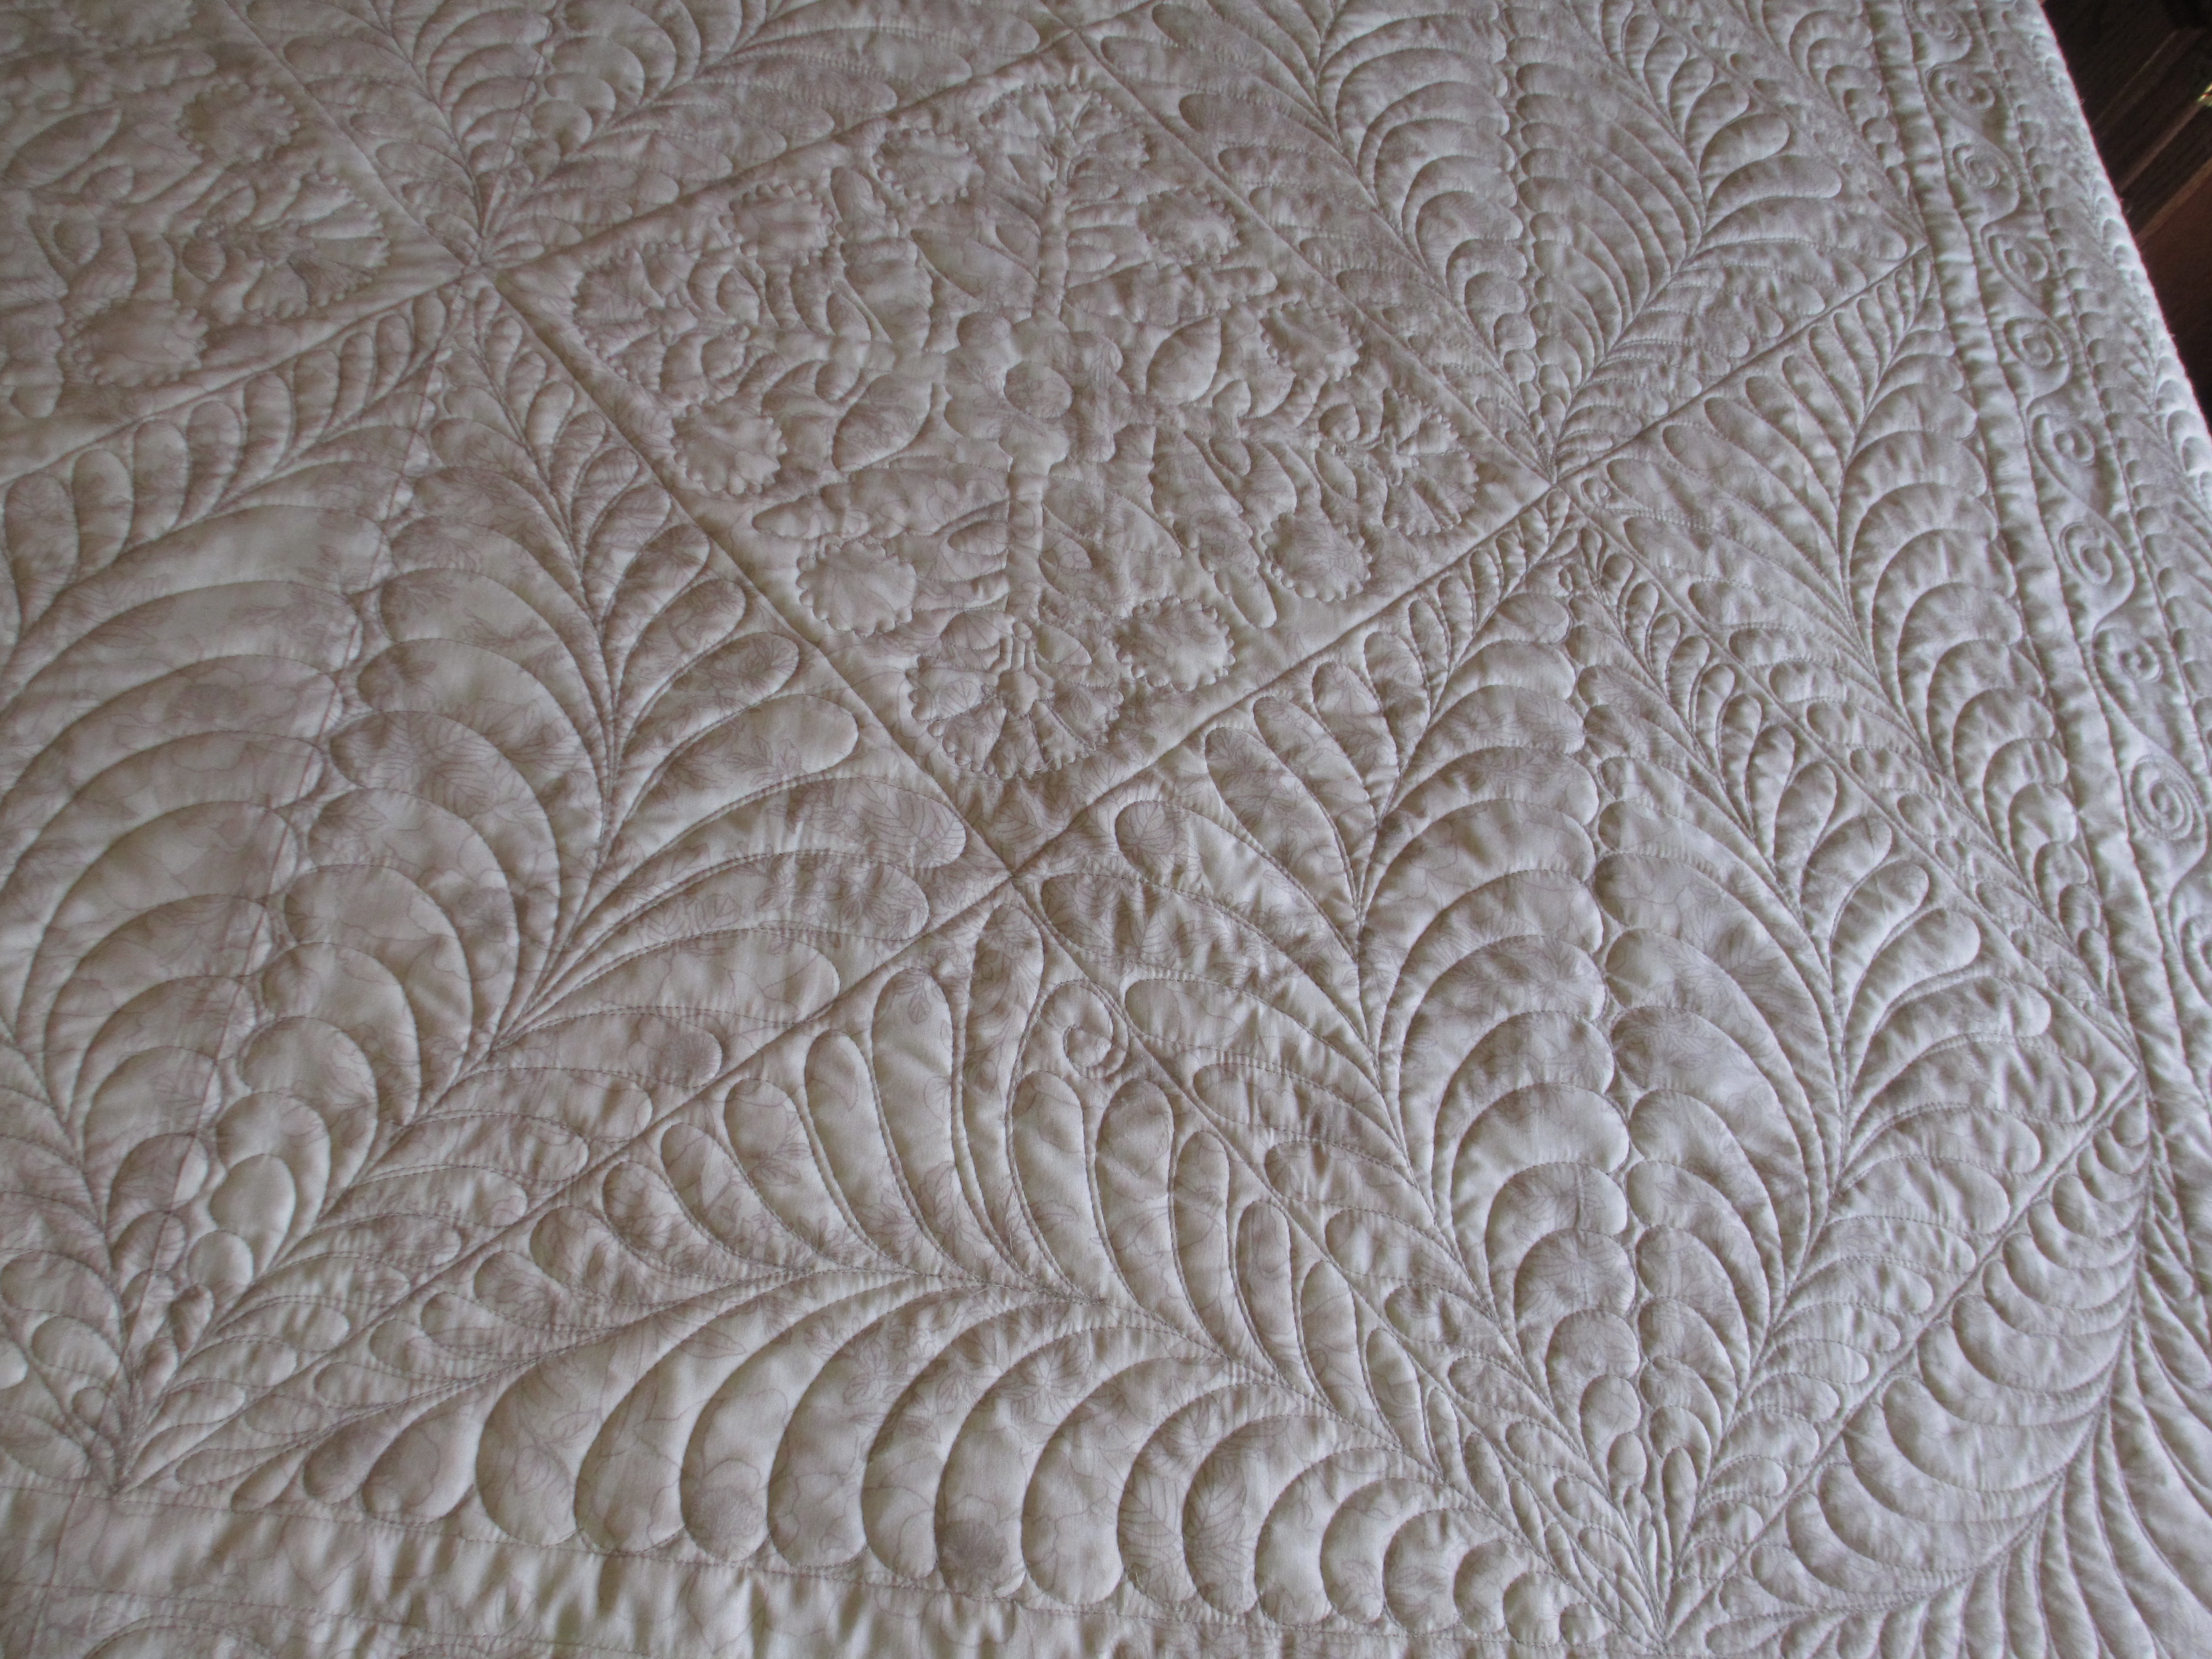
I put feathers in the yellow, outer border.   If you look at this next picture, here is that blue and yellow block.  It’s not completely flat, but it’s pretty dog gone close.  I think as I quilt more and learn more, I will get better.

charity quilt 033

And, the finished product…

charity quilt 031

It doesn’t look so bad now after all, does it?  I really did get lots of practice on this quilt and learned a lot.  Hopefully someone will pick this quilt to snuggle up into and will end up loving it.  And the quilt will have served its purpose of comforting and hugging the person wrapped in the safety of this warm quilt.

Hopefully this post has inspired you to make and quilt charity quilts, too.