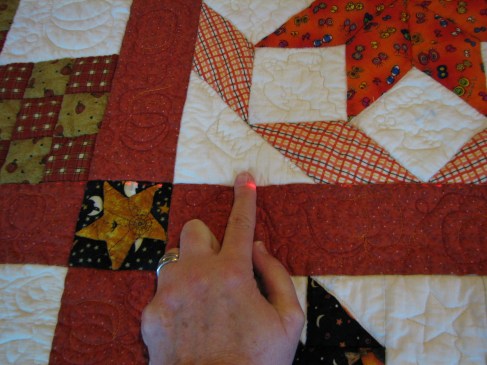
The quilting is done and all I need to do now is add the binding before sending this quilt back to its owner. But, before I do the binding, I want to “block” it to make sure it will lay flat and square. I’ve heard that once you block a quilt, it will always be square, but I don’t know about that. Have any of you heard that?
So, here goes the blocking and how I do it. There are many strategies for blocking, but I’ve found that using a laser square is the easiest for me. First I lay out the quilt onto a surface that I can pin into – that would be my design wall placed on the floor. I forgot to tell you that I get the quilt wet first and run it through the spin cycle in the washing machine and then air fluff it so that it’s not soaking wet; just damp enough to nudge the fibers around.
I start at opposite corners and try to make sure those corners are fairly square and then do the other 2 opposite corners. This is just to get them in the ball park area, because you are going to be doing some nudging and things will shift. I then work from the middle out – I start with the middle blocks and make sure they are as square as possible, putting a few pins in there to hold the blocks in place while I work outward.
You can barely see the orange beam of light along the blocks’ edges, but you can see where the laser square is on the right side of the picture. Look for a horizontal beam and a vertical beam.
Sometimes as I am working along a seam line, the beam gets blocked by a pin or the quilt sticking up a bit in an area. In that case I run my finger along the beam to help me nudge the fabric into line.
When I’ve got the blocks where I want them, I then start with the inner borders and make sure they are square, sticking more pins along the lines to hold them in place.
And then I move to the inside edge of the outer border. Yes, more pins!
And then, finally, the outside perimeter of the quilt… I stick the most pins along these edges and will many times I will go back and remove some of the pins that are inside, especially those around the blocks and sashing. The quilt is where I want it at this point, and it will just be laying there.
When I’ve got it all pinned in place, I finger press down the edges to get it completely flat and then let it dry for a couple of days. This is a good reason to have a place that will be undisturbed. Oh, and I have a fan or 2 blowing air on it to help it dry. Then, it will be ready for binding.
So, if you have a laser square tucked away somewhere in your garage or in your husband’s tools, borrow it some time to see if this strategy is easier for you, too!


