Quilters Newsletter offers free videos, with a new one each week. Check out this video on longarm quilting challenges. It will be current until Friday, Sept. 14th.
http://www.quiltersnewsletter.com/videos/index.html
So, if you bring a quilt to a longarmer, please do not baste the layers together or finish the edges. This video shows us some strategies for dealing with this when customers bring their quilts to us this way.
Category: Quilting Strategies
Adding Flanges
I really like adding a chiseled edge to my quilts. I’ve been adding piping to several of my quilts and I do like it. However, I’ve been wanting to just put a bit of color and separation in there without the bulk of piping. I am so glad that my friend, Tina, posted a tutorial about adding flanges. As you look at her pictures, you can see how just that little bit of “separation” makes her blocks “pop.” You can find her tutorial here: http://backporchquiltworks.blogspot.com/2012/08/adding-flange.html. I am now going to have to try this! I love the way it looks so much better than with piping!
Oops! Please add more batting and backing fabric.
One of the problems that longarm quilters face is when a customer brings their own batting and backing. Customers may not understand why they need to provide so much more fabric for the backing and also for the batting – I will show you why. Personally I request a minimum of 6 inches more in length and width. In other words, if the quilt is 72 inches x 80 inches, I will request that they provide both batting and backing that is at least 78 inches x 86 inches. I’d rather have 4 or more inches more on each side, which would be at least another 8 inches from the quilt top measurements. In this case, the batting and backing would need to be at least 80 inches x 86 inches. I provide batting and backing for the customer, and it’s always better for me to do this so that I don’t have to worry about issues that may come up.
The reason we want you, the customer, to provide us with extra batting and backing is this.

You can’t really see all the roller bars, but that black pole that you see with my cheater clips is one of the rollers (those white clips on the black pole help me make sure I am rolling the quilt stop straight – they are lined up to the border seams). I have 3 roller bars on my machine’s table. You would think that they would roll all 3 layers (top, batting, and backing) at the same rate… but, they don’t. Those rollers seem to suck up the backing and the batting much more than they do the top.
Let me show you an example, using a magazine.


As you look at this rolled up magazine, you will see that the front of the magazine (the top layer) does not meet the back of the magazine (bottom layer on a quilting machine, which would be the backing). In fact, this letter size magazine has the top rolled up part extending about an inch beyond the bottom. In between the 2 are the pages (batting) of the magazine. If you can get that much difference on that small a piece, imagine what happens when you have a quilt top that is 72 inches x 80 inches. You need a lot more batting and backing than you do for the quilt top.
So, here is my dilemma. I picked up a charity quilt to work on that had the batting and backing included. I measured before I put it all on the machine and feared the worst because I didn’t think there was enough extra batting and backing. When you lay them all out on the table, they look fine, like you have plenty of batting and backing. I told myself I was just being paranoid and that, surely, I could do this. I’d just be careful.
Well, this is what happened.

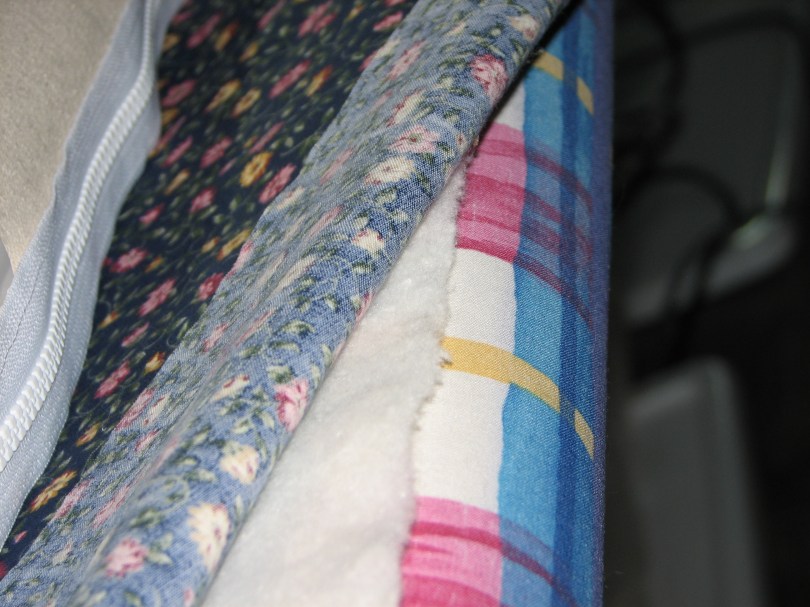
As you can see, the batting came up too short. I folded the flowery, quilt top fabric back, so you can see that there is not enough batting for this quilt. I am VERY lucky on this one, because I thought the backing would be too short as well. I barely have enough backing – it’s the rose and blue plaid. If you come up short on the backing, you basically have to take the quilt off and sew extra fabric onto the back and then re-attach it to the table/frame, etc. I can’t tell you how relieved I am not to have to do that!!!
I can fix the issue of batting much easier. There are 2 ways I can deal with this, and I’m curious as to which way YOU would fix it. That navy blue fabric with the pink flowers is the border of the quilt.

I stitched in the ditch all around the border and used an allover design for the body of the quilt. So, one of the things I could do to add batting would be simply to remove the batting already in the border area beyond the stitch in the ditch. I’d cut a piece of batting to butt up against the stitch in the ditch and then enclose it by stitching along the edge and quilting it with the border quilting design (big flowery design). OR… I could just cut about 2 more inches of batting the length of the batting already there and just continue on my merry way.
Either way, my concern is whether or not there will be a gap where I’ve added batting. In other words, will there be a gap next to the stitch in the ditch if I choose that option? Or, will there be a “no batting gap” in the middle of that border where the battings would meet? Certainly I can whip stitch the 2 battings together where they butt up against each other. But, I’d really only be able to do that if they meet in the middle of the border. Butting a solid piece up against the stitch in the ditch could be less noticeable and less work, but will the batting migrate away from that seam?
What would YOU do?
Charity Quilts
One of the things I am doing when I don’t have customer quilts to work on is quilting charity quilts. This particular quilt was perfect for using a pantograph because it had no borders and no regimented block placement. I don’t normally like using pantos (pantographs), because it’s not as easy for me to follow a line from a paper and then hope it turns out okay on the quilt itself as it is for me to be able to watch where my next quilting stitch will go (whether it is free hand or drawn on there with a disappearing marker). At least if I’m watching where I will be going next, I can quickly fix a mistake. Pantos aren’t as easy as they are cracked up to be, BUT they are great practice for mastering your machine and the pantograph itself. You will be building muscle memory for when you want to do those swirls and curls and feathers, etc. either on your own or with another pantograph.

I enjoyed this particular design once I got started.

These 2 quilts were very similar, and I was given enough backing for both of them to load as one piece (well, it was pieced but was loaded as one piece), so I put the backing on the frame and then loaded my first quilt, quilted it, and then loaded the 2nd quilt and quilted it with the 1st one already done and rolled up on the frame ahead of it.

This one was harder for me to follow. I don’t know if it was because the patterns are so “definite” so a mess-up would be more noticeable or what… Perhaps it is because there is a lot of open space? Or???

The other thing that was happening while I was quilting this particular pattern was my machine was getting hung up on something. I never did find out what it was getting caught on. I would stop each time and check all over, around, and under but with no luck of finding what it was… a loose thread, bumpy seam, cord, etc. Thank goodness I wasn’t getting paid to do this!
Quilt Marking Idea by Rosemary
I ike this idea in Rosemary’s blog and thought it was worth a share…
http://quiltsbyrosemary.blogspot.com/2011/06/marking-quilting-pattern-using-pressn.html
Blocking… the final frontier
The quilting is done and all I need to do now is add the binding before sending this quilt back to its owner. But, before I do the binding, I want to “block” it to make sure it will lay flat and square. I’ve heard that once you block a quilt, it will always be square, but I don’t know about that. Have any of you heard that?
So, here goes the blocking and how I do it. There are many strategies for blocking, but I’ve found that using a laser square is the easiest for me. First I lay out the quilt onto a surface that I can pin into – that would be my design wall placed on the floor. I forgot to tell you that I get the quilt wet first and run it through the spin cycle in the washing machine and then air fluff it so that it’s not soaking wet; just damp enough to nudge the fibers around.
I start at opposite corners and try to make sure those corners are fairly square and then do the other 2 opposite corners. This is just to get them in the ball park area, because you are going to be doing some nudging and things will shift. I then work from the middle out – I start with the middle blocks and make sure they are as square as possible, putting a few pins in there to hold the blocks in place while I work outward.

You can barely see the orange beam of light along the blocks’ edges, but you can see where the laser square is on the right side of the picture. Look for a horizontal beam and a vertical beam.
Sometimes as I am working along a seam line, the beam gets blocked by a pin or the quilt sticking up a bit in an area. In that case I run my finger along the beam to help me nudge the fabric into line.

When I’ve got the blocks where I want them, I then start with the inner borders and make sure they are square, sticking more pins along the lines to hold them in place.

And then I move to the inside edge of the outer border. Yes, more pins!

And then, finally, the outside perimeter of the quilt… I stick the most pins along these edges and will many times I will go back and remove some of the pins that are inside, especially those around the blocks and sashing. The quilt is where I want it at this point, and it will just be laying there.

When I’ve got it all pinned in place, I finger press down the edges to get it completely flat and then let it dry for a couple of days. This is a good reason to have a place that will be undisturbed. Oh, and I have a fan or 2 blowing air on it to help it dry. Then, it will be ready for binding.
So, if you have a laser square tucked away somewhere in your garage or in your husband’s tools, borrow it some time to see if this strategy is easier for you, too!
Frogging…
So, it’s been a couple of weeks since I’ve posted about my quilting progress. I’ve barely had time to work on the latest due to being at Machine Quilters Showcase the week of My 12-19th. Last week I had doctors’ appointments and husband appointments to deal with. So, here I am ready to finish this quilt and get it back to the owner. Yesterday I finished all the quilting on it, so all I should have to do now is block it and sew the binding on it and get it back to the customer within the next few days. I say “should” because as I was stitching on it, a nagging thought crept up in the back of my mind telling me that my stitching was WRONG, that it needed to be fixed, which leads to frogging…
If you don’t know what frogging is, it’s an eeeeevil, naaaaasty, dirty word in the quilting world. The term derives from a frog croaking “Rip it! Rip it!” meaning to rip out imperfect stitches. In my mind, my quilting on customers’ quilts should be to enhance the piecing or applique, not to over power it with my stitching. However, if it is a show quilt, then by all means, there should be lots of embellished quilting and as some people say, “it should be quilted to death!”
So, there I was quilting along and I got to the corners of the outside border. Now the quilt itself has blocks in the middle with orange sashing separating the blocks. It also has an inner, pieced border outlined with solid black thin borders framing the inner border. The outside border, however, is plain white/cream. My quilting in the blocks is done with cream colored thread, so as to show off the blocks. The quilting in the sashing is done with an orange, variegated thread that will enhance the sashing just a bit. But, that outside border just needed something. I didn’t feel right quilting it with the same color thread as the fabric itself, so I am basically “drawing” with black thread on it. I don’t yet feel confident enough with my drawing abilities to make my quilting stand out that much, but I doubt I ever will. I’m plunging in and doing it anyway. People keep telling me that I’m better at quilting than I think I am, so I am trying to listen to that and plunge away.
The stitching in the outside border is of cats on a fence, jack-o-lanterns, bats and pumpkins. I used my new micro handles to help me stitch those. I stitched spider webs and a spider into the corners. The problem is that I wasn’t satisfied with how perfect the stitches were (or were not), so I did some thread painting to smooth the rough edges. Thread painting is basically sketching with thread. Of course, after I was finished I was mortified. I thread paint on my own quilts all the time, but how could I do that to a customer’s quilt? I had to rip it out and put a simple one-line stitching for that spider web.
So, here is the dastardly deed in progress…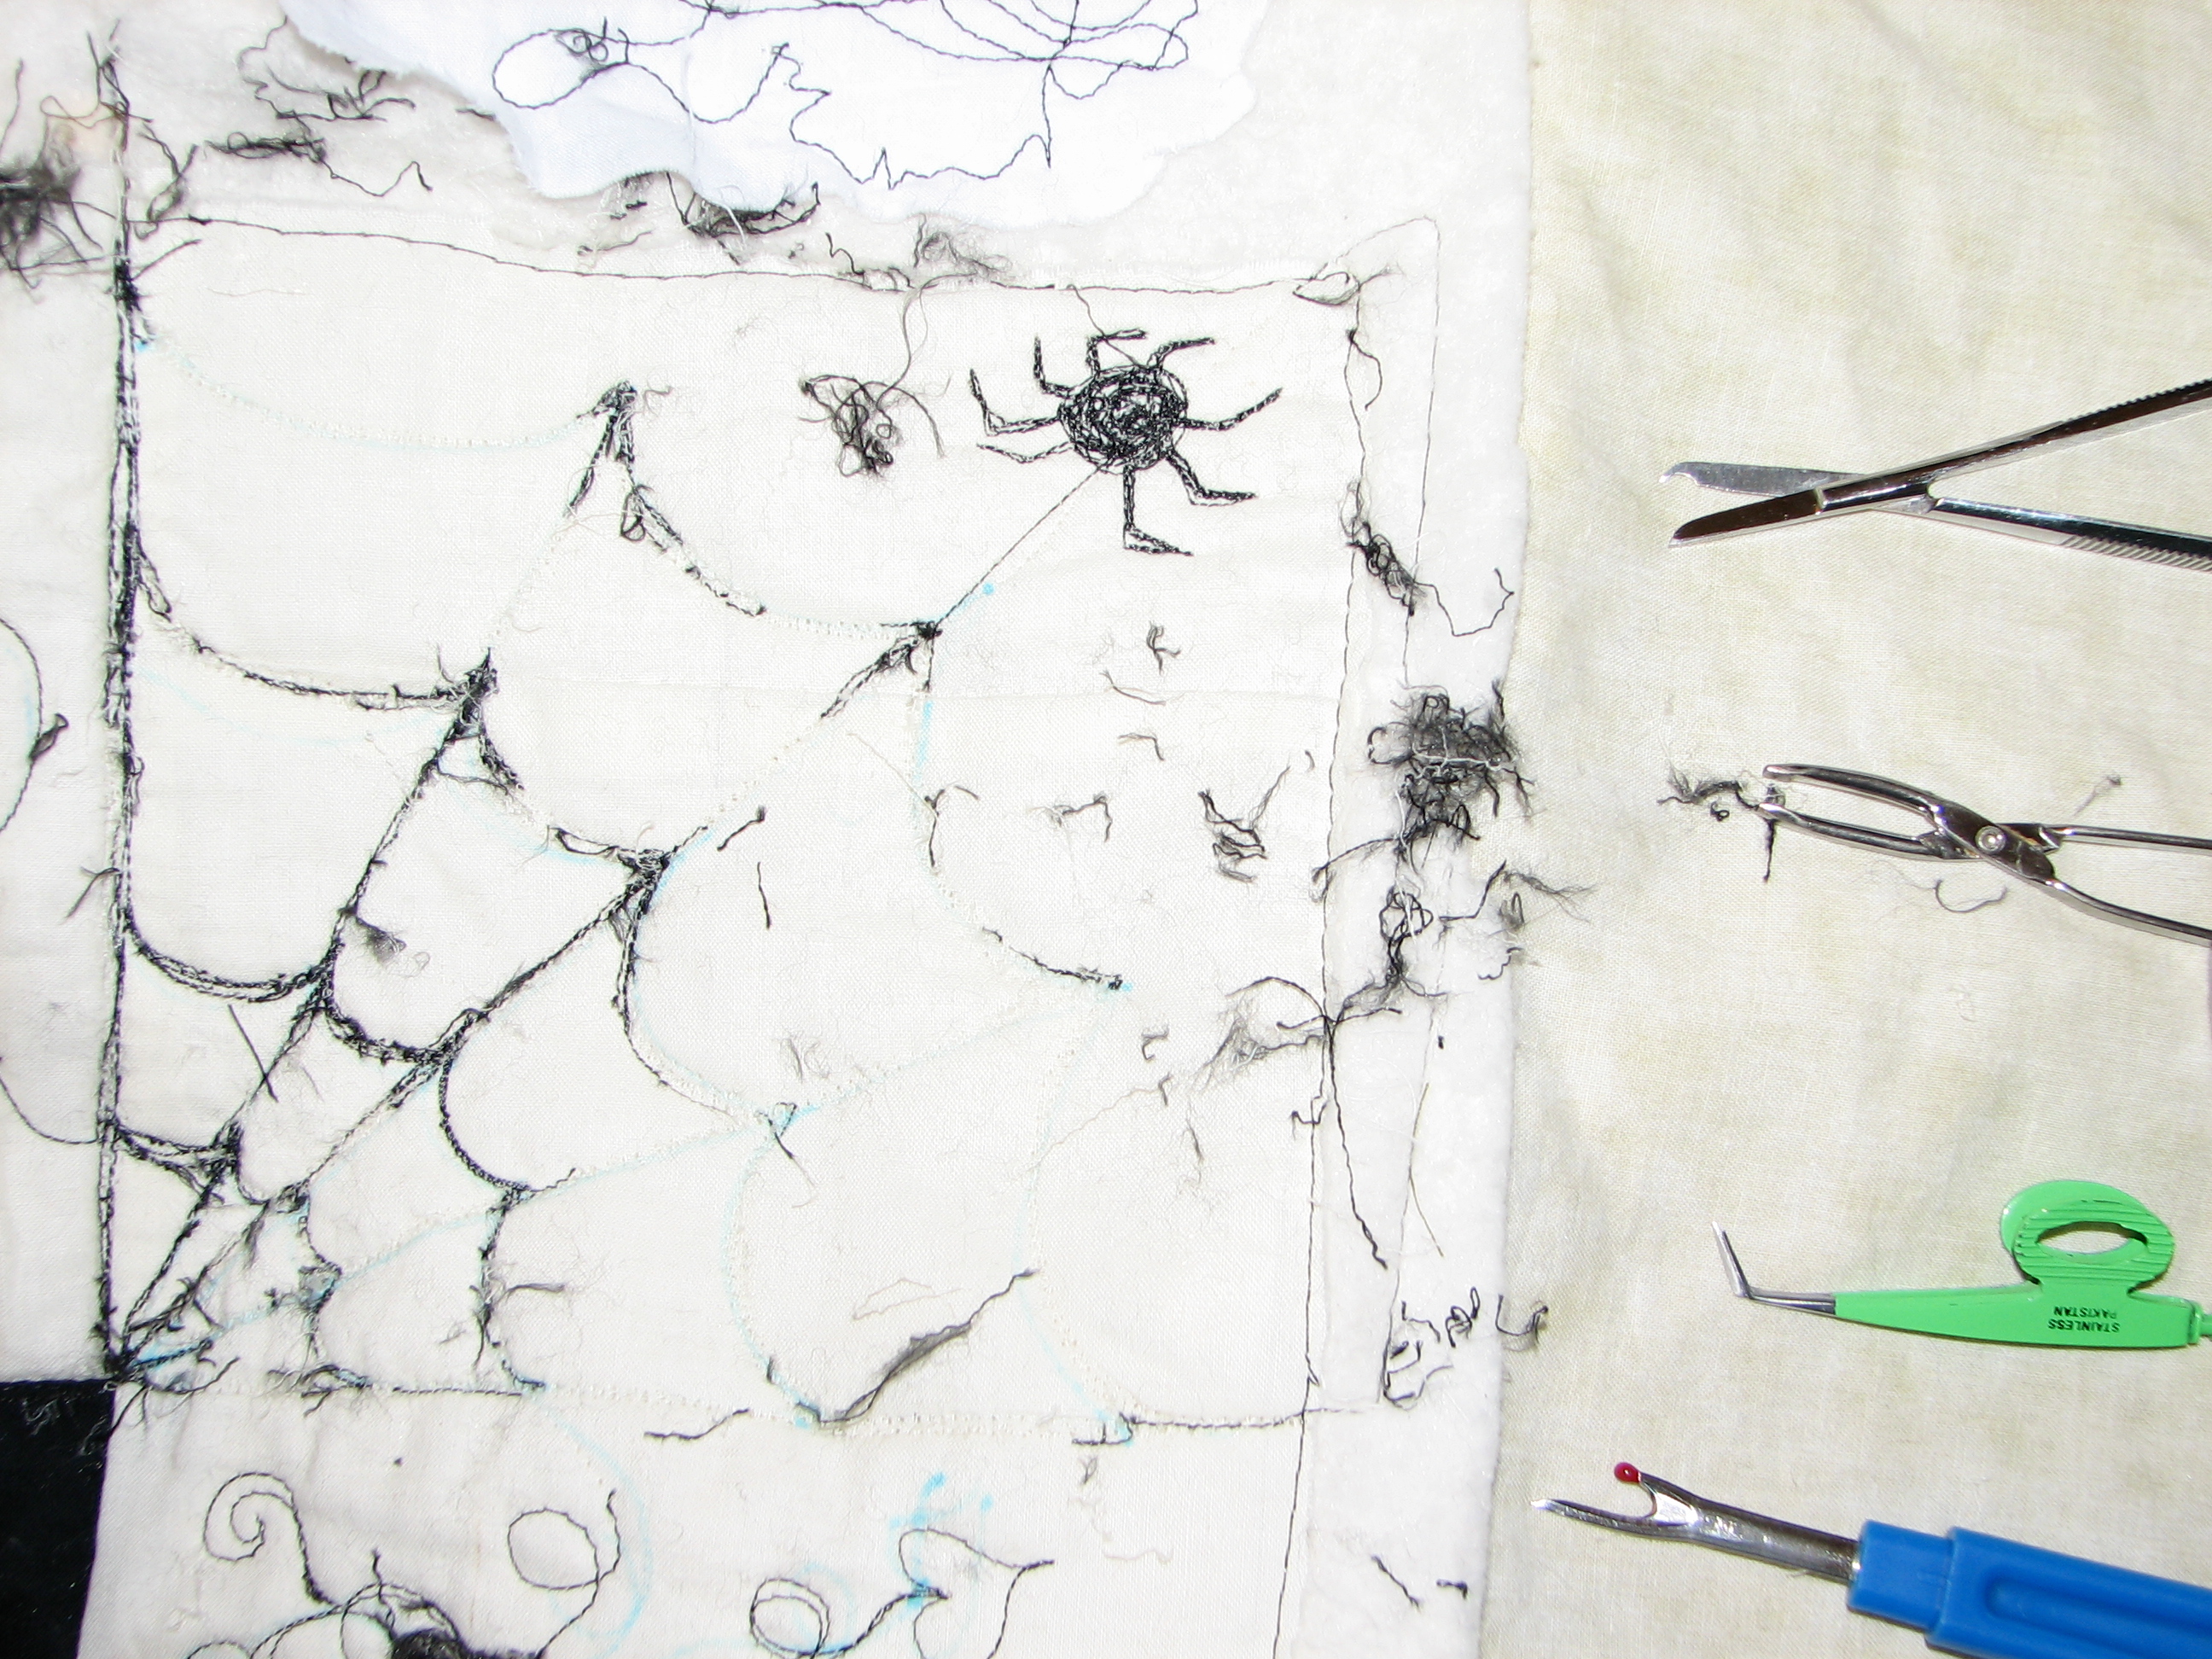
Notice the “weapons” on the right side of the picture that were used in tackling this project. I had been working for 3+ hours on just this one corner. You have to be very careful pulling out those stitches because you don’t want to rip the fabric or pull any of the threads of the fabric in the process.
Here is what the stitching should look like with only one layer of stitching and no thread painting. This is the border next to that corner – white/cream fabric with black stitching.
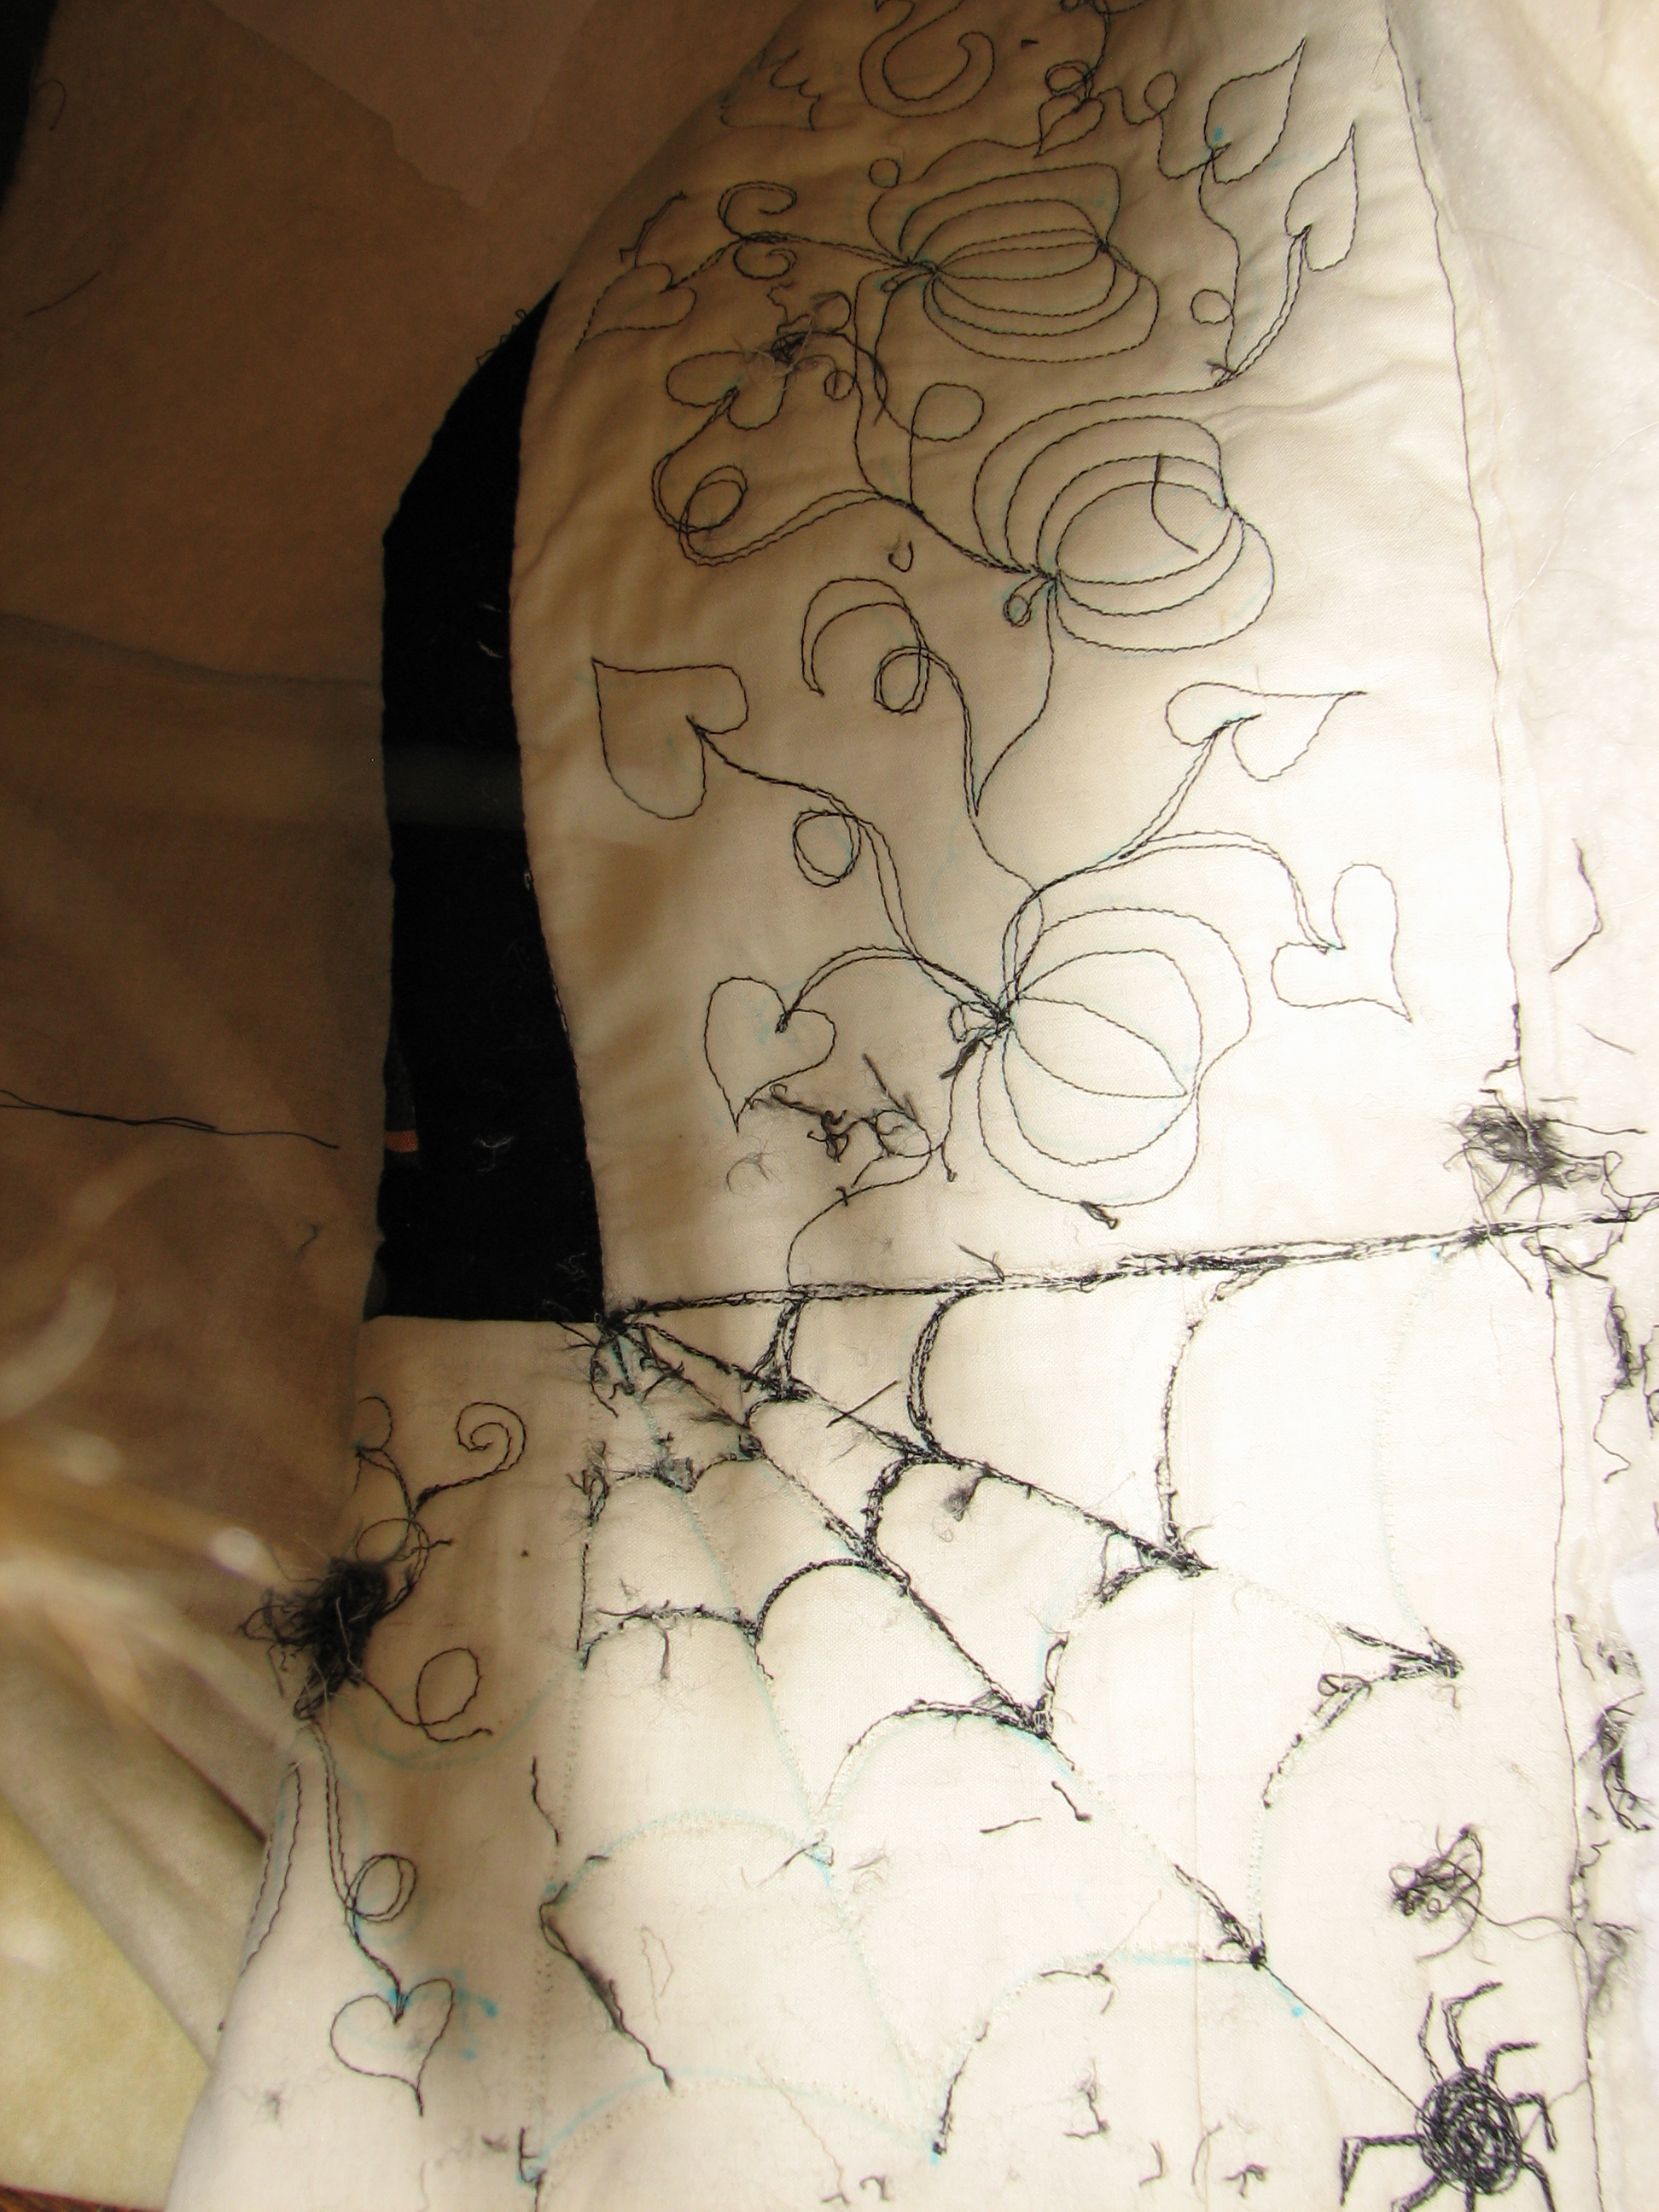
And, here is what the other 3 corners look like before “frogging.”

It actually doesn’t look that bad (now that I’m 3+ hours into the task every quilter dreads and looking at several more hours of this… and multiply that by 3 more corners, each taking a day to rip out). And, the extra stitching actually helps to stabilize the corner stones. Soooo… I have decided that I will leave the other 3 spider webs as they are. I will continue frogging this particular spider web and will re-stitch it to look like it did and/or the other 3 webs. If the customer is not happy with it (and I’m very much okay with that!) then I will certainly frog all 4 corners. At this point, though, I just want to get this quilt to the owners.
Lesson learned! And, I’ve also learned that I am going to try quilting with the same thread on top and in the bobbin. Most people do that, but I have been trying to match the bobbin thread with the backing fabric (in this case it is a mottled tan/cream). The cream colored and orange variegated top threads worked fine with the cream colored bobbin thread. But, for whatever reason, that black thread did not cooperate at all, so it shows through on the back anyhow – drives me nuts. I worked and worked with it to no avail. I can certainly see now why others use the same color on top and bottom.
Quilting Strategies on a Quilting Machine
Ever think how lucky someone is to own a longarm quilting machine? I mean, they must just slap the fabric and batting on there and turn it on and it does all the work for them. Right? WRONG! There is a a lot of work that goes in to loading a quilt, getting it straight, and making it come out right. With backing fabric, it’s nice not to have any seams in it, because each seam can draw up the fabric around it. You can’t avoid that with the quilt top, but you can with the bottom/backing. Batting needs to be a decent quality, too, because these high-powered machines will run right through thin batting and shred it to pieces. As for the quilt top, this is the most important to make sure you have it loaded properly.
As I load the quilt backing and top, I make sure I am rolling them so that their edges meet the edges of the fabric they are rolled on. For example, think of a fabric that you roll around a pole. With each roll, you want to make sure the edge of the top fabric meets with the edge of the fabric underneath. You also want to make sure you are not rolling one side tighter than the other. One strategy I use for that is the blocks and sashings in a pieced top.

The above photo shows a block and sashing. See how it is kind of caddy wonker and not straight across? If I were to roll the quilt top like that, the whole quilt will end up caddy wonker and stay that way after I’ve quilted it. So, using the seams and sashing as a guide, I try to roll it straight on. I look down the length of the roller to make sure it is straight before advancing the roller.

See how the sashing on this is a little crooked at the bottom of this picture? I’d make sure it was straight before advancing the roller any farther.
Another strategy I like is using a laser square for making sure my quilt top is laying square on the frame during and after I roll it forward. I also like to use my laser square for blocking my quilts, but I will show you how to do that in a later post. You can buy a laser square at the hardware store.

I can use the laser line as a guide for pinning the top edge of the quilt top to the batting and backing before I baste it together and stabilize the entire quilt. You can line up the vertical line to the edges of the quilt as well as sashings and other pieces within the blocks and the horizontal line will go across the top to show where the edge needs to be in order for your quilt to end up “square” and not caddy wonker. There are many tools you can use to achieve this. The laser square just happens to be one of my favorites.
