It’s spring time at Wilma’s

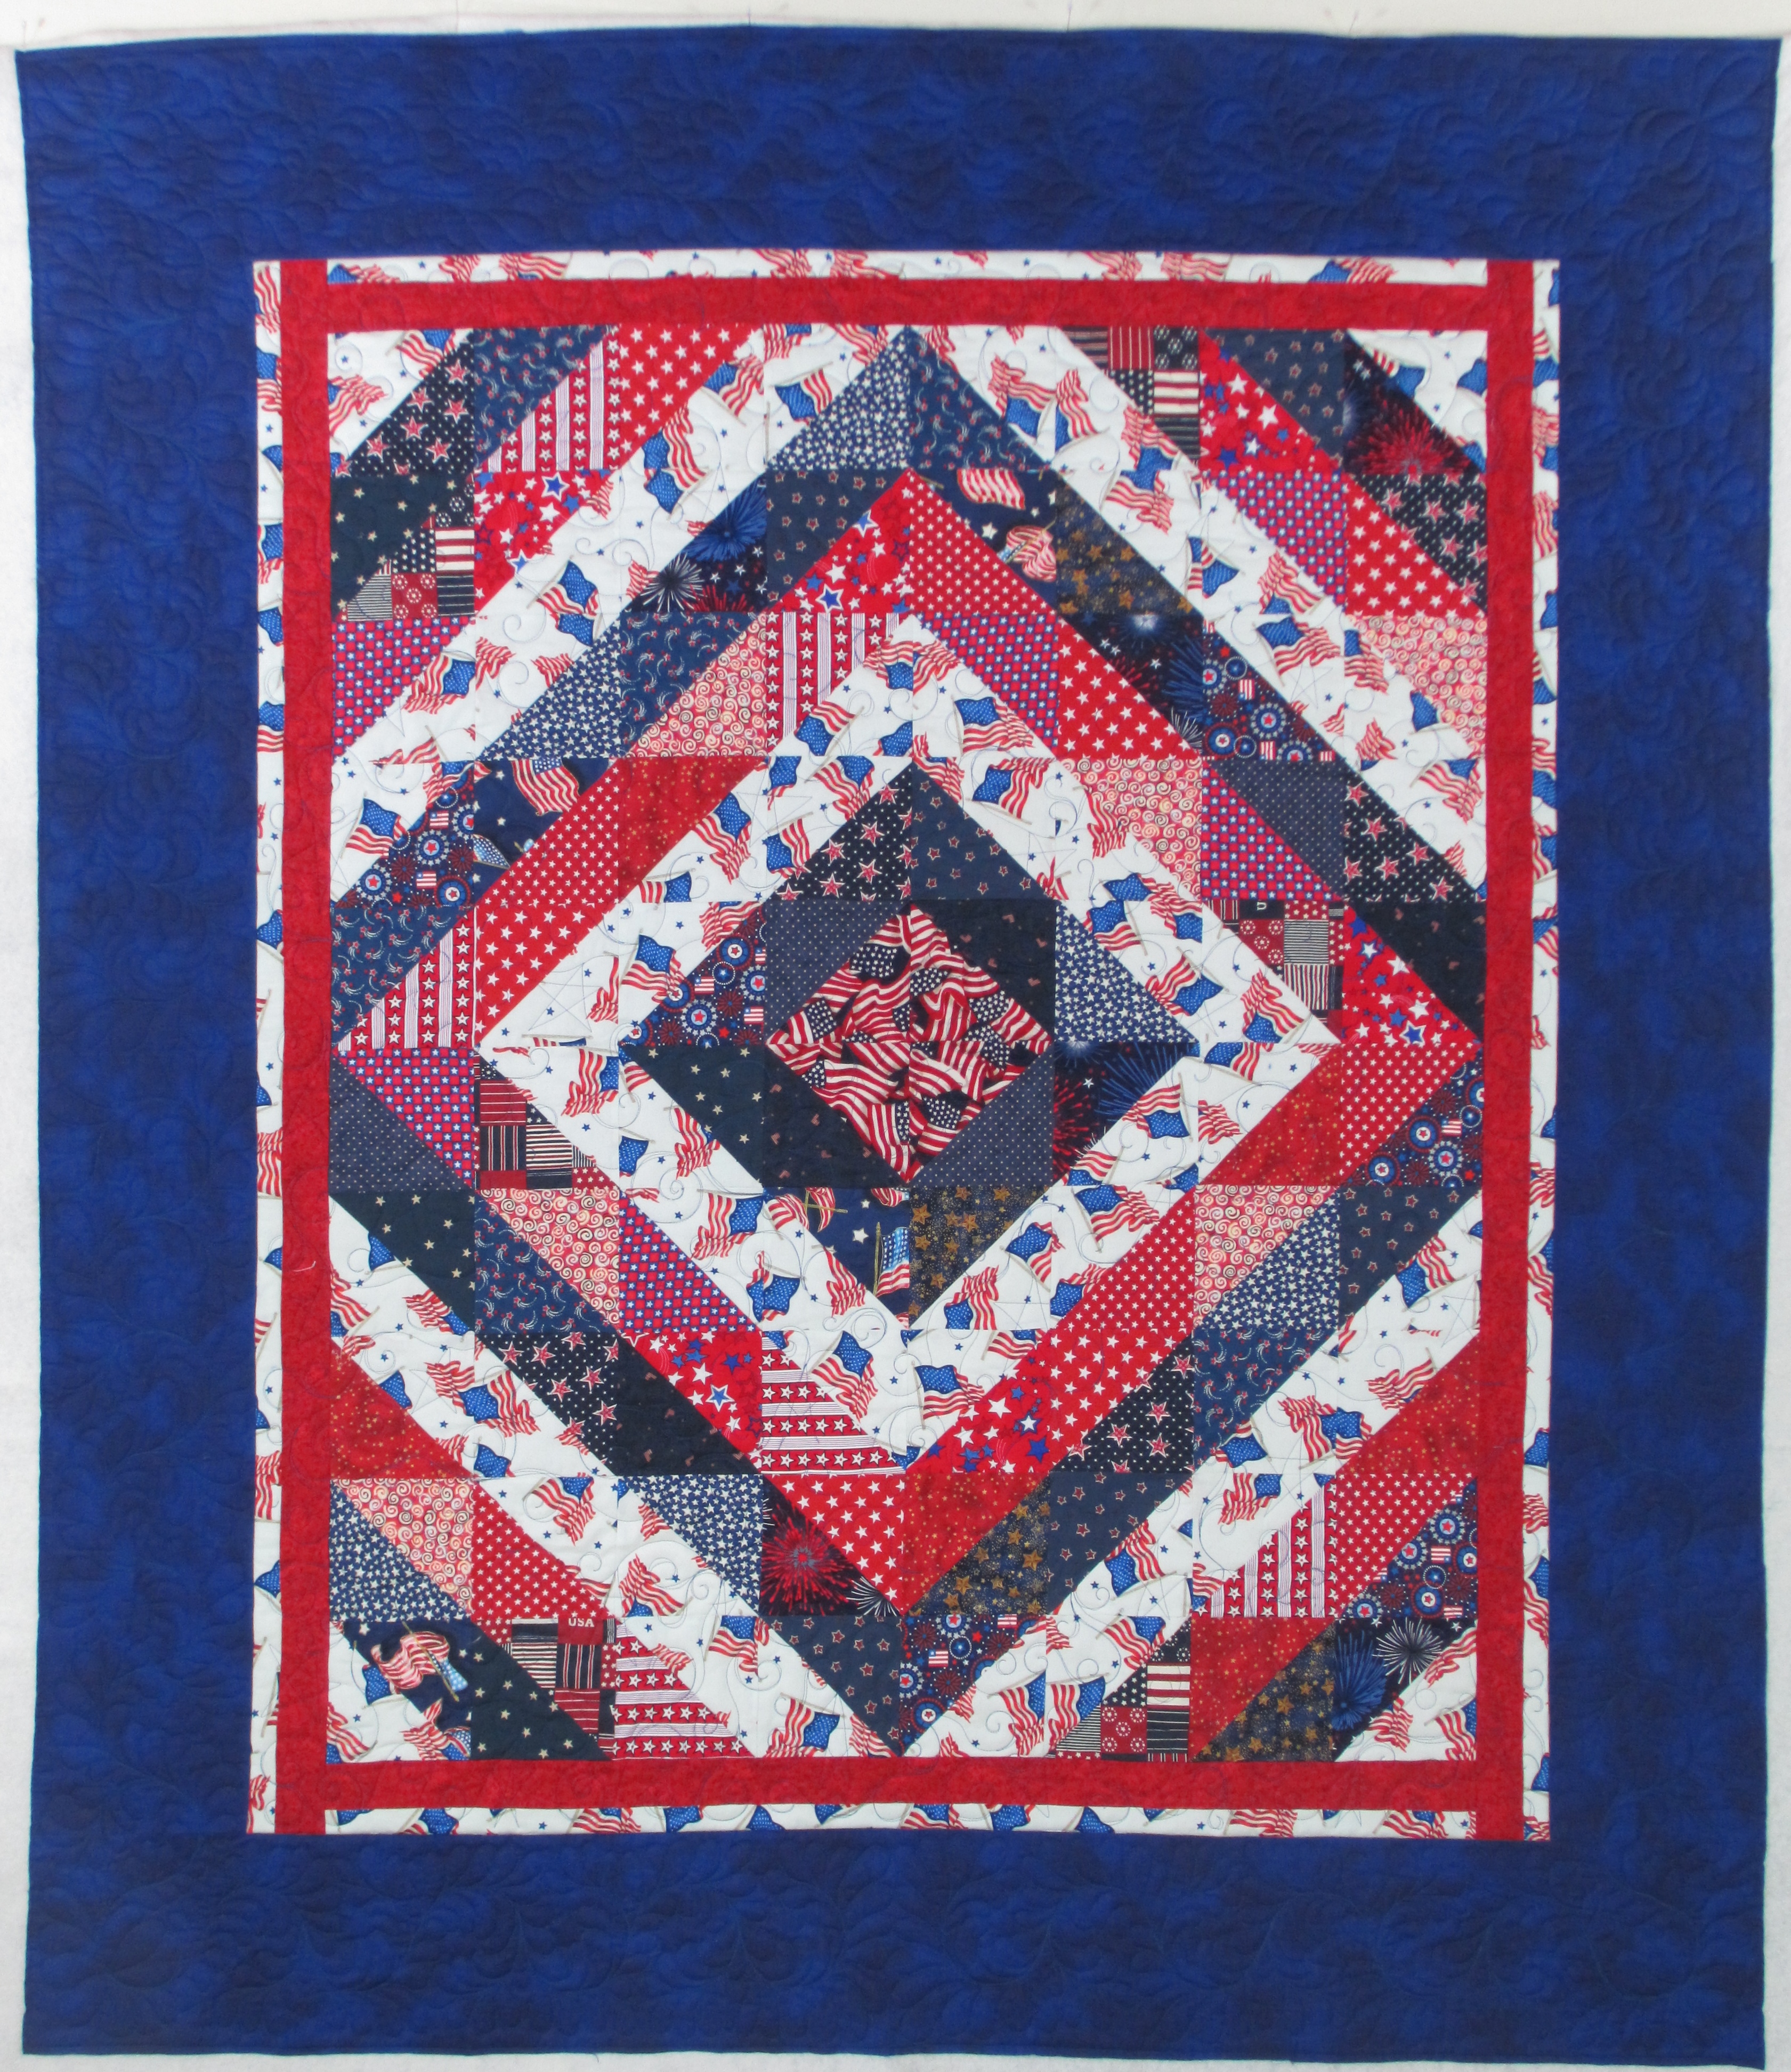
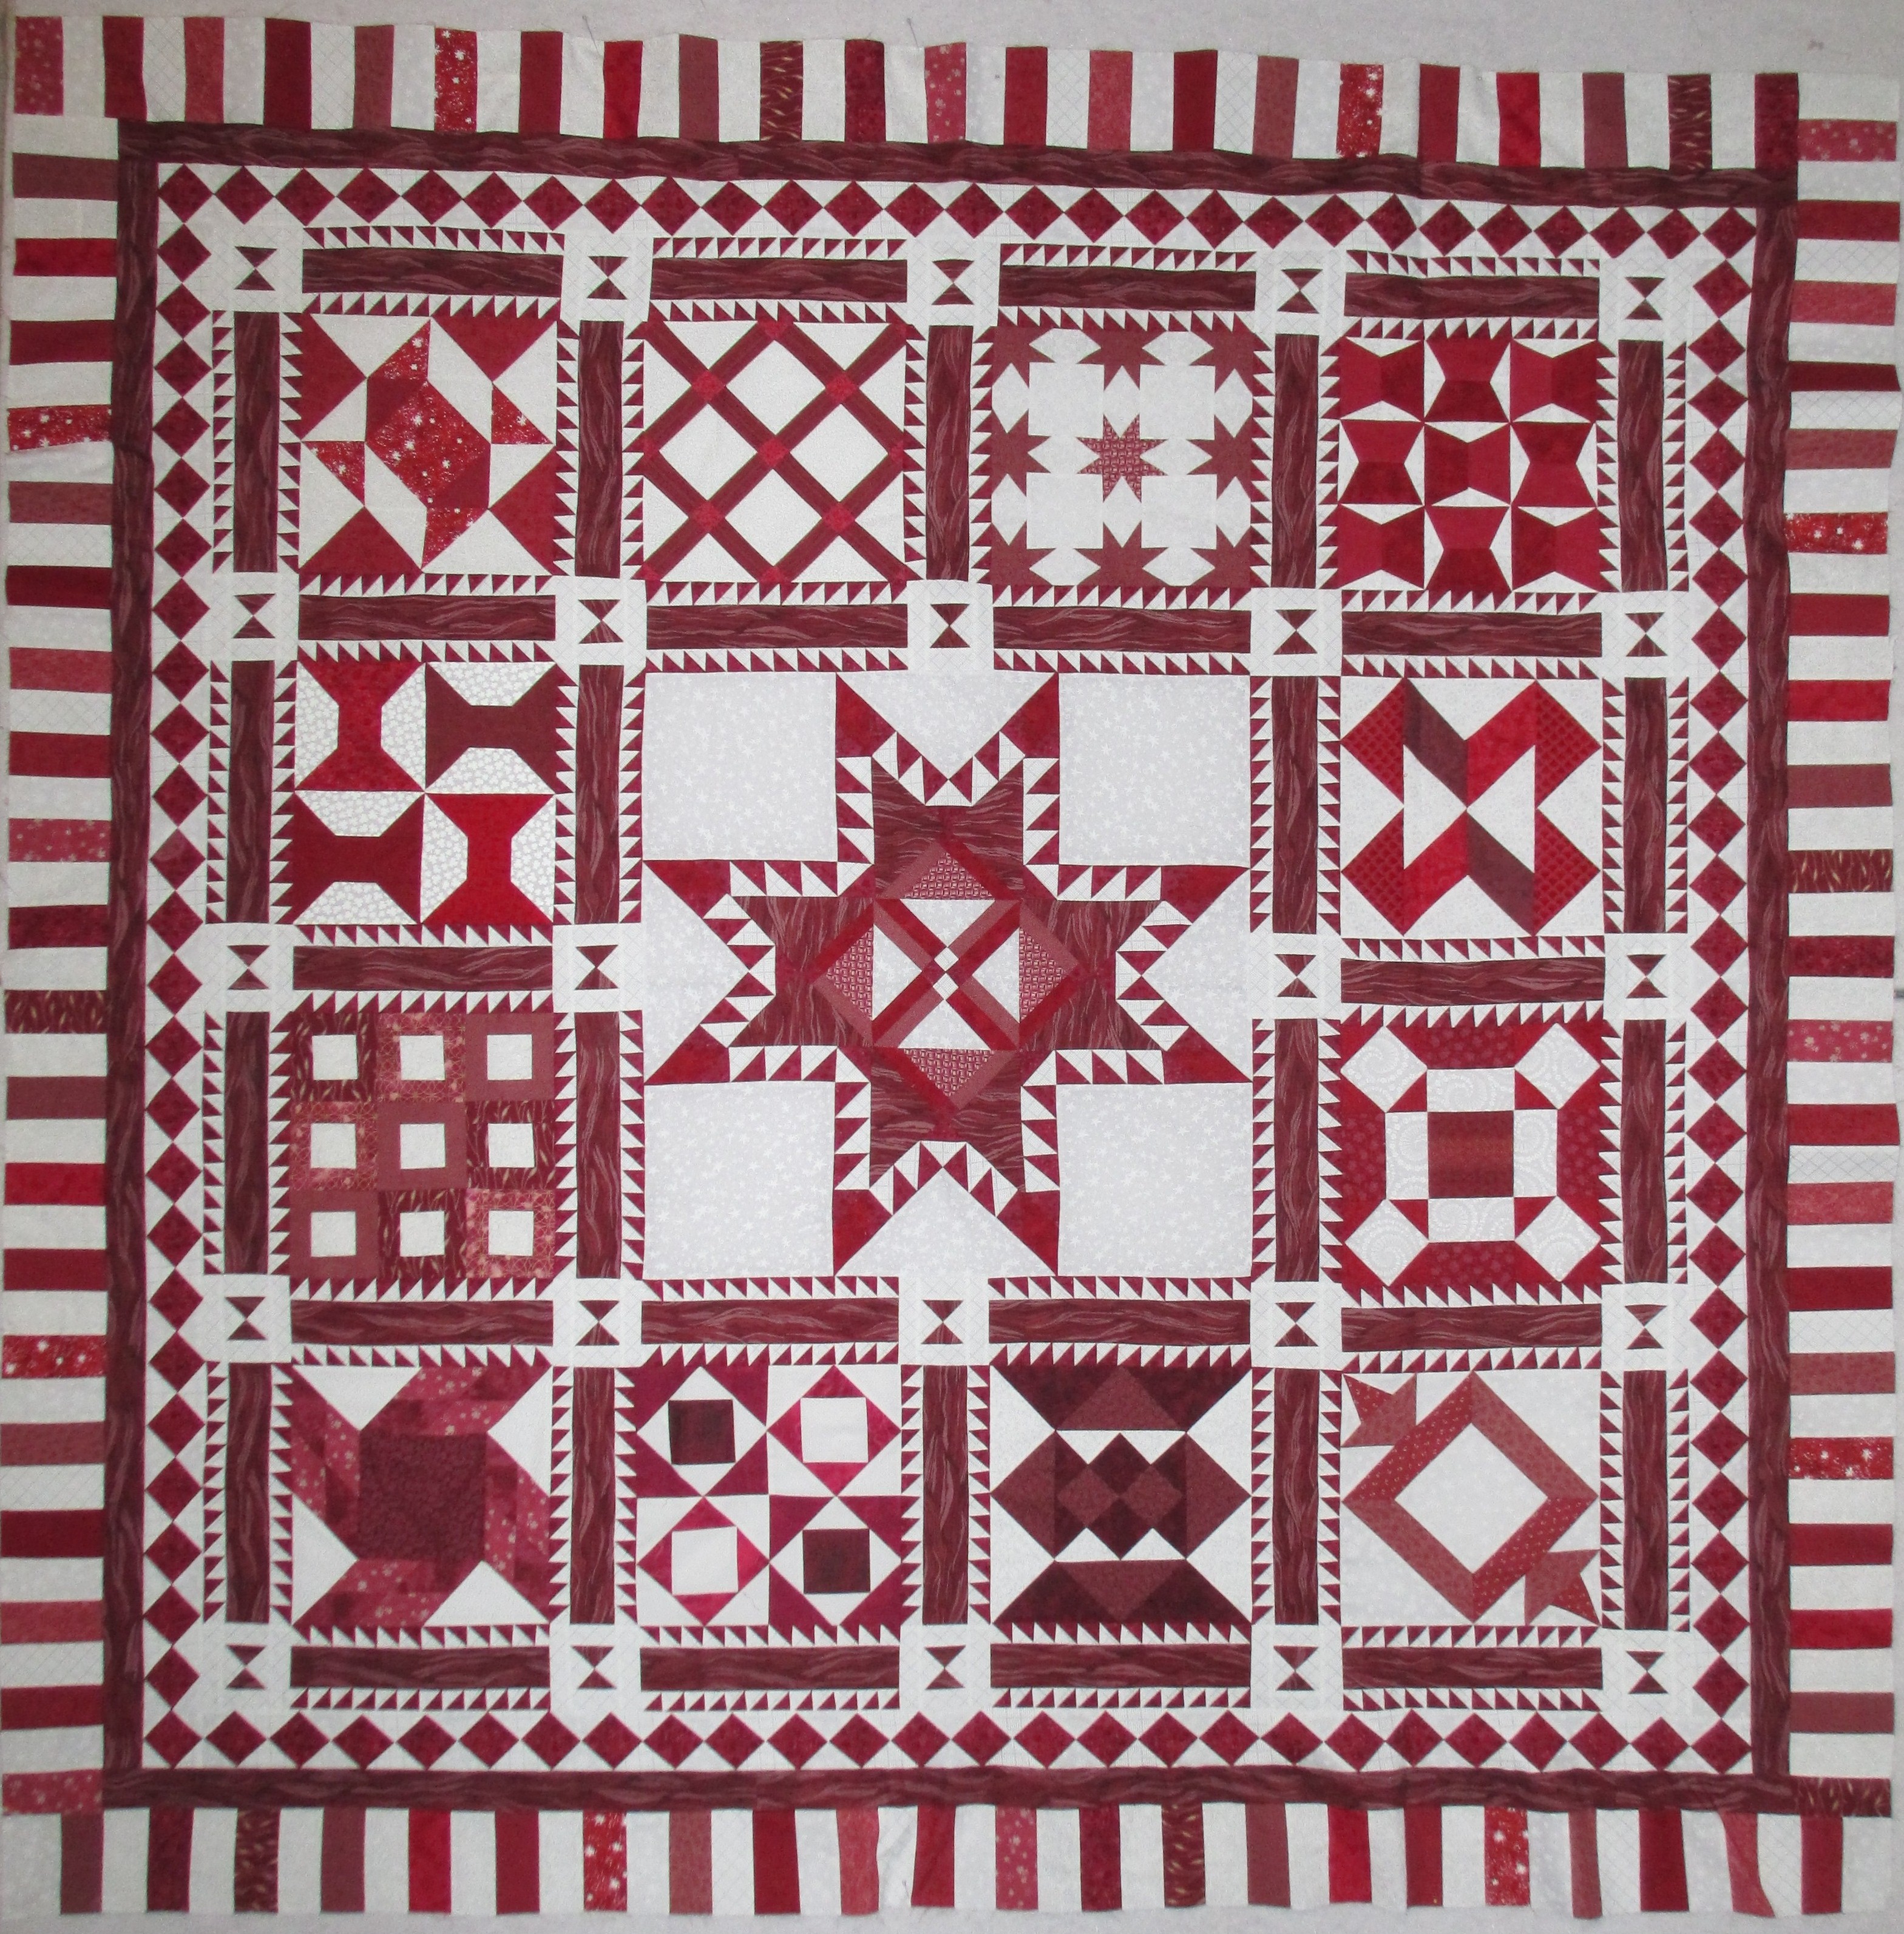
Wilma has 2 quilts that I’ve done for her in the past few months – you will soon see why it’s spring time at Wilma’s.  She’s a quick quilt-maker.  This lady has a talent for putting together colors like nobody I’ve seen before.  The first quilt I’d like to share is what I called “Wilma’s Mums.”

IMG_2266

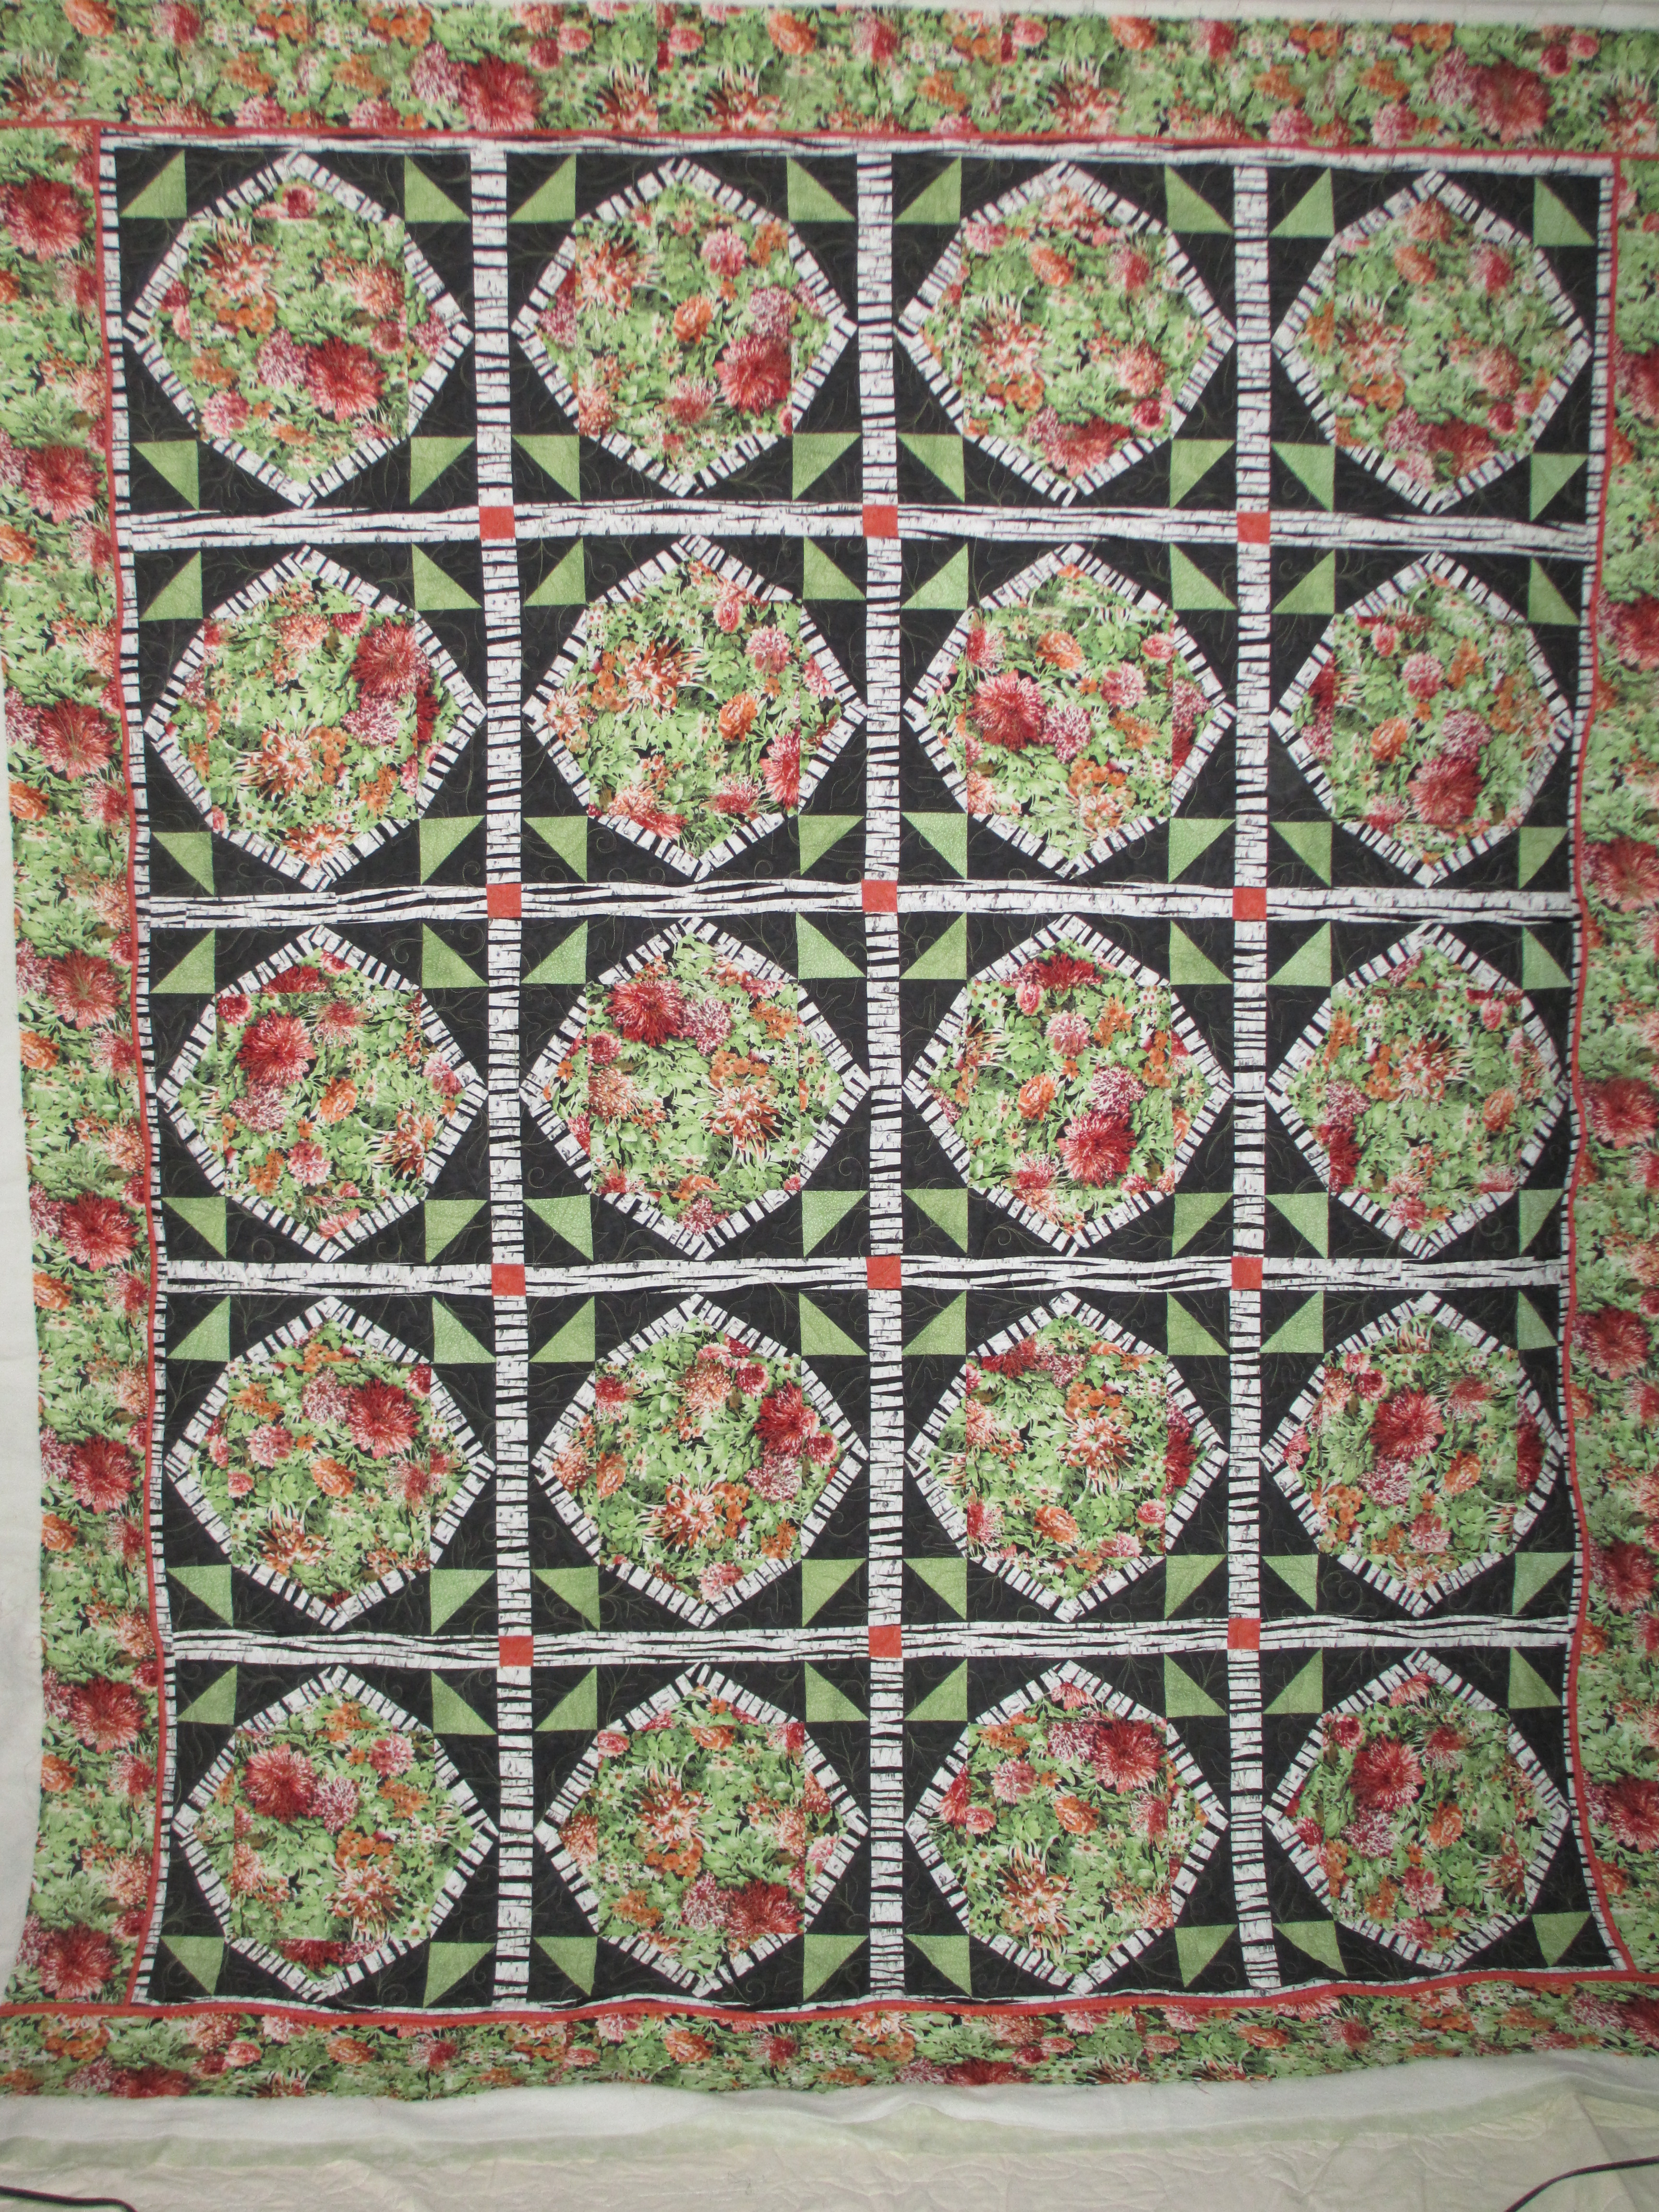
Can you see the mums in the quilt blocks?

IMG_2267     IMG_2268

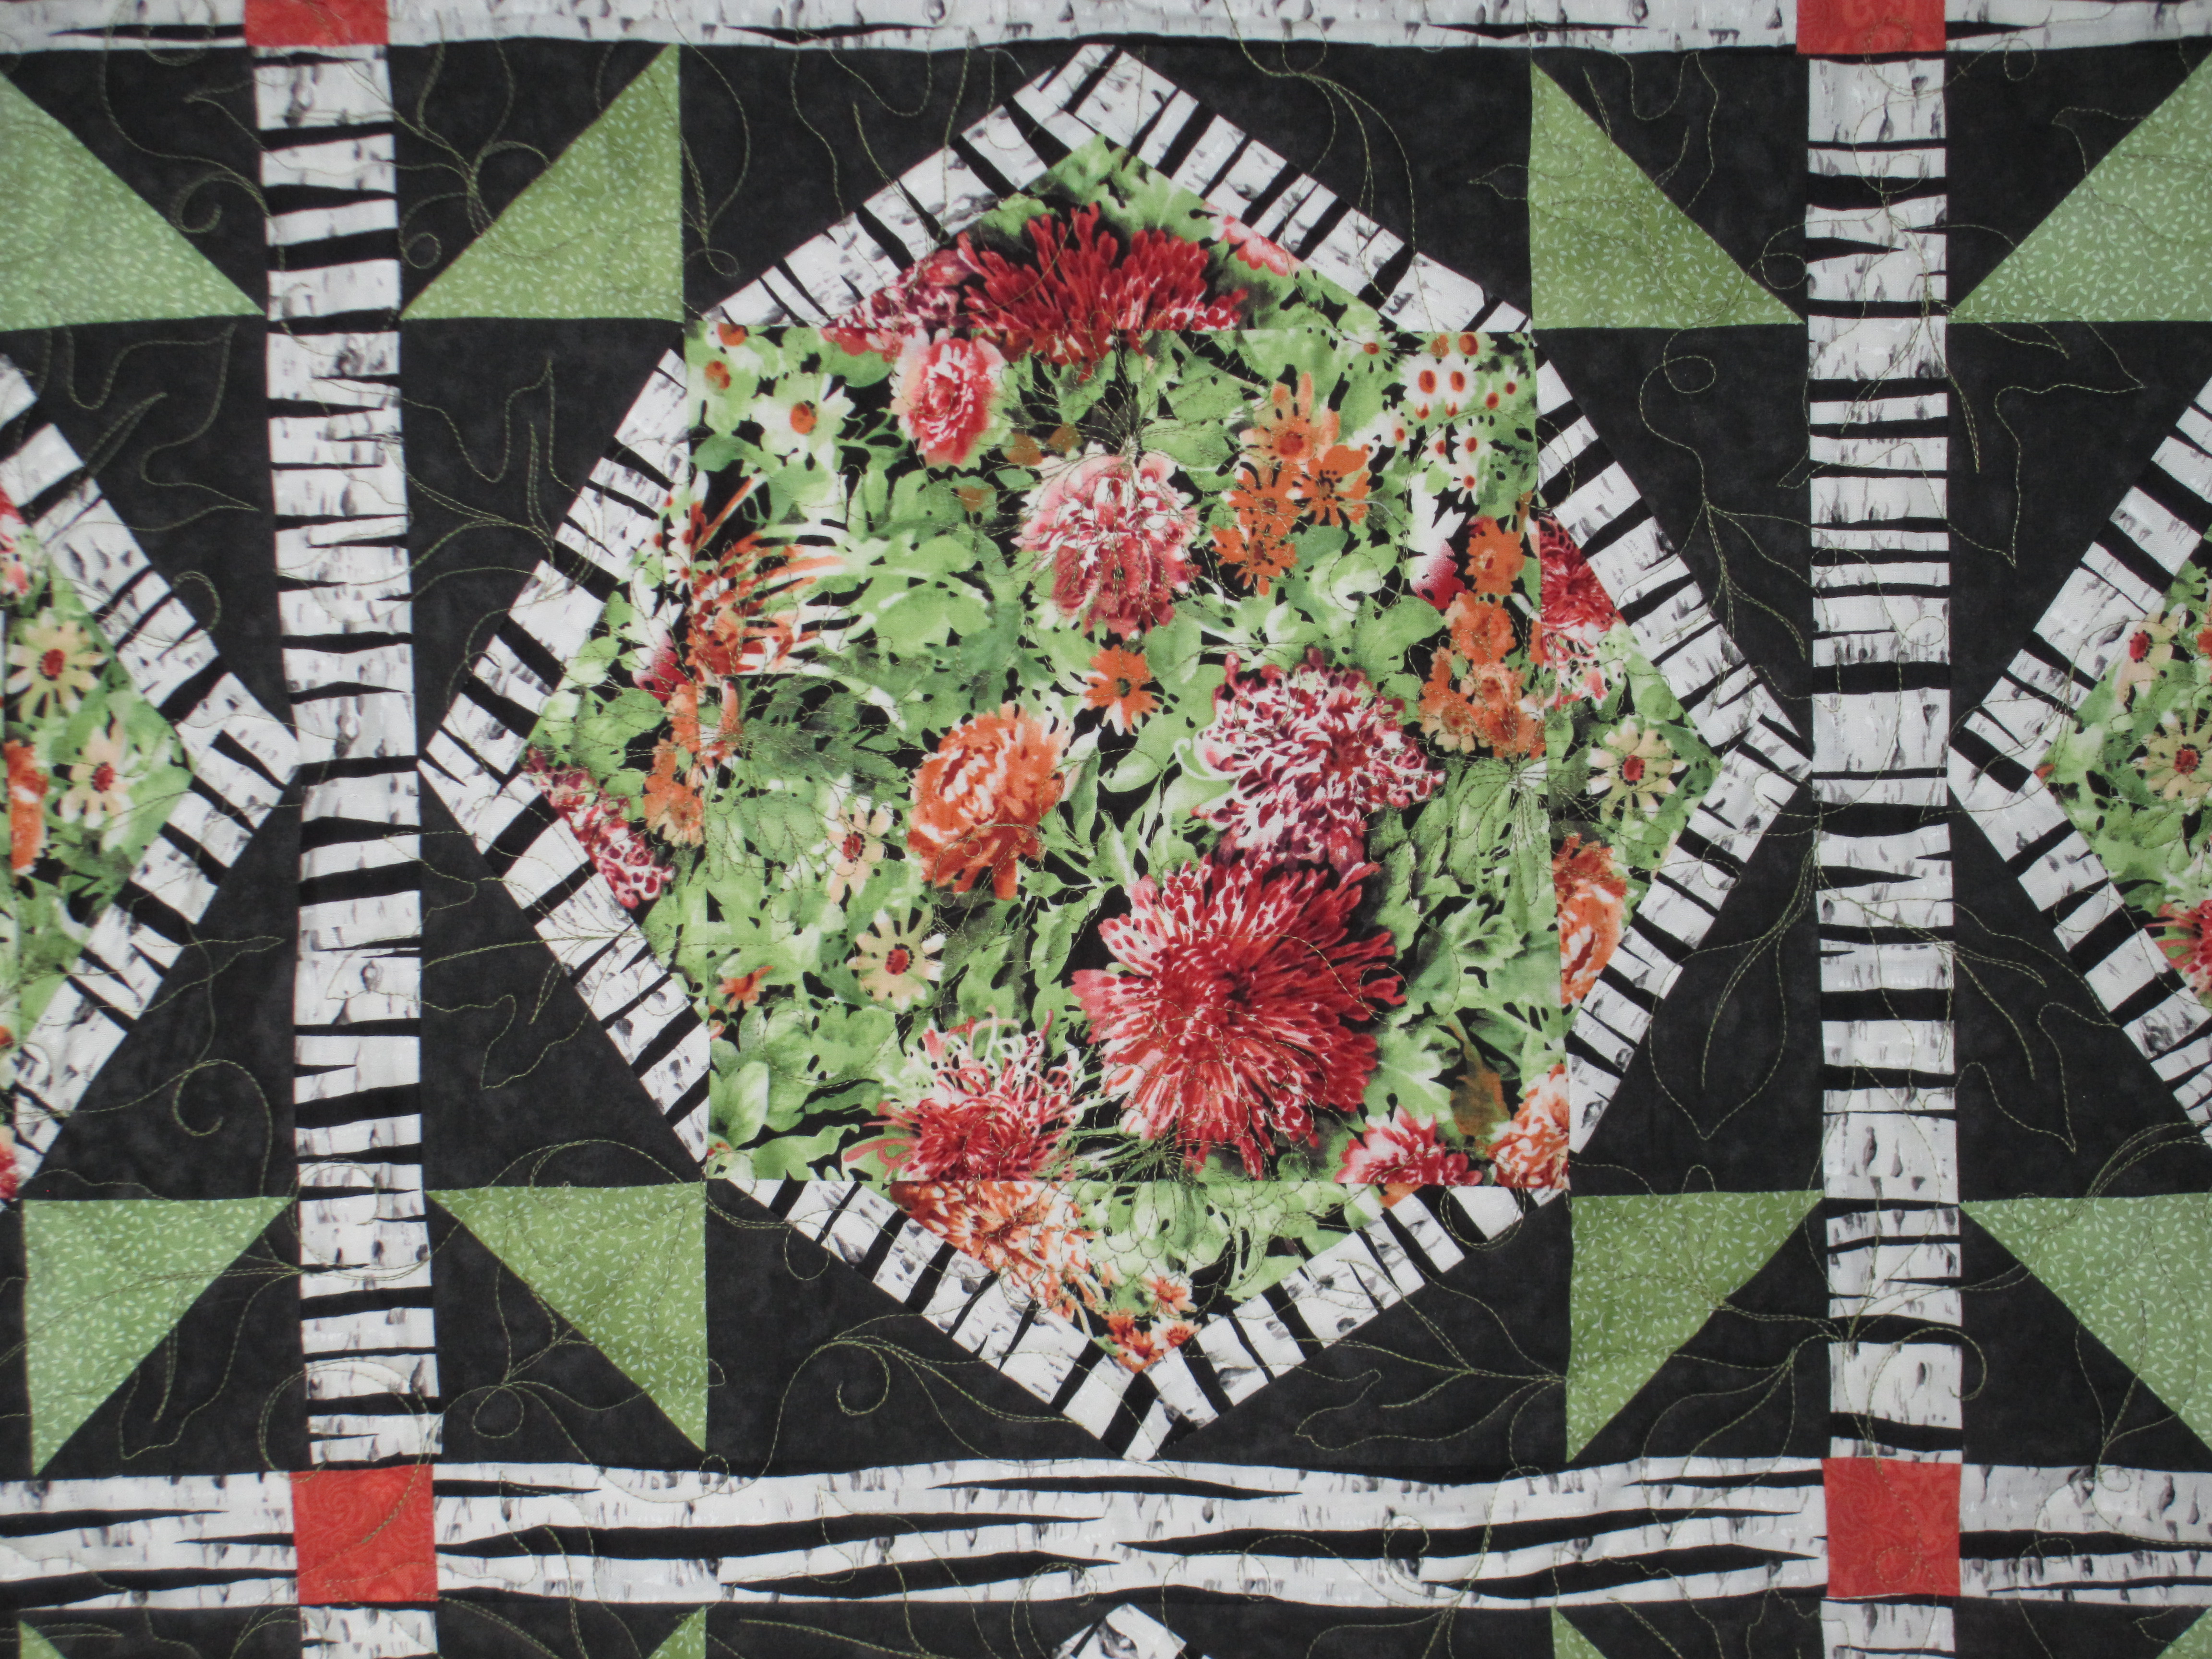
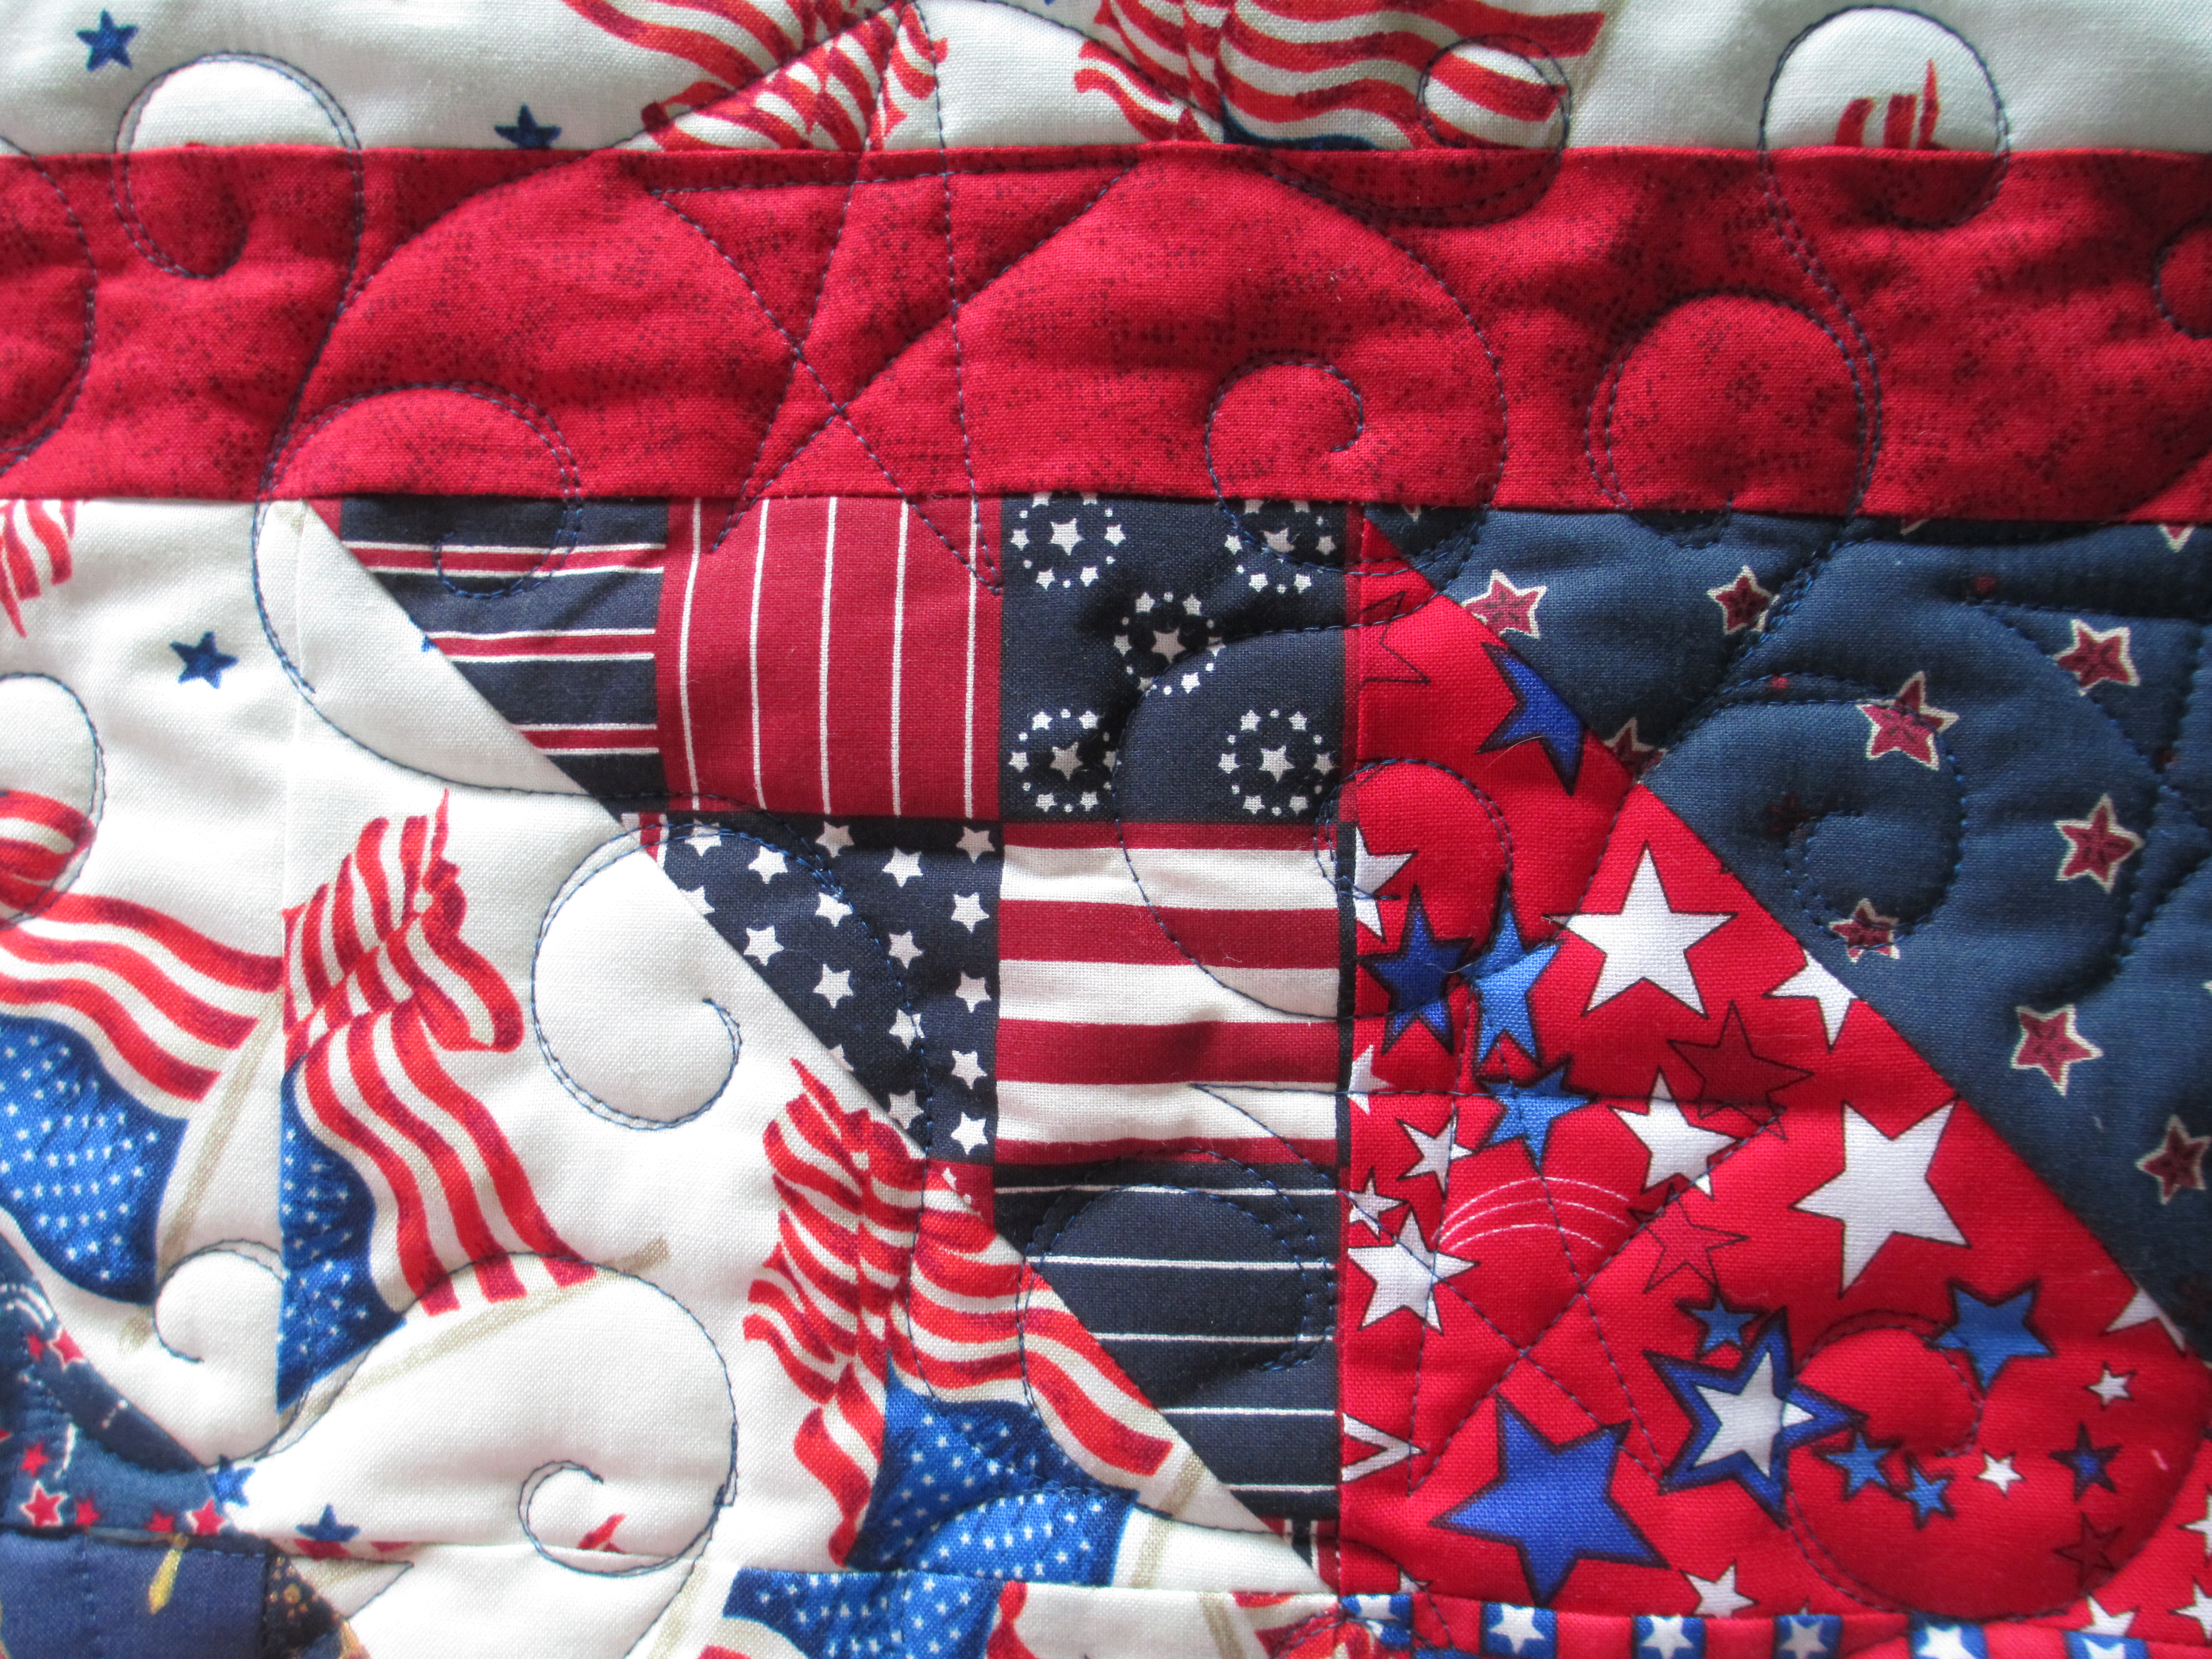
I tried to put leaves all over the black and green areas, but I hid mums in the quilt blocks behind the “fabric” mums.

IMG_2261  IMG_2263

And, along the borders, I changed it up a bit by quilting spider mums.  I’m not sure I got the exact essence of the flowers because I was only going with my imagination and the pictures in the fabric.  Spider mums are one of my favorite flowers, so I knew the petals needed to be short in the middle and long on the outer edge.  But, I wasn’t sure how to stitch that out so it would look more 3-D.

IMG_2264

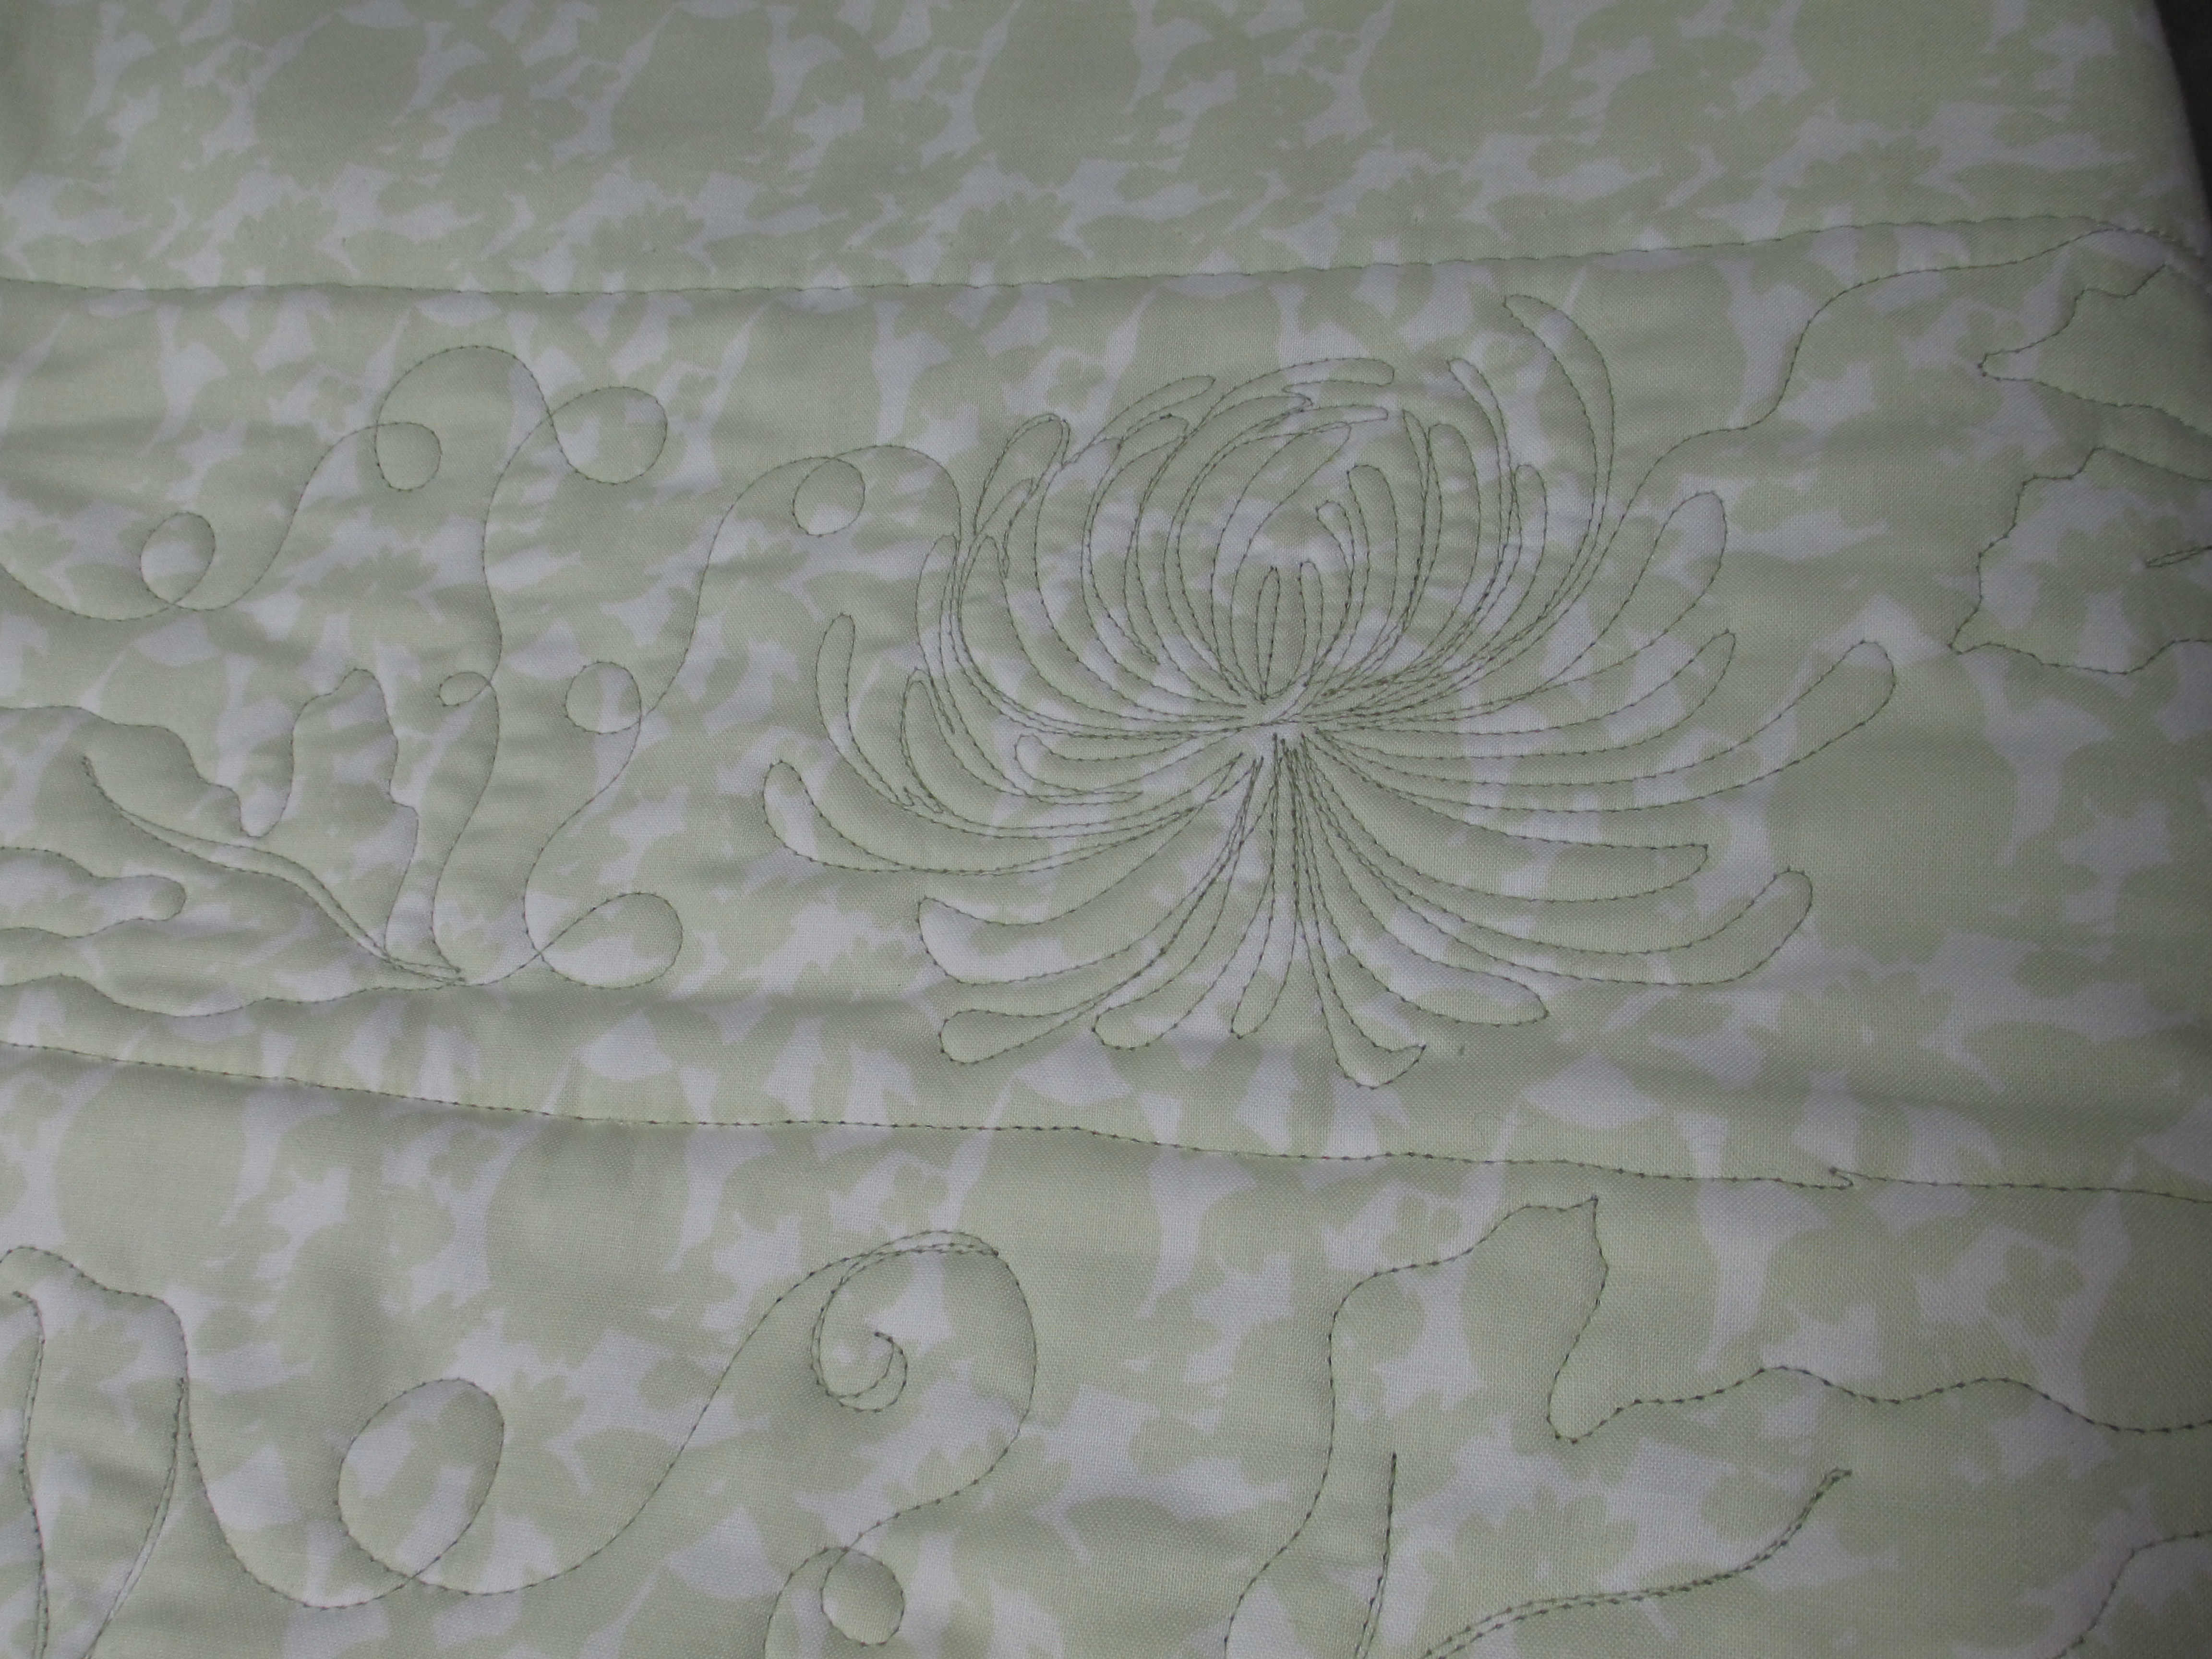
Another cool thing about the backing on this quilt is that the fabric is very soft.  And, if you look very closely, you can see green owls in the fabric… watching over the garden.  🙂


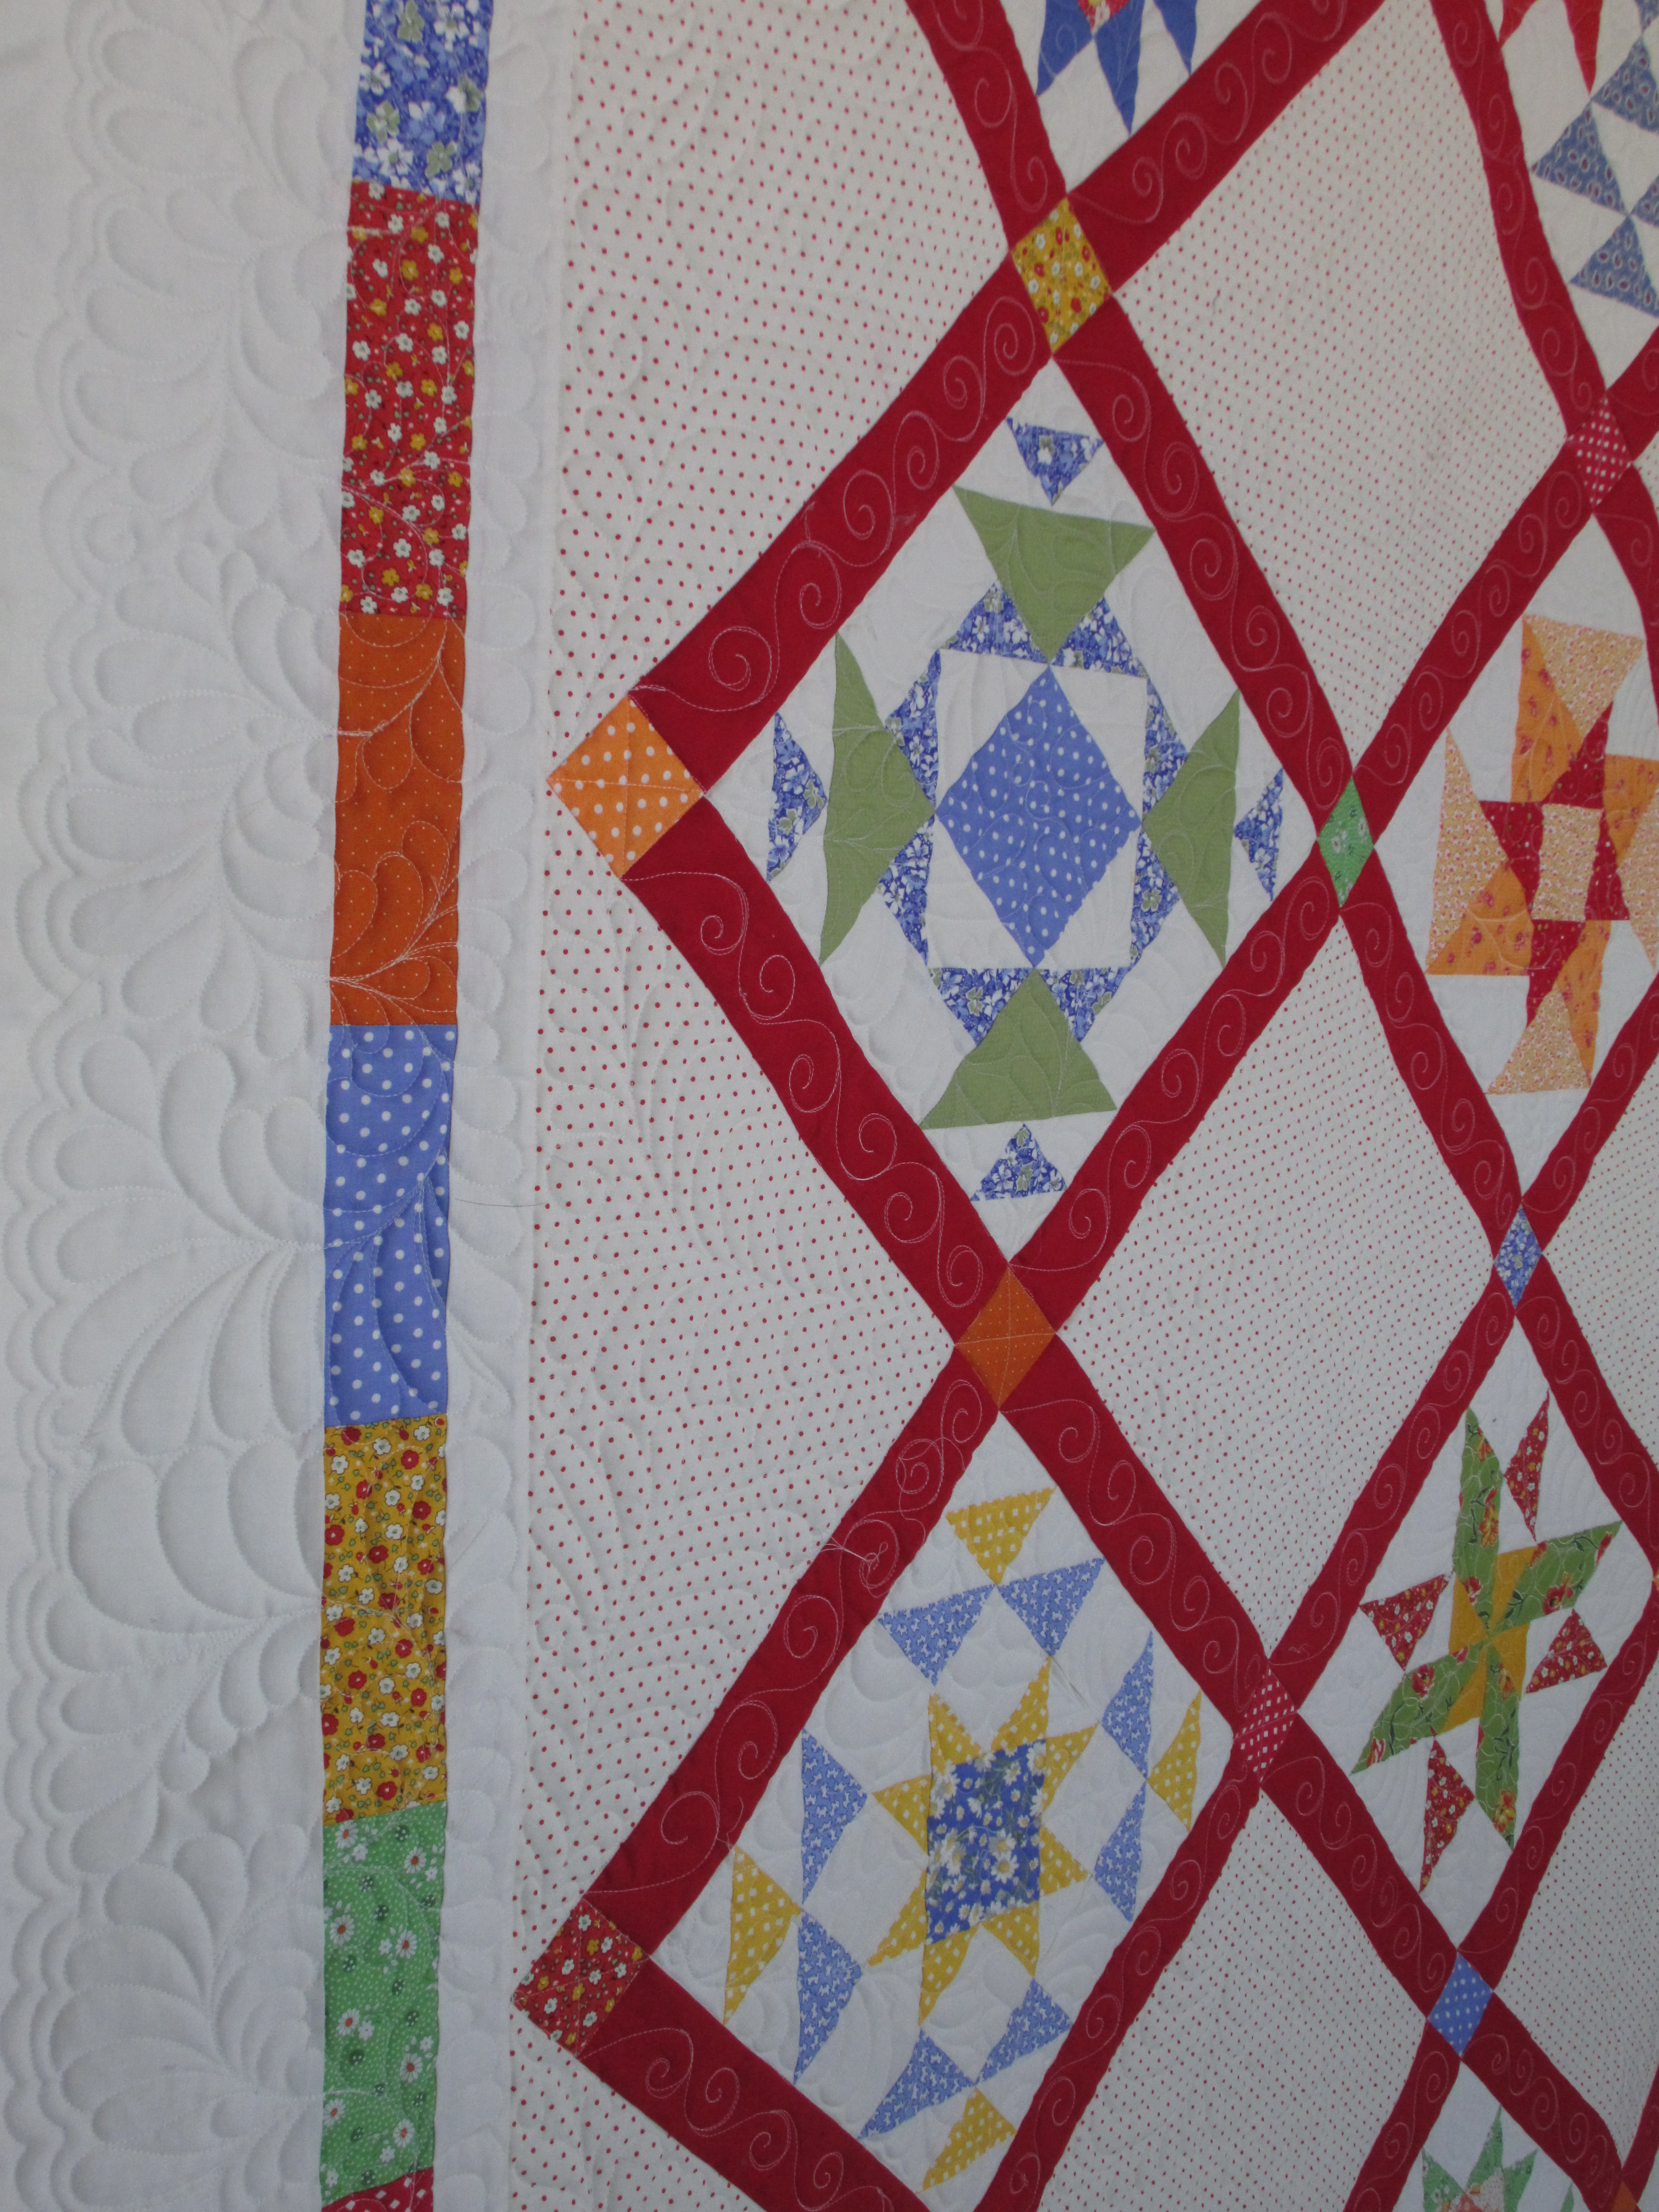
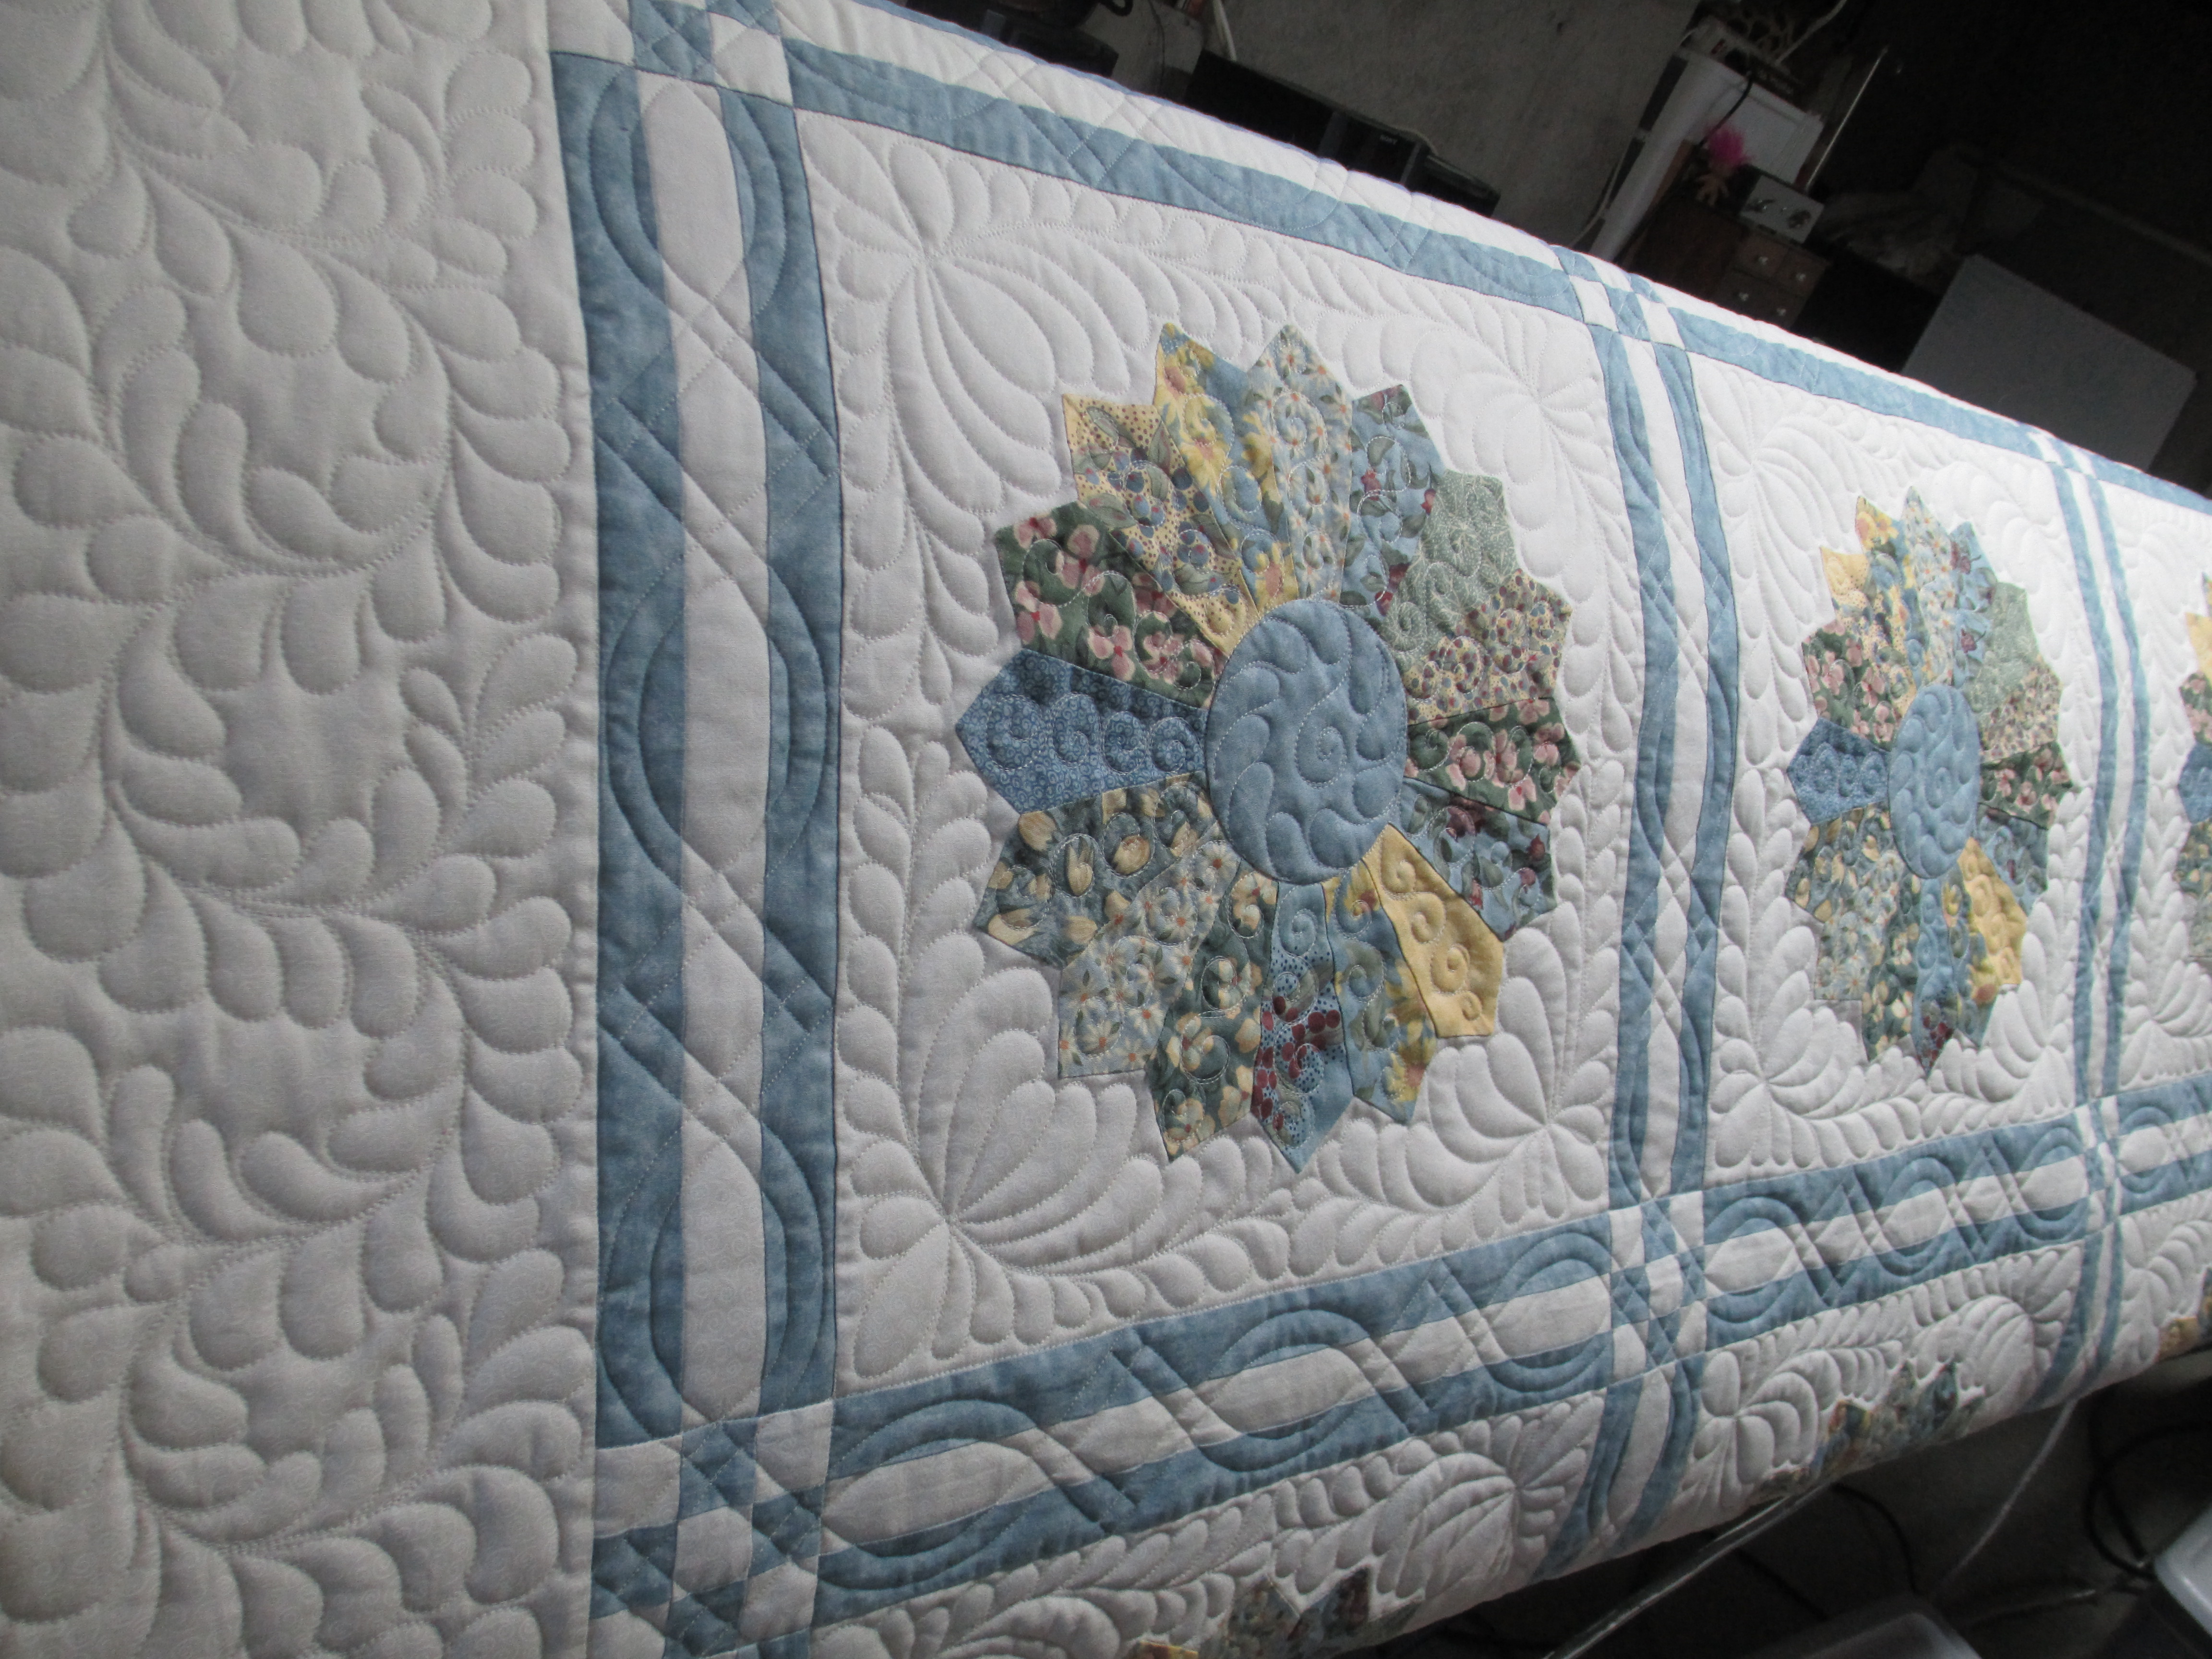
This next quilt of Wilma’s is the latest one I’ve quilted.

IMG_2476

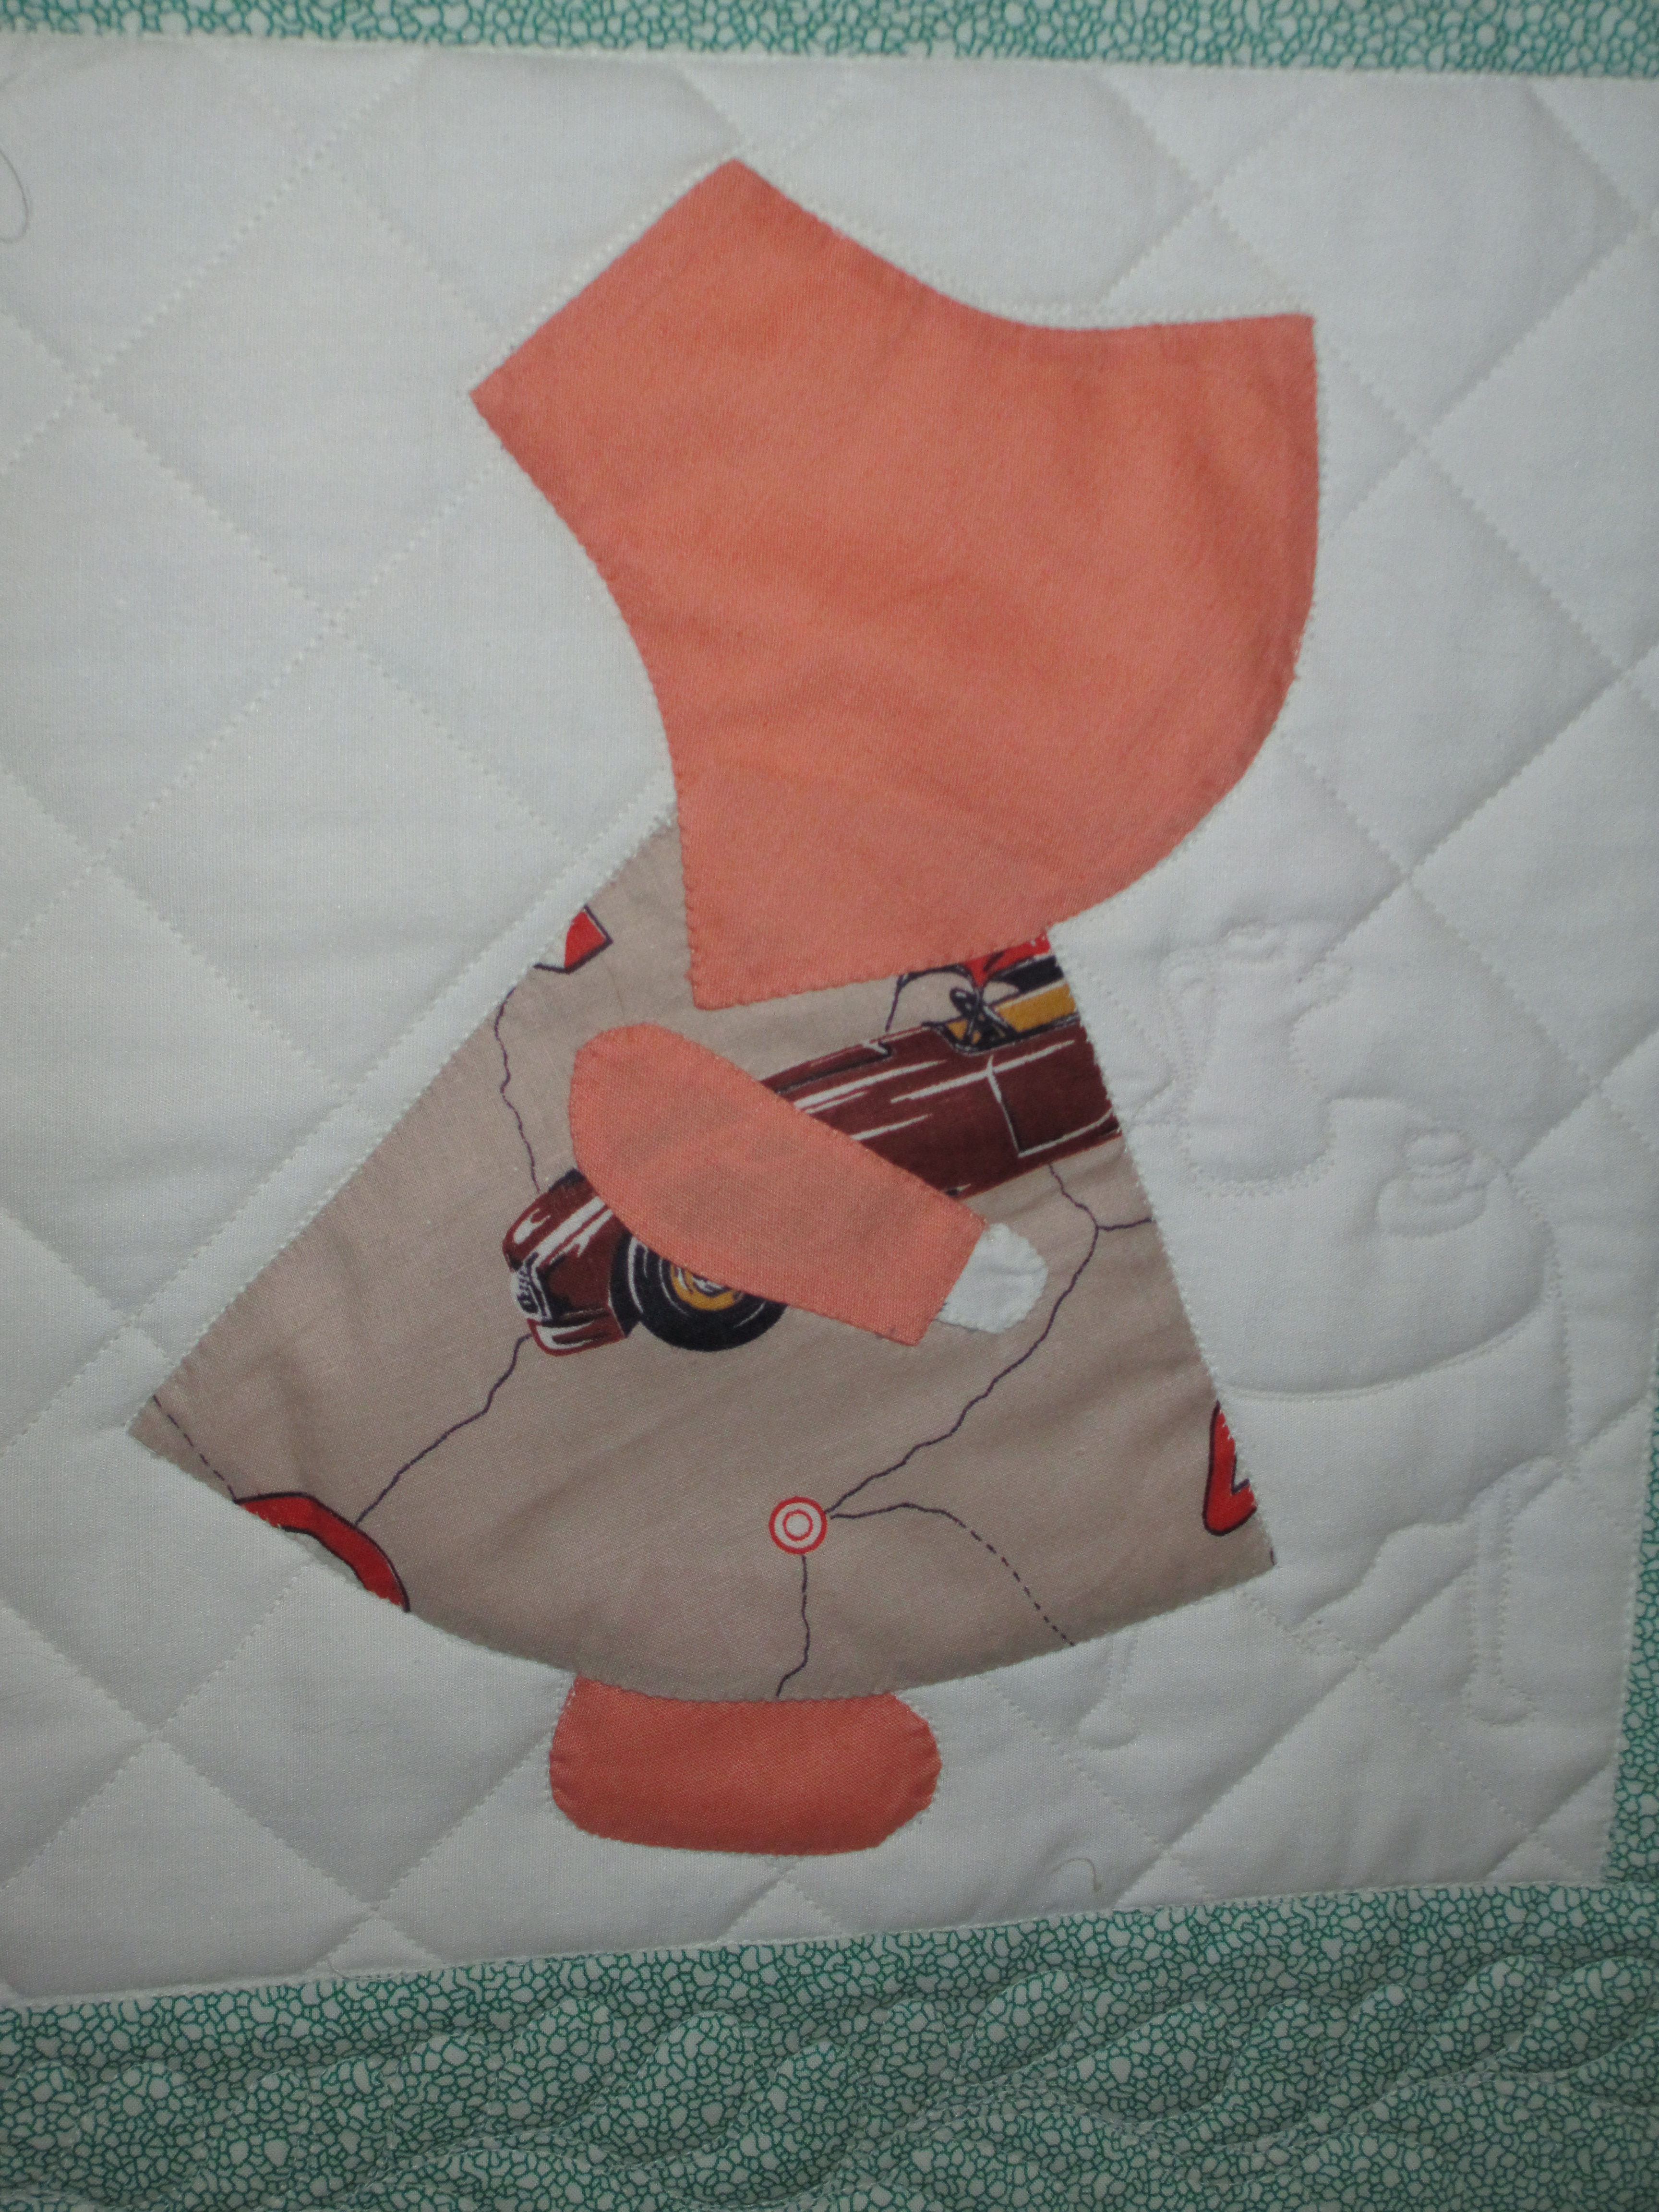
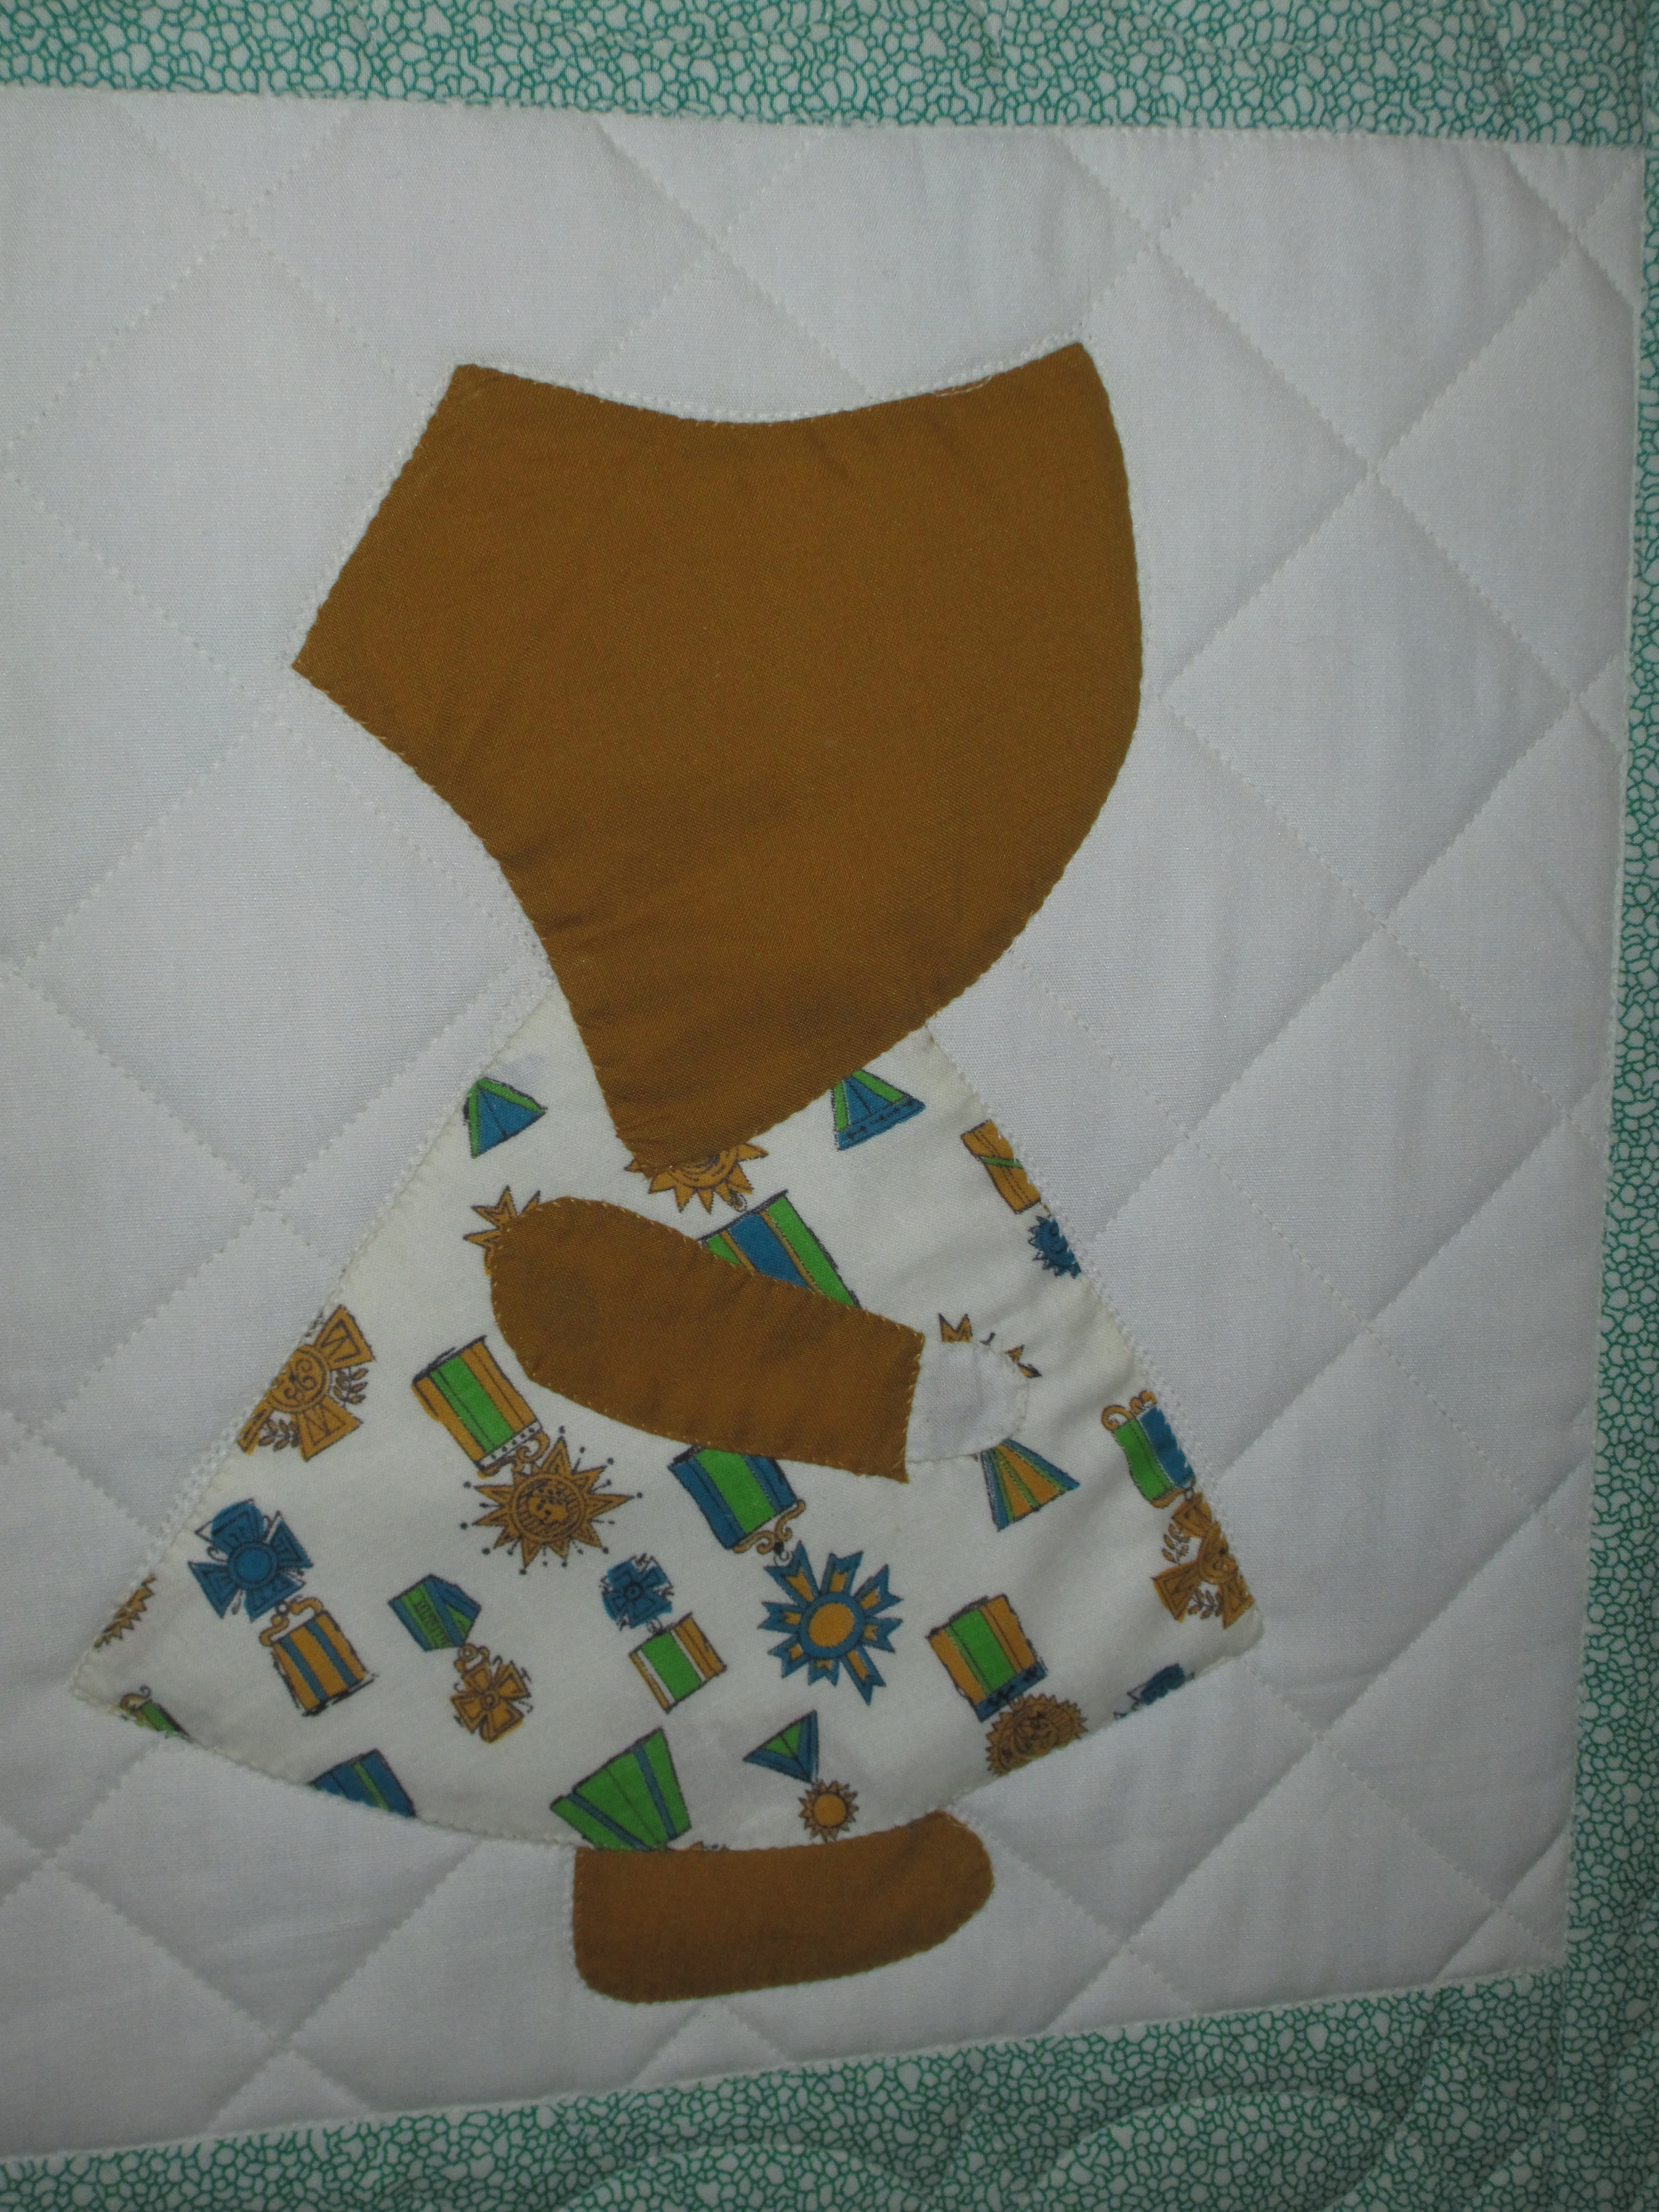
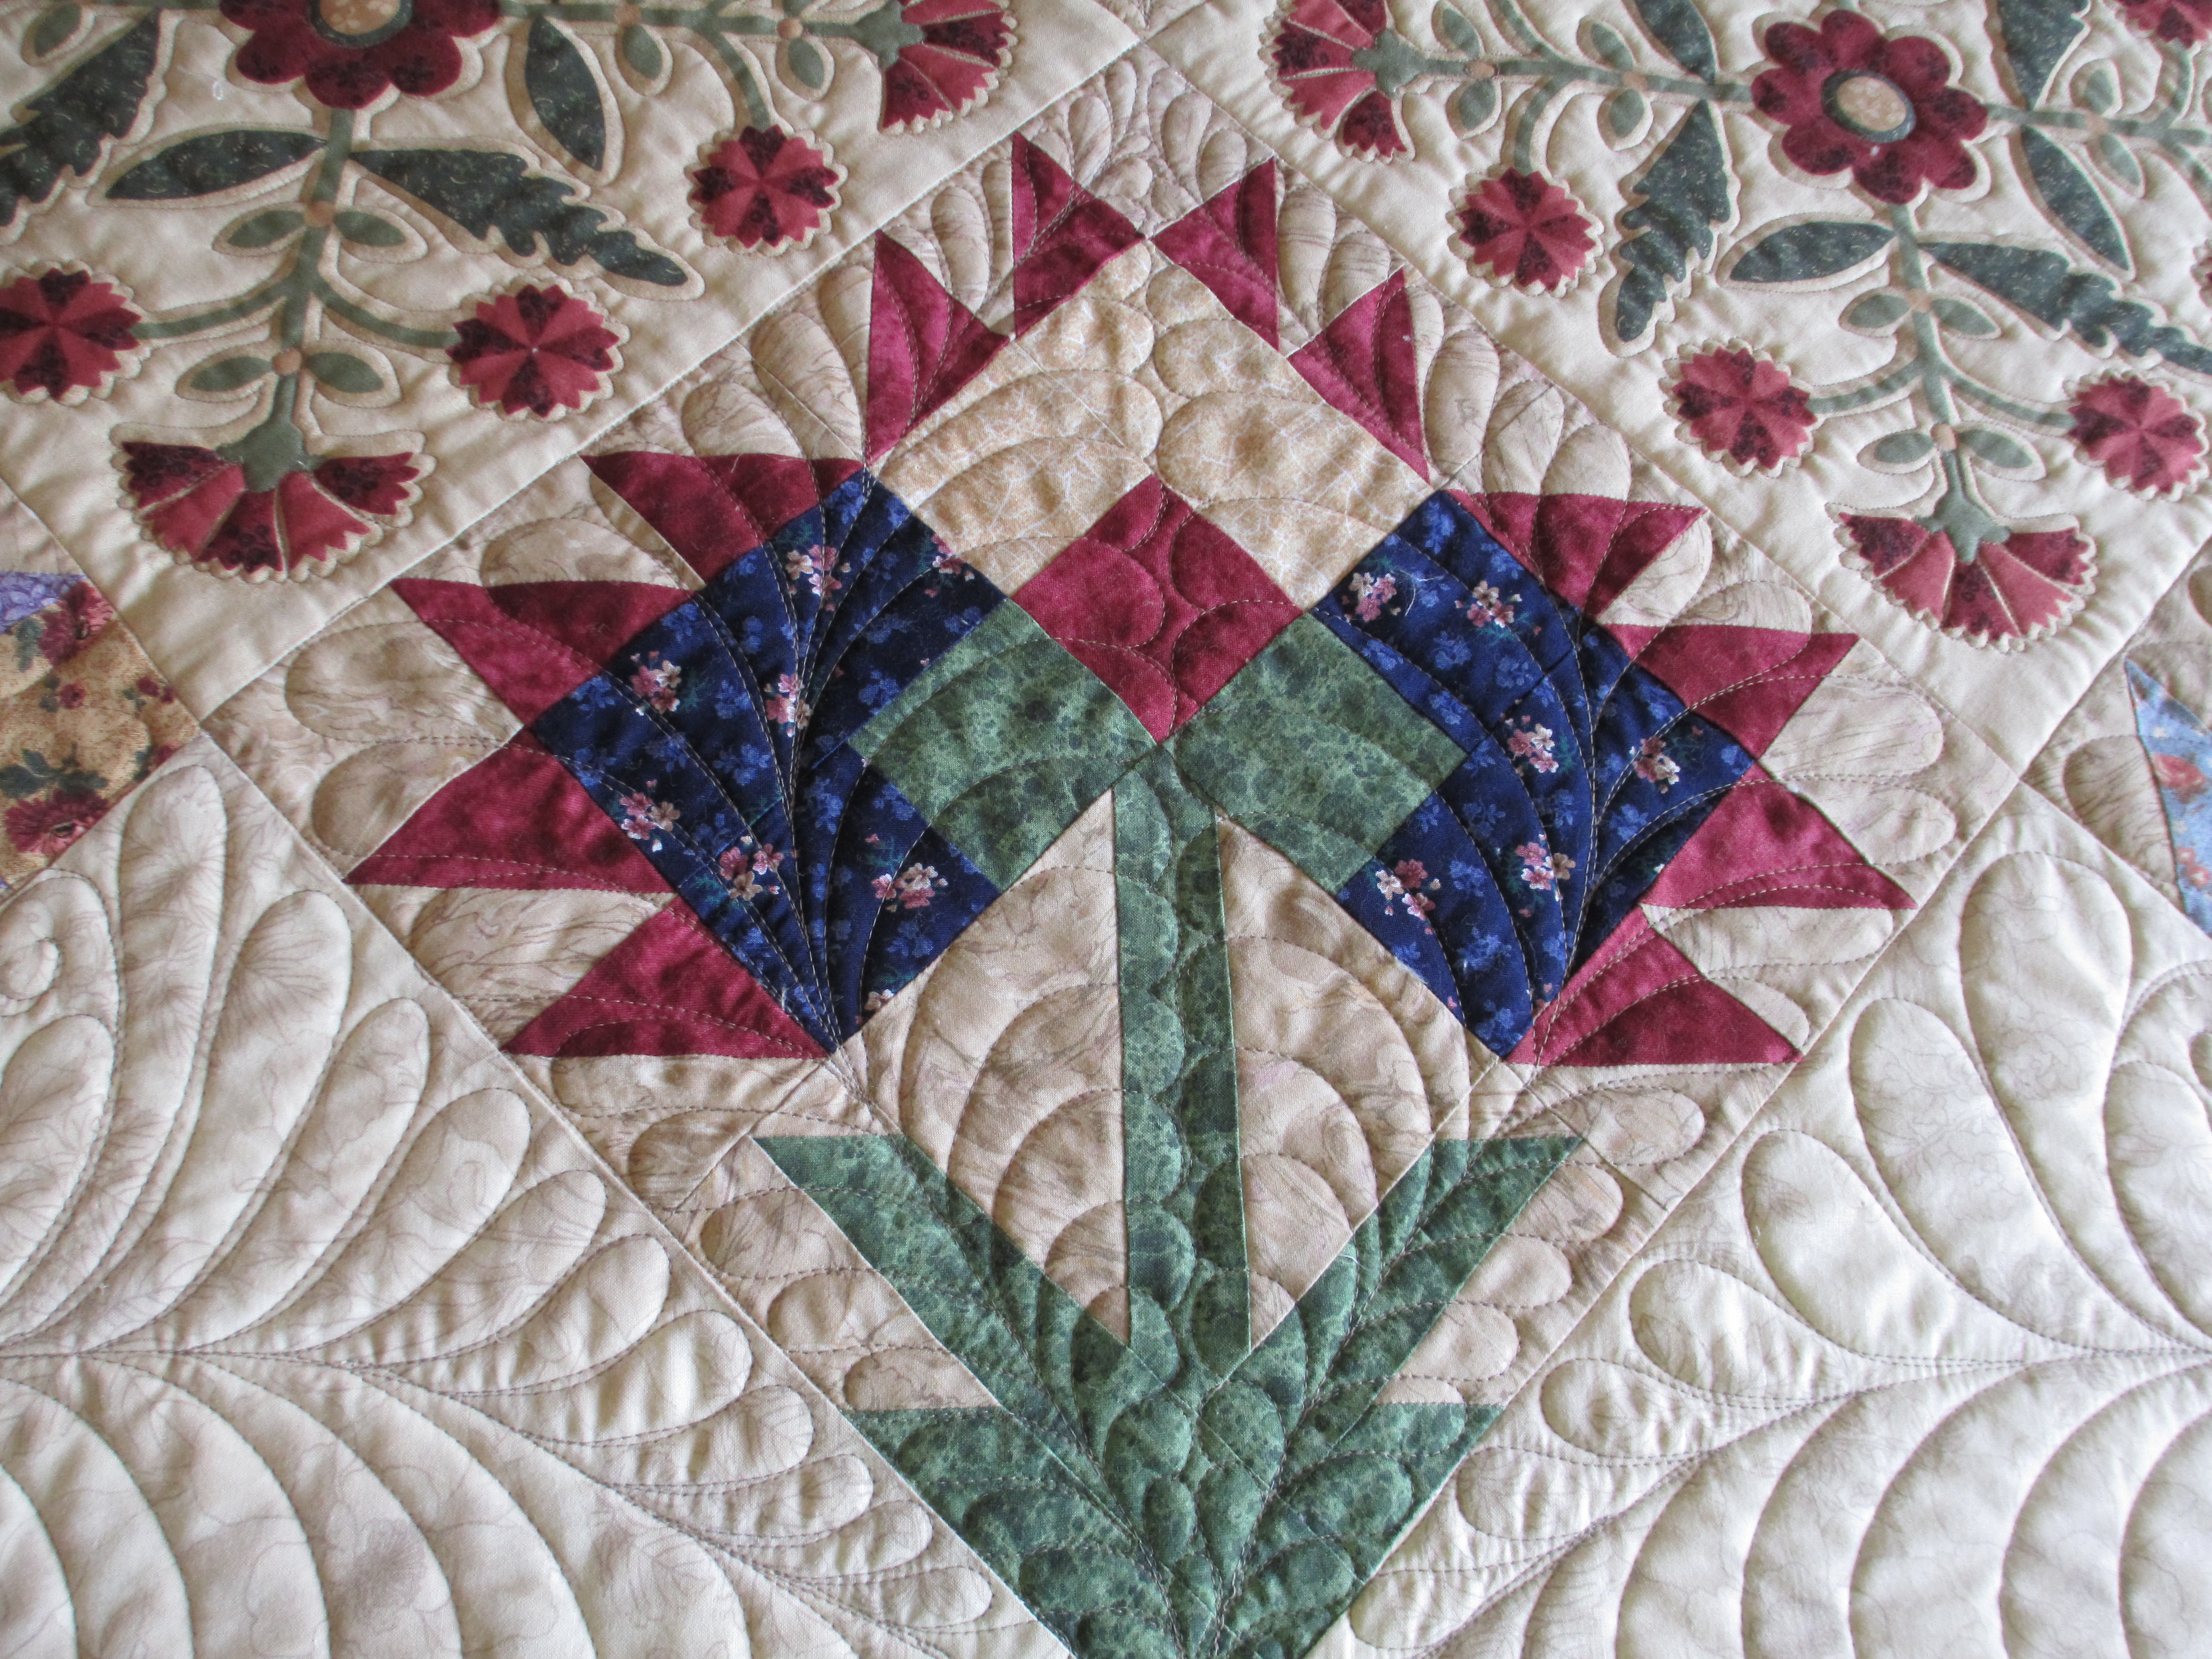
As you can see from this next picture, what looks like applique blocks are actually fabric panels.  This is great for those of us who love the look of applique but don’t have the time to do it ourselves.  I think it looks real enough.  Don’t you?

IMG_2487

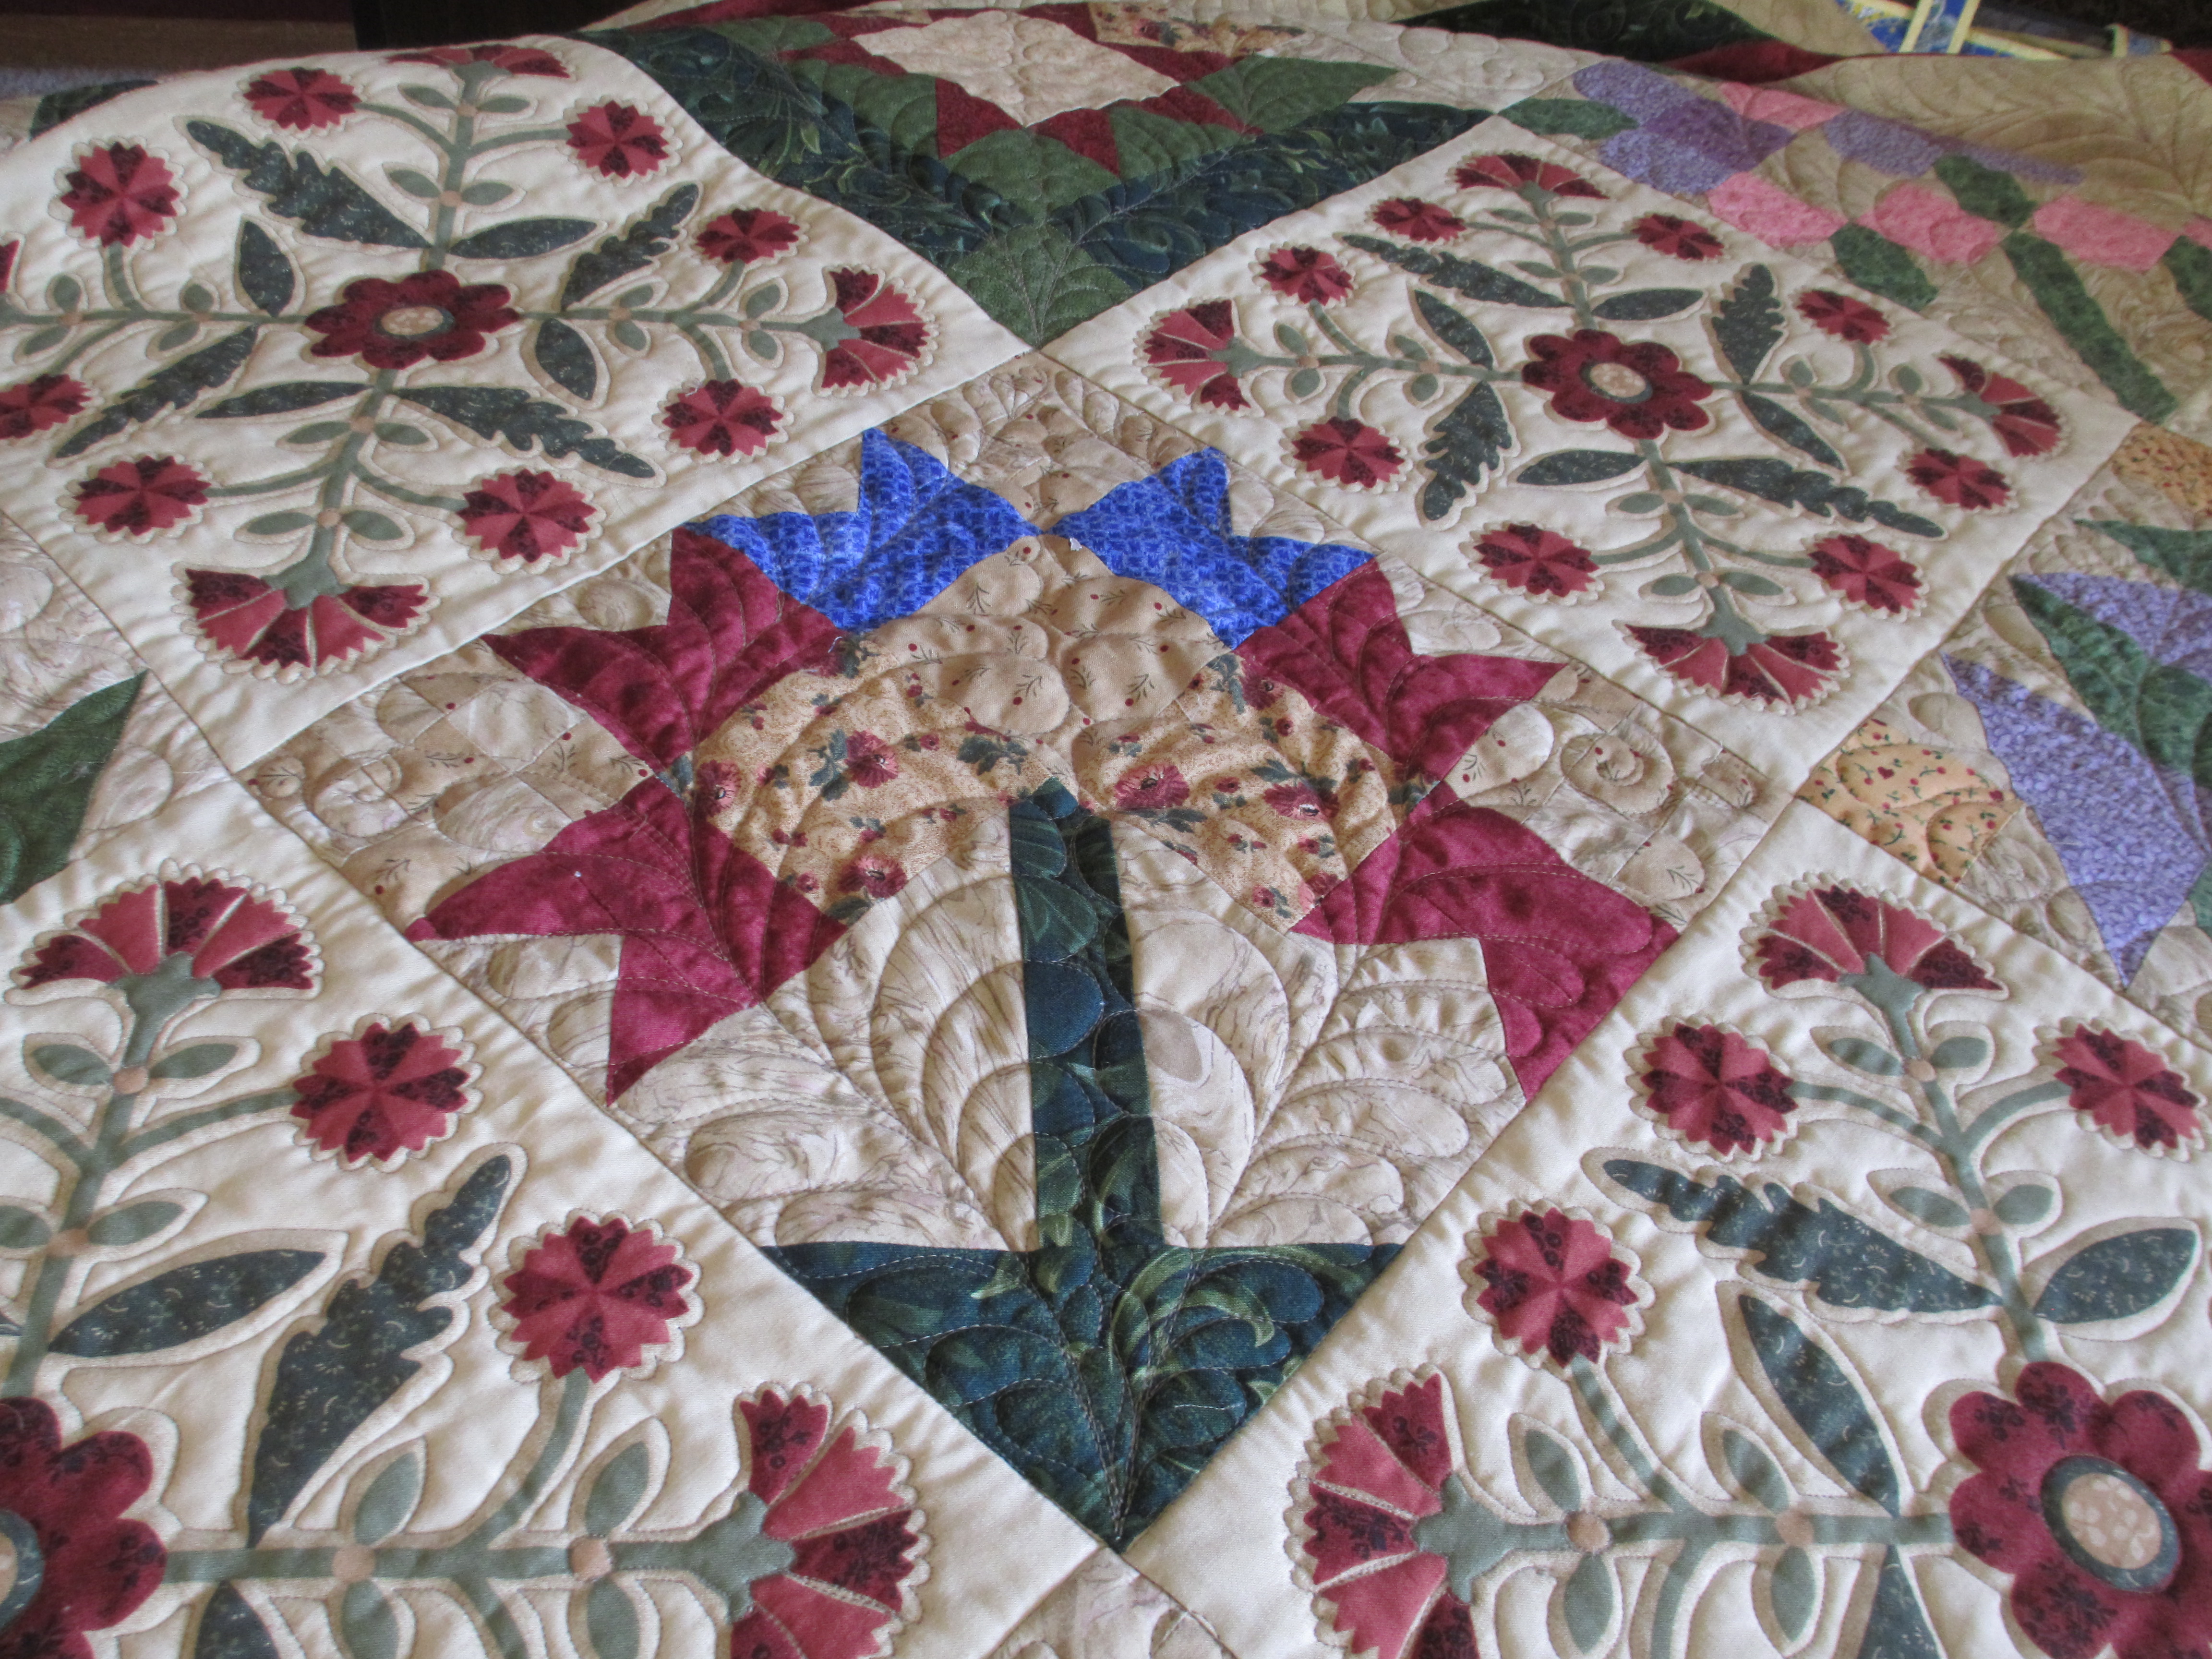
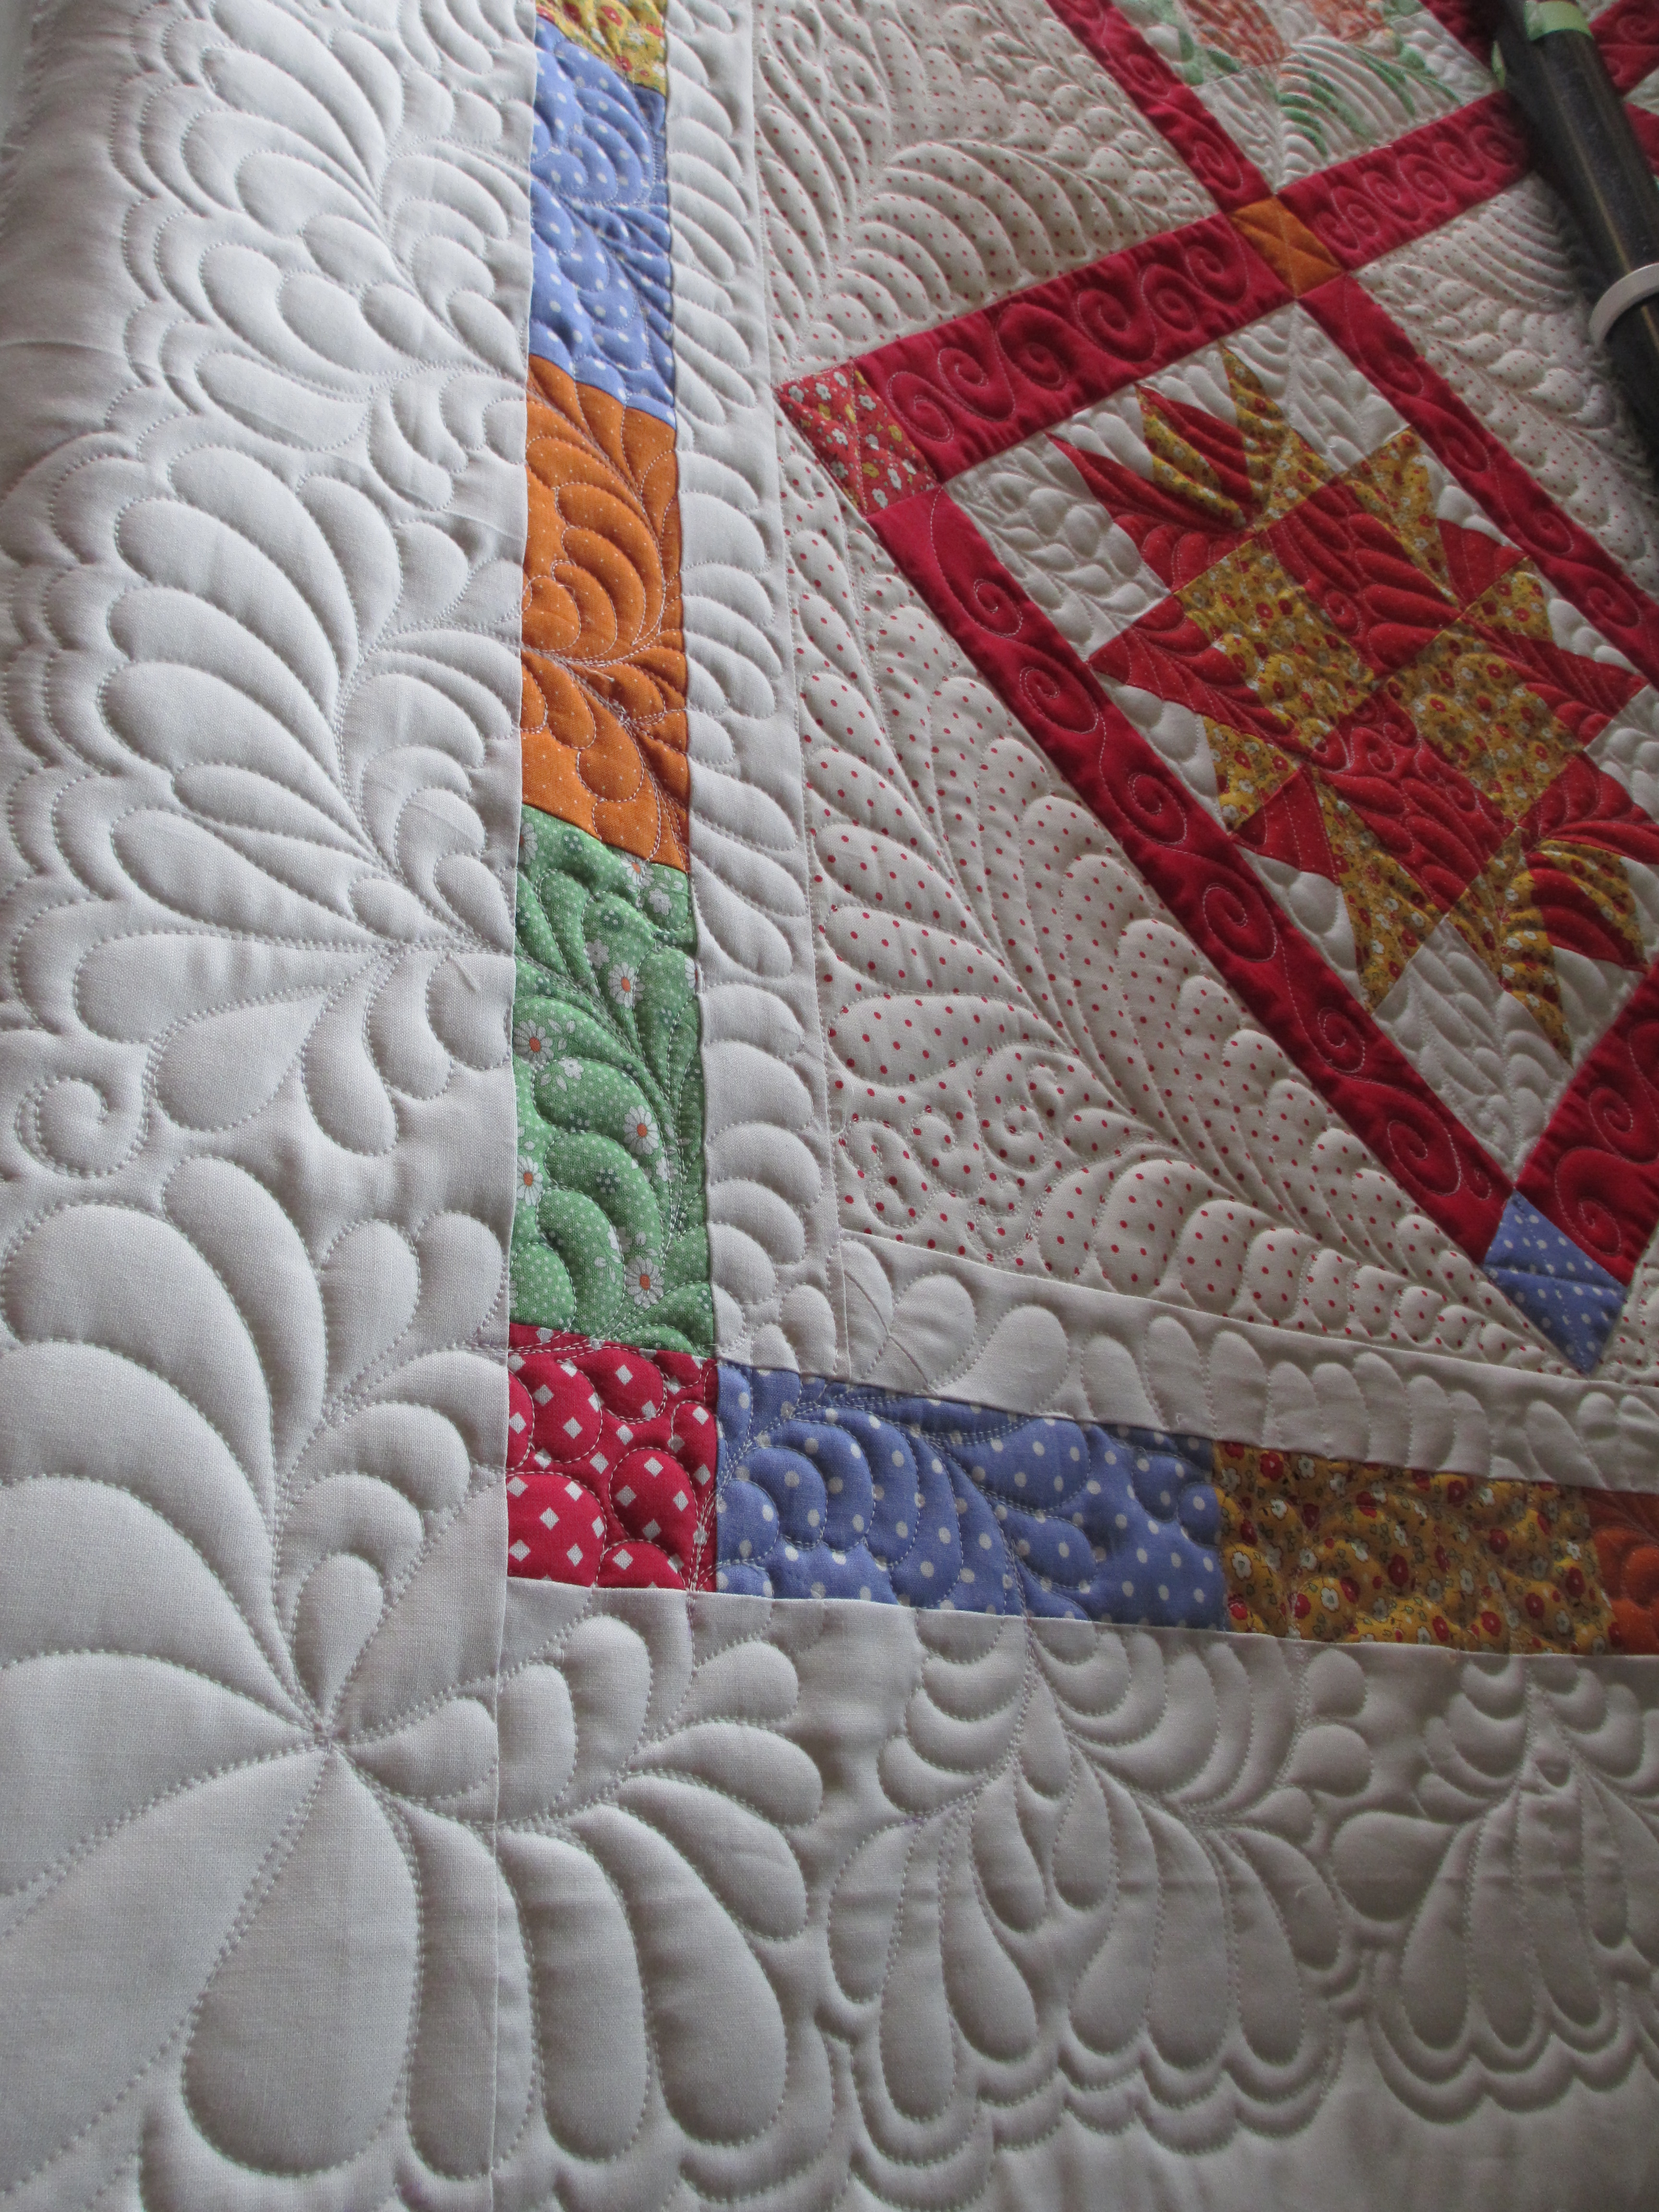
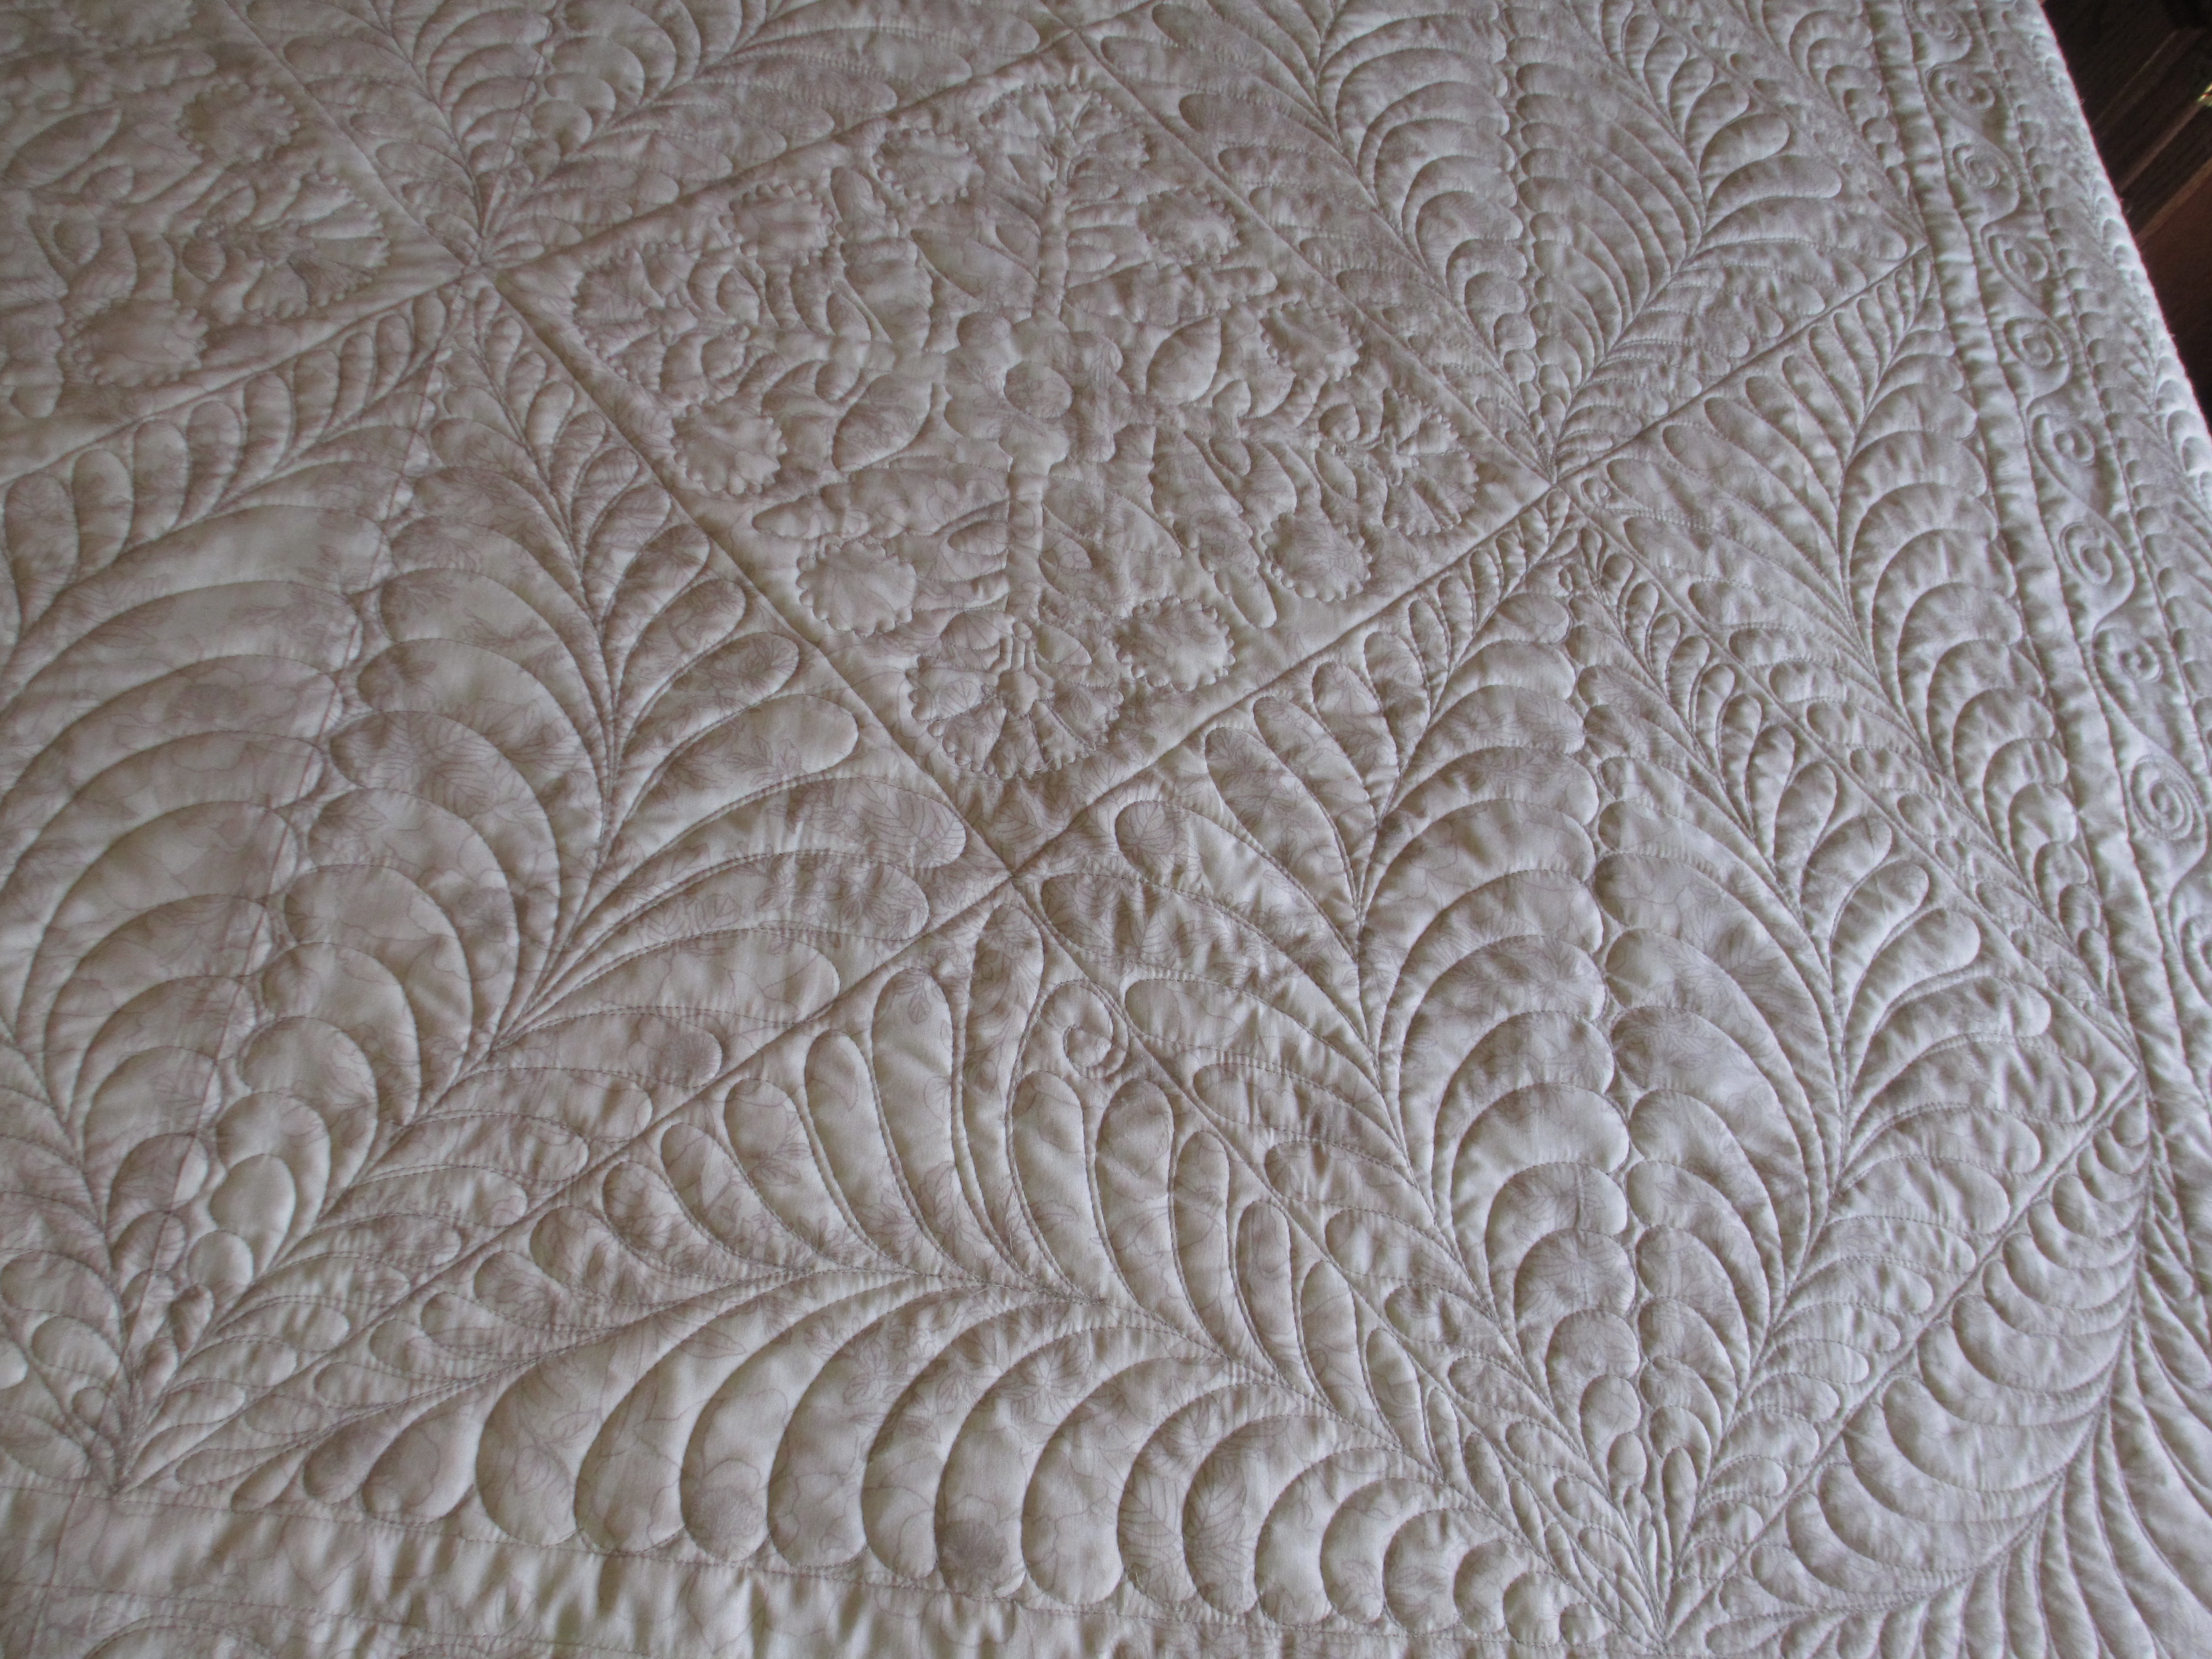
Wilma wanted the faux applique outlined and feathers everywhere else.  So, feathers, we did!

IMG_2483    IMG_2484

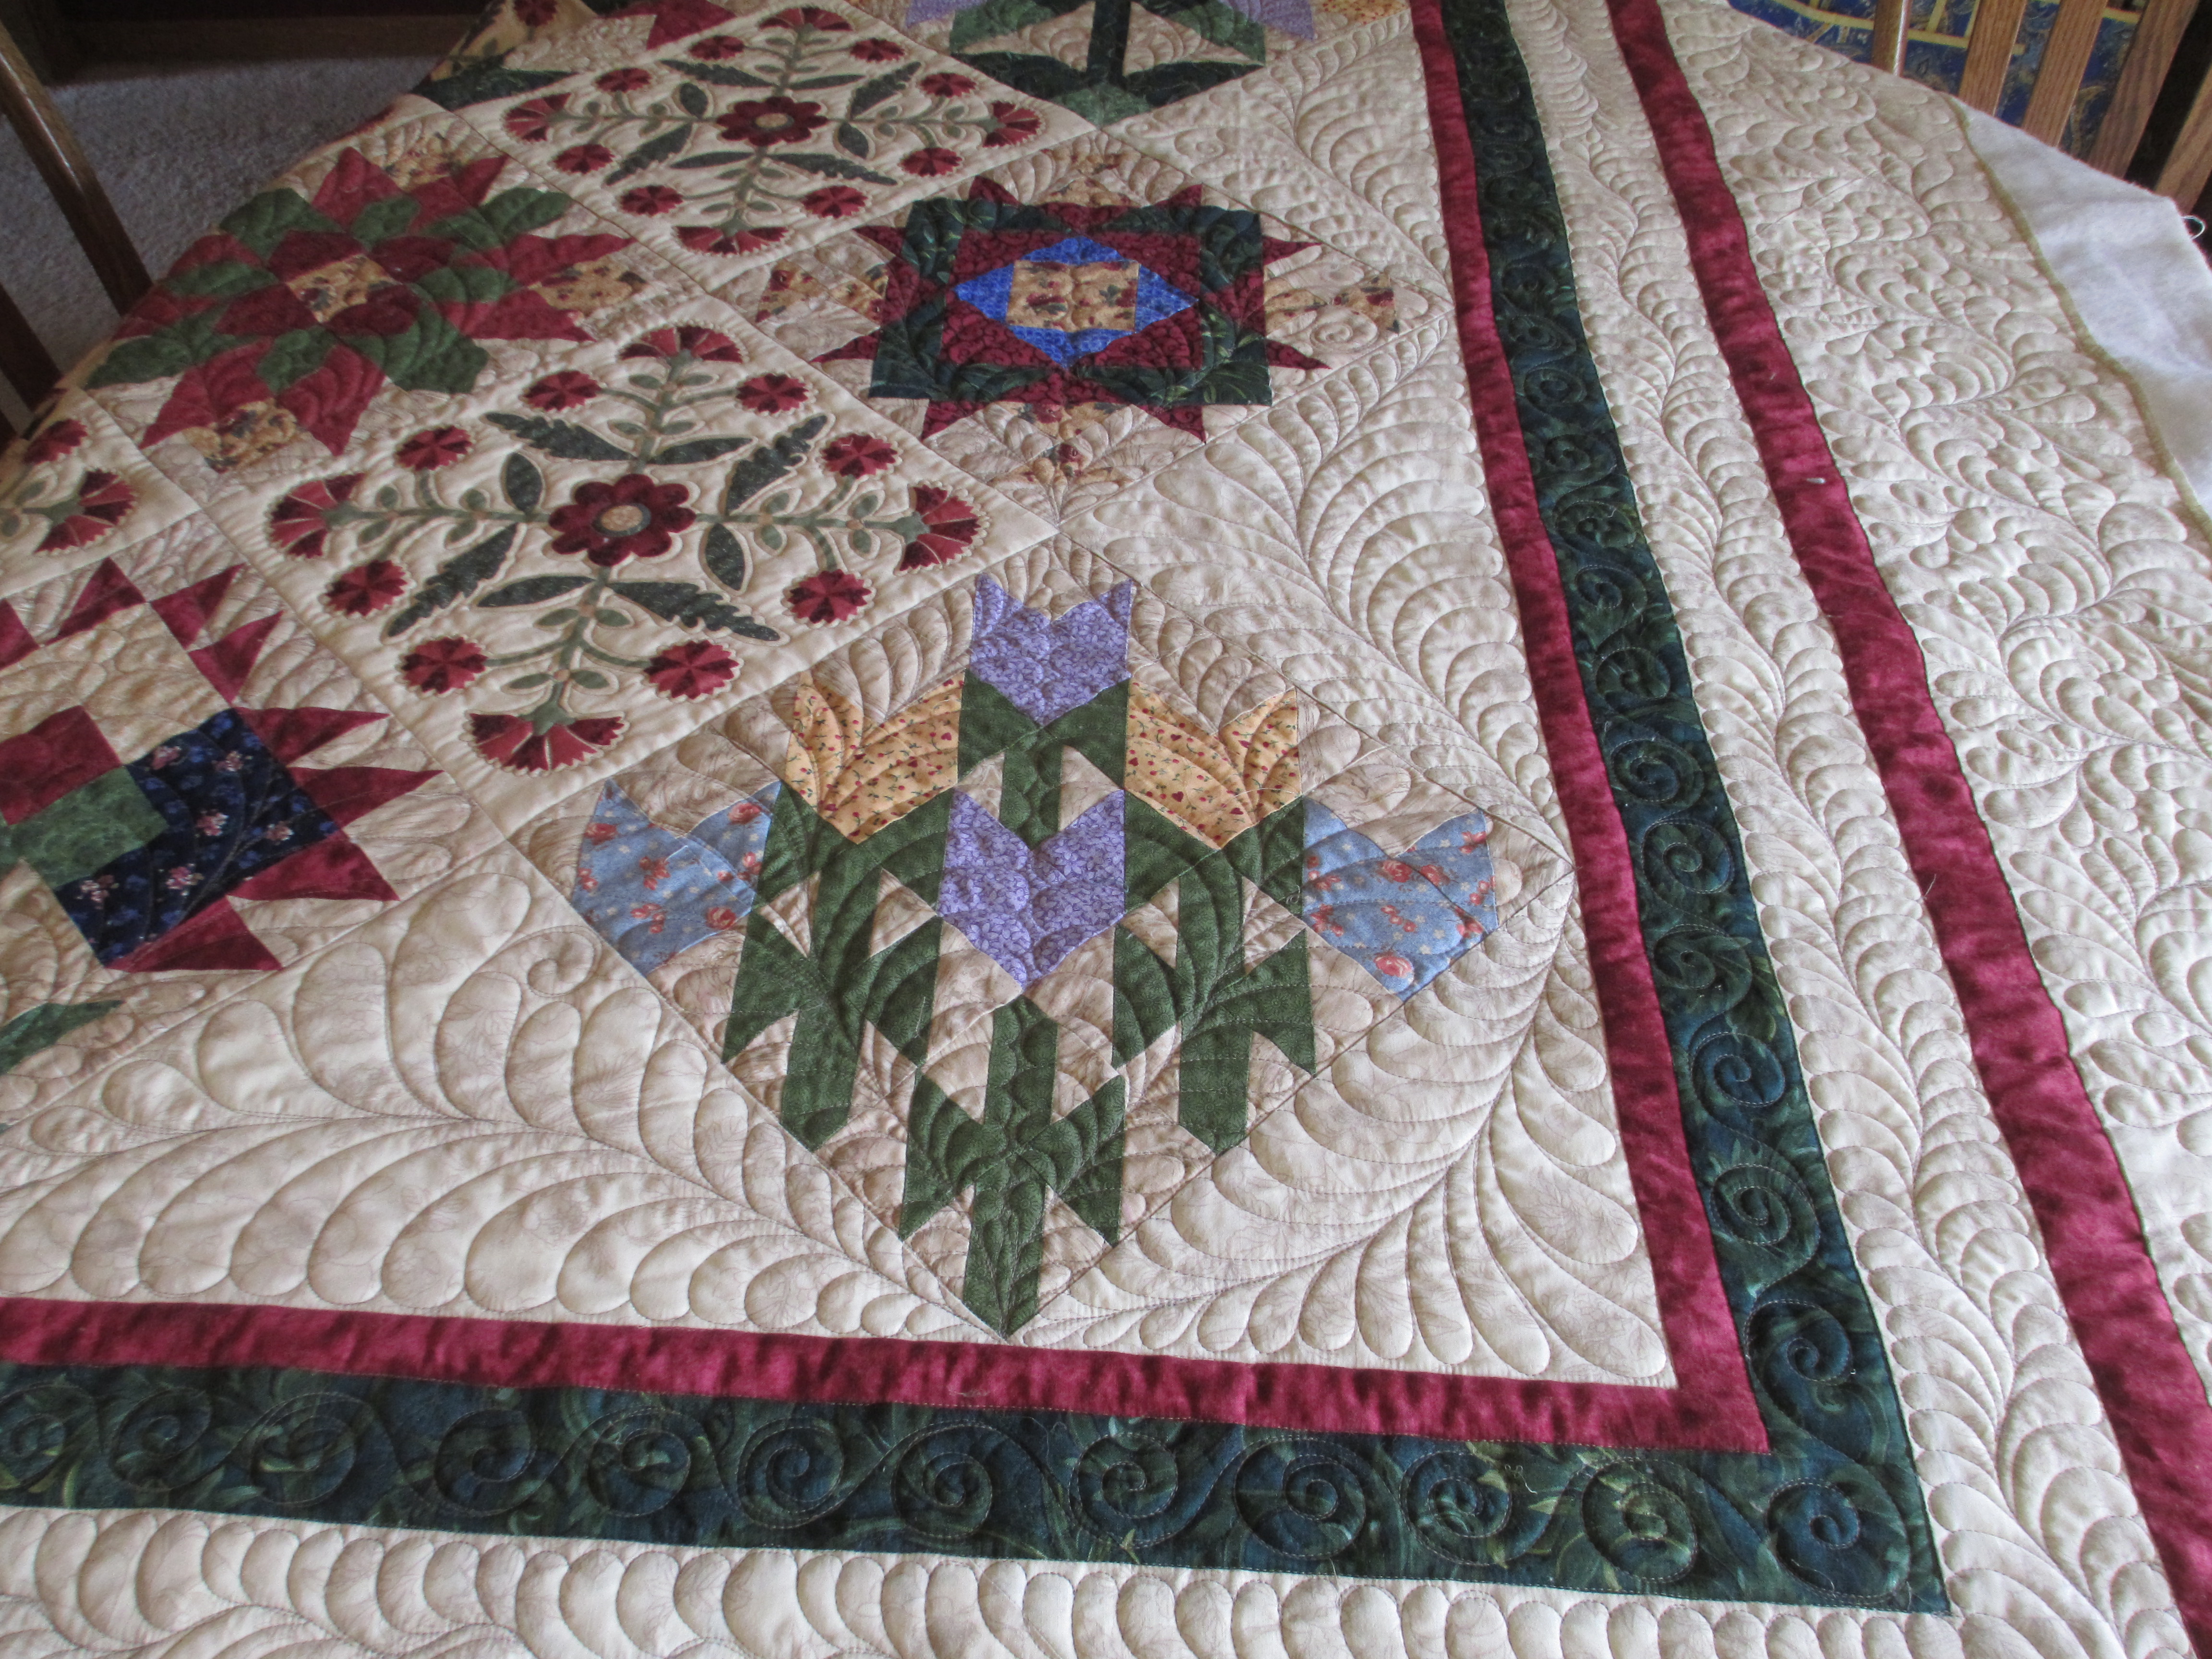
I could have done any number of variations of feather styles on Wilma’s quilt, but I liked the way the feathers in the picture below cradled the bouquets of flowers.  I thought they complimented the pieced blocks nicely.

IMG_2485

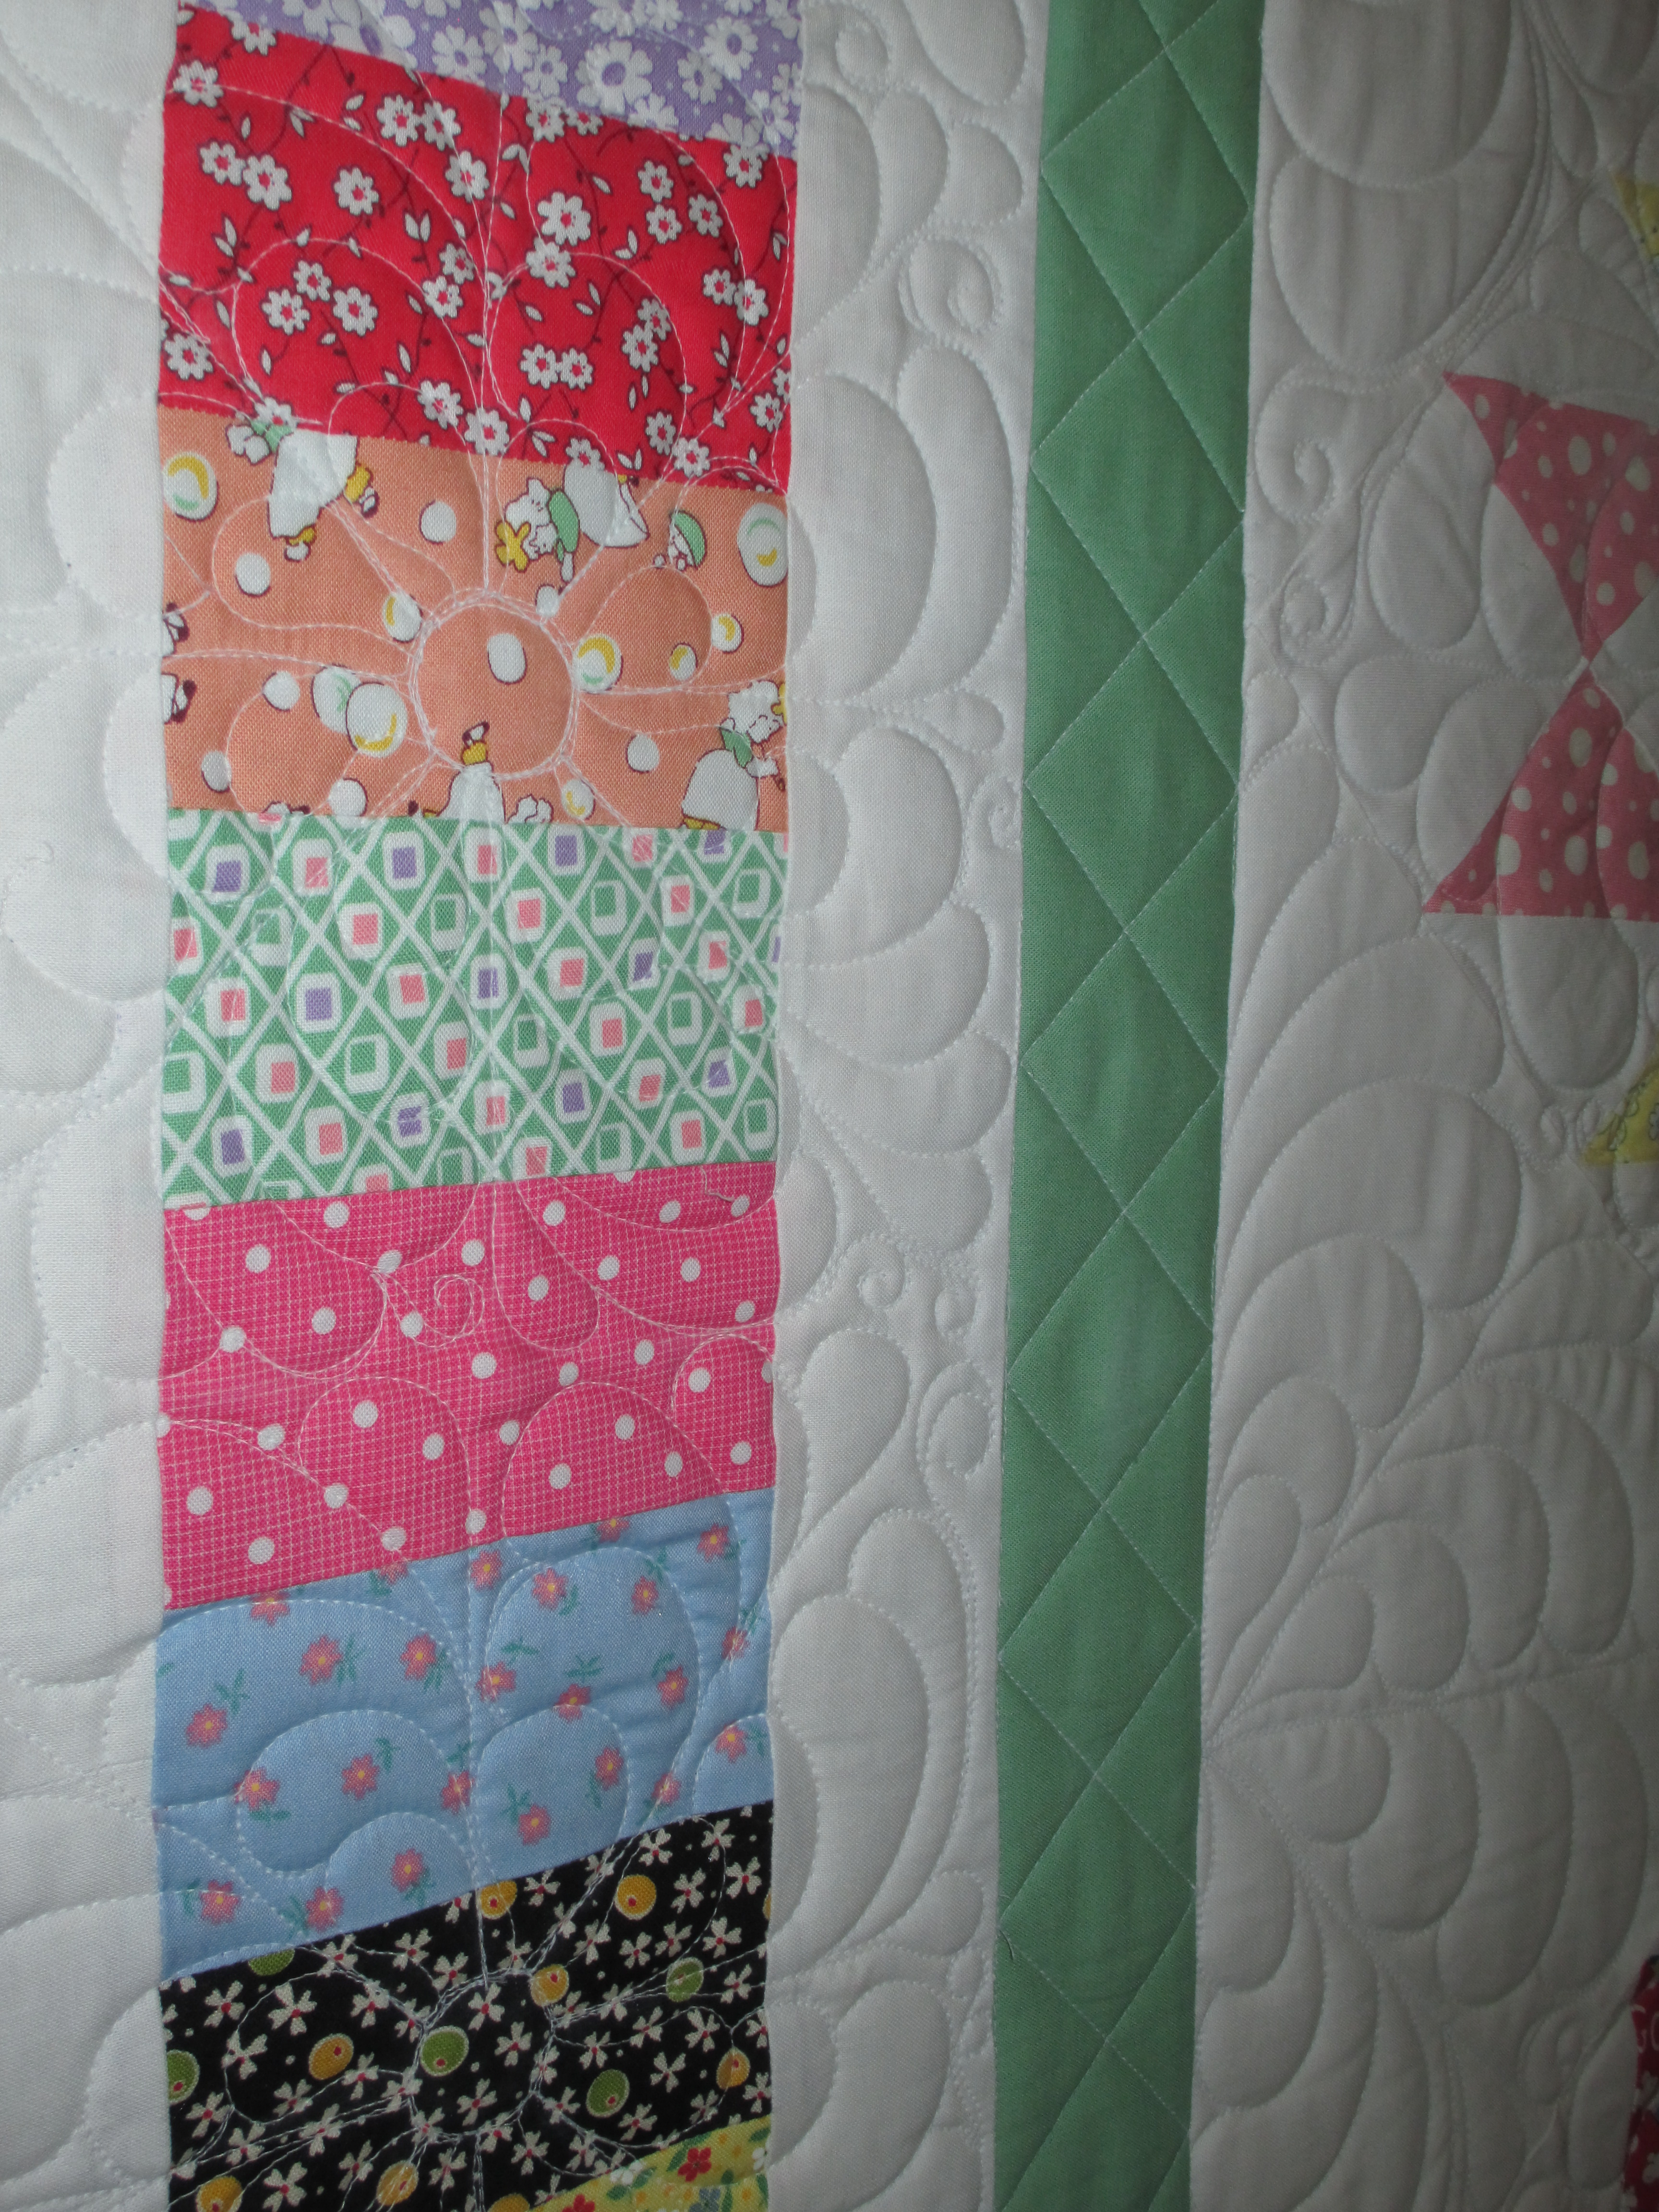
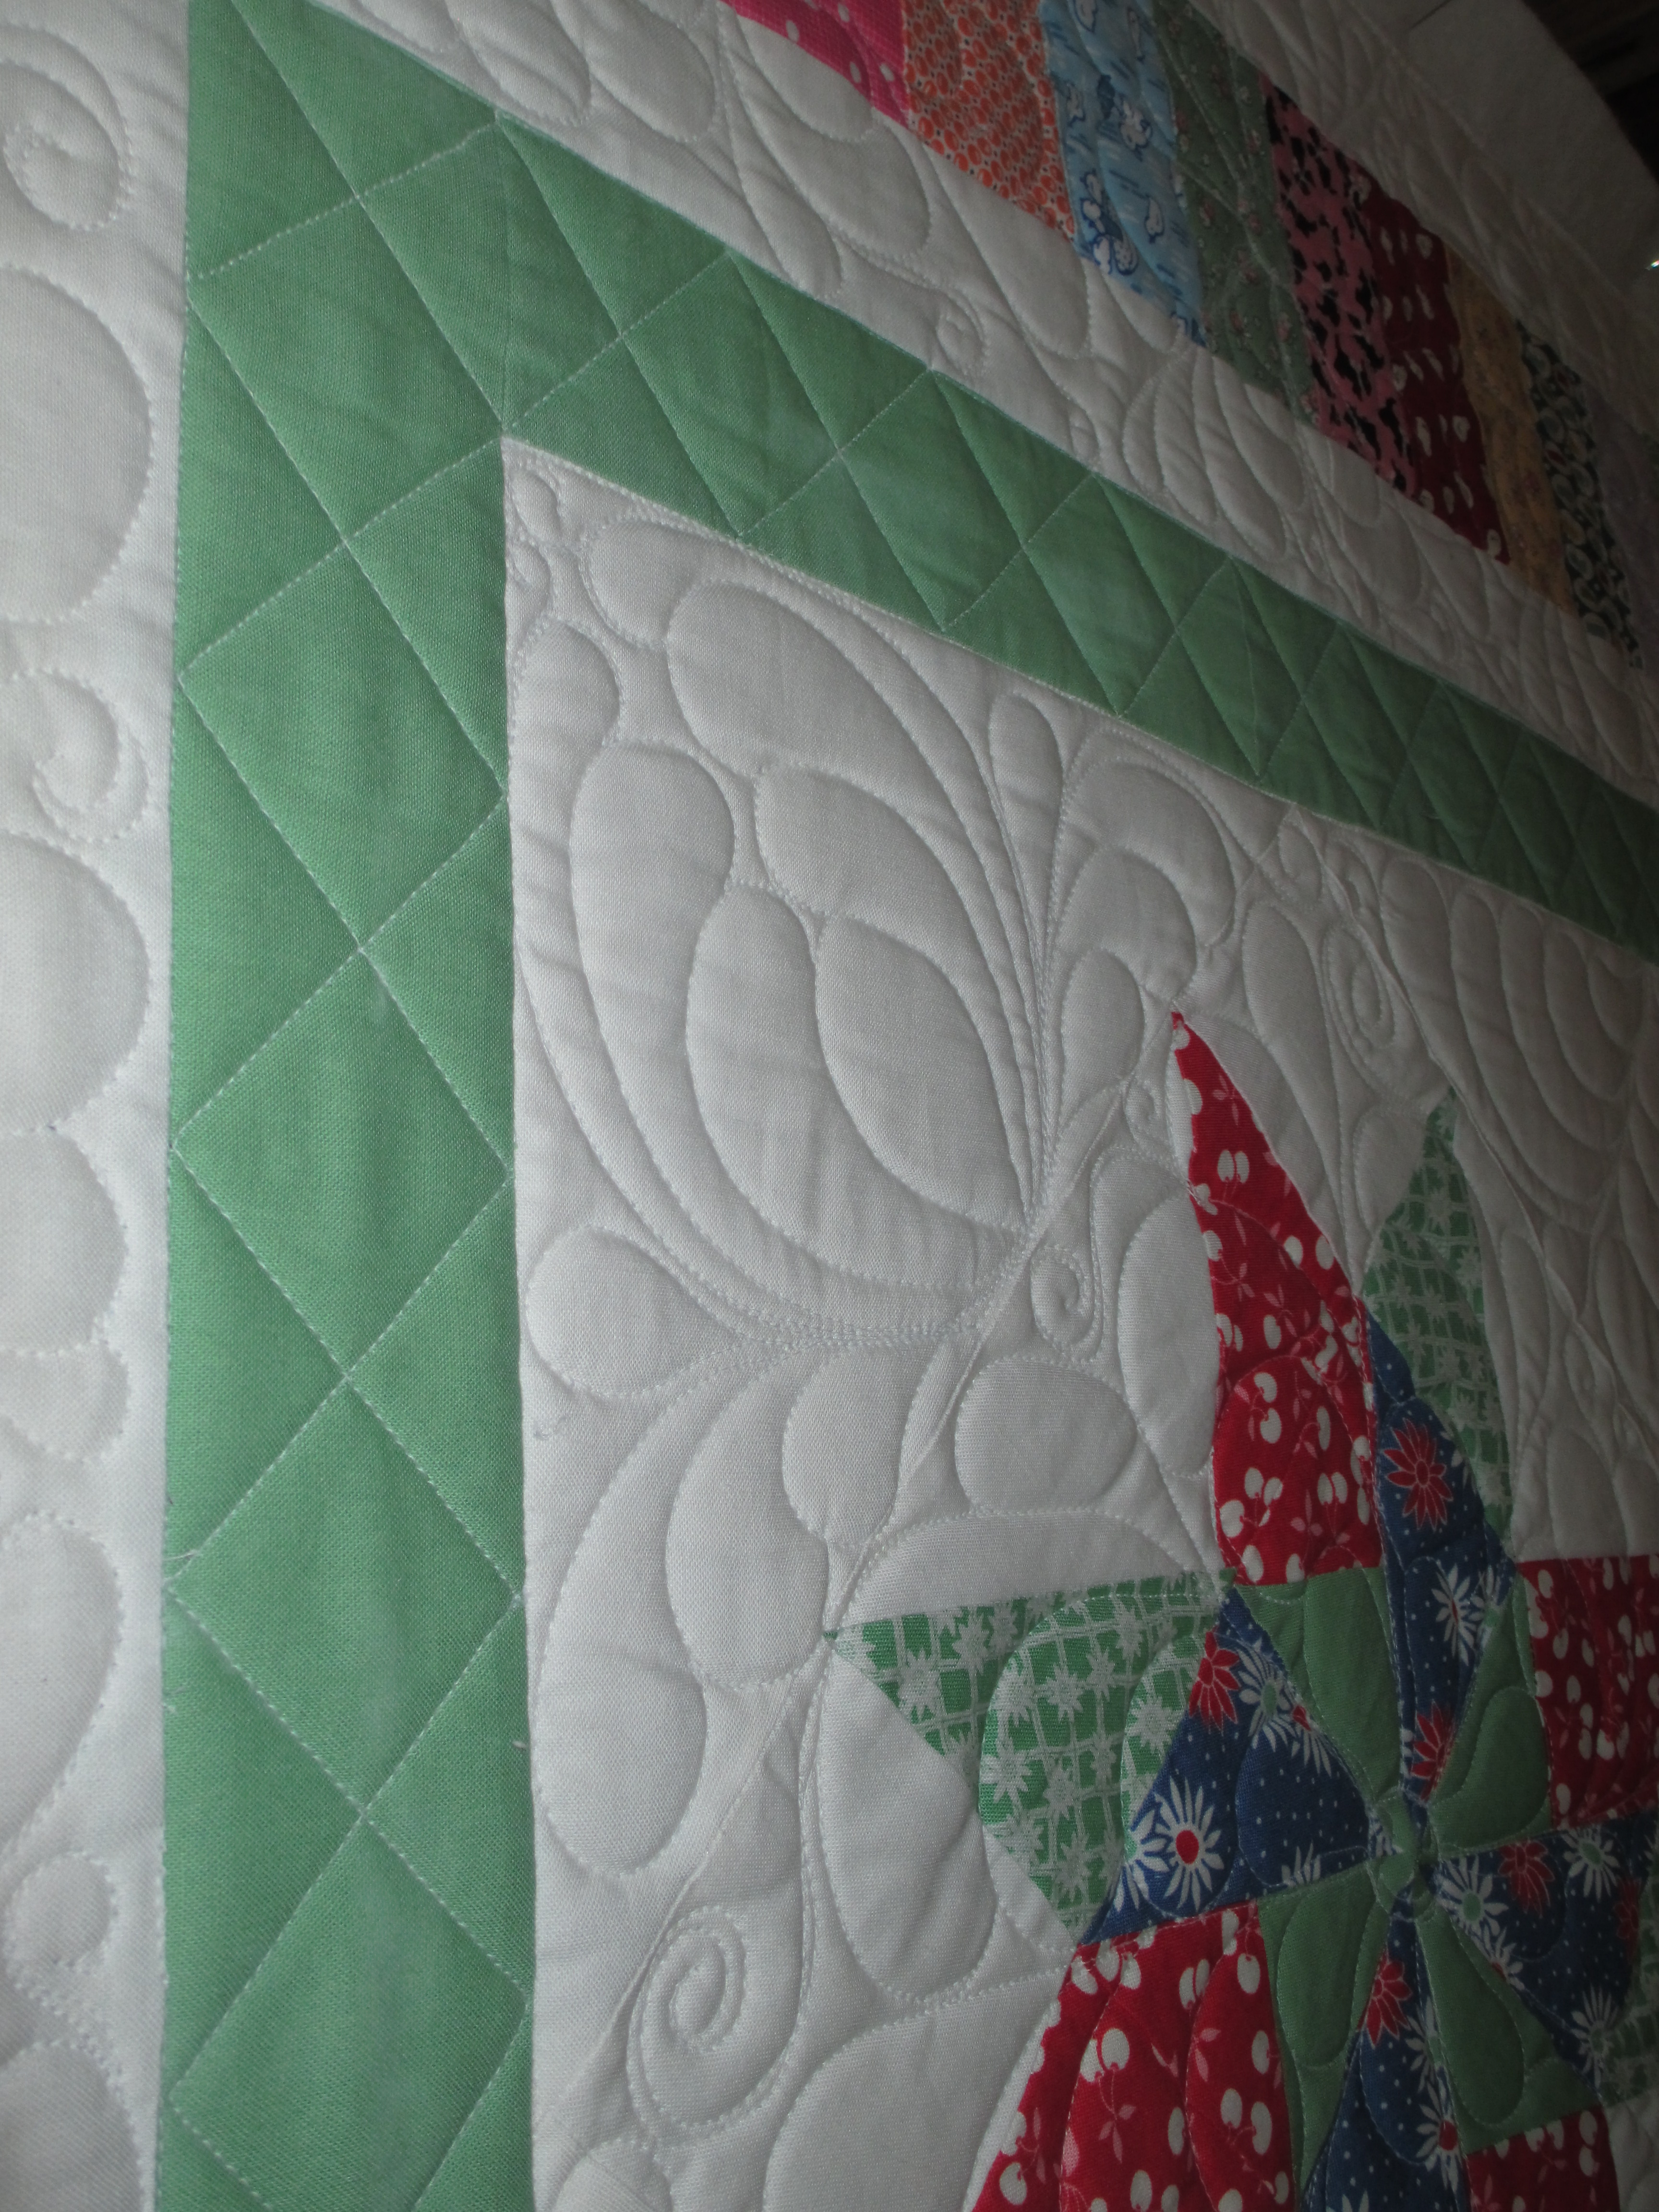
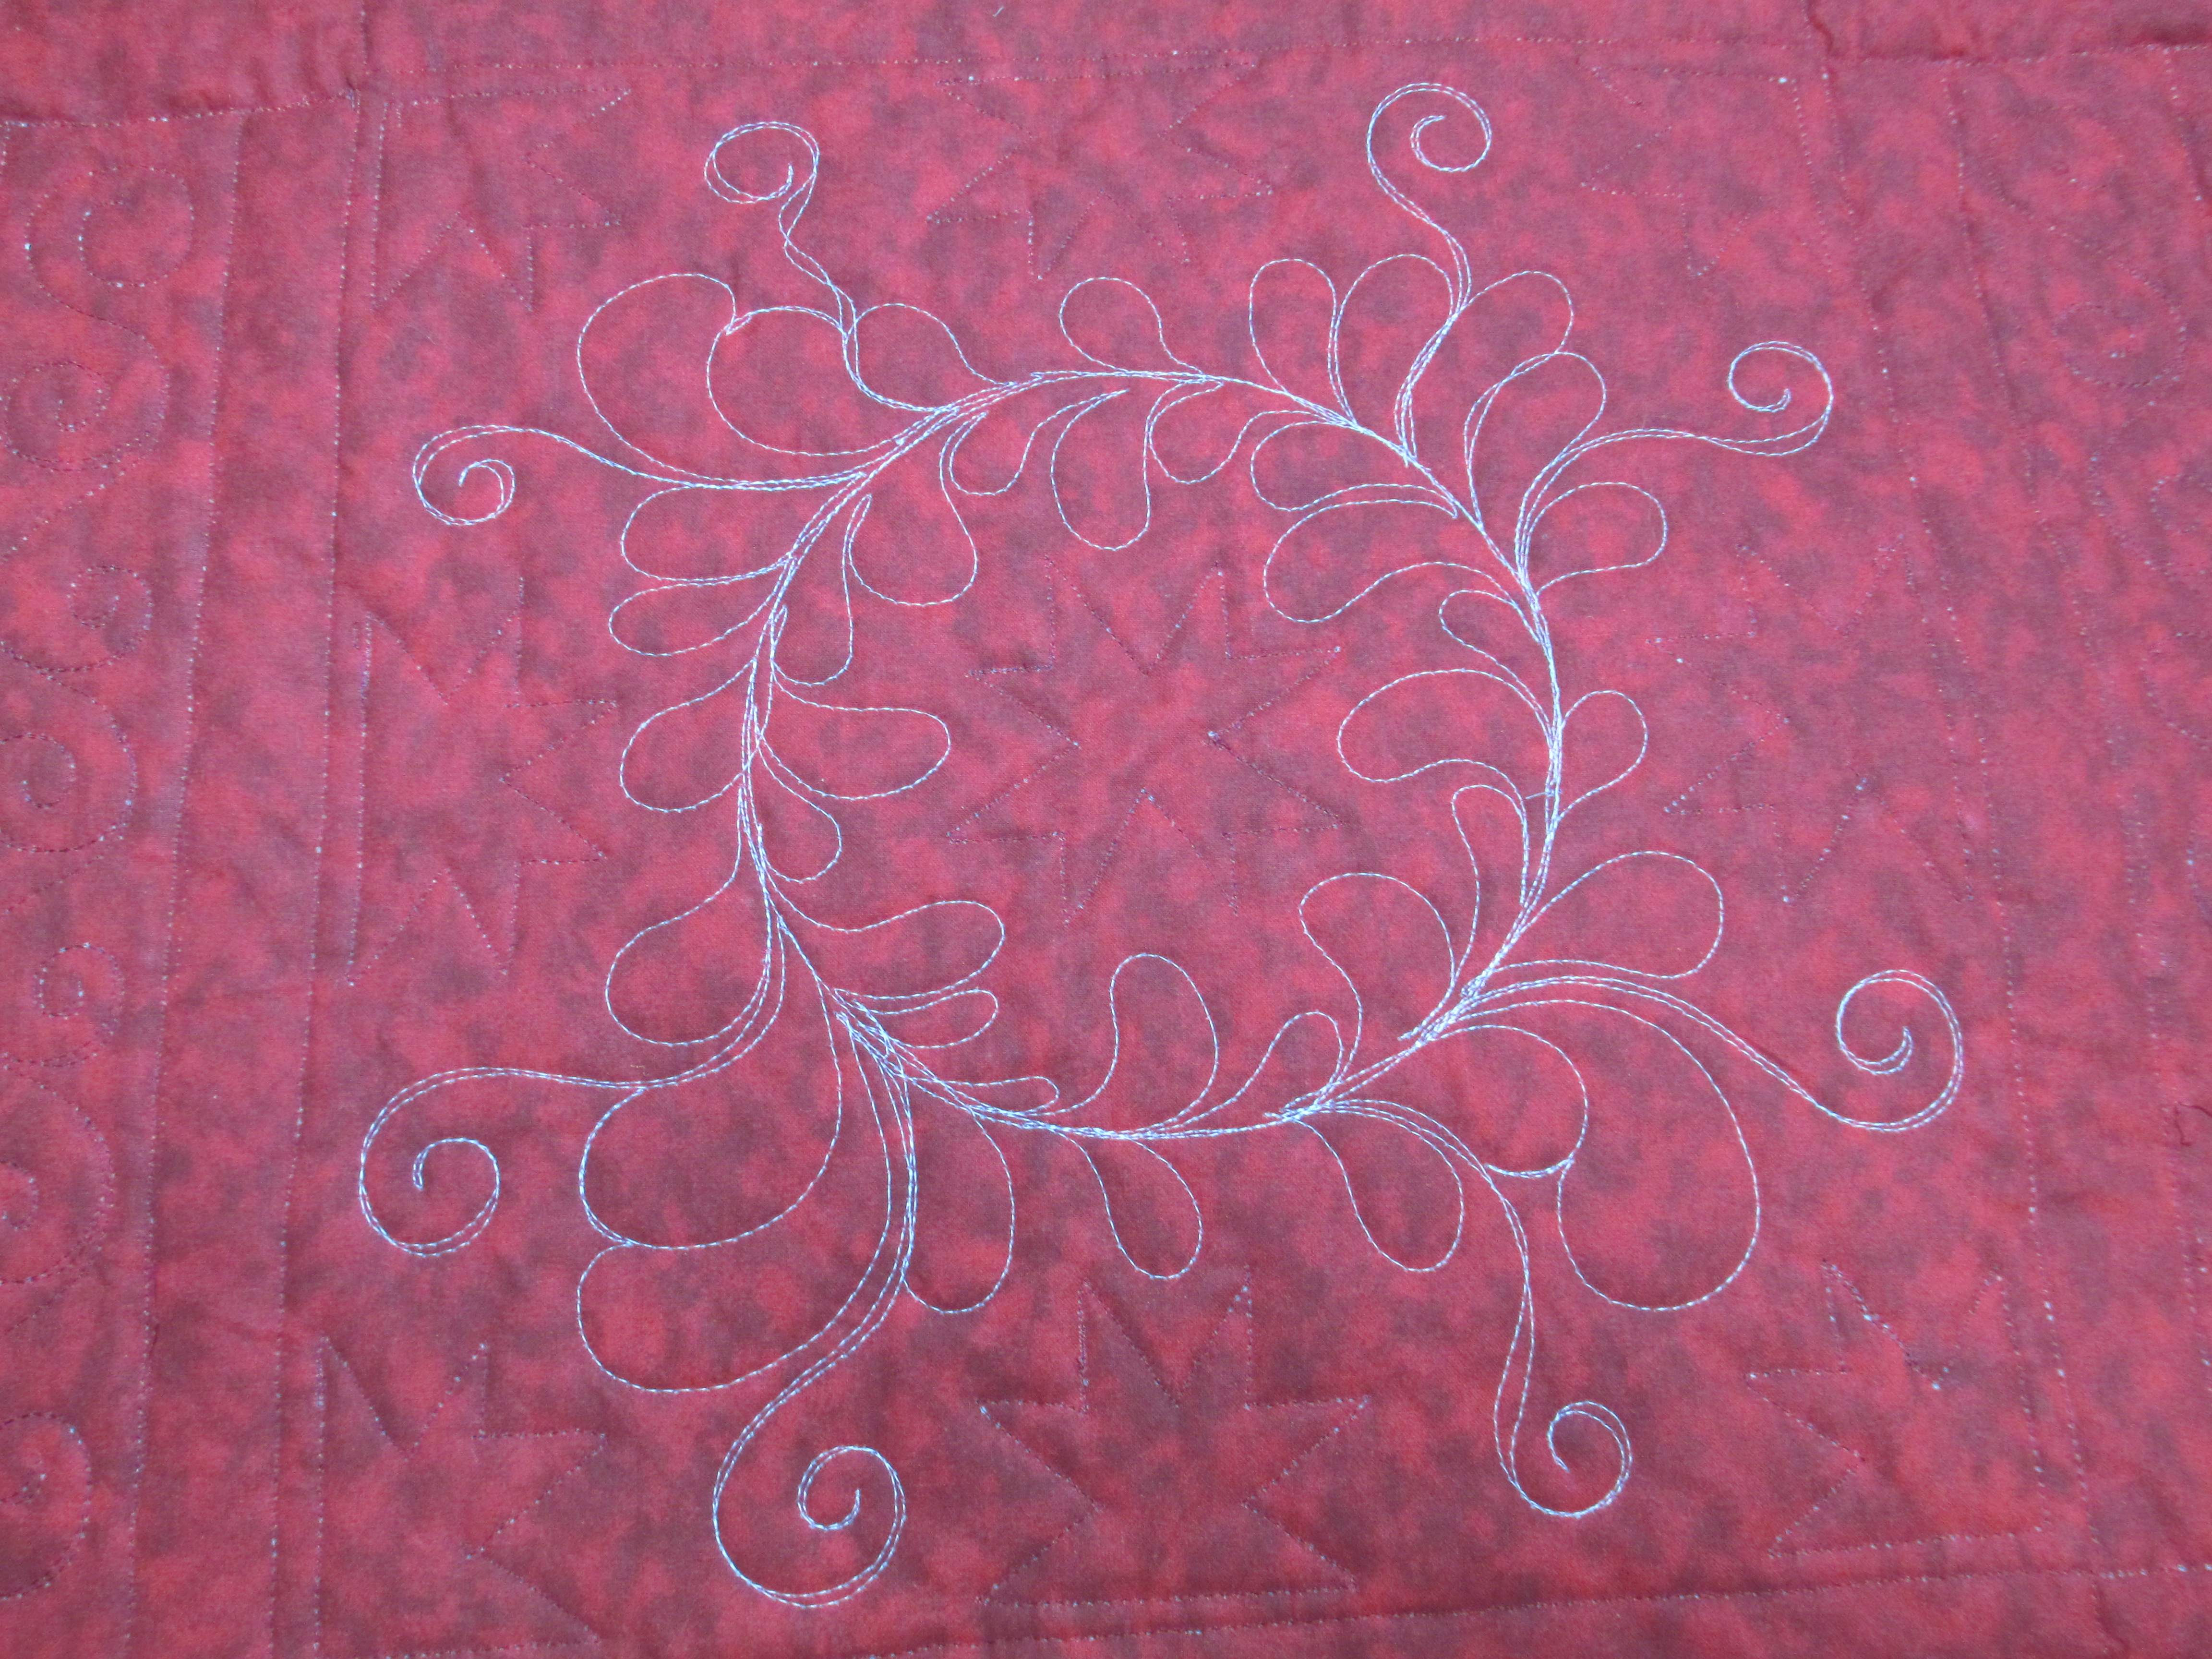
And, here’s the back side.

IMG_2481

IMG_2480  IMG_2479

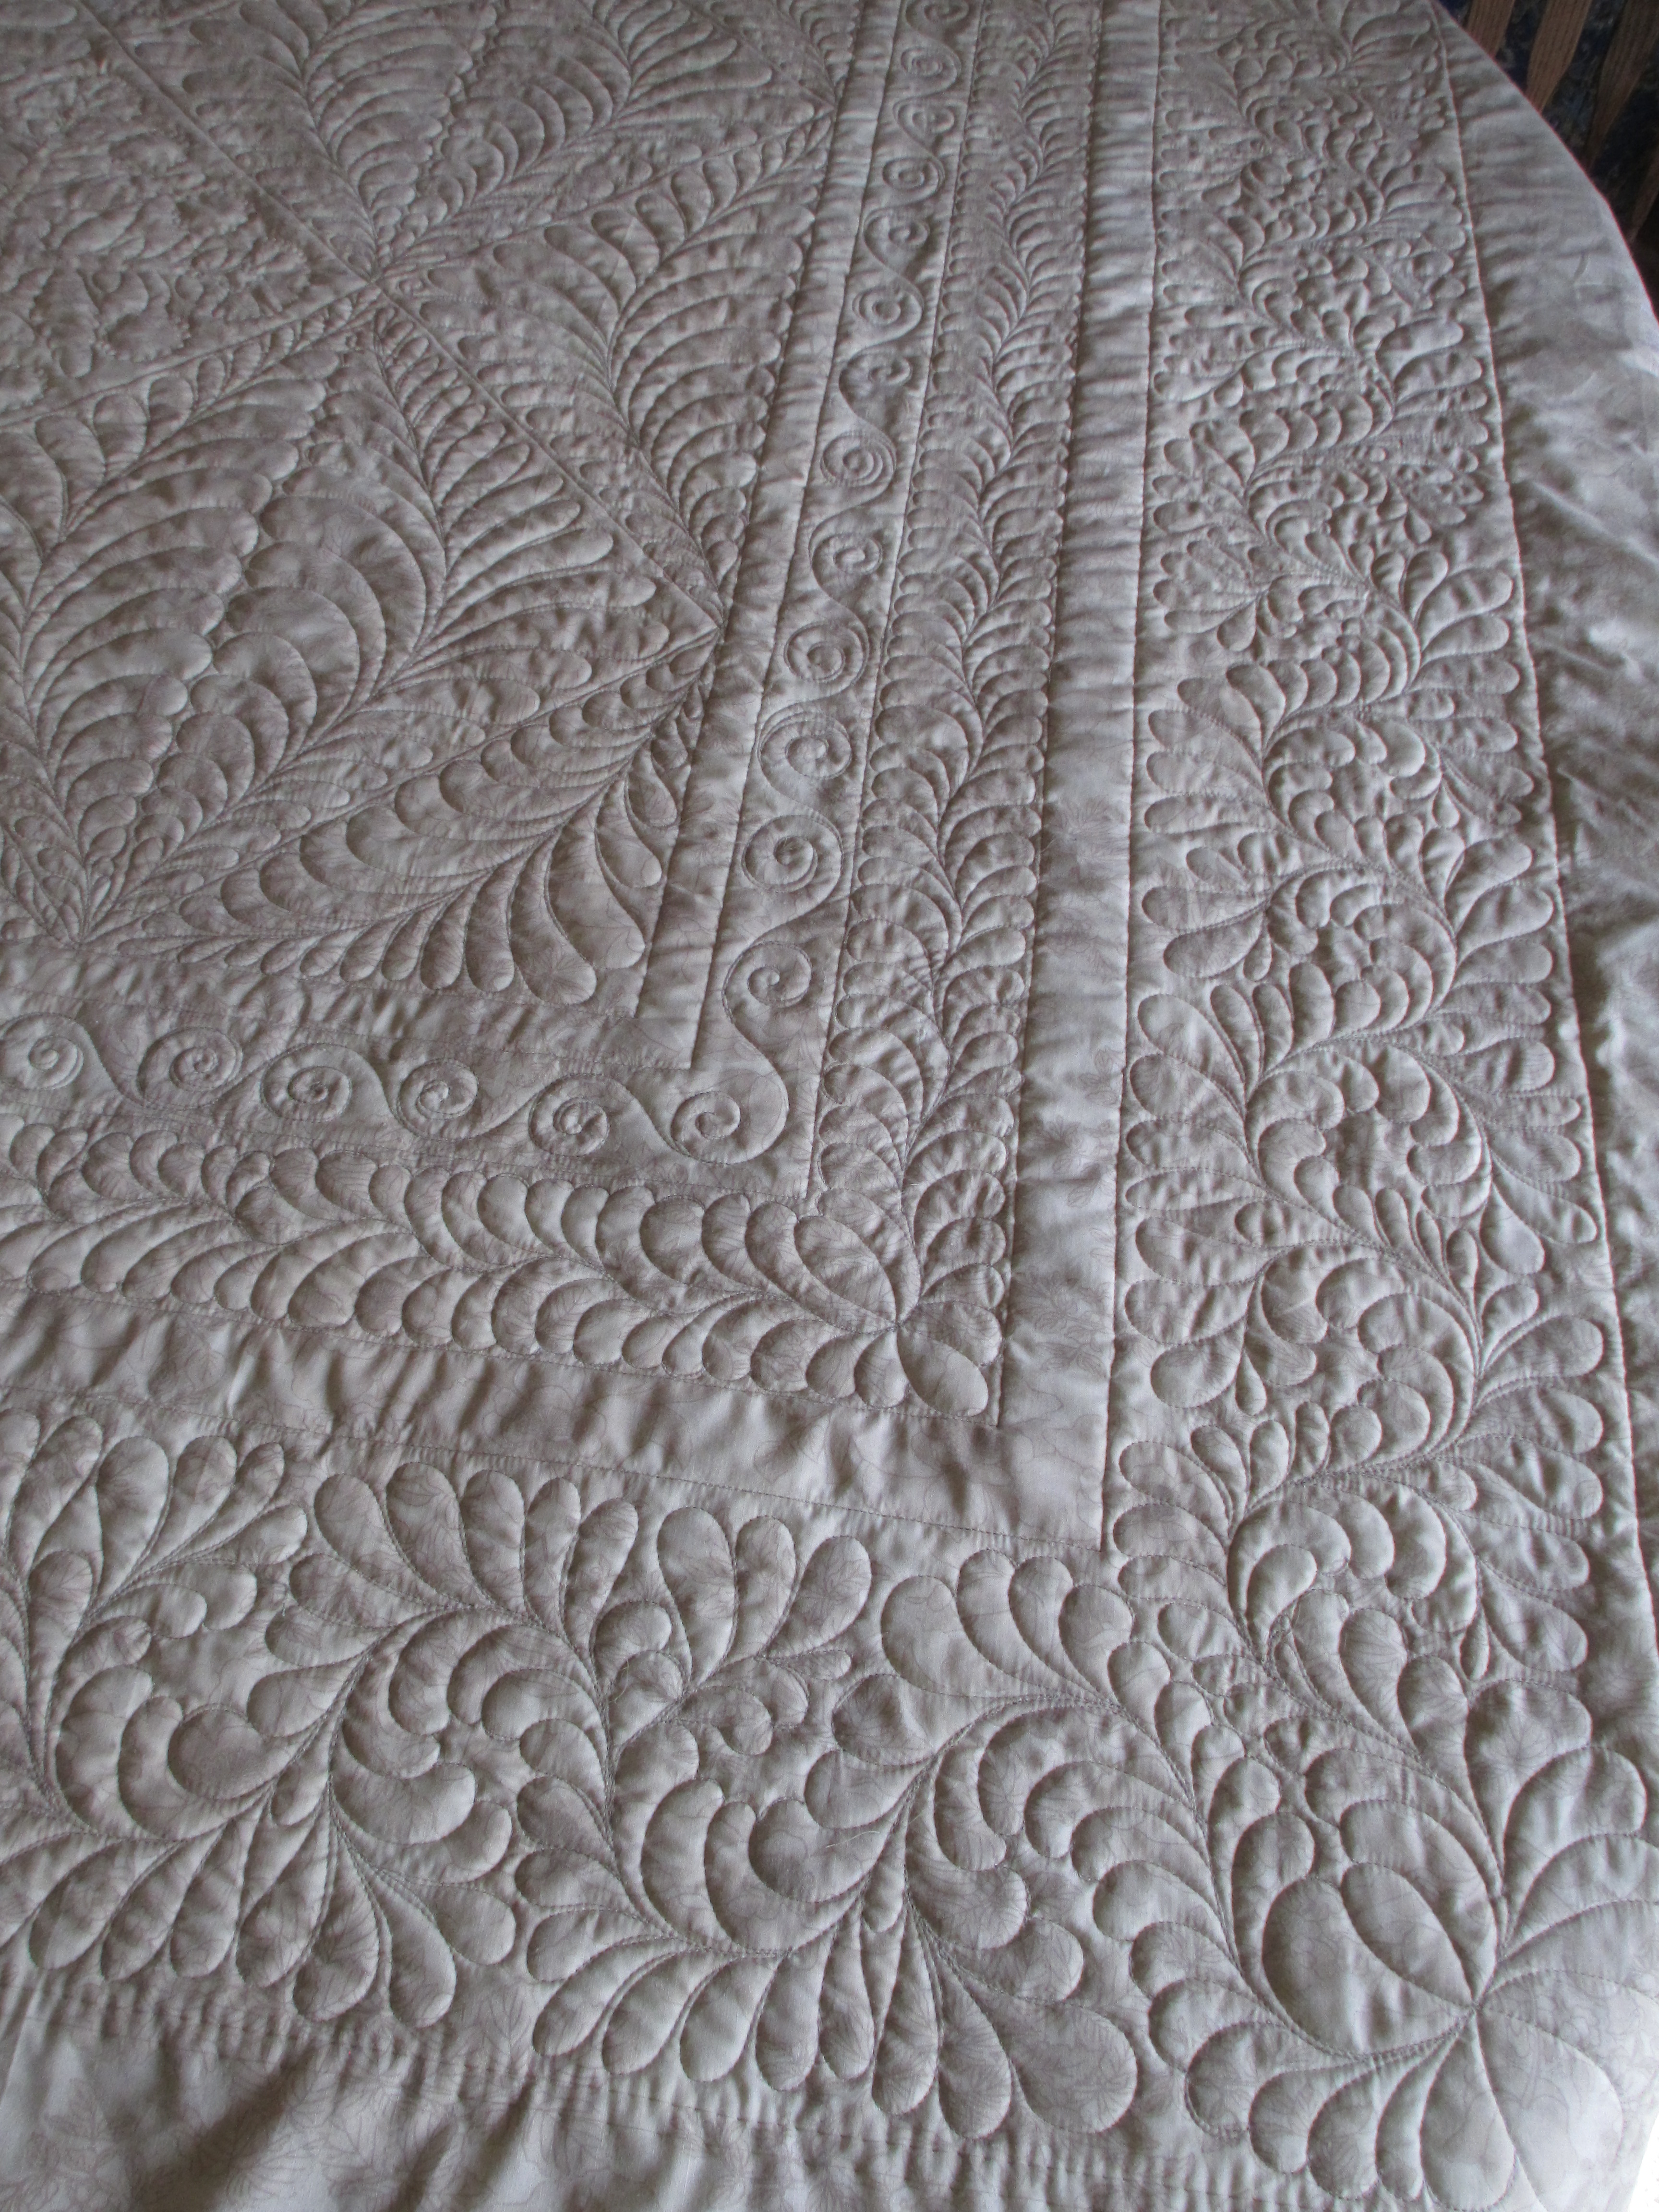
What do you think?  Does it have enough feathers?  I think the pictures of the back side makes it look bouffant or like divinity candy or something like it.  I don’t know how to describe it.  But, I love it!


Cynthia’s QOV quilt

I have 2 other posts started, but I have not had time to work on them, and I really want to show you some of my customer’s quilts.  They are doing such a phenomenal job on their quilts.  So, let’s start with Cynthia’s quilt.   Here is the whole quilt.  Just half square triangles sewn together, but what a great pattern she made with them! IMG_2320

Cynthia wanted an allover design quilted into the body of the quilt with a separate border, which was perfect for this quilt, because the border is a fairly solid color and quilting wouldn’t show too much in the body of this quilt.  This is semi-custom quilting, and it is a great, reasonably priced option for many quilts.  Here are some close-ups of the allover, edge-to-edge quilting done in the body of the quilt. I quilted loops, swirls and stars into this section.

IMG_2310 IMG_2311

Edge-to-edge designs make it easy for me to slip a surprise into the quilt, since about 98% of the quilting I do is freehand.  I quilted the recipients name into the middle of the quilt and I added Cynthia’s name in the lower right corner.

IMG_2315

As for the borders, Cynthia wanted feathers in them.  Feathers are done free-hand, so they take less time to quilt than anything with ruler work, such as piano keys… well, for me at least.

IMG_2308 IMG_2309

I really like her quilt, and I hope the receiver likes it, too!

Vintage Red

Claudia hasn’t told me the name of her quilt yet, and I’m not sure if she has even named it.  But, I’m calling it Vintage Red.  You will see why when you see the pictures.  I LOVE this shade of red, and I love the white with red pin dot fabric that goes so well with it.  I’ll post a full shot first, so you can see why it looks vintage to me.

IMG_2231

And, here’s a shot of that white with red pin-dot fabric that looks white in the above picture: it is what is in the plain blocks.

IMG_2232 IMG_2233

One of the coolest things that Claudia does is this.  She adds a line of stitching at the end of her seams along the outside edge of her quilt top.  I’ve never seen that done before.  Nor have I ever heard of it, but, let me tell you, it’s genius!  I love the fact that she does this.  it keeps the ends from opening up, especially since those seams get stretched on the long-arm machine’s frame.  Have you ever heard of this being done before?  it’s pretty cool, imho.

IMG_2197

Claudia chose feathers and swirls for her quilt, so she got some swirls and she got a ton of feathers on this quilt.  The swirls were done in the sashing and interspersed into the feathers as well, but the bulk of the quilt has feathers galore, for what I call a “bouffant” look.  🙂  There are triangular feathers in each block and twirly swirly feathers in the border.

IMG_2226 IMG_2223 IMG_2221 IMG_2216 IMG_2220

I hope she likes it!  She hasn’t seen it in person yet.

Does it look “bouffant” to you, too?  Or can you think of another “feathery” word to describe it?

Dresden Doodles

I’ve been waiting to get this quilt back to Charlotte before posting anything about it, but I decided to go ahead and share this now.  I’ve been gone this last week to Machine Quilting Exposition, where I took classes from some amazing quilt teachers, so I am slow to get back in gear and into my regular routine.

Charlotte has this beautiful quilt with Dresden Plates and wanted traditional quilting all over.

IMG_1741

Here’s a close-up so you can get a better look at the fabric.  I think it’s very pretty.

IMG_1747

I took plenty of shots of the quilting, but, truly, the best shots are of the quilt laying across my machine’s frame, with the natural sunlight coming in.  So, here are 2 of those.

IMG_1736IMG_1735  

Charlotte wanted feathers in the outside border and as filler around the Dresden Plates (in the white areas in the background and border), so those were fun to do.  I filled the petals of the Dresden Plate with swirls and the inside circles with feathers and a swirl.  I think the formal cable and square design in the sashing borders works perfectly with the checkerboard corners and striped sashing.  I found it funny how the feathers and swirls were quick to finish, but the sashing took as long to finish as the rest of the quilt – I used rulers for the cable and square quilting, but did the feathers and swirls freehand.  I was trying to get it perfect, but, really, there’s no such thing as perfect.

What do you think?  Does the quilting design compliment the quilt itself?

Marianne’s 30s Repro

That’s the thing I like about Marianne… that she is trying all sorts of techniques and styles.  She’s not boxing herself into one particular style of quilts and is trying whatever she can to expand her repertoire.  She reminds me of me.  I like all sorts of quilts and no one style in particular sticks with me… well… other than whimsical quilts, that is.

So, here is Marianne’s latest.  It was a Block of the Month (BOM) quilt, full of 1930s reproduction fabrics.

IMG_1724

Marianne wanted feathers all over her quilt, and not your run-of-the-mill feather wreaths.  The quilt hanging at the store had feathers quilted similar to this, and that’s what she wanted.  I didn’t quilt it exactly like what they had at the store, but it’s close.  It looks kind of like a pin-wheel, doesn’t it?

IMG_1725

The picture of the quilting she wanted looked like flowers, so I did that in the colored blocks and in the borders.

IMG_1728

It’s that center circle that makes it looks like a flower.  So, this is where I snuck in smiley faces, but I needed to put them some place where you wouldn’t find them unless you were looking hard.  Look closely at the next picture.  The smiley face is in the middle of the “flower.”  You can barely see it in this one, and that’s the idea… for the quilting to be personal for the quilt-maker, but not over-powering the quilt blocks and the quilt itself.

IMG_1726

Here’s a shot of the corner.

IMG_1732

I haven’t been asked to quilt feathers on many quilts, so this was fun to quilt.  This next quilt I’m quilting has lots of feathers on it, too.  Hope you enjoyed this fun quilt!

Red, white, and feathers

I have always wanted to make my own red and white quilt.  And, I’ve also wanted to make a blue and white quilt.  In fact, I have the fabric to make the blue and white quilt, and I’ve been meaning to get to the quilt store to get some red fabric, but I’ve been too busy lately.  Have I told you that whenever I am quilting a customer’s quilt, I feel like I made a quilt without having to do any of the work on the quilt top?  I get to admire others’ work and at the same time, I get the satisfaction of completion of yet another quilt.  🙂

Wilma made the big, beautiful red and white quilt, and I am the lucky one who got to quilt it.  So, in a way… I’ve already completed a red and white quilt.  Don’t you think so?  😉  Here is a shot of the whole quilt.

red and white quilt 007 (2)

Isn’t it beautiful?  There is a TON of work in this quilt top!!!  She didn’t know what she wanted quilted on this quilt, except she thought feathered wreaths would be good in the white corners of the middle medallion block.  Piano Keys were very fitting for the striped border, but what to do with the rest of it?  Each of the blocks are so different, I wasn’t sure how to pull it all together.  I finally decided that I wanted to put an emphasis on the red, without taking away from it with the quilting.  So, I just outlined the red parts and put swirls in some of the longer red pieces with red thread.  I filled the white parts with feathers quilted with white thread.

Wilma Red & White 009

One of the blocks, front and back…

Wilma Red & White 019       Wilma Red & White 004

Can you guess which block this is?

Wilma Red & White 006

Here are a couple more shots of the back – yes, I remembered to take pictures of the back this time, but only because you really couldn’t see the stitching on the front.

Wilma Red & White 003 Wilma Red & White 005

And, finally the customization…  I wasn’t sure what to do with this one, the white squares were so small.  So… I added surprises!

Wilma Red & White 011     Wilma Red & White 001

I love this quilt, and I hope Wilma will be happy with the almost finished product!

Sunbonnets and a Garden Tea Party

I just finished quilting this beauty for Mary.  She said to do whatever I wanted with it, which, for me, was preserving it as much as possible with historical stitching… but also adding some surprises finishing touches to make it unique for her.  The border is about 3″ wide, so I stuck feathers in there and added traditional quilting to the sashing.  For the most part I added cross-hatching in the background of the blocks, because that is what I think of when I think of Sunbonnet Sue blocks.

Mary's Sunbonnet Sue quilt 001 (2)

Looking at this while I was working on it was a real delight.  These Sunbonnet Sues were blocks that Mary’s mom had appliqued.  Her mom is gone now, so Mary wanted to preserve them and finished the quilt for her with borders and sashing.

The fabric was like a step back in time.  Look how her mother fussy cut the red fabric so it would look like Sue is holding that shovel.

Mary's Sunbonnet Sue quilt 003

And, look at this fabric with the car.  You can also see where I stitched a table with a pot and cup on it – this was part of the garden tea party theme I quilted.  I wish I had taken a picture of the backing fabric (Why do I keep forgetting to do that???), because it has colorful teapots all over it.  Very cool!

Mary's Sunbonnet Sue quilt 004

Here’s one with medals.

Mary's Sunbonnet Sue quilt 005

I think black and rose has been a good color combination for a long time now.  Here’s one where I added her pouring tea into a cup.

Mary's Sunbonnet Sue quilt 006

A little girl can’t have a tea party without a teddy bear.  😉

Mary's Sunbonnet Sue quilt 007

Check out this black and coral colored fabric – I thought this one was cool, too!  I mimicked the flowers in the dress fabric and added it to the garden of the tea party.

Mary's Sunbonnet Sue quilt 012

I can’t wait to see what Mary does with this one and who she gives it to!  Lucky person, who ever it is!  Maybe… ME???  😉