I am giving up my website and coming back to this blog site. I have no idea how this will work with the new Net Neutrality rules, but I’m okay with that. I no longer quilt for others, but you will be seeing posts whenever I get a chance to quilt for myself. This particular post will be full of tips, because I haven’t been quilting on a regular basis and just got back into the game – I’ve realized how many tips I’d taken for granted. So, I will share them with you today. Please forgive me if they seem to basic to you!
I just put this quilt on the frame and the first thing I did was make a straight stitching line to butt my quilt top up against so that my quilt will be straight and hopefully square – I don’t know if you can see that or not. I also use a laser square to check as I go along, making sure any stitch lines going across or down are straight as well.

As I go along, I use a “centering” measuring tape across the quilt to make sure each side matches the original measurements. At this point, I am near the bottom of the quilt and have decided to go ahead and stitch my straight line across the bottom of the batting and backing sandwich. I’ll butt the bottom of the quilt up to that stitching line.

To make sure the sides are where they need to be, I put a pin where the measuring tape has hit along the sides to keep it square.


Then, I’ll pin it and baste it down along that straight stitching line.

I’m not the best quilt top maker in the world, which is why I prefer the quilting part of the process. I can fix some of my problem areas.
Before

After… I just took the bulk and spread it along the side before basting it down.

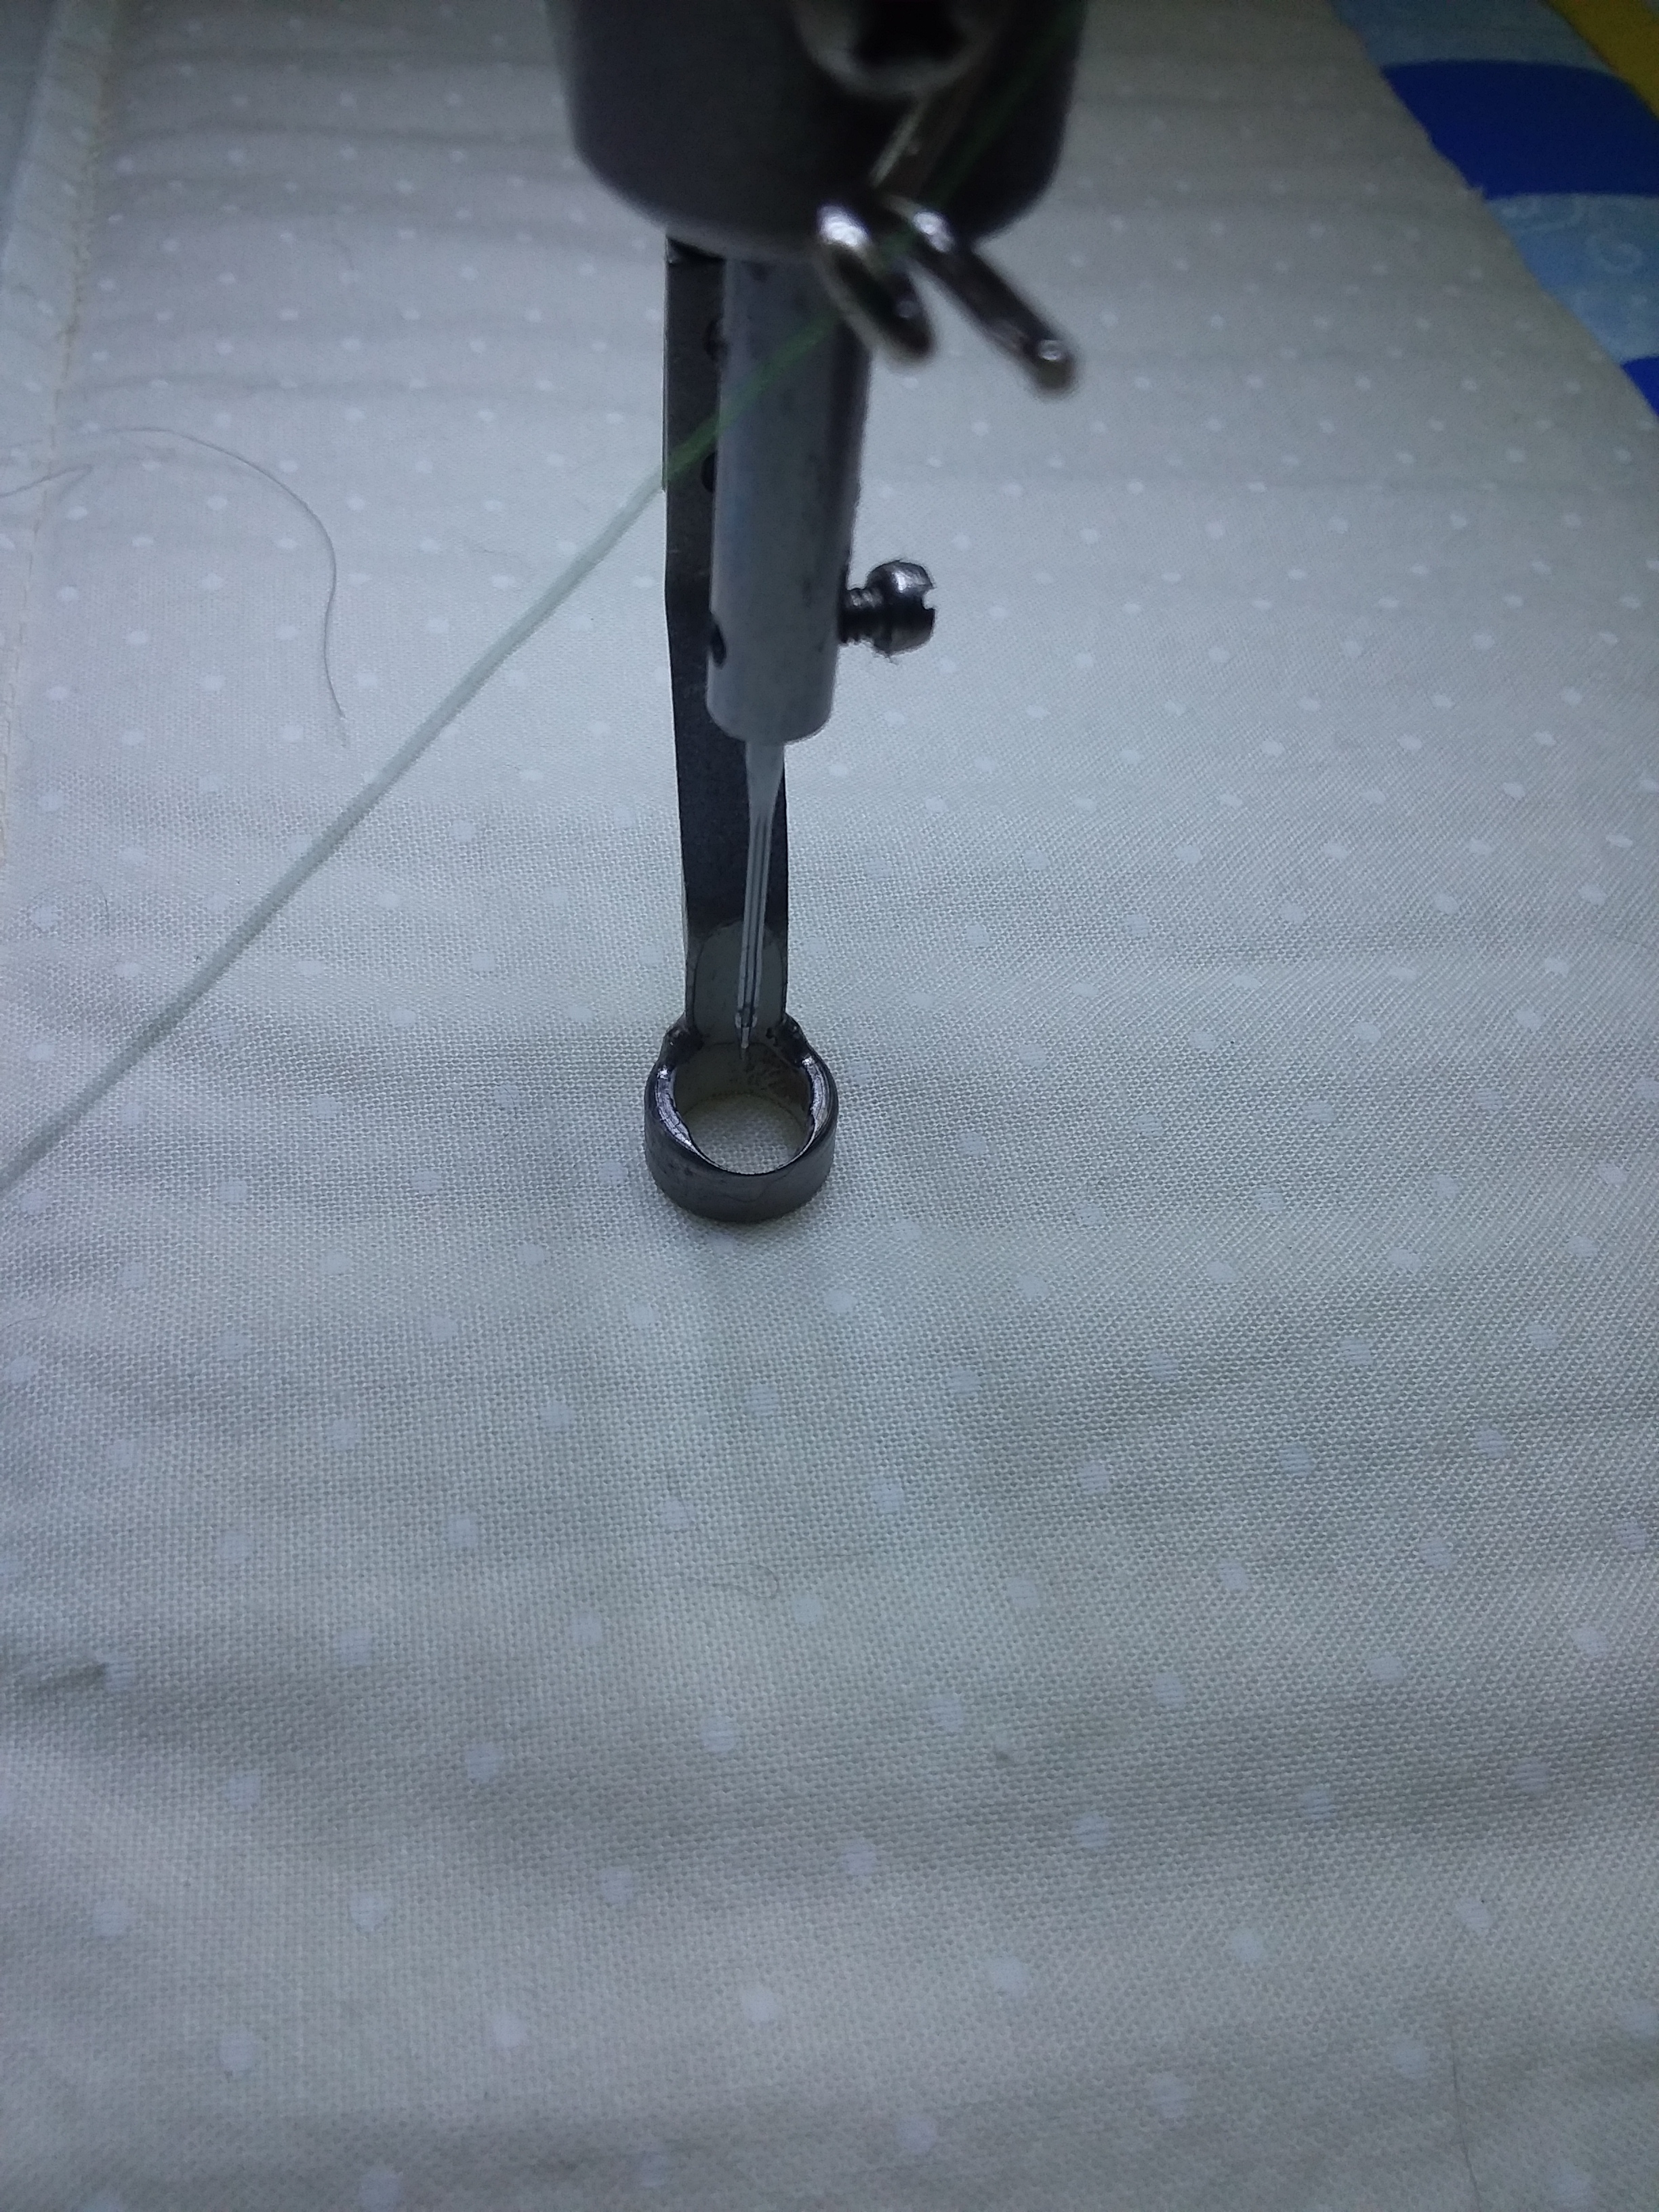
I am not done with this quilt yet. I’ll save finished pictures for another post. But, I wanted to throw a couple more tips in here. I have trouble with glare… a LOT of trouble with glare, which is why I created the quilting rulers in my shop. Take a look at this picture. I need to thread the needle. Can you see the eye of the needle? I can’t.

But, if I move the needle over onto some fabric, I’ve removed the glare from the bottom of the machine and, voila! I can see the eye of the needle.
One final tip before I go. For those of you who send your quilts to a quilter… if your quilter asks for 8 inches of extra backing fabric on each side of your quilt, this is the reason why. That plastic thing is the base that fits on the bottom of my machine. I thought I had the measuring tape showing in this picture so you could see for sure that I have 8 extra inches of backing fabric. My needle sits in the middle of that square hole in the plastic base. Do you see where it is on the quilt top? It’s not even reaching the edge of the quilt top. If I’m using that base, which I do on custom quilting (and for this quilt; quilting around the applique pieces), the base is going to hit those clamps and cause me to make mistakes along the edges. So, PLEASE, if your quilter asks for 8 extra inches of backing fabric on all sides, make sure your backing has that much or more. You will be doing yourself and your quilter a huge favor!

P.S. If you’re wondering about this quilt, you can find the pattern, “Forest Galorest,” by Java House Quilts here.
