Dresden Plate with a Jelly Roll

Making a Dresden Plate quilt was on my Bucket List (the mental list of the many, many quilts I want to try before I die). Problem is that I really am trying to use fabric I already have. I’m bad about buying jelly rolls, because I figure I can easily make something without having to cut all those strips. But, they sit in my studio.

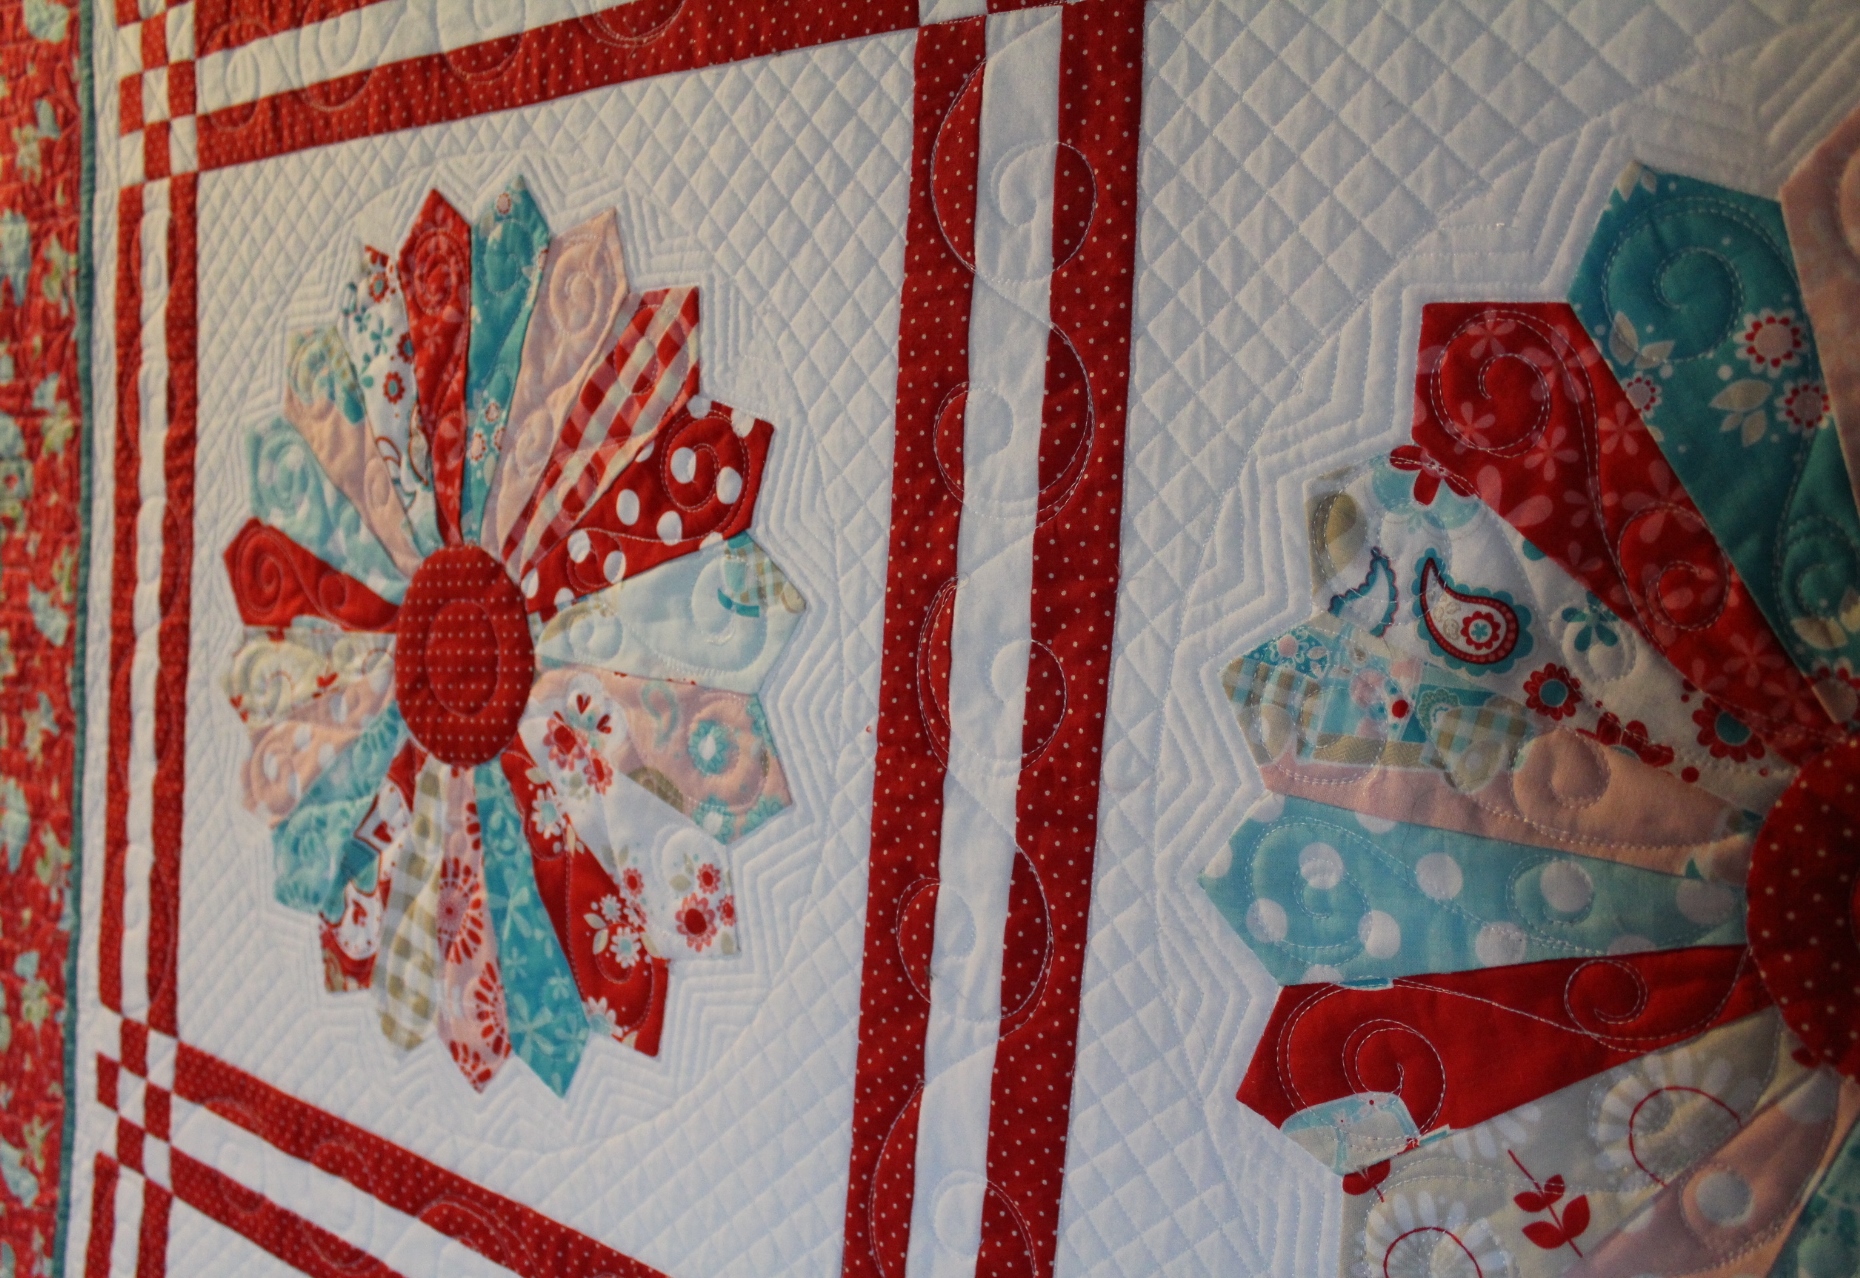
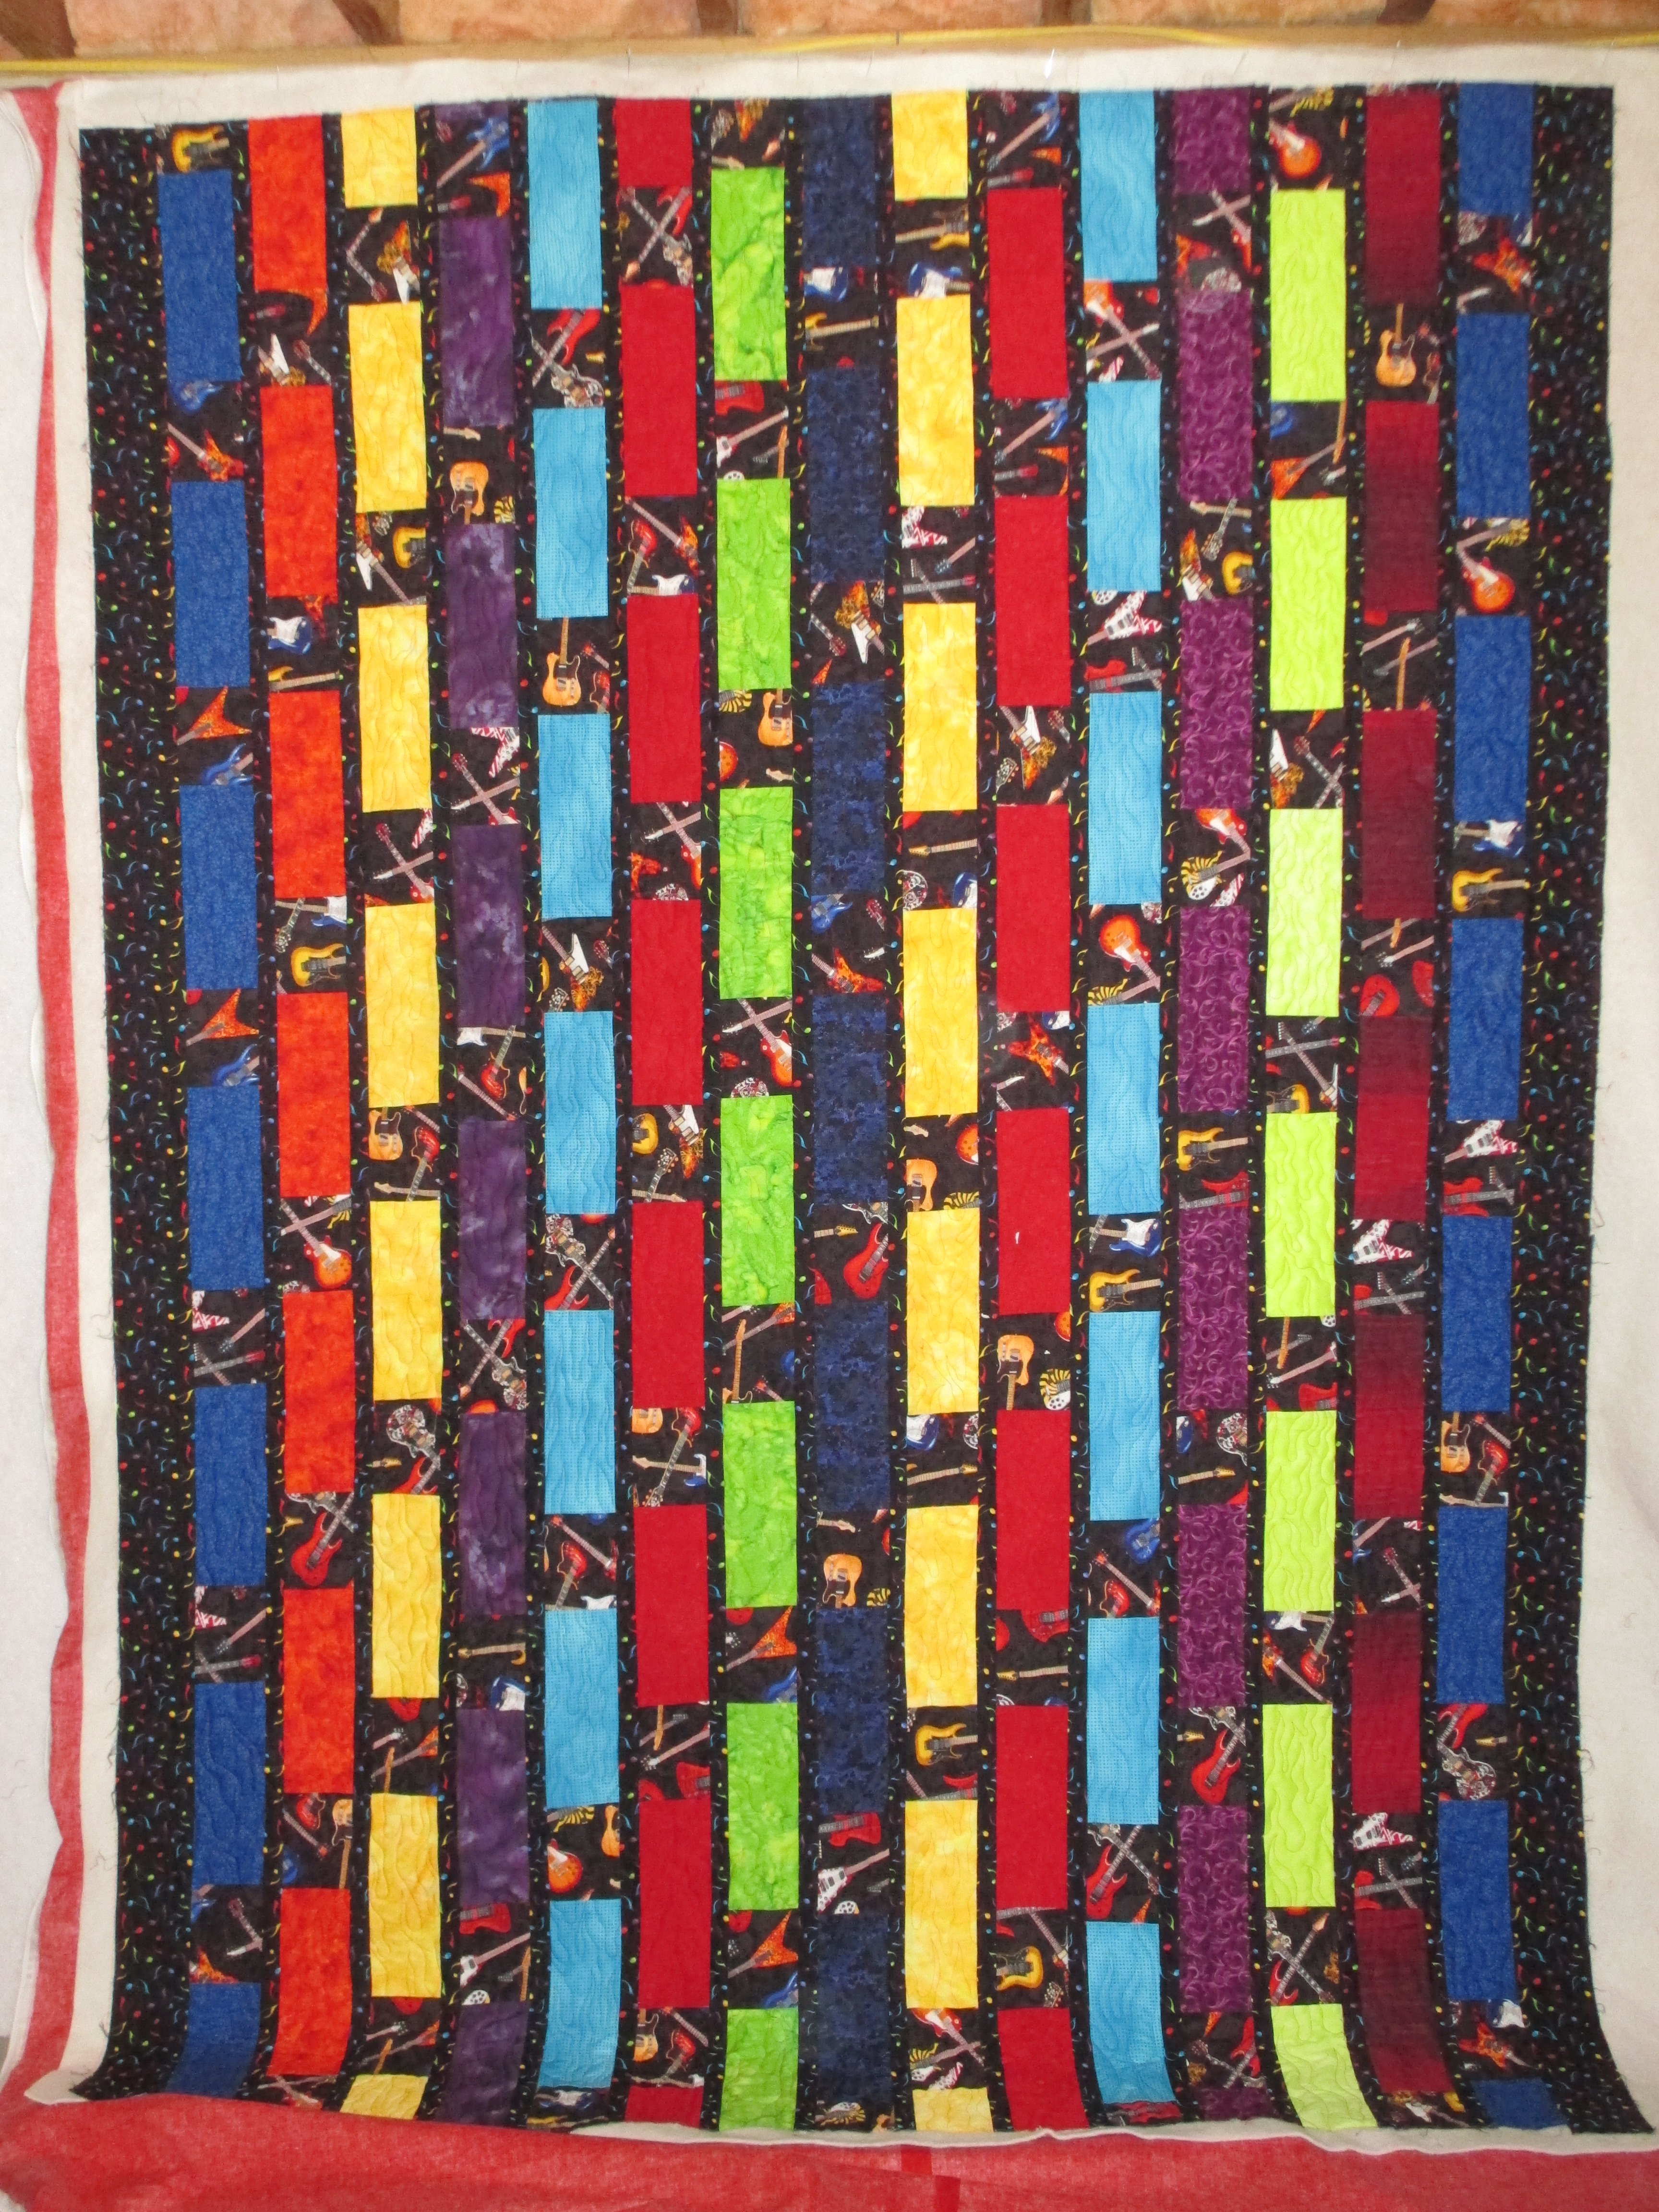
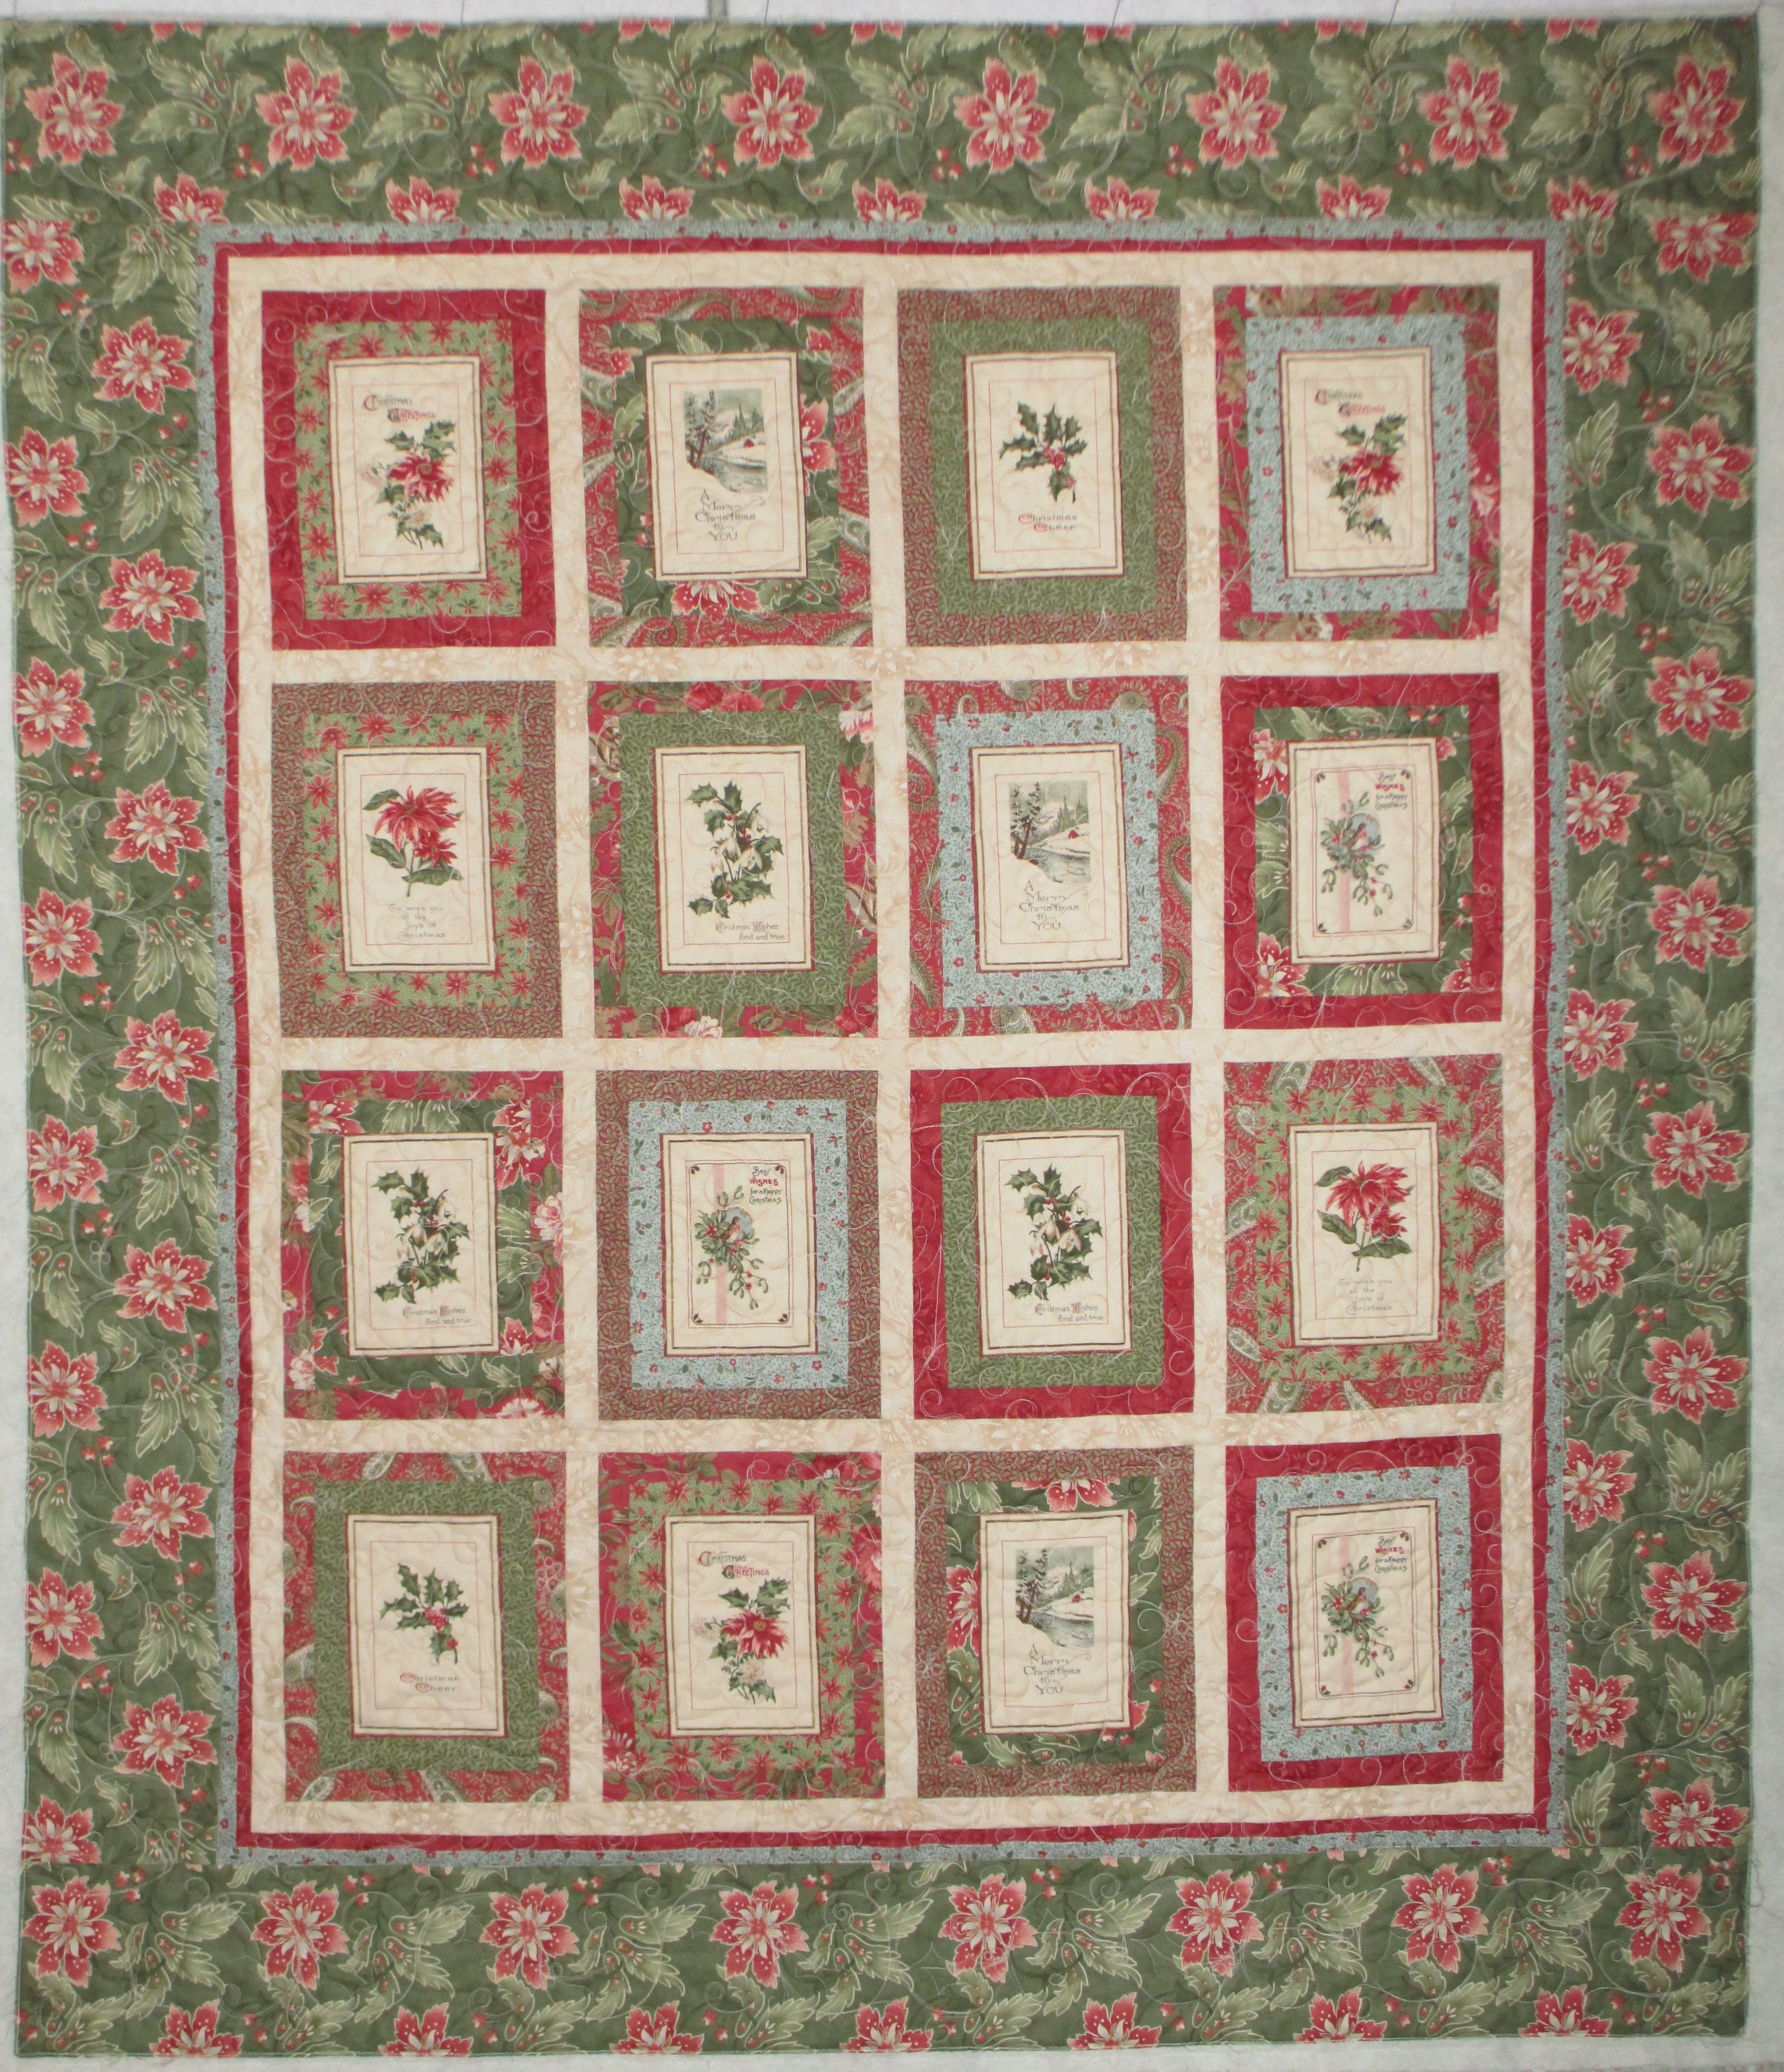
So, for this quilt, I decided to use one of my Riley Blake jelly rolls. I don’t know if you can see or not, but there are 20 points on these Dresden Plates. Twenty-two rolls came with the set, but I left 2 of them out, thinking I could use them in the border somewhere. But then I didn’t. Funny how as you are making a quilt, your journey takes you down different paths than you had originally intended. Anyhow, 20 strips… what size ruler do I need? A circle is 360 degrees. Divide 360 by 20 strips, and you will need an 18 degree Dresden ruler or template.

I wanted big blocks, so I extended a bit beyond what the template showed for where I should cut the tip end. I would be folding the strip lengthwise and sewing that top end to make a tip when it’s folded back, so it wouldn’t be missed when it’s tucked to the back. Missouri Star Quilt Company has a tutorial on how to make the plates here.

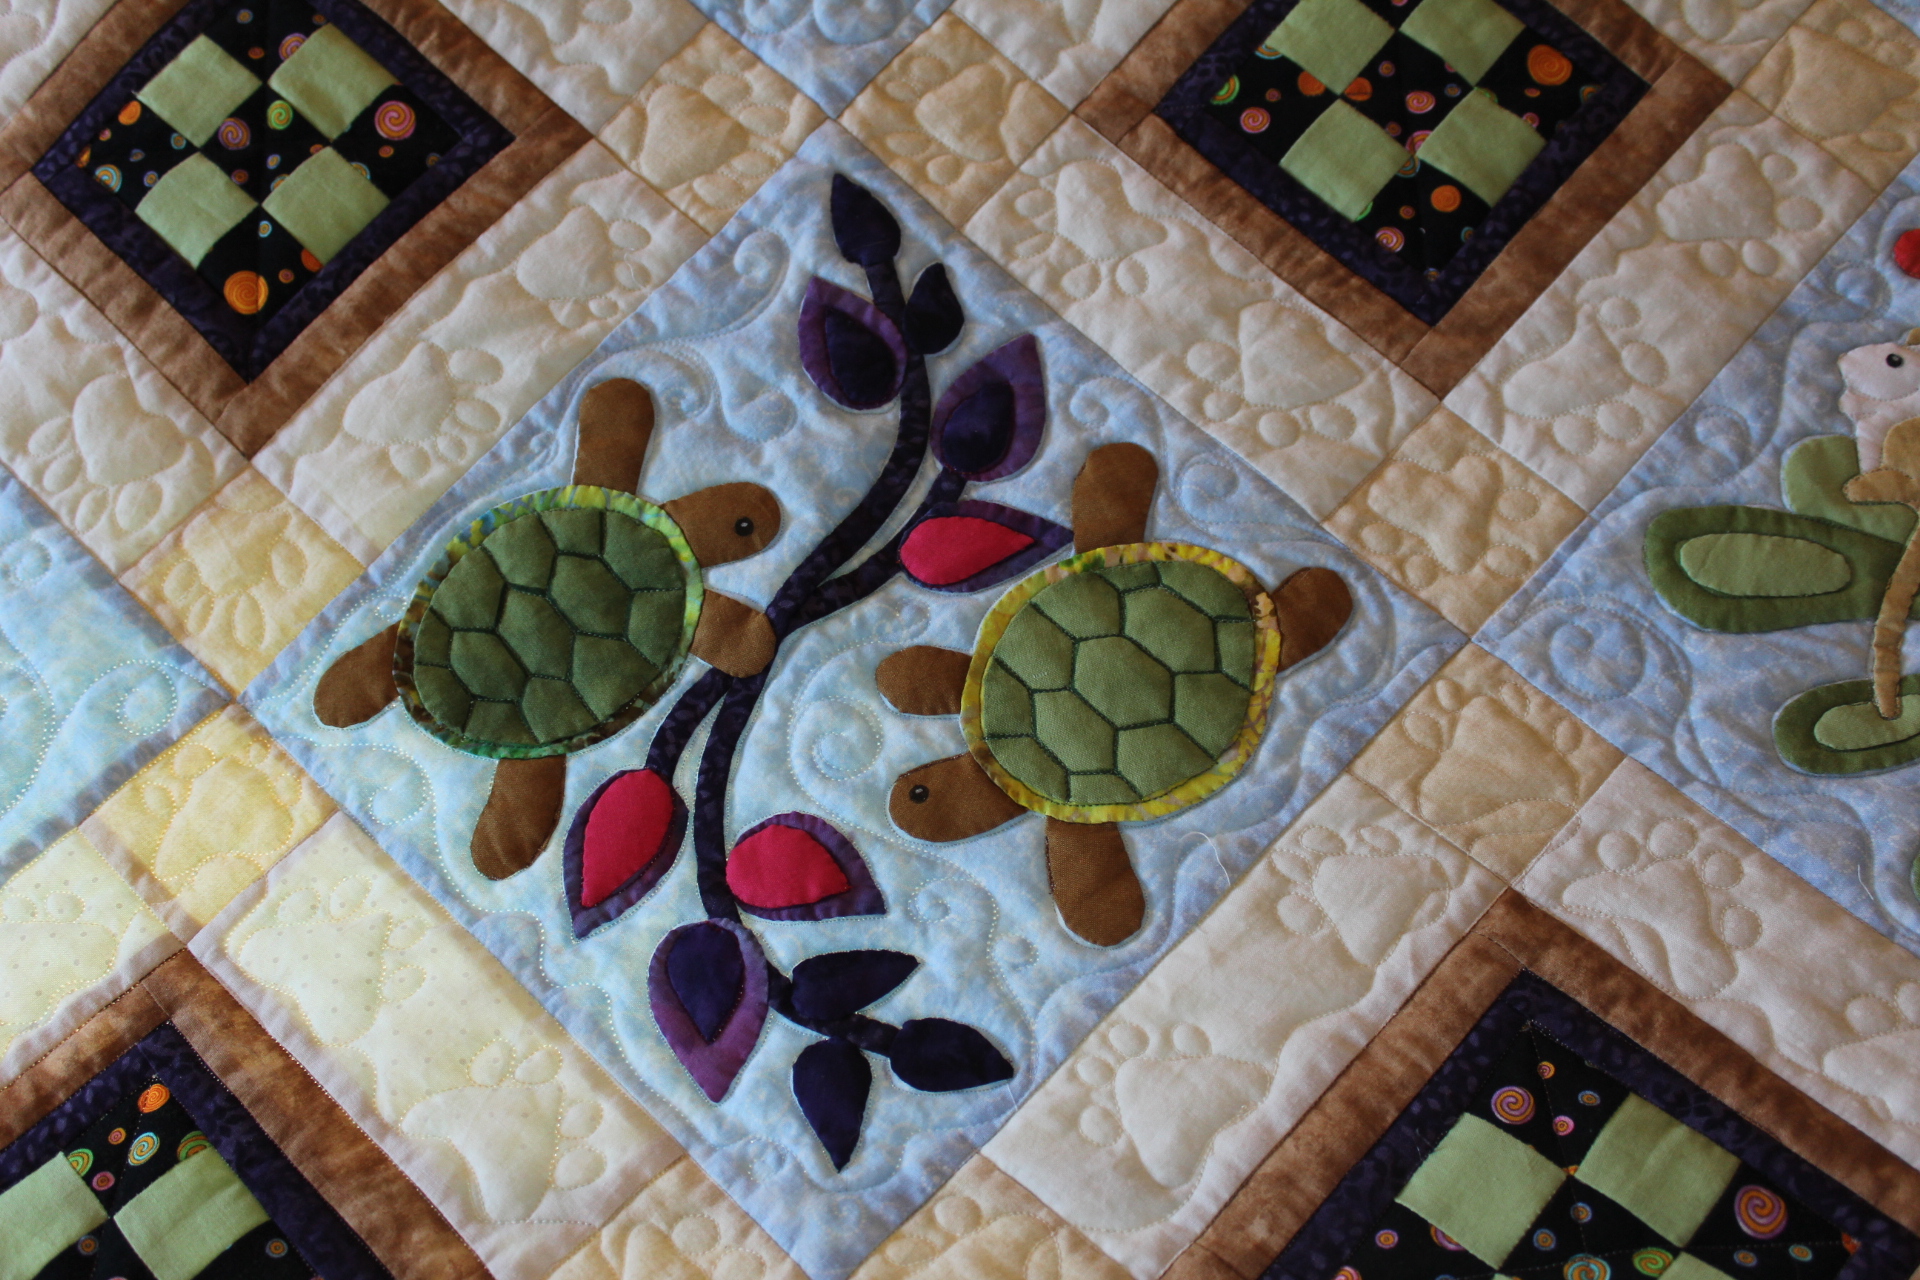
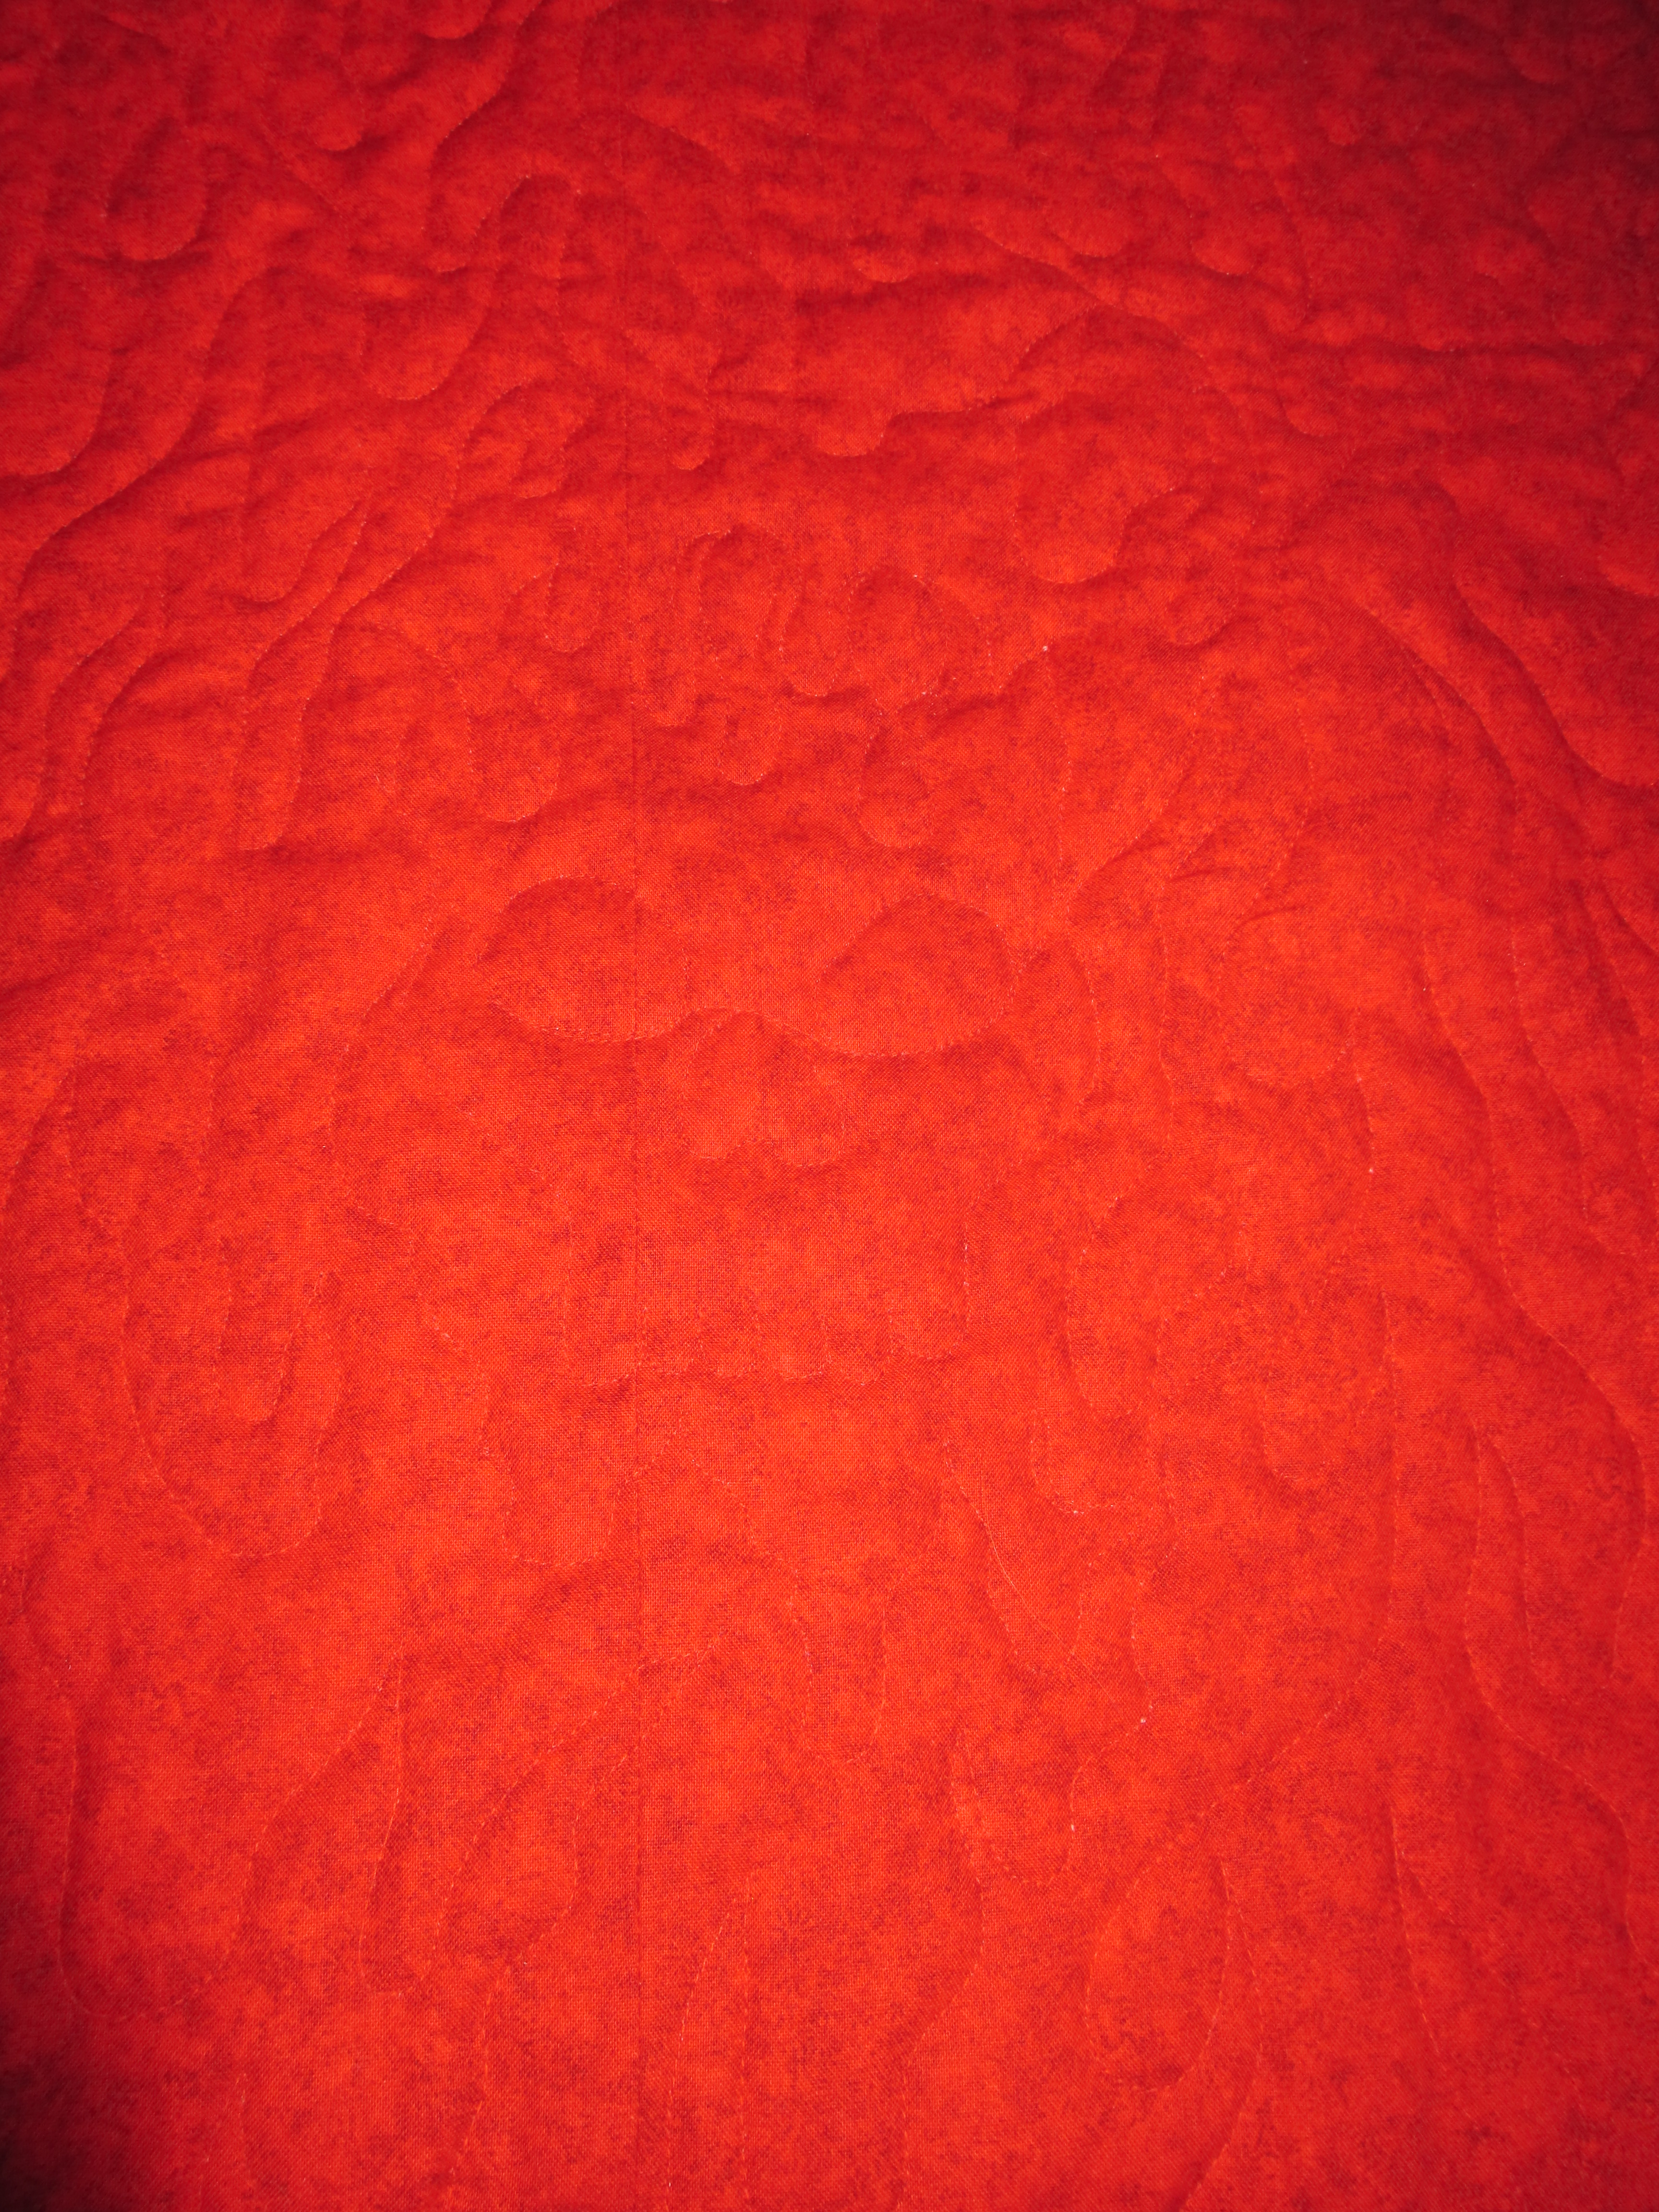
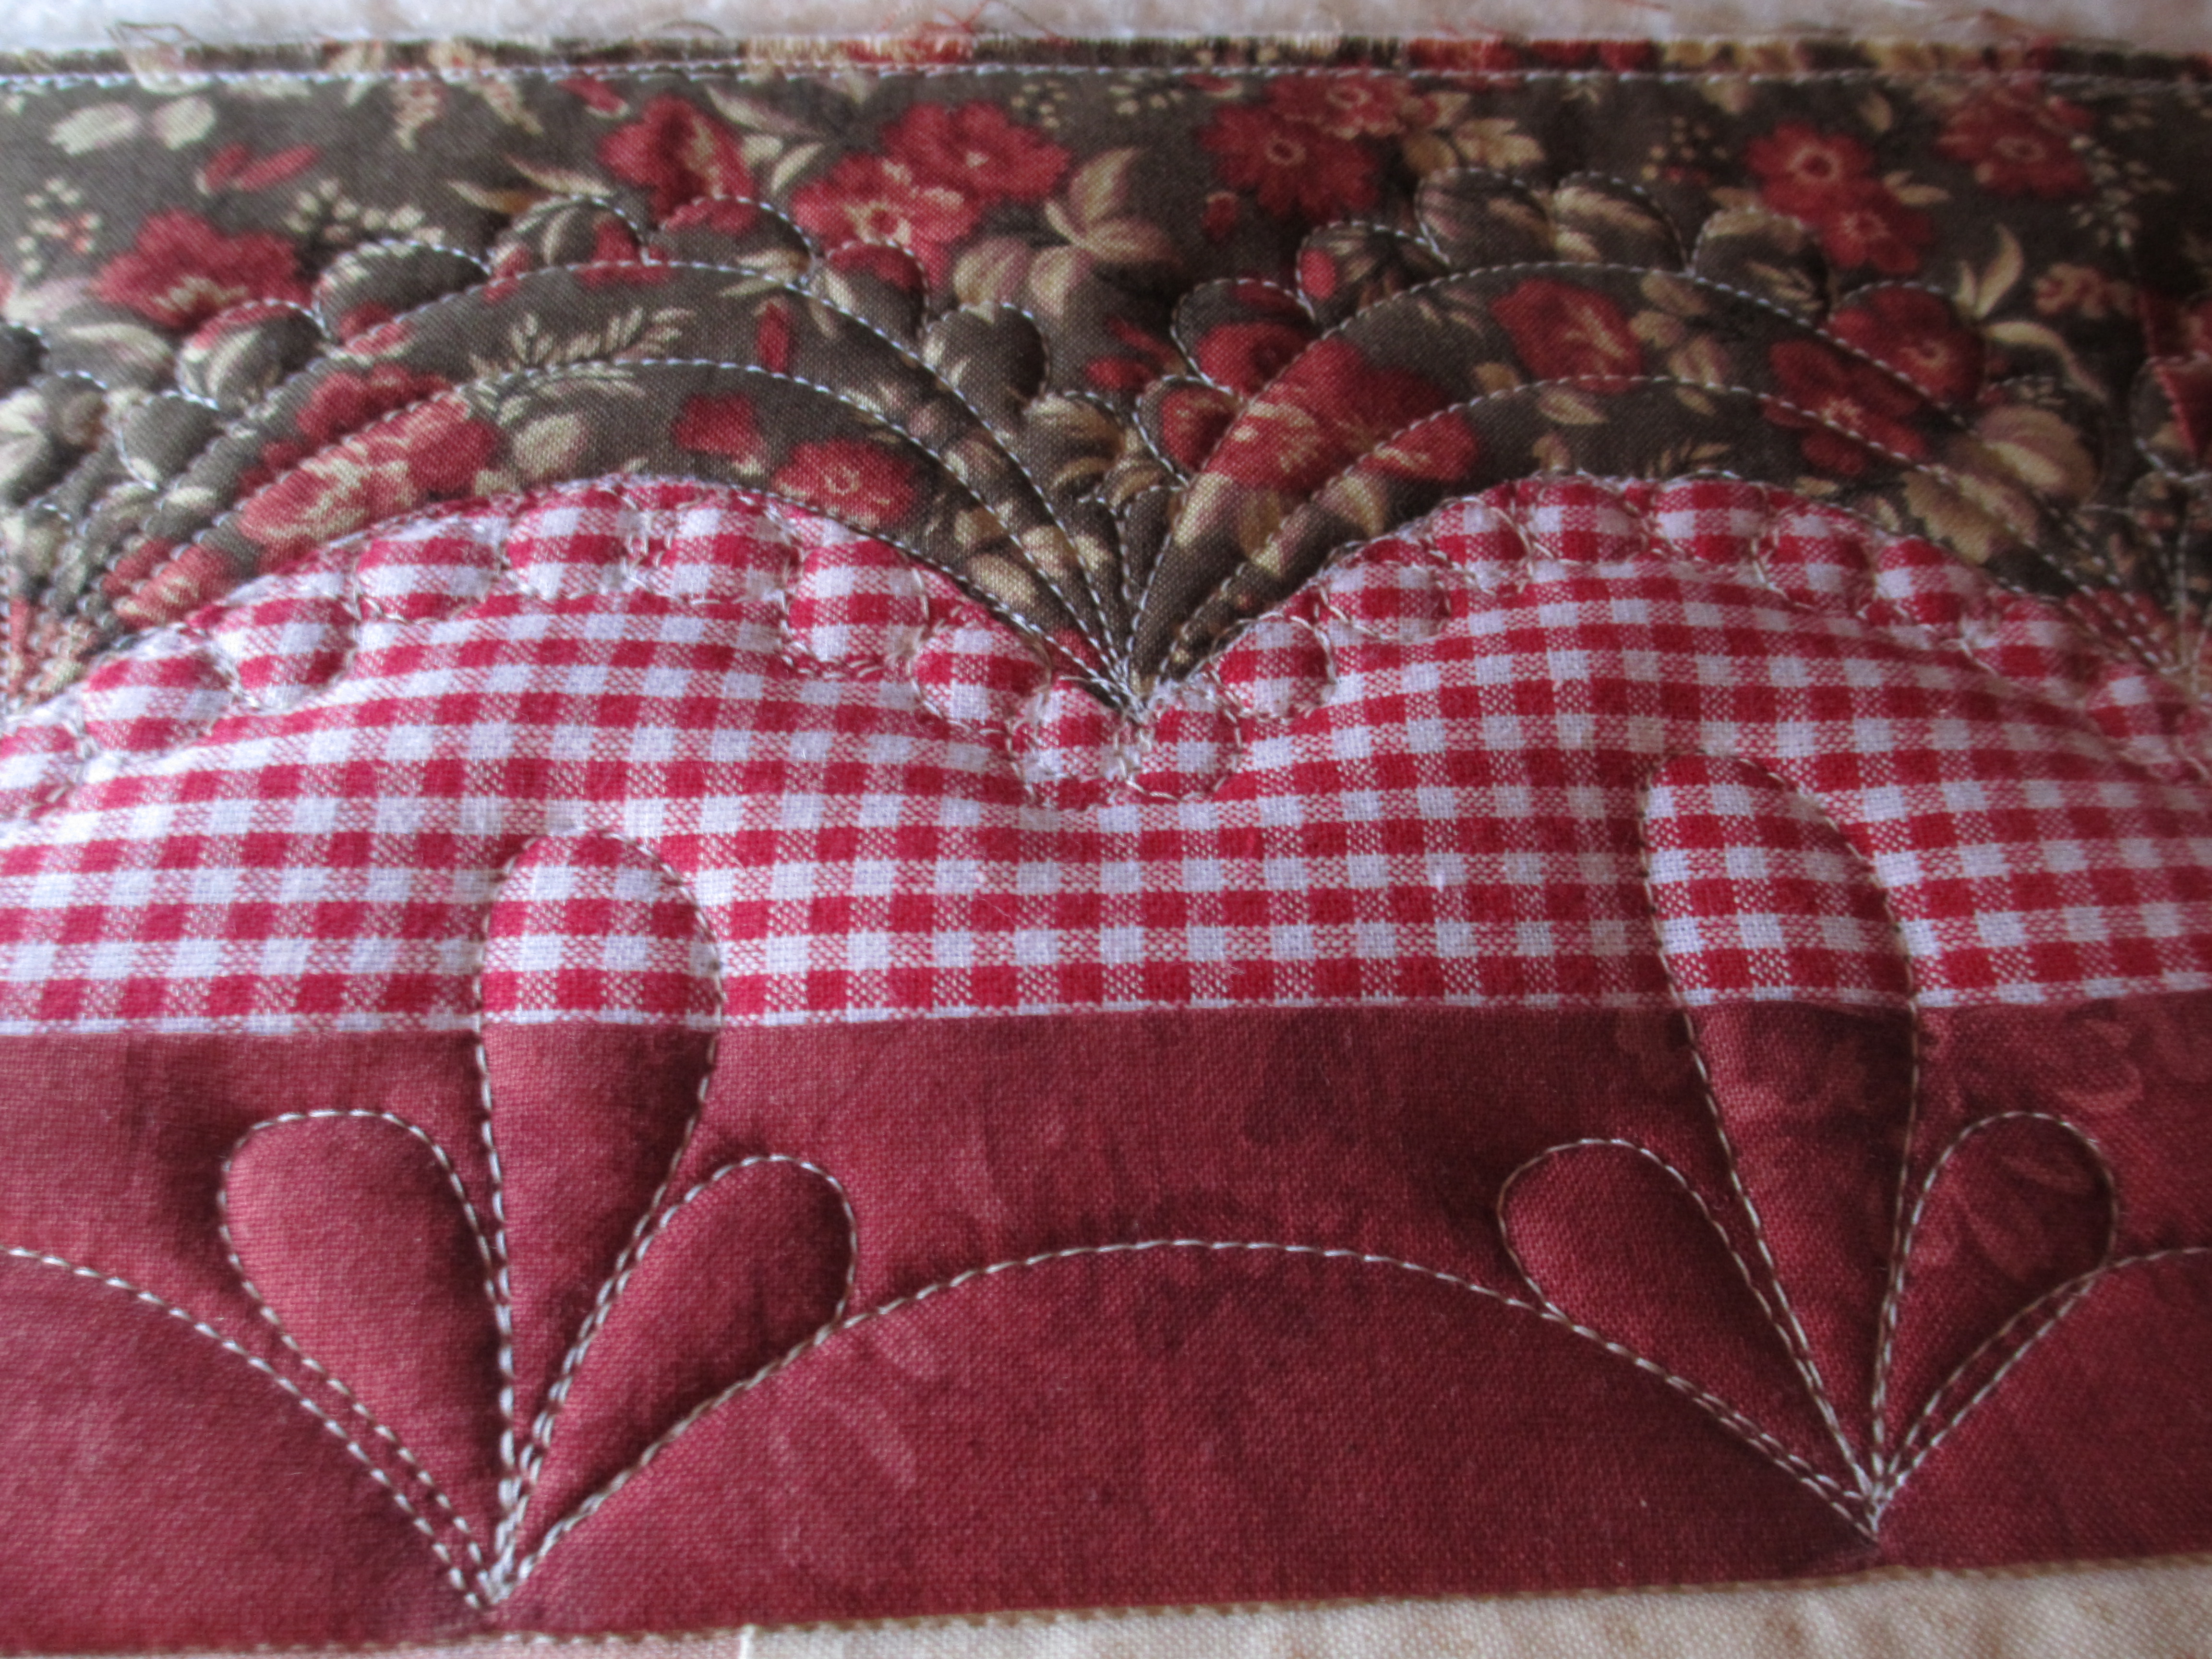
I finally finished it and tried some different quilting techniques on it. Those who know me, know that I try to make each quilt unique and add special touches. And, I’ve done those all freehand. I do not have a computer for my machine… yet. I am saving my pennies… it’s on my bucket list. 😉 But, I have a couple of the quilting designs on this quilt digitized and available for those who DO have a computer for your quilting machine.

The Crosshatching frame inside the block is available at Legacy Quilting.
The Eyelet Lace border design is also available at Legacy Quilting.

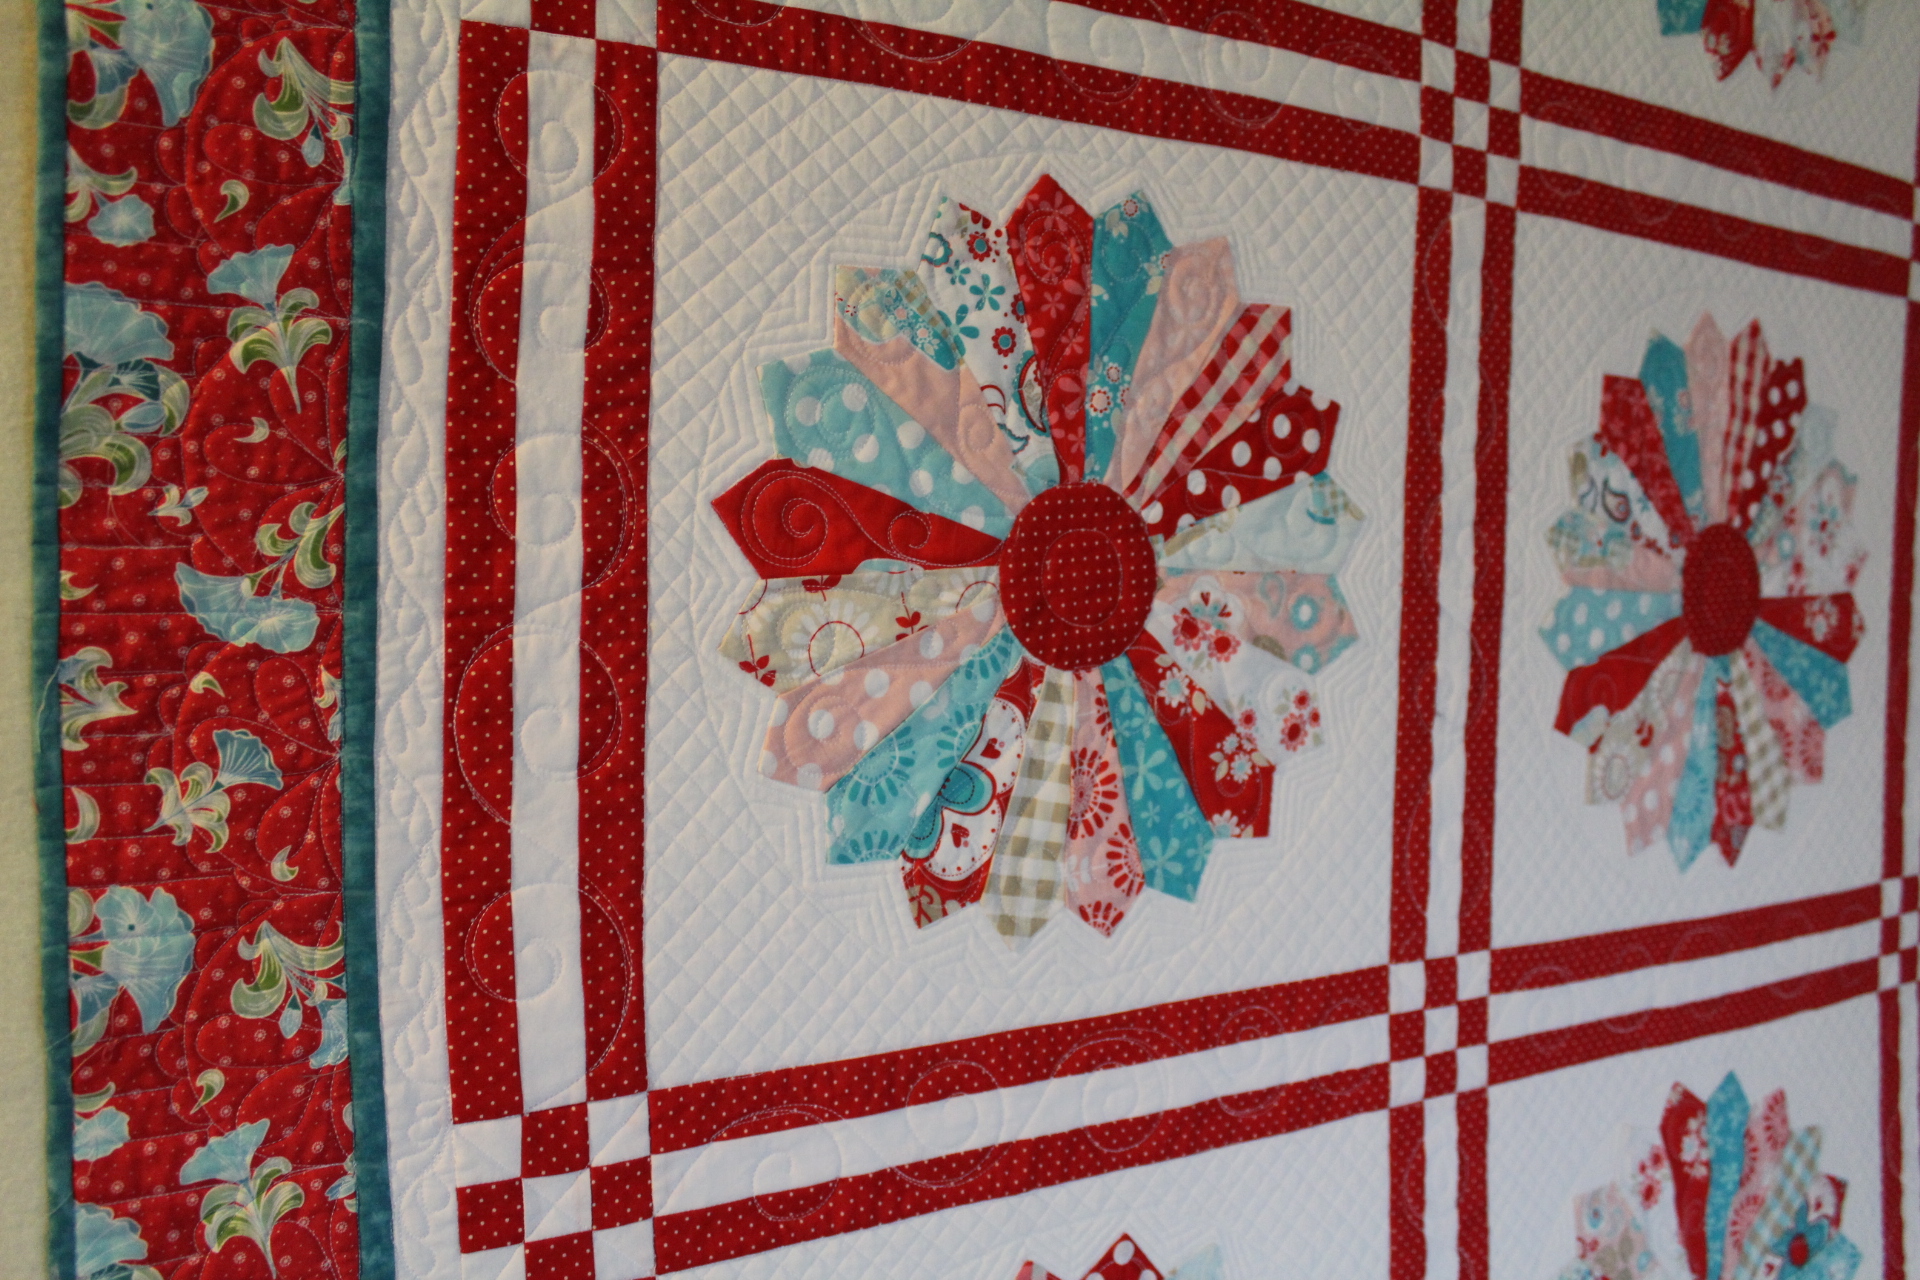
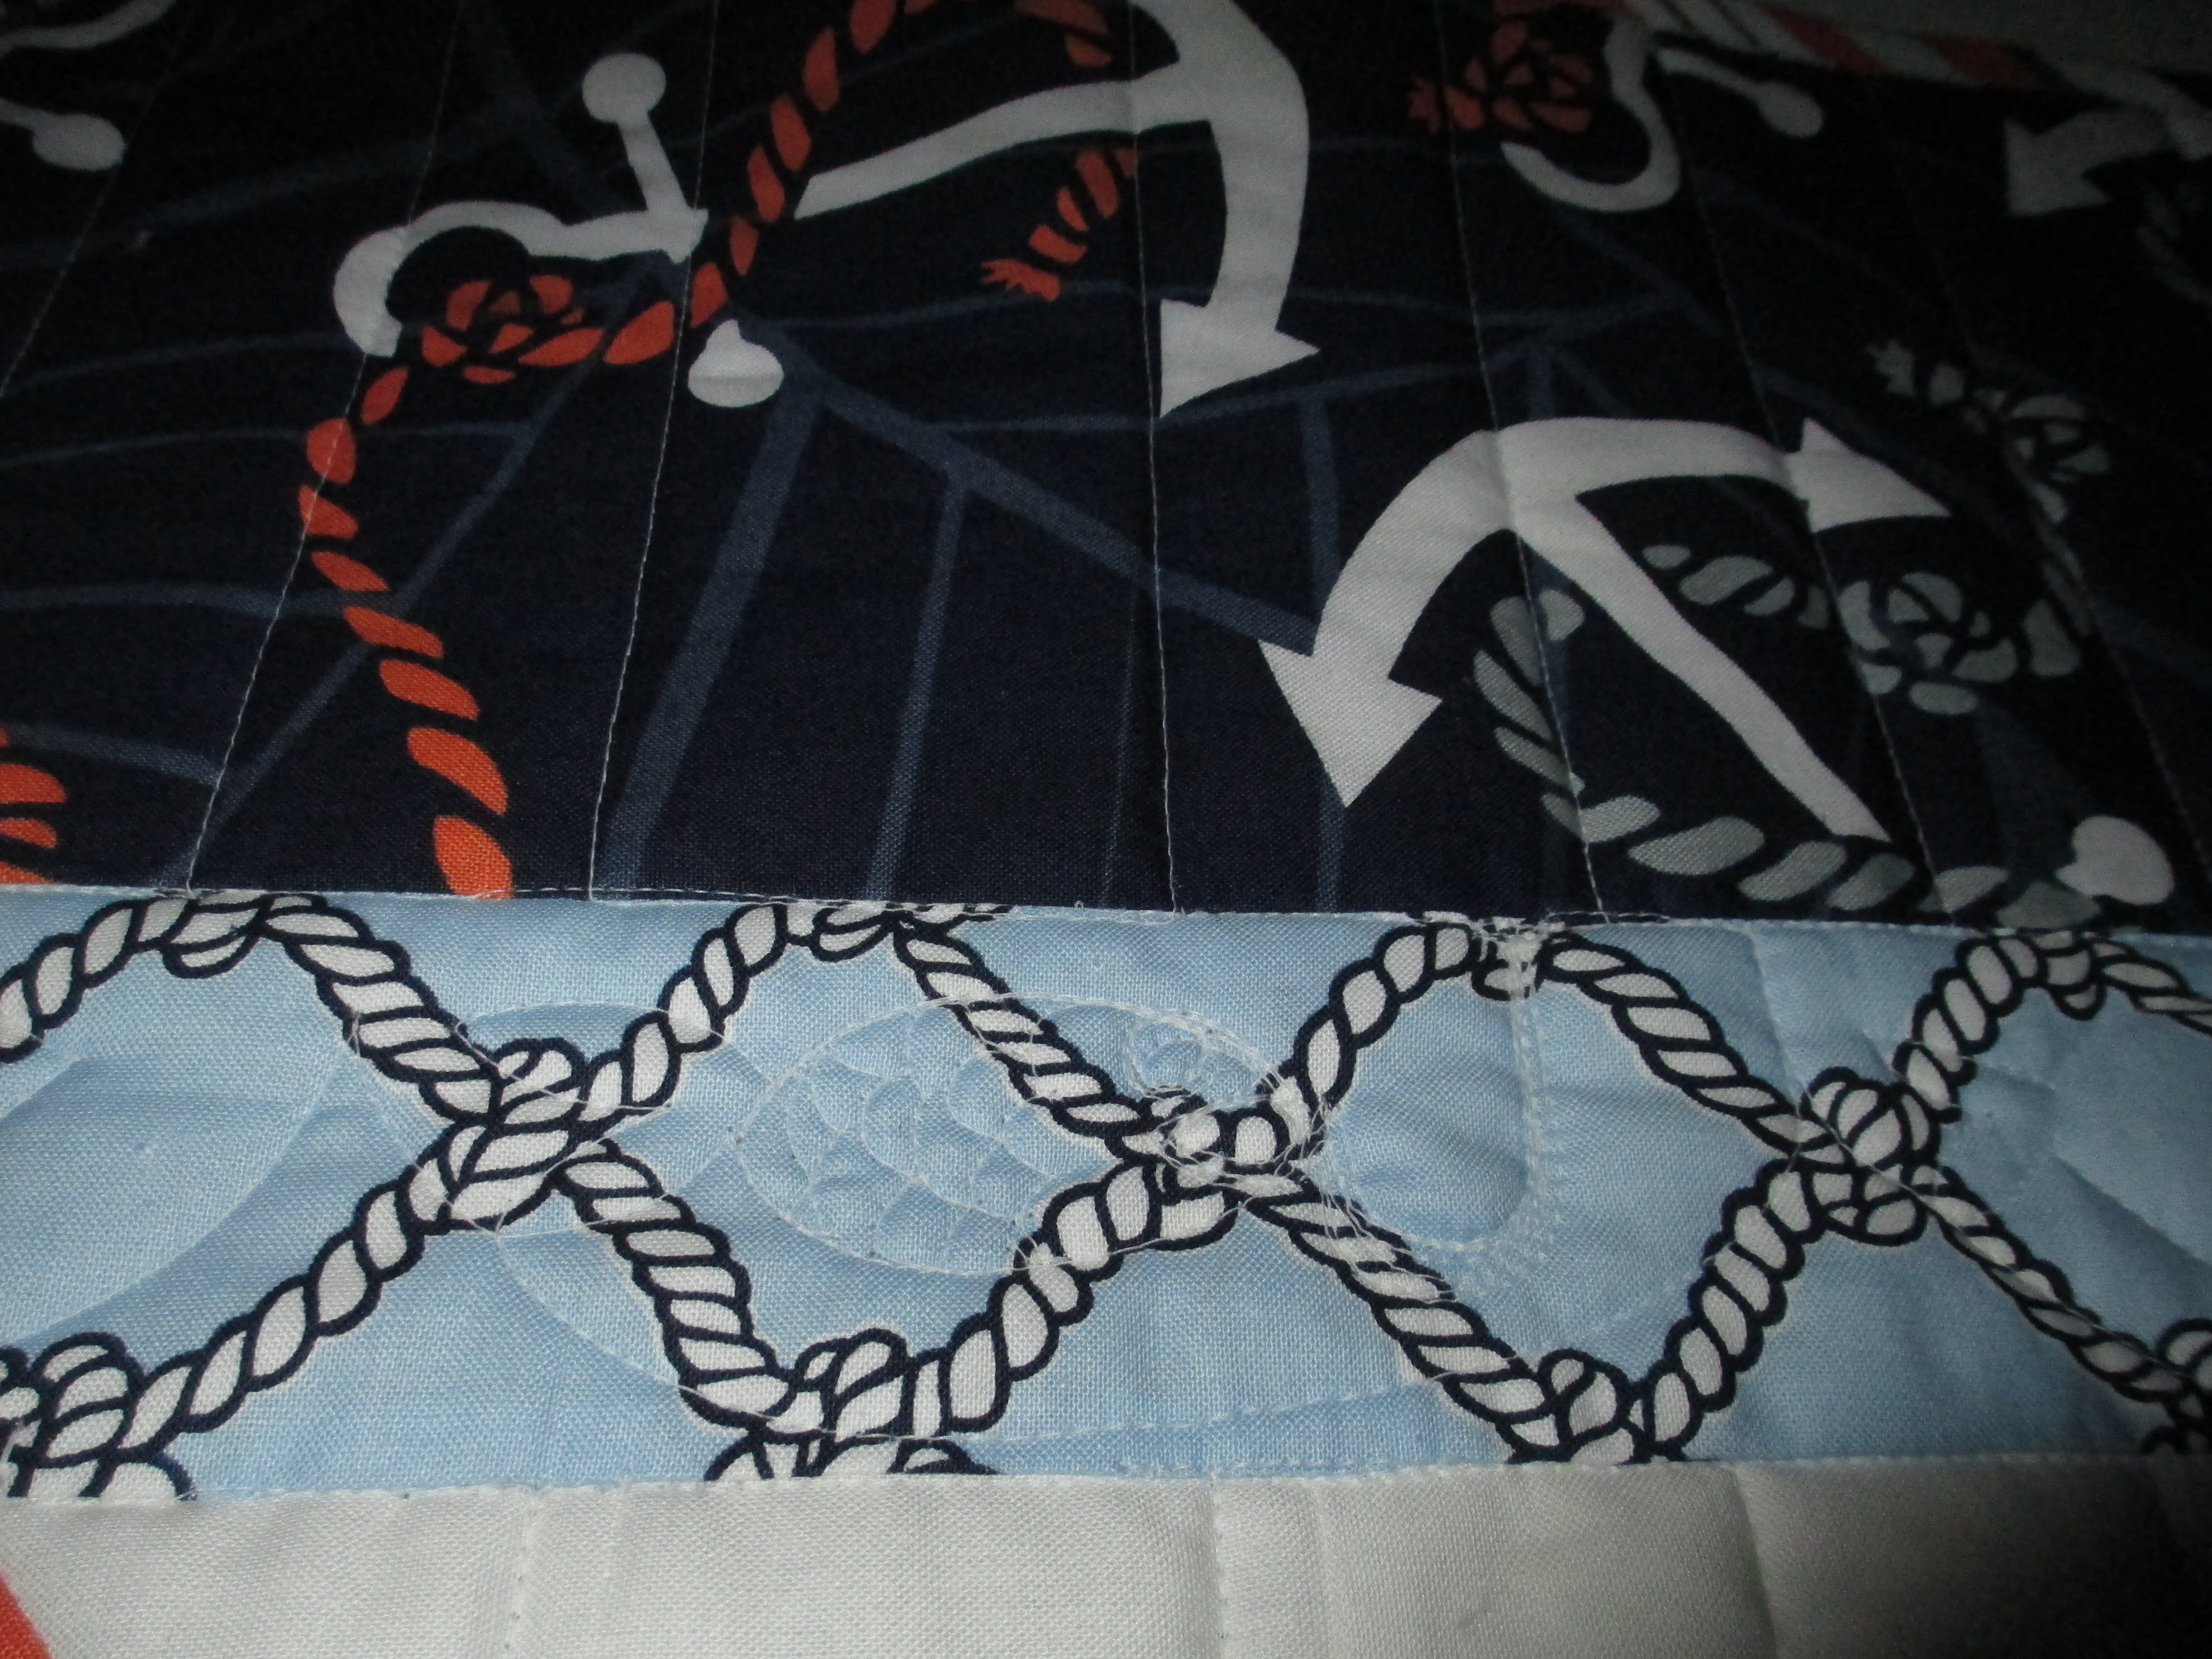
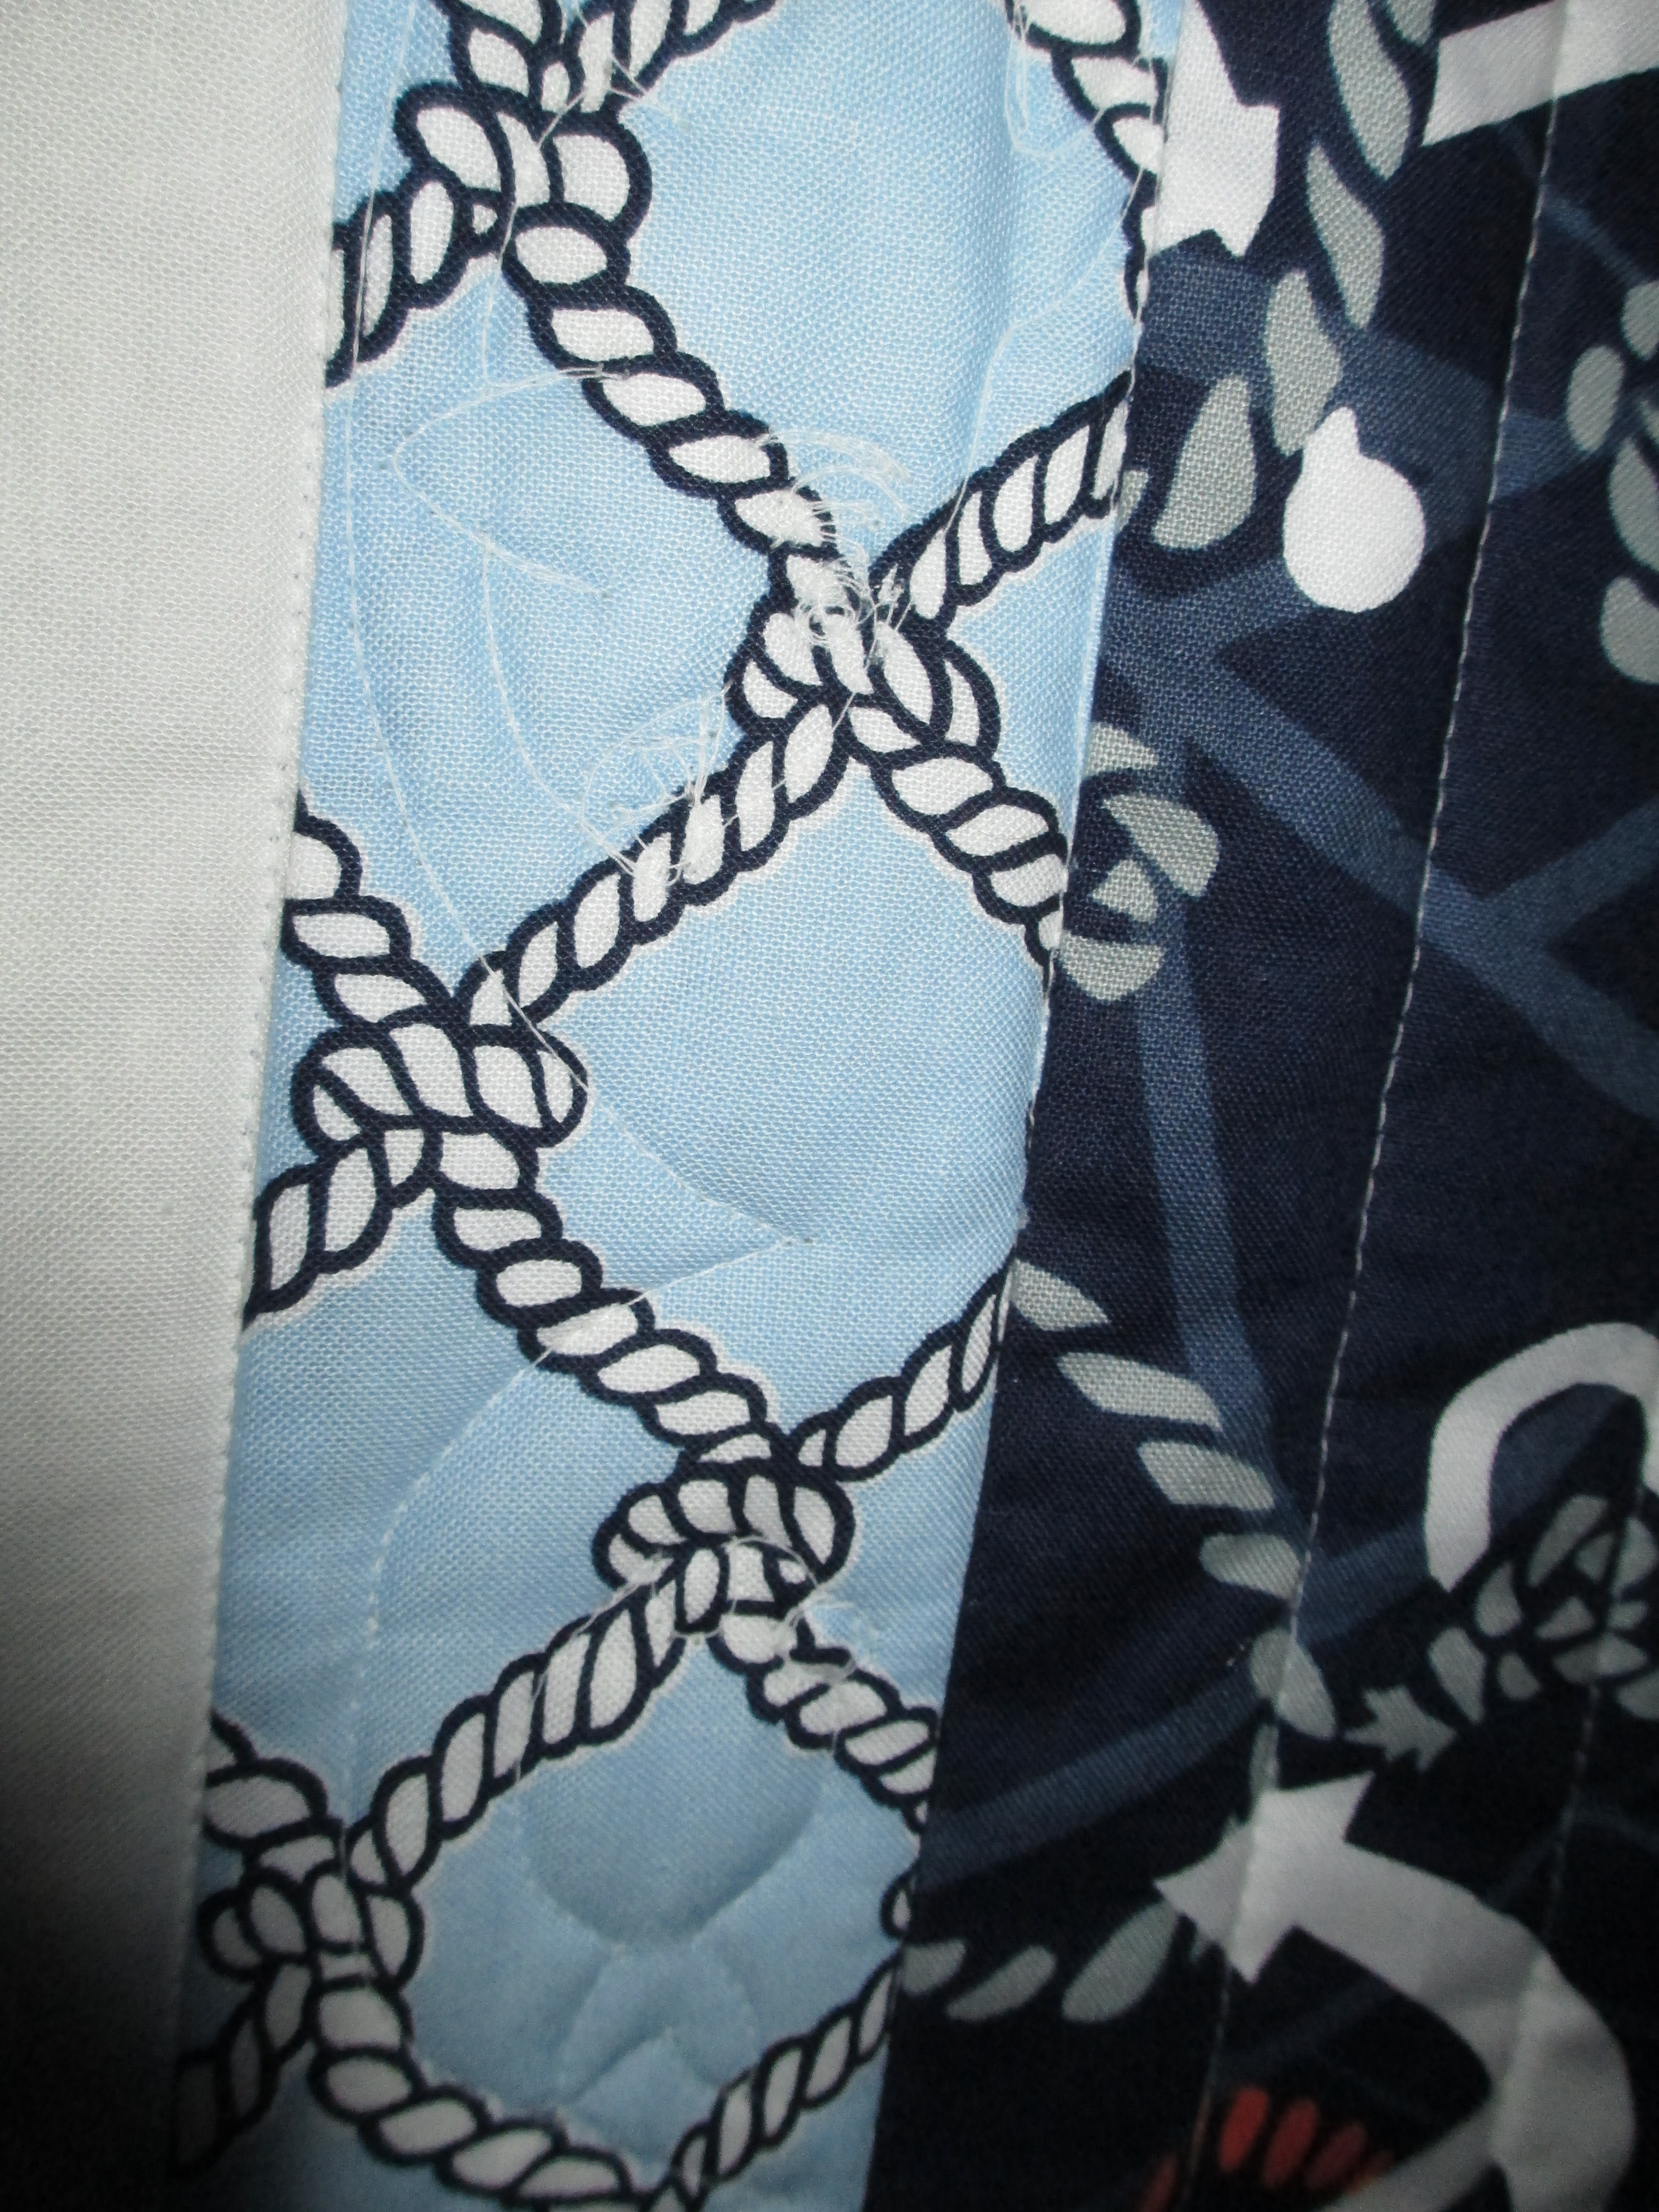
I wasn’t sure what fabric to use for the binding. I love using striped fabric for binding, and my friend, Tina, showed me some striped fabric that would be perfect for this quilt. It picked up that color of blue and the red. But… I ended up just using what I had and repeated that 1/2″ blue border. Saving my pennies…

For those of you who don’t know, I am no longer quilting for hire. The arthritis in my spine won out. So, now I am doing a few other things. One of them is digitizing machine quilting designs. Yes, I can do that for other people’s designs and have done that. My hope is that this will eventually lead me to getting a computer for my machine. Maybe then, I can think about quilting for hire again. I don’t know. That’s a lot of money and a long way off.

A couple of things I’ve done lately is cut my own extension table to fit into my sewing machine table. I ordered an insert 8 months ago, but have not gotten it yet. Yes, I’ve called the shop several times. I finally gave up and made my own. It’s not pretty. I still need to paint it white. But, it feels so much better to be able to spread out the fabric to be sewn without it catching on the edge of my machine.

Not pretty, but it does the job!

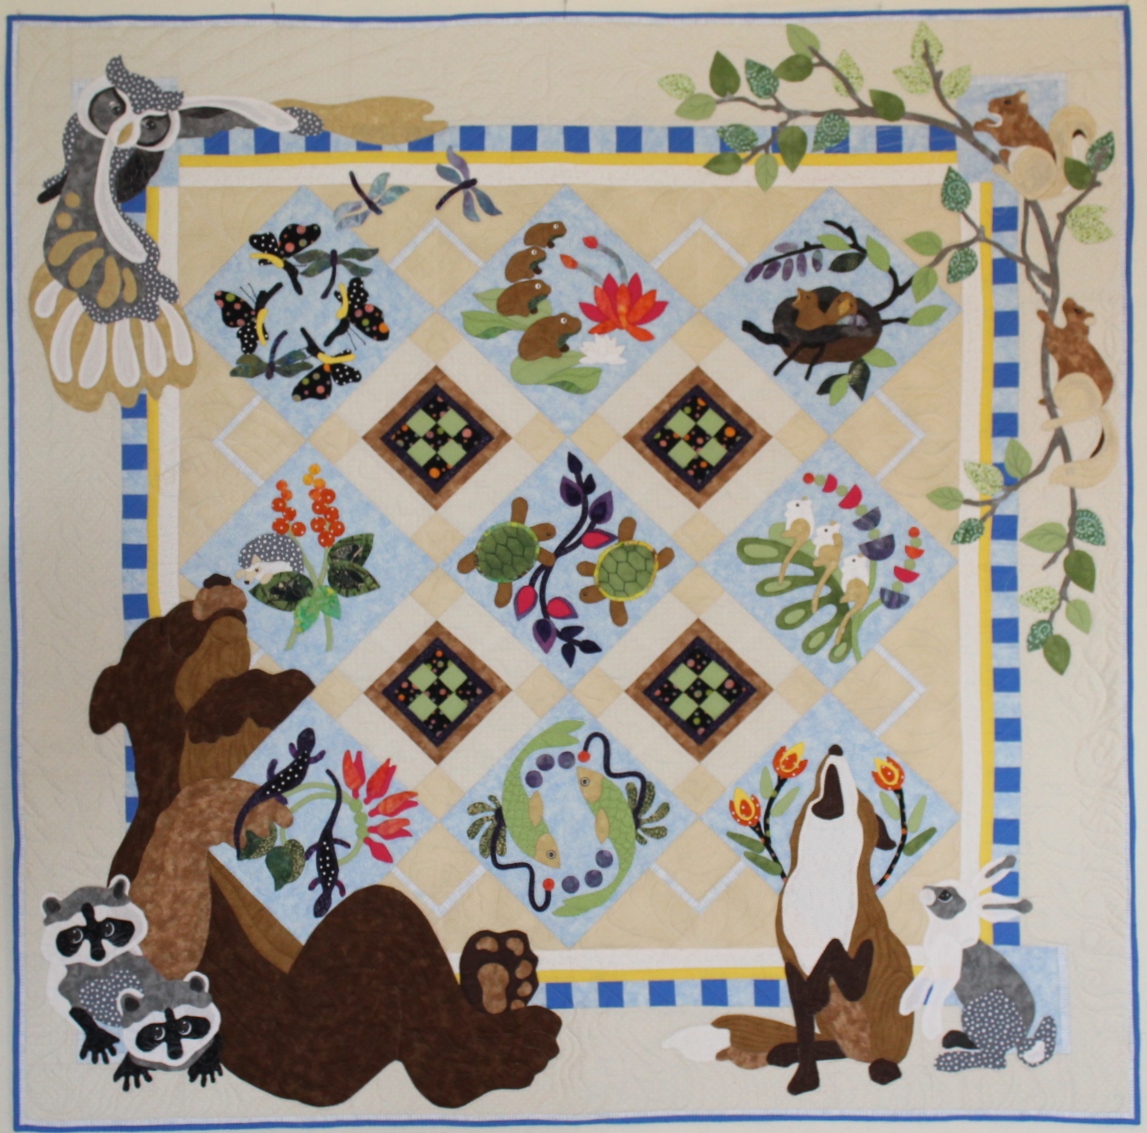
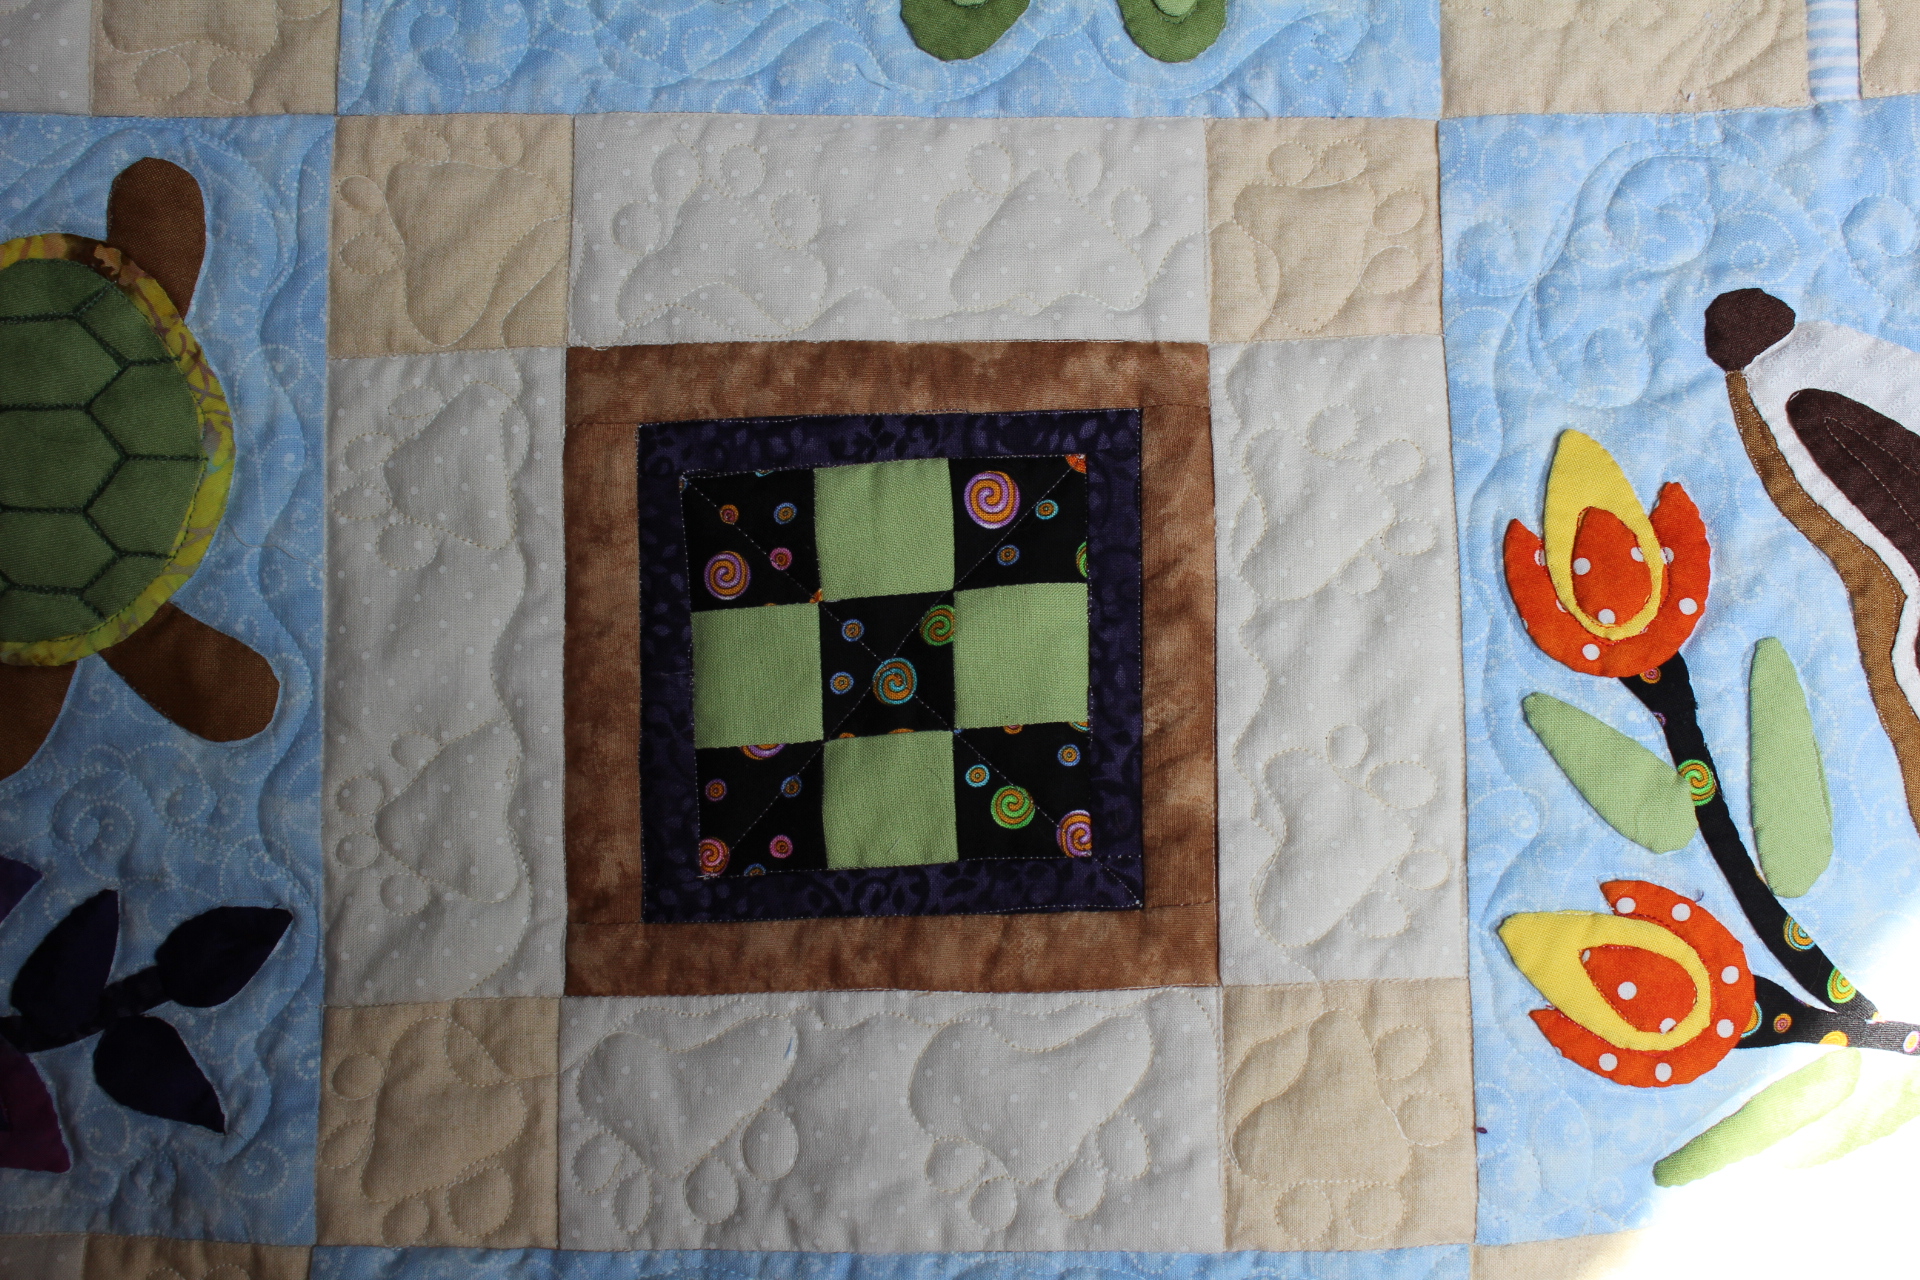
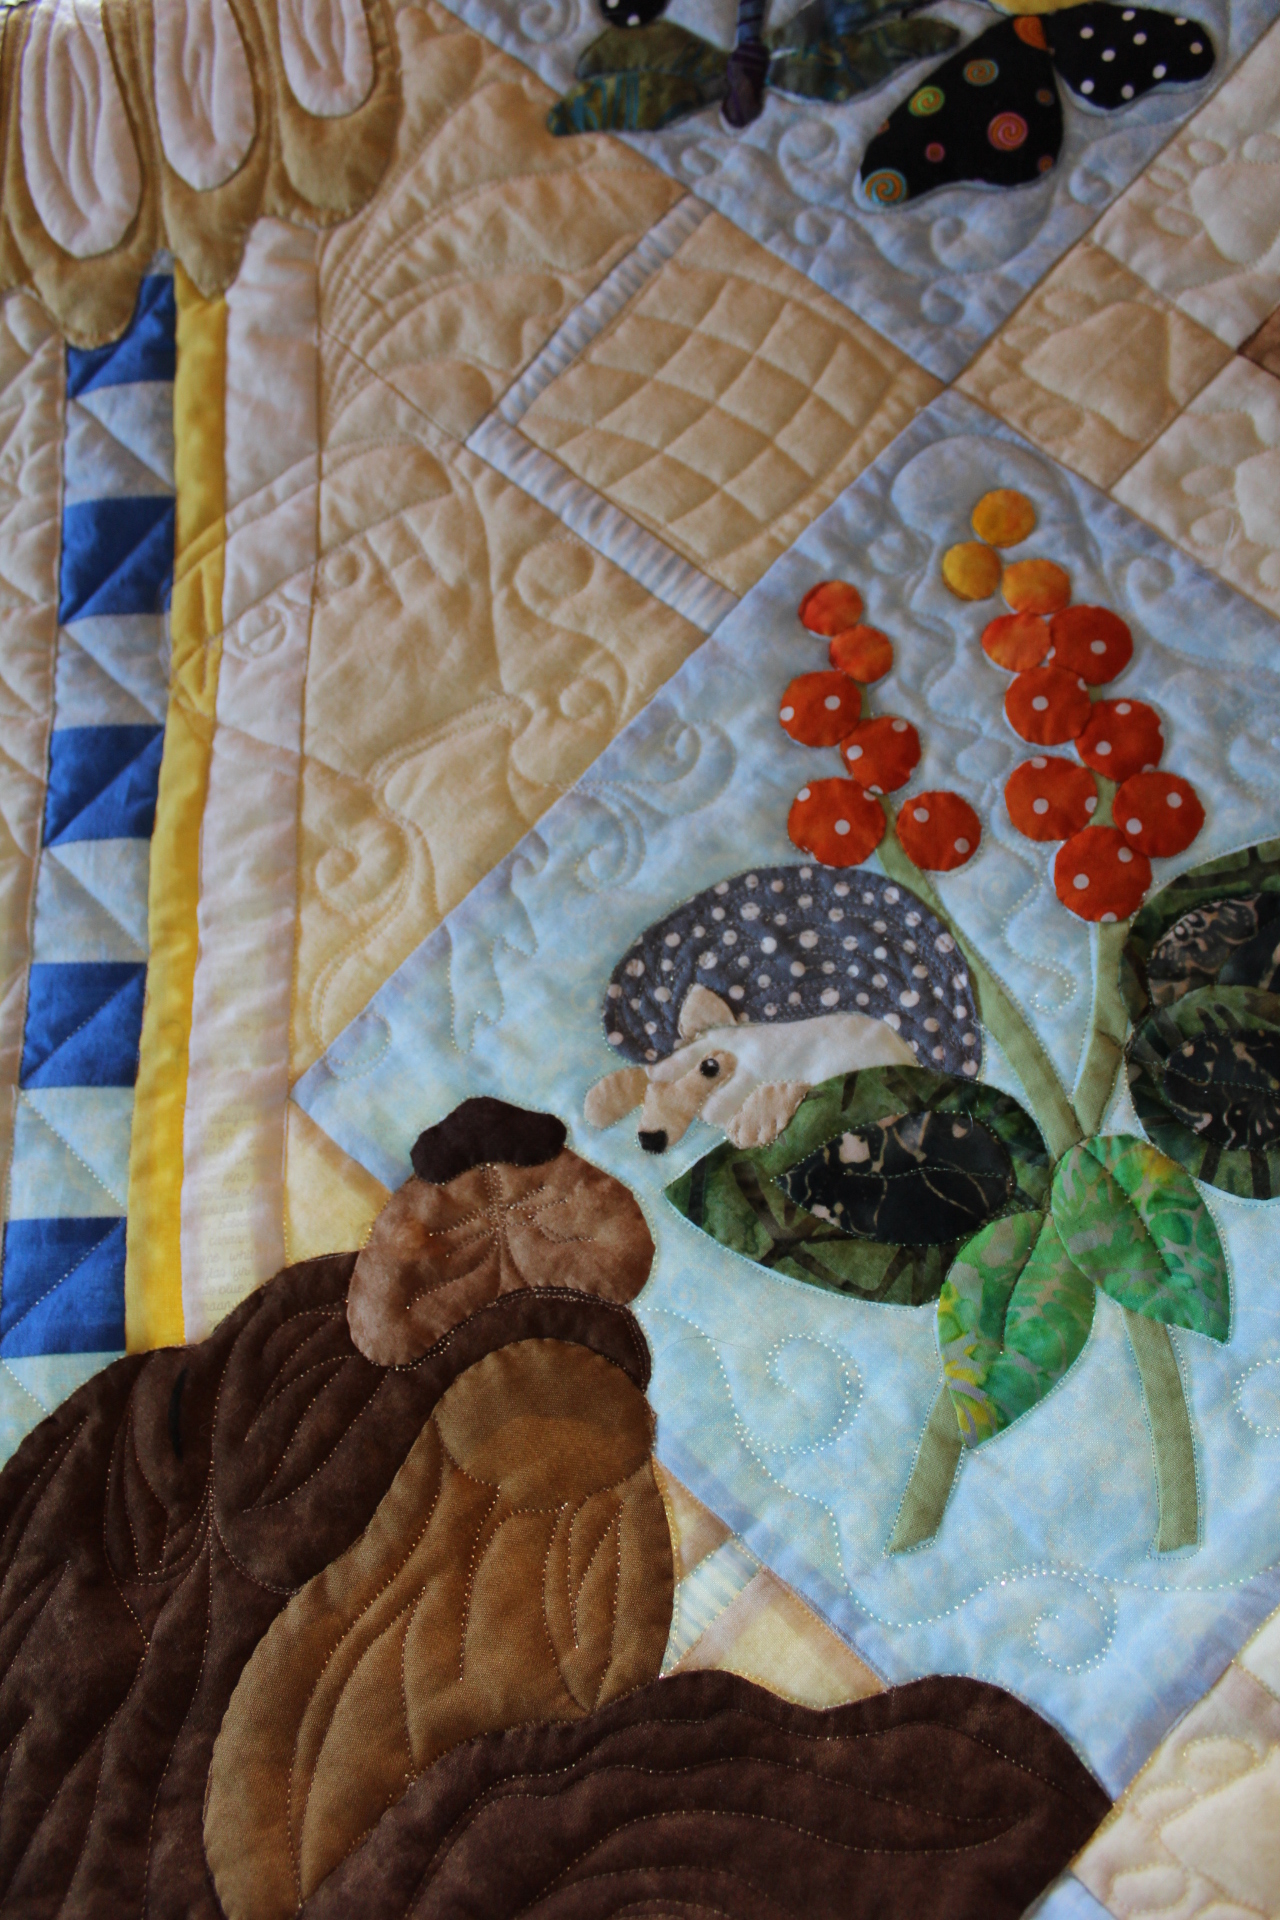
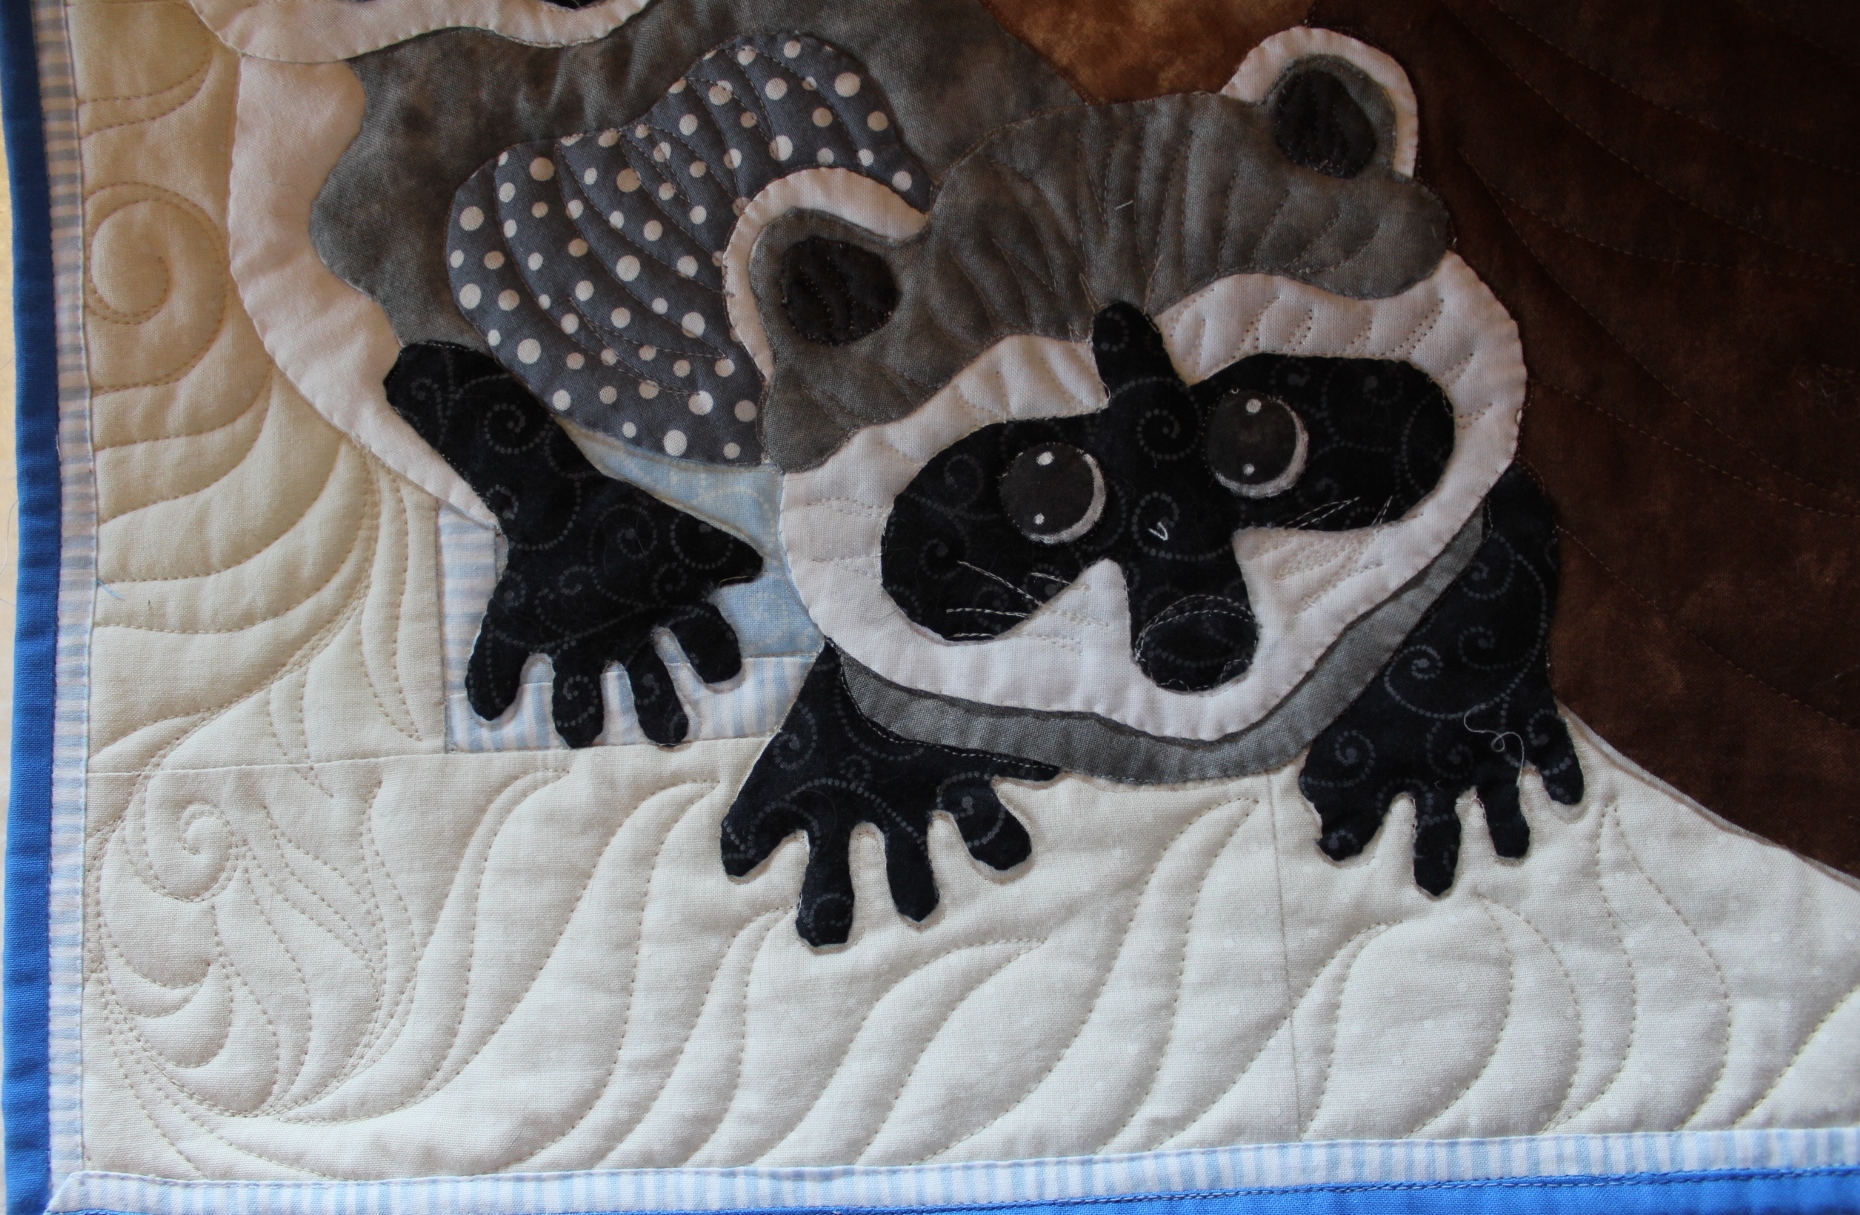
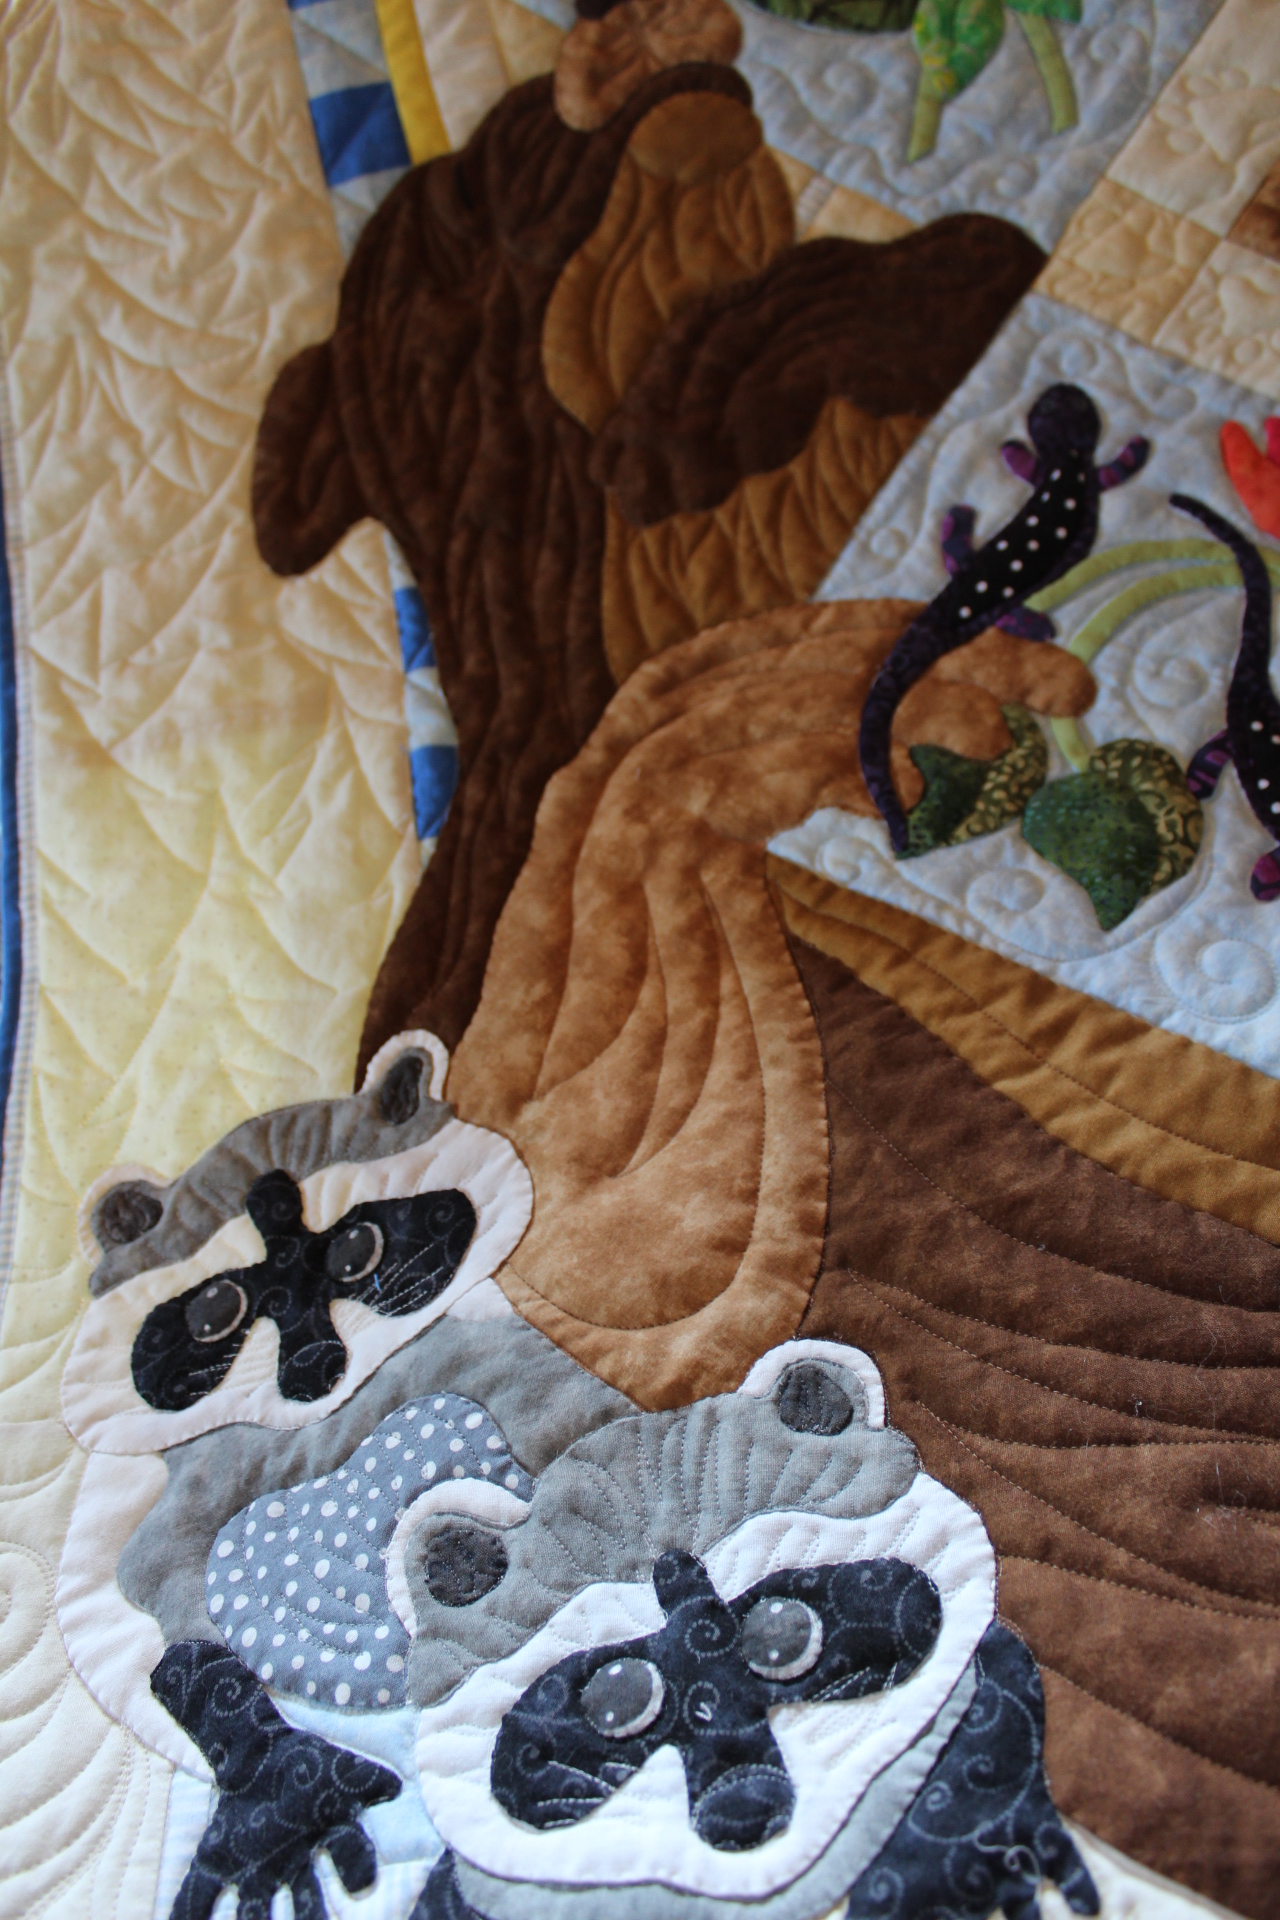
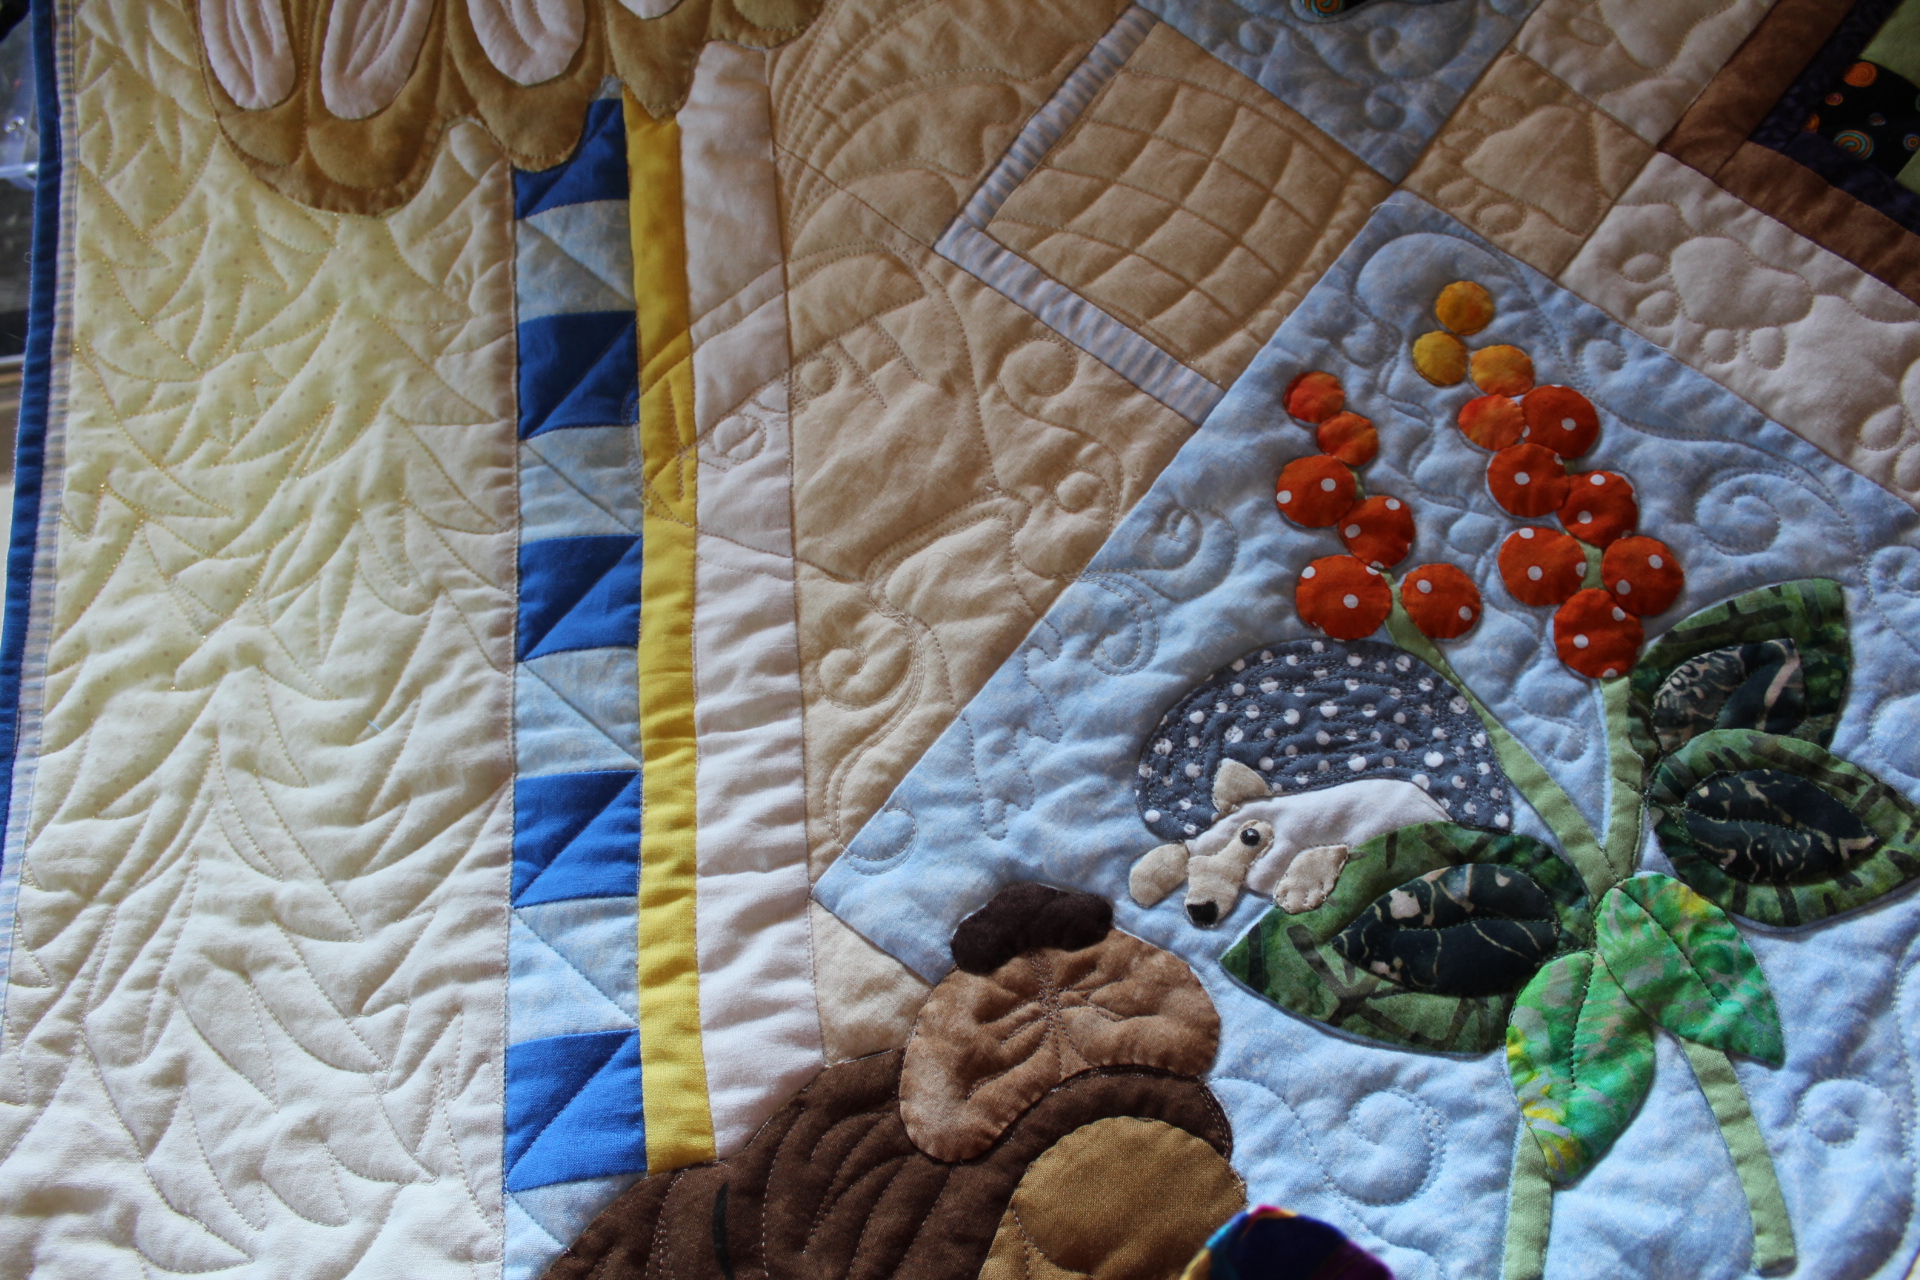
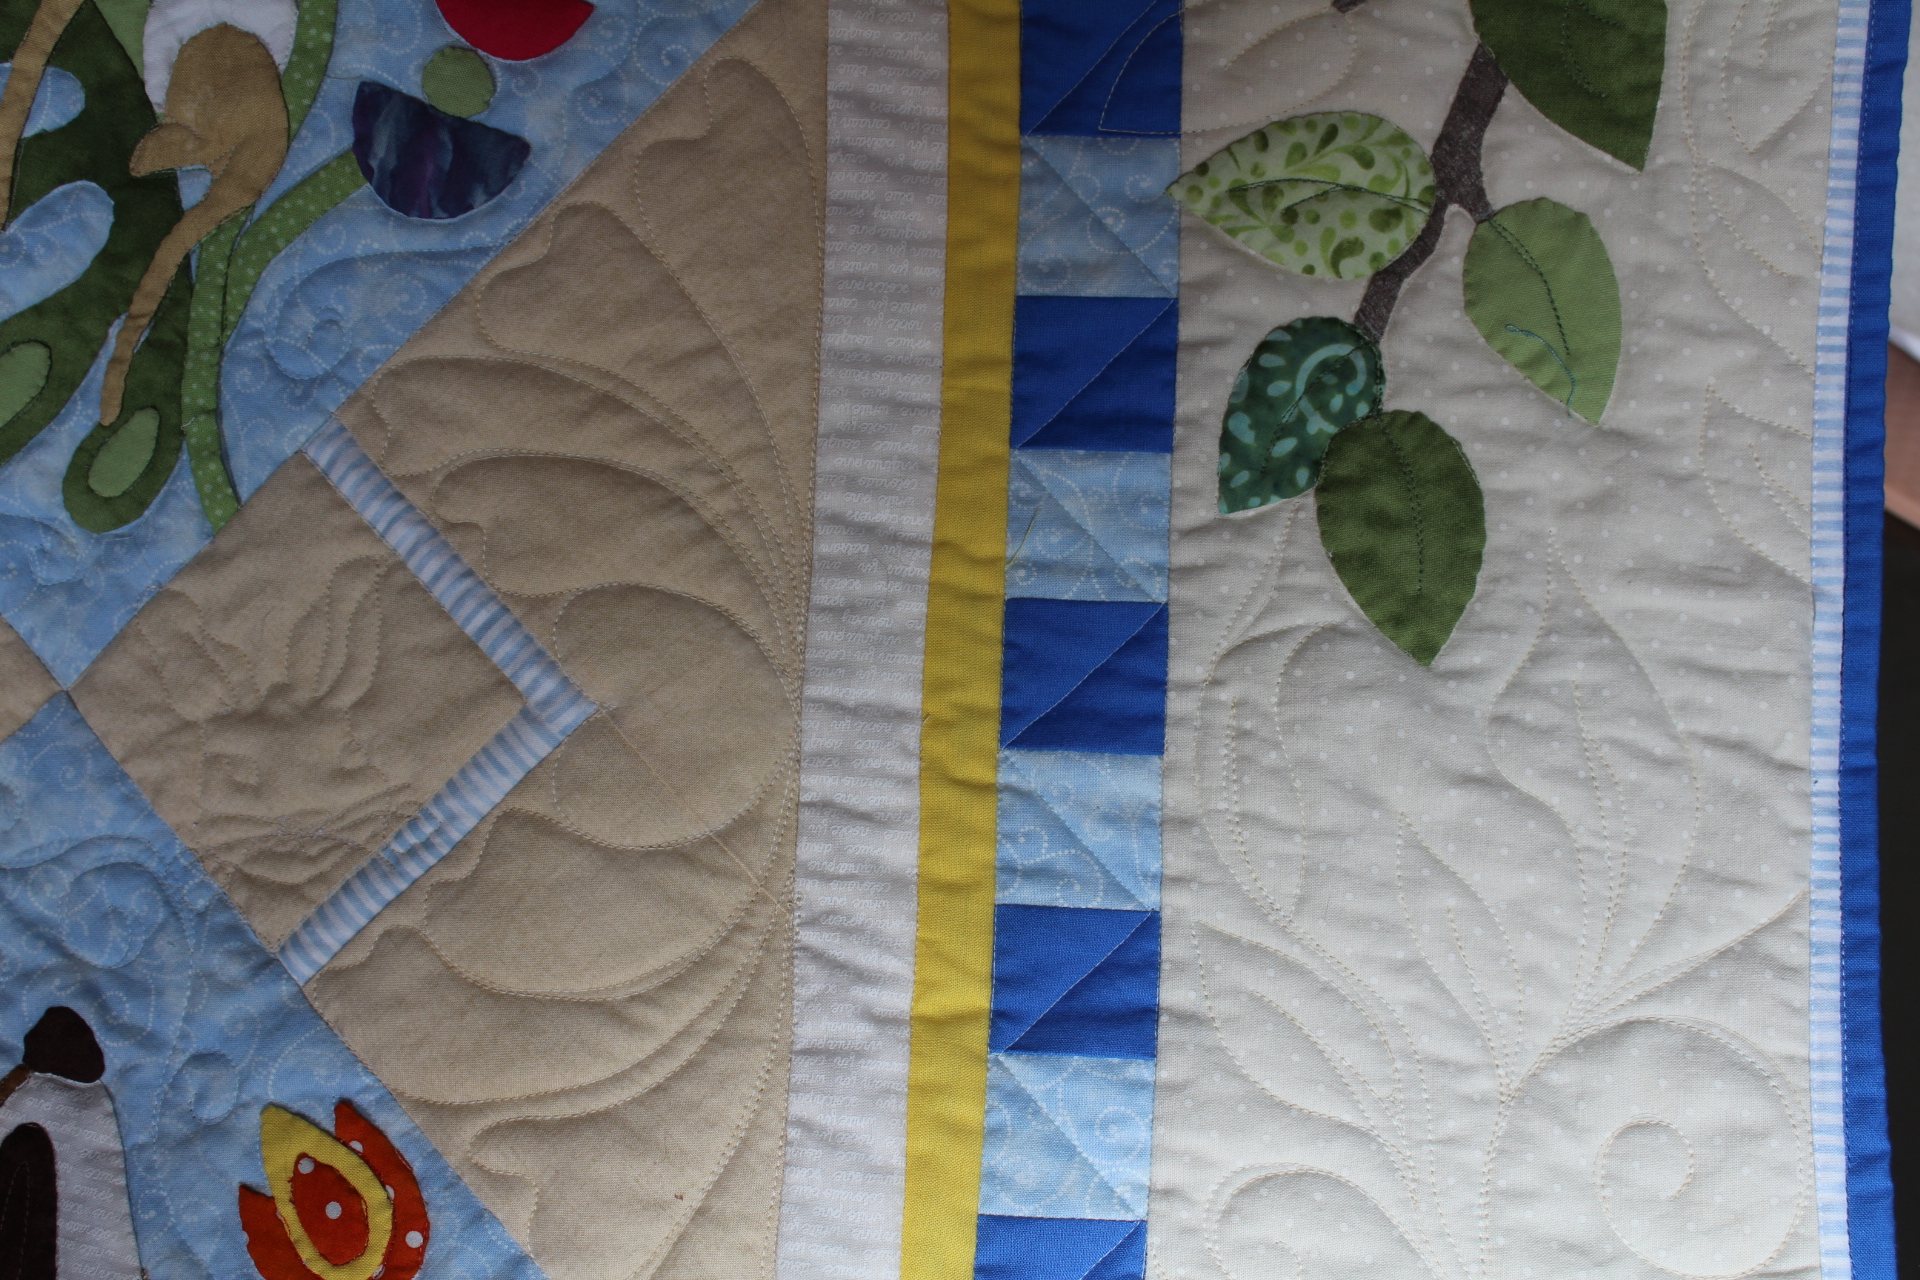
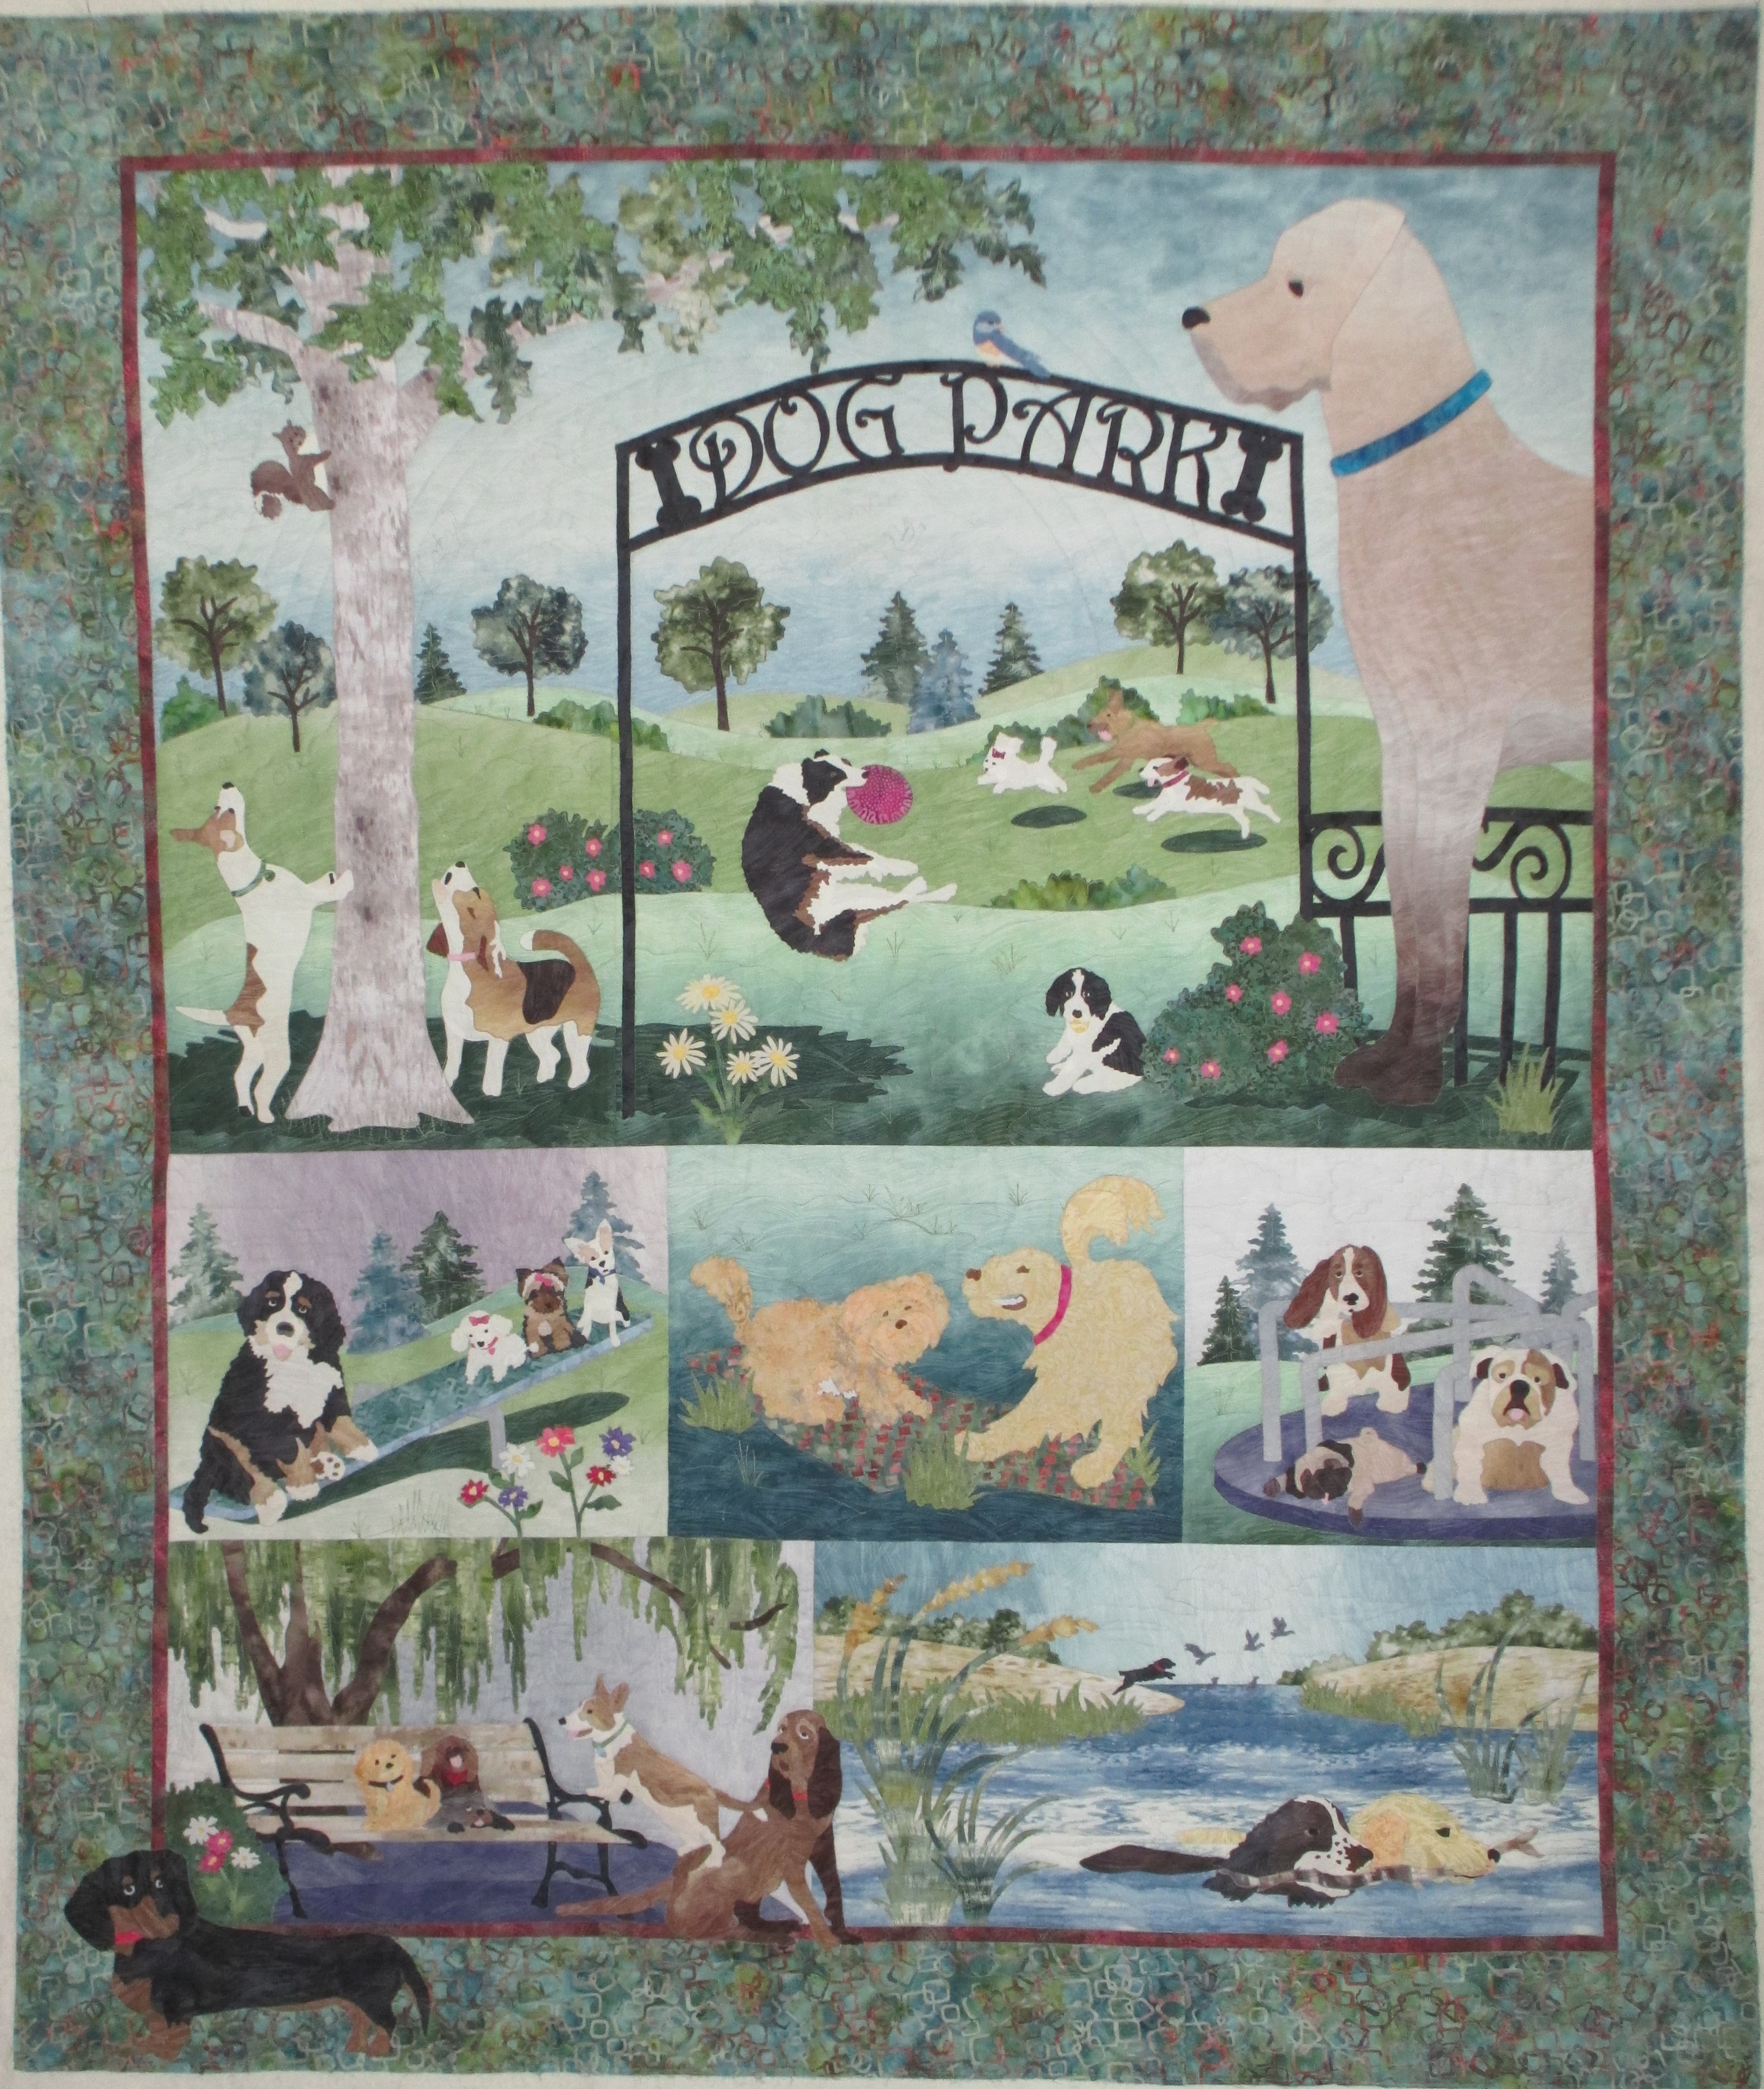
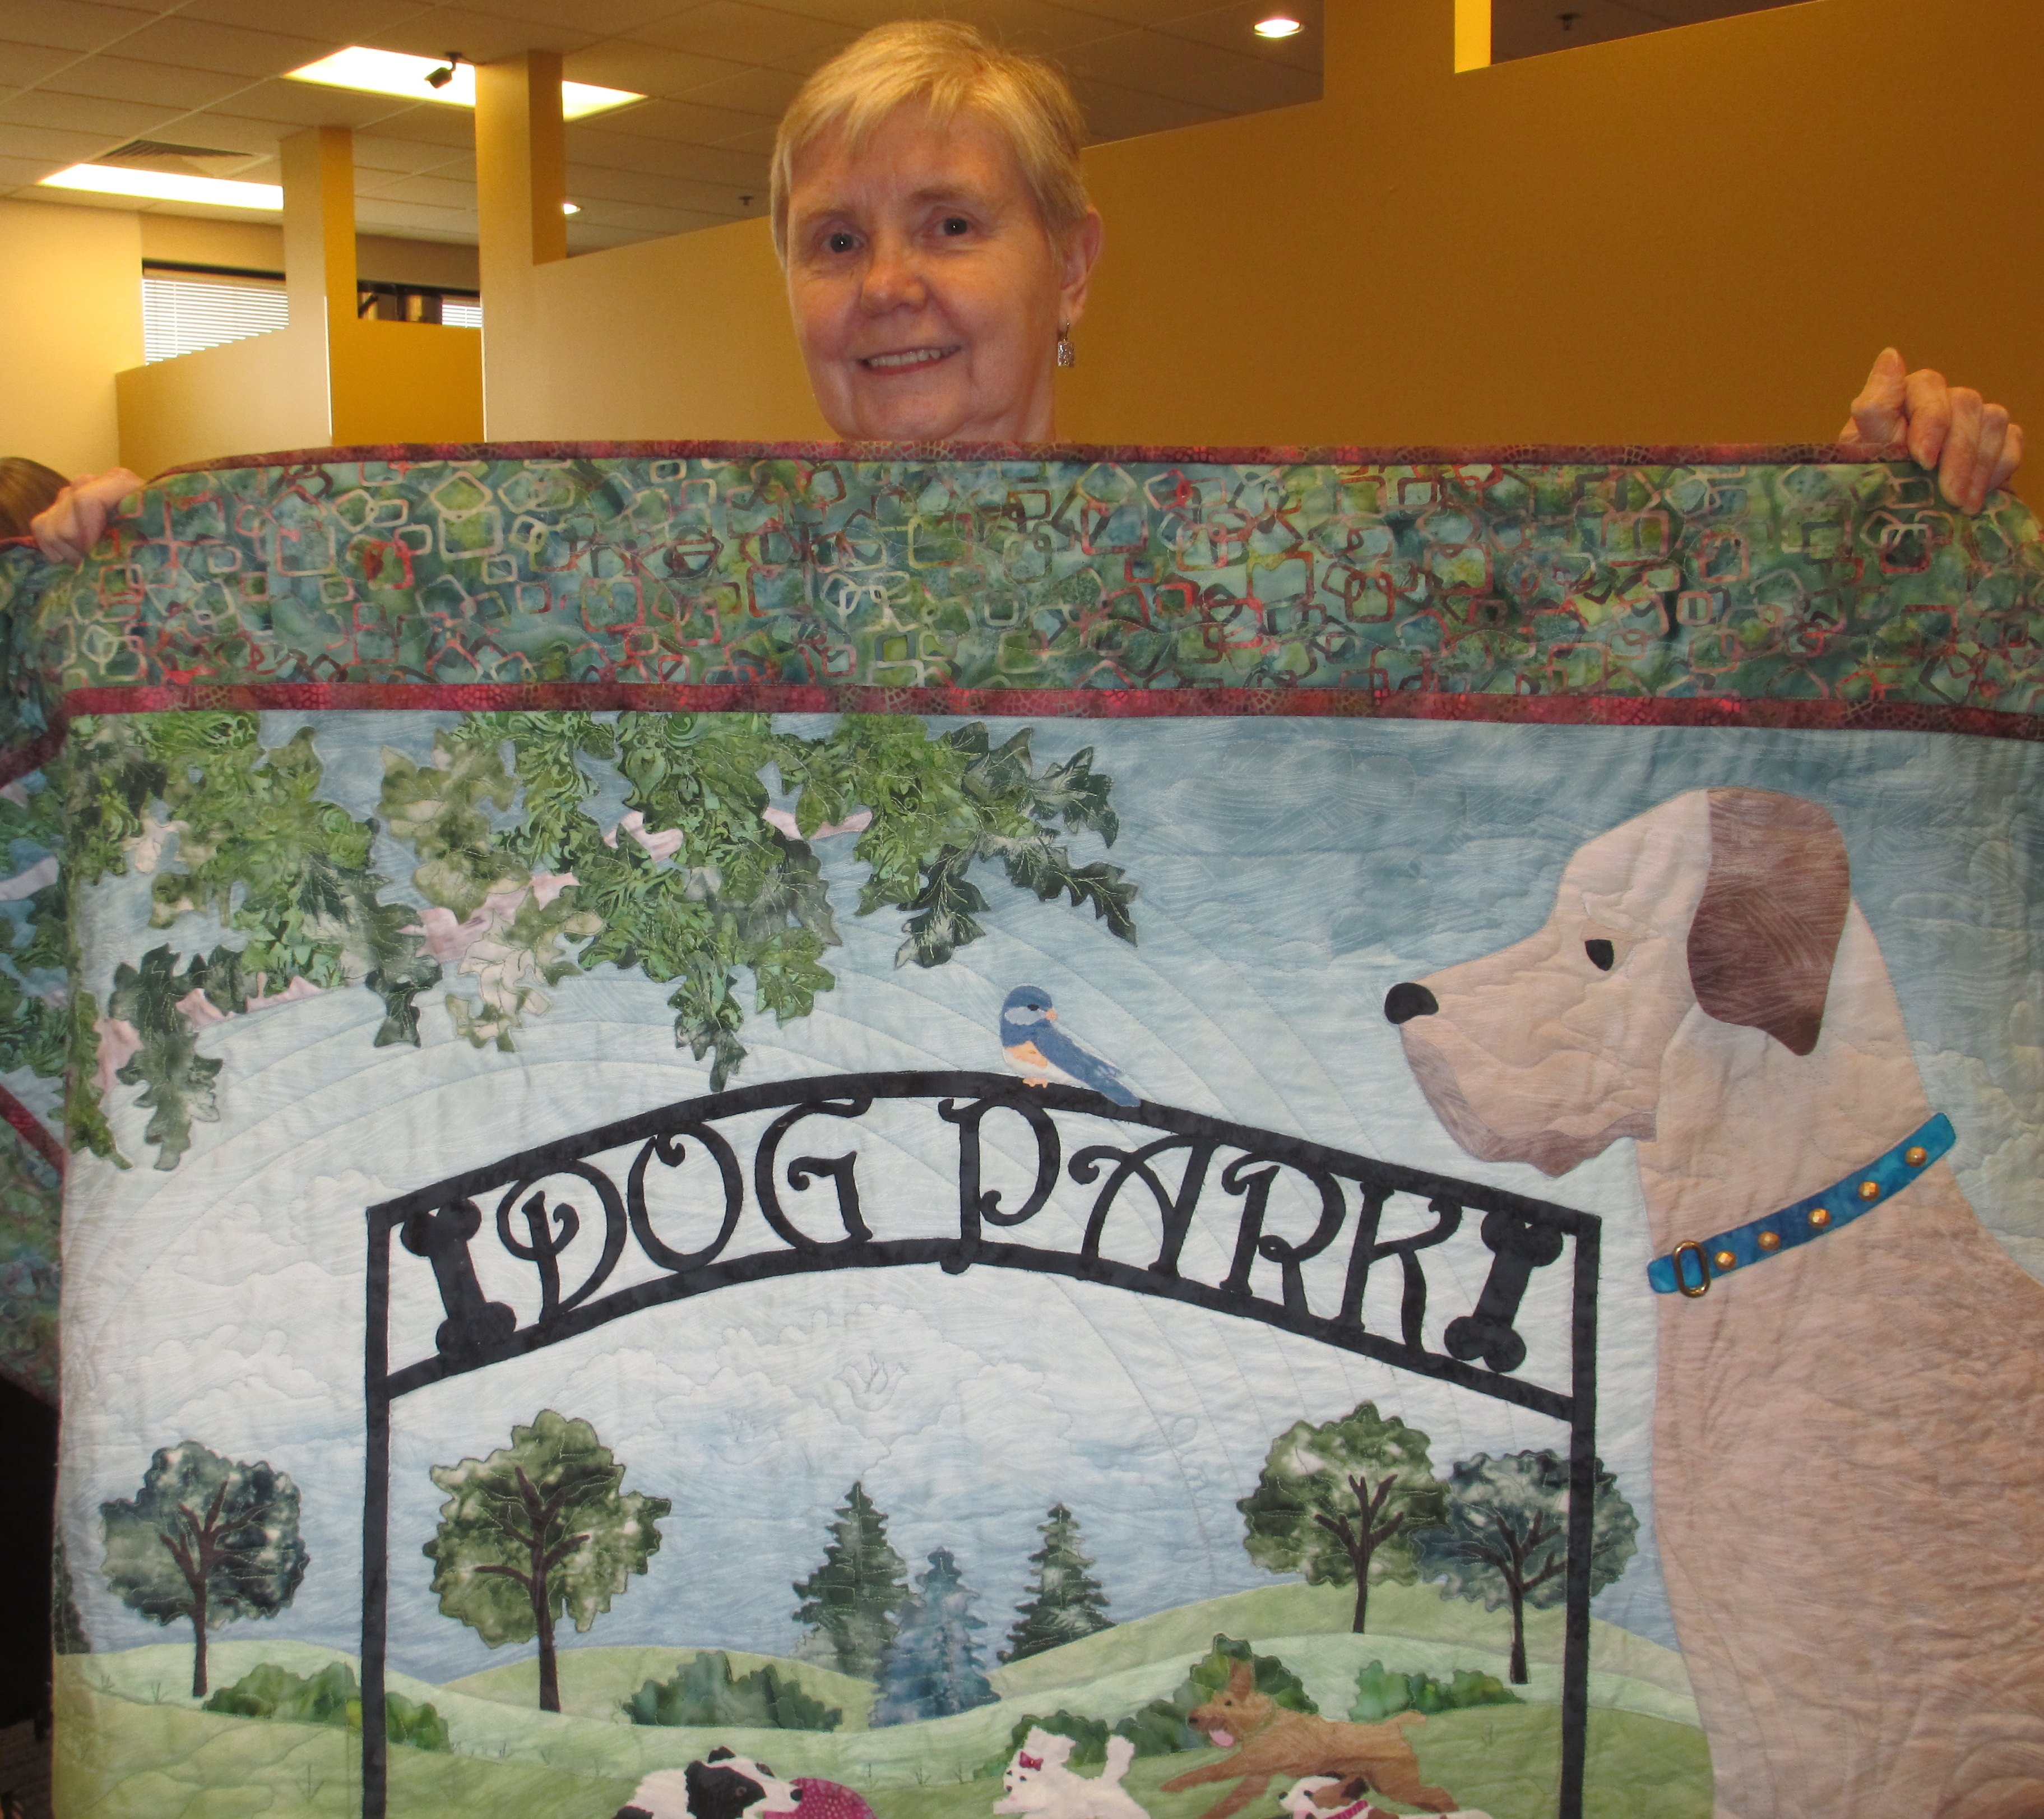
Also, Kansas City Regional Quilt Festival was Father’s Day weekend. A quilt that I had quilted for Joan won 2nd place in Viewer’s Choice. It’s a really cute scene of Mom taking care of her baby, so I can see why people liked it. The pattern is called “Love from Above” by Charley Harper. You can buy it here.

I was surprised at the quilting. I thought I hadn’t done a good job on it, but time passing gives you a new view – it wasn’t as bad as I’d thought. But then, the lighting was very complimentary to the quilting great as it bounced off the trees and tall grasses that were stitched into her quilt.

No photo description available.

What was really cool is that both Joan and I got a ribbon for her quilt.

Yay! Thank you, Voters!

The next Kansas City Regional Quilt Festival will be in 2021. Their website is http://kcrqf.com. This year they did an awesome job meeting the needs of so many quilters. Check out their site and try to make it next time!

Forest Galorest

I loved this pattern from Java House Quilts the first time I saw it.  If you love it as well, you can purchase it yourself here.  I started working on this quilt back in September.  The applique would be needle-turned, meaning by hand.  The edges would be turned under and stitched down by hand vs fusing down a raw edge applique onto the background and machine finishing the edges (a tedious, but much quicker method).  I figured it would take me about 2 years to finish; a nice project for me to work on in the evenings before bedtime.  My daughter was going to start “trying” to get pregnant soon.  Maybe this would make a nice baby quilt.  If she never conceived, I could keep this quilt for myself (trying not to get my hopes up).  Her older sister took several years of trying to conceive naturally and then several attempts of in vitro before getting pregnant.  So, 2 years… I would have plenty of time to casually work on this quilt.

Then, in October, she told me she was pregnant.  Or, was it late September?  She was due June 2nd.  I was shocked, floored.  Surely, it was too soon to know for sure… a false positive…  I admit it.  One of my first thoughts was about this quilt.  How on earth would I get it done in time?  It has plenty of big pieces but also LOTS of tiny pieces.  I figured I’d better get busy.  As I got farther and farther into this quilt, I was kicking myself for not machine appliqueing it.  It is what it is.  And, I am done now.  I’m late for the arrival, but I am done.  He’s about a week old now and a cutie patooty!

The question once I finished it was how to quilt it.  The more quilting you do on a quilt, the more thread you add to that quilt and the heavier and stiffer it gets.  This was for a baby, so I wanted it to be soft… or at least as soft as I could make it and still add details to it.  You will notice there are plenty of gaps in the quilting where it seems like there should be more quilting.  That was intentional to prevent the quilt from becoming too stiff and heavy.  I stitched down enough to give the effect of what I wanted and then let the rest go.  Sometimes you’ve just gotta “let it go.” 😉  My desired effect was playful, yet polished.

Simple swirls were stitched inside the appliqued blocks around the animals and flowers.  My instinct was to put something formal on the outside edges of the pieced blocks, but I ended up putting animal paws there instead.  They are not perfect, by any stretch of the imagination, but it’s okay (Let it go!).  The way you make these animal paws is to stitch a curvy triangle with 2 ovals going up one side and 2 ovals going back down the other side, all as a continuous path with no starts and stops.


What should I do with those outside odd blocks along the border?  I could have added nature scenes, but that would involve intense stitching.  It needed to be open and flowing.  So, I opted for something formal and polished in those areas; feathers and curved cross-hatching.  Traditional feathers would be nice, but I chose bumpy ones to mimic butterfly wings.

I did sneak some playfulness into some of those areas.


As for the borders, I started at the bottom and stitched a very loose fern to mimic a grassy look.

Moving up the sides, I stitched pine trees on the left by the raccoons and bear.  My pine trees got worse as I stitched more and more of them (Let it go!) up towards the owl.

On the right, I transitioned the ferns into leafy vines to meet the squirrels at the top.

At the top I transitioned the leafy vines to meet the rays of whatever that circle thing is around the owl’s head.  It could be the moon.  Or, it could be the sun.  Whatever your imagination sees is what it is.

A couple of notes… as far as the binding goes, I had a hard time deciding which fabric to choose.  I finally decided that I wanted to see that darker blue repeated somewhere in the quilt.  It’s one of my funny idiosyncrasies; I believe you need to repeat fabrics in a quilt to make it look more polished or professional.  So, I chose that darker blue for the border and had intended to make a piping of the pale blue stripes that you see very little of in the quilt.  The pale blue stripes are around the little square blocks where I stitched curved cross-hatching and also in the corners of the border.  To get that effect, you create a faux piping within the binding.  Here’s a tutorial by Margo Clabo from “The Quilt Show” of how to create that.  For whatever reason, I decided I wanted to go with 1/4″ piping, so I cut my strips at 1 3/4 inch for the pale blue stripes and 1 1/4 inch for the solid blue – after stitching the strips together and then folding that wider pieced strip, I’d have a 1/4″ piping instead of 1/8″ inch piping.  That was a mistake.  It turned out to be a flange.  There’s nothing wrong with a flange, but I was worried about it flapping around.  So, I stitched it down.  I’m okay with that.  It still looks fine (Let it go!), and I still get to see both of those fabrics along the border.

Also, if you are wondering how I place appliques on their blocks, I draw out the original design onto a piece of plastic first.  This particular piece is one of those pieces of plastic that hold papers together with a strip of hard colored plastic, while the clear plastic acts like a folder for the papers.  I use a vis-a-vis marker which stays on there until I run water across it.  I don’t know whether or not a dry erase marker would work.  If you have tried that and it does, please speak up in the comments.

My goal is to teach you something new with my posts, if I can.  So, I hope you learned something today!


Square Peg in a Round Hole

Reposted from my other site.

Susan inherited this quilt top from her dad and step-mom. You can obviously see that the design flows into kind of a “sweep”.  But, to me, it looked like it could have been a Native American design.  The design is merely different colored squares sewn together into an interesting design.

IMG_0354

Susan already had the PERFECT thread for this quilt.  The colors matched perfectly. When I got it home and threaded the machine and put the first stitch into the quilt, I realized it was thicker than any thread I’ve used.  And, I was worried.  It took some coaxing to get the thread to go through the quilt layers, but once I got it going it worked like a charm…and didn’t break, not once!

I’m glad Susan decided on a Native American quilting design.  And, you know what?  That thick thread REALLY showed off the design in the light-colored border.  And, the batik border fabric is a wonderful companion to the quilting design and Susan’s thread.   Edge-to-Edge quilting used the wavy lines and the stepping stones under the sun in the border design.

I don’t remember ever getting the chance to quilt a Native American design into a quilt, so this was a lot of fun to do.  If you’re wondering where to find the border design, I took one of Meadowlyon Designs’ pantographs (named Modern Southwest) that you can find here.  Their pantograph is 10 1/2″ tall, but the border of Susan’s quilt was 7 inches, I think.  So, what I did was make a smaller copy of one repetition in the pantograph.  I then traced it onto Golden Threads Quilting Paper (you can buy it from their website and other stores) and pinned it to the quilt top.  I wanted a cornerstone, so I took the bird , enlarged it in different sizes to find the size that worked best and then traced it onto the quilting paper as well and then stitched through the quilting paper. In the past, I’ve used vellum, tracing paper, Press ‘n Seal, etc for marking quilts.  But, I had this on hand and it was just sitting on the shelf, so I thought I’d try it.  I actually really like it.  The paper is a soft yellow, which blends with lots of colors, believe it or not.  When you pull the paper off, it doesn’t leave as much paper behind, and the paper isn’t a bright white.  Judge for yourself if the end product (quilting shown in the pictures above) turned out okay.

I said earlier that Susan inherited this quilt top from her dad and step-mom.  Well, here’s something you don’t realize you need or would like to have until you get it.  They left their quilt tops in “kits” with batting, thread, and backing included on many of the quilts; ready to be quilted.  And, check out this batting!  I was floored.  How cool is that! The batting is marked so I know which way to load it (you need more from roller to roller than you do side to side, because the rollers will use more batting – you can read more about that in my blog post “Oops! Please Add More Batting!“).

I have a tip for loading quilt backing.  I like to load backing fabric so the selvages attach to the rollers. The reason I like to do that is because the width (weft) of the fabric has a little more stretch than the length (warp) of the fabric.  When I load the backing fabric to the canvas of the rollers, the fabric will stretch some.  It stretches even more if I load the quilt with the width going side to side rather than roller to roller – that produces a “waistline”, as I call it, on the backing fabric.  See how the top of the fabric in this picture is stretched more?  That’s because it is attached to the roller canvas.  The rest is not attached to anything yet.  I lay batting on top of the backing fabric and then stitch a straight line across the top of the batting so that I can get the edge of the quilt top straight.  I then baste the top down.  After that, I will check to make sure the sides of the quilt top are straight and will stitch it down.  AFTER it’s stitched down, I attach stretchy clamps to the sides of the backing fabric to hold it taut – that’s what helps keep wrinkles out of the backing fabric, where you can’t see it as you roll the quilt.  So, what will happen is the backing fabric will have more of an “hourglass figure” if I load the backing with the width (weft) of the fabric going side to side than it will if I load the backing with the length (warp) of the fabric going side to side.  And, the selvages have the extra thickness in its weave, so that adds to the strength where it’s attached to the roller canvas.  The difference it makes for the quilt maker is that if there’s a seam down the back, it might not end up straight.


20170109_153424

One of the best parts of my job is the variety of quilt tops and quilting designs that I get to work with each day.  I learn something new with each one.  I had a lot of fun with this one.

To the Moon and Back

Reposted from my other site

This is another quilt I should have put up on my design wall before quilting it, because the colors and the pattern are striking.

This image has an empty alt attribute; its file name is img_0388-640x616-1-1.jpg

Kathy called this her Universe quilt.  It has the 4 quadrants in colors.  Do you see the circles of color in the blues down in the lower left?  Those look like planets, too, and all the mottled batiks in the borders look, to me, like an Aurora Borealis.  So, how would you quilt this?

This image has an empty alt attribute; its file name is img_0391.jpg

The colors are so magnificent, that it’s hard to see the quilting, but I decided to stitch a sun into the upper right hand (yellow) corner with the 9 planets circling around it.  The orbiting circles are anything but perfect.  I hand drew them on with chalk and then stitched following the chalk lines.

In the purple down in the lower right is where I put Earth and its circling moon.  Can you see it?  The moon’s orbit is elliptical, so maybe if you find that semi-sideways oval, you’ll see the big circle inside, which is Earth.  I also drew the Big and Little Dipper with the North Star to the lower left of Earth.  Of course, my ADD brain struggled with which way to put those stars (they’re not in correct proportion anyway)…as I am looking at them on the quilt?  Or as I would look at them if I were on Earth?  I also put shooting stars and meteors in the quilt, but you can’t see them here.  The backing on the quilt did a good job of hiding them, too, which I’m always glad for, because my pea brain talks smack to me about my quilting abilities.

This image has an empty alt attribute; its file name is img_0393.jpg

This particular quilt was a good example of some of the strategies I used for getting a quilt squared up as it rolls on the frame for the quilting machine.  And, since you can’t see the quilting too much, I thought I’d add some tips here.

First off, this quilt has lots of straight lines.  I use those lines to guide me to getting the quilt straight.  I’ll explain the tape measure in a bit, but for now, take a look at the lower edge of the picture.  That’s where the lower roller bar lies.  I use the lines in the quilt to help me gauge whether or not the quilt is straight going across.

This image has an empty alt attribute; its file name is img_0382.jpg


I’m sure I’ve showed you before the laser level I use to make sure the lines are straight as well.

This image has an empty alt attribute; its file name is img_0384.jpg

I used to use these white clips on the rear roller bar to help me with placement of blocks and borders as I quilted, but, unless you find a way to make them stay put, they roll and move.  By the way, if you look closely at the edges of the quilt top, you will see a line of basting on the batting.  There are 3 roller bars on my machine’s frame.  The backing fabric is attached to 2 rollers; one at the bottom and one above this black roller you see in the picture below.  That roller is used to keep the fabric in place at it rolls. So, first, I attach the backing fabric to the canvases that are attached to those 2 rollers.  Then, I lay the batting on top of the backing fabric.  I use my channel locks to stitch a straight line across the top of the batting – it helps to have a dark thread for this so you can see it better.  That is my guide for where to butt the quilt top fabric up against.  I then pin the quilt top fabric in place and then stitch it down about 1/4 inch along the edge.  I’d like to make it 1/8 inch, but I’m just not that good.

This image has an empty alt attribute; its file name is img_0385.jpg

As for the tape measure, I use that as a guide for where to stitch the sides in place.  When I get the top stitched down, I use my laser level to tell me where to butt the sides up to and then stitch the sides down to about 12 inches from the top.  Then I see where the sides hit the tape measure and write those numbers down.  I use those numbers for placement of the rest of the quilt along the sides.

This image has an empty alt attribute; its file name is img_0386.jpg

A machine quilter’s job involves a lot more than just quilting.  The above tips are just a sampling of the many things we do when we work on your quilt.

Flaming Guitars

My latest customer quilt is for Mary’s grandson.  Mary has done a wonderful job of combining colors to match her black fabric with musical notes.  I think she is using up her scraps; smart lady!  Anyhow, she paired the musical notes fabric with another black fabric that has guitars on it.  Here’s a shot of the whole quilt and a couple of close-ups.  Mary was very open to whatever I wanted to quilt on this, but this time we were looking at quilting something other than musical notes.  This is for her 10-year-old grandson.  What kind of stitching would you quilt on this?  The backing is a fire red, so I thought flames would work alright on this quilt.

IMG_1952 IMG_1954 IMG_1956

I snuck in a surprise down towards the bottom in the middle.  I put it in a place where it wouldn’t be obvious – you’d have to search to find it.  I wasn’t sure if her grandson would be frightened by it or think it was cool.  I’ll turn it over to the back so you can see what it is before I show you the front.  The orangey-red (flame red) is the actual color of the backing, but you can see the picture better in the second picture.

IMG_1957 IMG_1959

I needed a template for adding this to the stitching, so I drew the flaming skull out onto vellum paper and then pinned it down before stitching it.  I avoid marking on my customers quilts unless I can find no alternative.  It’s just too risky.

IMG_1948

As you can see (or maybe you can’t – that’s the idea), after pulling the paper off, you have to really look to find the skull.

IMG_1950

If you are interested in seeing this process in action, I have a video of me doing this on my YouTube Channel.  You can find that video here.  I hope this helps you learn some strategies for marking (without marking ON) your quilt top for quilting.

Permission to Play

Recently I finished a quilt for Joan called “Dog Park.”  The pattern and kit is through McKenna Ryan.  If you don’t know who McKenna Ryan is, go here to look at her work.  The details in her patterns are phenomenal, and this quilt in particular gave me a new respect for Joan.  I knew she had to have put hours and hours of work into this quilt top with all the tiny pieces she had to applique… the patience of a saint!  Wait til you see the details!

Here is a picture of the quilt after I finished quilting it.  Joan said I could do whatever I wanted with her quilt.  She only wanted the names of her 2 dogs who have passed on in the quilt somewhere. 

IMG_1620

I decided to quilt a Rainbow Bridge and put her dogs’ names there. 

IMG_1630

Can you also see the little squirrel I stitched on the tree branch (peeking out from behind the leaves)?

IMG_1626

Here’s a close-up of the squirrel.  See its tail between the leaves on the branch?

IMG_1629

At the base of the tree are the 2 dogs – I decided to have one barking and the other howling.

IMG_1625

Over on the merry-go-round is where I decided to put some dog bones.  You can barely see them in this photo.  One is under the big dog in front and another, partially-chewed, bone is under the tongue of the little dog. 

IMG_1622

With this quilt, I had to figure out how to hold the quilt layers together with stitching in a creative way.  In this next picture, you can see how I tacked it down with “grass.”

IMG_1624

For the skies, I mostly stitched in clouds, but this block needed something different.  So, I used a light gray thread to stitch in the shadows of the cascading branches and leaves.

IMG_1623

The big dog in the main block created a special challenge, because, like quilts with people’s faces, I didn’t want to stitch on the dog’s face.  But, I needed to tack it down somehow, comparable to the amount I stitched elsewhere in the quilt.  Otherwise, it would poof up and look distorted.  I should have, and wish, I had asked Joan if she knew what kinds of dog this was.  I don’t know why I didn’t think to ask her.  I should have guess that it was a Great Dane, due to the shadowing on its lower legs.  It would have made a difference in how “smoothly” I stitched the fur onto this dog.  Mistakes and regrets are always an opportunity for learning, so I will try to do better next time at asking my customers more questions and not assuming too much on my own.  And, no, the dog’s head is not bashed in.  Joan, smartly, waited until after the quilting to add the embellishments.  She added a 3-D ear to this dog, which you will see in the photos following. 

IMG_1631 IMG_1654

As for the border, I simply quilted dog paws around the edges.

IMG_1632

Here is a shot of the dachshund in the lower border.  Notice how Joan added a “loose leash” on the dog?  Too cute!  I had to put some kind of mischief in there as a reason the dog had gotten loose, so I stitched a small circle as a ball for the dog to run after.

IMG_1653

Here’s another shot of the center of the quilt after Joan added the 3-D embellishments.

IMG_1652

And, a shot of the completed quilt…

IMG_1650

Finally, I got a picture of a customer holding her finished quilt!  Meet Joan, the proud owner of this awesome quilt!

IMG_1655

Four Books for your Perusing Pleasure

Once again, I have a few books to review for Martingale (8 to be exact), so I will post about a few of them tonight and then follow up later with the others.  First off, since my blog is mostly about machine quilting, I’d like to tell you a bit about “You Can Quilt It!  Stunning Free Motion Quilting Designs Made Easy by Deborah M. Poole.   She quilts for Kim Diehl.  I hate to admit this, but I kind of figure I know a lot about quilting already, so I wasn’t sure what I’d learn from this book… but I was very pleasantly surprised.

Martingale - You Can Quilt It! (Print version + eBook bundle)

Here’s a look at the table of contents so you can get an idea of what to find in this book.

Martingale - You Can Quilt It! (Print version + eBook bundle)

Not only does she tell you what you will need as far as essential tools, but she also tells her secrets for using those tools to achieve perfect looking quilting.   In the “Feathers” section of the book, she gives you many different kinds of feathers to quilt, more than I’ve seen in any other quilting book.  This book is not just for longarm quilters, but also for domestic machine quilters as well.  It will have a prominent place in my library.

Another quilting book that I think is worth your time if you are a quilter is 501 Quilting Motifs from the editors of Quiltmaker Magazine.

Martingale - 501 Quilting Motifs (Print version + eBook bundle)   Martingale - 501 Quilting Motifs (Print version + eBook bundle)

As you can see, the book has a variety of motifs from which to choose, and shows you different ways to adapt and use then and to transfer them onto your quilt top.  I love the different motifs for children’s quilts and some of the fun styles this book shares.

Martingale - 501 Quilting Motifs (Print version + eBook bundle) Martingale - 501 Quilting Motifs (Print version + eBook bundle)Martingale - 501 Quilting Motifs (Print version + eBook bundle)

To keep with the “stitching” theme of this post, let’s take a look at My Enchanted Garden: Applique Quilts in Cotton and Wool by Gretchen Gibbons.

Martingale - My Enchanted Garden (Print version + eBook bundle)

Don’t you just love the colors on the cover?  Wait ’til you see the inside!  There are lots of different projects in this book, each as colorful as the cover.  The author combines wool and cotton in her applique and shows you how to embellish with embroidery (directions for embroidery stitches are included), beads, etc.  Clear cut directions are given for the applique.  I think you will find lots of eye candy to drool over in this book.

Martingale - My Enchanted Garden (Print version + eBook bundle)

Here are a couple of the close ups of the blocks on the above quilt, with embroidery, beads, and buttons added.

Martingale - My Enchanted Garden (Print version + eBook bundle)    Martingale - My Enchanted Garden (Print version + eBook bundle)

Martingale - My Enchanted Garden (Print version + eBook bundle)

Martingale - My Enchanted Garden (Print version + eBook bundle)Martingale - My Enchanted Garden (Print version + eBook bundle)Martingale - My Enchanted Garden (Print version + eBook bundle)

Yummy, yummy!  Even if I never make any of these projects, I will enjoy looking at them forever!

Finally, let’s take a look at 25 Patchwork Quilt Blocks, Volume 2 by Katy Jones.

Martingale - 25 Patchwork Quilt Blocks Volume 2 (Print version + eBook bundle)

This is a great book for beginning or intermediate quilt makers or those who want to expand their horizons a bit.  Katy takes traditional and contemporary quilt blocks and throws a couple of news ones in there and combines them with fun and funky fabrics for a fresh look.

Martingale - 25 Patchwork Quilt Blocks Volume 2 (Print version + eBook bundle)  Martingale - 25 Patchwork Quilt Blocks Volume 2 (Print version + eBook bundle)  Martingale - 25 Patchwork Quilt Blocks Volume 2 (Print version + eBook bundle)  Martingale - 25 Patchwork Quilt Blocks Volume 2 (Print version + eBook bundle)

Techniques and strategies for making each of the blocks are given in easy-to-understand format.

I hope somewhere in these 4 books, you found one you’d like to look into further.  You can order these books from the Martingale website  or from Amazon.com.  Many thanks to Martingale Publishers and  their photographer, Brent Kane, for providing these books for me to review and the many pictures for you to enjoy!


The devil got the best of me…

The quilt I have been working on is Joan’s applique quilt for Easter.  She was/is so worried about her needle-turn applique abilities, but I think she did great!  Besides, with applique, I think it all blends in when you look at the big picture.  Honestly, my applique ability looks a lot like hers.  Plus, I have a LONG way to go to perfect my stitch in the ditch quilting.  Anyhow, here is a full shot of her quilt.  Isn’t it cute?

Joan's 2 001

Joan made the mistake of telling me to do whatever I wanted with the quilting.  BIG mistake on her part!  People know I put surprises in my quilting, but I can have a twisted sense of humor, and it will show up in my quilting.   I was so happy to get to draw on an applique quilt, that as I was quilting merrily along, my sense of humor got the best of me  my evil twin took over and quilted stuff all over that quilt!

If you look at the whole quilt, it could be a big parade, so that’s how this first row ended up, with the bunny in front leading the way with a flag.

Joan's quilt 2 006

On the top right is the biggest block.  I tried to figure out a way to emphasize the applique, but I don’t think echo stitching around it was the way to do that.  This is all done freehand (not computer guided), so duplicating the appliqued tulips onto the left side of the bunny is less than perfect, but okay.

Joan's quilt 2 004

You know how people tend to correct others’ speech, grammar, etc.?  The next row down has a bunny on the left saying “Happy Easter” and the bunny on the right with a thought bubble saying “Hoppy” as in Hoppy Easter.   Notice the egg “turds” trailing behind the chicken?  This is where things started getting… well… evil.  This is the “Haters row.”

Joan's quilt 2 010

I mimicked the upper right-hand corner stitching in the lower left-hand corner.

Joan's quilt 2 015

Playing nice, I noticed that this row was full of love.  The bunnies gazing lovingly into each others eyes begged to have hearts floating up between them.  This is the first block in the “Love is in the Air” row.

Joan's quilt 2 017

The bunnies playing on the Teeter Totter have hearts floating up as if playing along with them.

Joan's quilt 2 018

And, the tulips are hugging.  So, of course there had to be hugging hearts as the final block in the “Love is in the Air” row.

Joan's quilt 2 019

This next row, the bottom row, is called the “Hostage” row.  Looking over the quilt, you notice how the bunnies are riding chickens and stealing collecting their eggs.  So, in the first cart of eggs, there is a chick(en) being held hostage.  Next to and at the rear of each cart is a bunny walking guard.

Joan's 2 006

You might be able to see it better here.  I just need to remember to clean off the loose threads BEFORE taking pictures next time.

Joan's quilt 2 022

Finally, behind those 2 carts is a chaperone car zooming to stay right behind the hostage.

Joan's quilt 2 023

And, the border, as seen in the last post…

eyelet 007

As a side note (*tip!), whenever I think I am done quilting, I take the quilt off the frame and lay it out on a table I have next to my machine.  I let it “rest” there overnight so the fibers can relax from being stretched on the frame.  This gives me a chance to rest and come back and look at it fresh the next morning.  That way I can see if there are places I missed or things I want to add.  In this case, I had a “road” stitched horizontally across the middle of the quilt.  I didn’t like the way it looked, so I went back and made cobble stones on that path way.  I was able to easily put it back on the quilting frame, because of the zipper leaders.  They allow me to put the quilt back on the frame exactly like it was before.

Joan's 2 003

I really had a lot of fun quilting drawing with thread on this quilt.  I hope you enjoyed looking at it as much as I did!

Tip from Trisch

Back in June I posted about a quilt I had quilted for a friend… Trisch.  Well, on her blog, she offers some quick tips on Tuesdays.  I would like to share one with you today that I think is well worth the visit to her page.  If you’ve ever had trouble getting perfect circles for needle-turn applique and other hand-work, you’ve gotta check out how she does her circles on this Quick tip Tuesday page of hers.  You won’t regret it!

circle prep 10

Ahhhh… back to some normalcy, whatever that is…

And, for me, normalcy is me in my studio, working on quilts.

I had said in an earlier post where I was talking about using Zipper Leaders to hold quilts onto the frame that I would also post a picture at a later date of the clips I use – the Grip-Lite Clamps.  Well, here they are.  They are about the size of those potato bag clips, but a little bulkier.  I like them because they are easier for my old hands to open and close in order to clamp onto the fabric.

Joan's quilt 001

On the back of the clamp gives you a website where you can buy them.  Of course, if you Google them, you will find other places that sell them, too.

Joan's quilt 003

Onto the quilts I’ve been working on…  It was Christmas in August here.  It’s a good thing Joan gave this to me now, because quilters get VERY busy the 3 months before Christmas, and if you don’t get your Christmas present quilt top to us early on, you stand the chance that it may not be done in time for Christmas.  Joan wanted swirls quilted onto her quilt, and I was so happy and relieved to do that for her.  Have I told you that I LOVE swirls?  I have had so much fun quilting swirls into quilts.  Other than the surprises that my evil twin sneaks into quilts, swirls are probably my favorite thing to quilt.  This is her finished quilt and a picture of the swirls on the blocks.  She chose a variegated cream, which goes well with this quilt, and the swirls do not interfere with the pictures on the blocks.

   Joan's quilt 007      Joan's quilt 015

I also mixed some holly leaves and berries in the swirls but tried to keep them off the pictures themselves in order not to interfere or compete with them.

Joan's quilt 014

We did a separate border with the same theme; swirls with holly and berries.  I played around on my drawing board for ideas for the border.

Wilma's quilt 5 007

And, this is what I did, swirls with holly in the center of the back and forth swirls, similar to my bottom drawing.

Joan's quilt 004

And, finally, a couple of surprises to make this Joan’s personal heirloom quilt… mailbox stitched around the bird and 2013 stitched into the bottom right of a block.  She’s got one more surprise, but it’s a very small one.  I’ll let her wonder what it is and look for that one.  I had a LOT of fun with this quilt!

  Joan's quilt 011     Joan's quilt 012

This next quilt is Wilma’s.  I don’t know how she does it, but I swear, she’s been piecing at least one quilt a month.  She’s keeping me busy, and I am perfectly okay with that!  😉  Here’s a full shot of her quilt.

Wilma's quilt 5 009

She wanted maple leaves quilted into it to match the fabric, so she chose a pantograph that had the maple leaves for the body of her quilt and piano keys for the border.  The pantograph I used was Maple Breezes by MeadowLyon Designs.  You can find the pattern here.  Angela Meadows and Judy Lyon are a team of quilters in business together.  As far as I know, Angela does the quilting, and with Angela’s input, Judy designs the pantographs.  If you’ve used their pantographs or seen their pantographs, you know they have a wide variety of designs.  I don’t know where Judy comes up with all her designs!

Wilma's quilt 5 017

Now the problem with this (for my evil twin) was how on earth I would be able to add surprises to a pantograph…  I couldn’t add a surprise to the border, because it was all piano keys; straight lines.  The good thing about this particular pantograph is that there were some areas that had big swirls where I could put a surprise in its place.  If you’ve ever used a pantograph, you know you have to play around with the edges anyway and especially when you are almost done with the quilt and have only 1/2 of a row for a full row of pantograph.  So, you just draw lines with a dry erase marker on the plastic on top of the pantograph, so you can adapt it to fit the space you have available.  Okay, so if I can do that, I can add a surprise.  I just drew out a mouse on Vellum paper to be eating within all those leaves and taped it to the spot where I wanted it to go.  That red dot is the laser light pointing where to follow the lines.

Wilma's quilt 5 001

And, here is what the mouse looks like stitched out.

Wilma's quilt 5 004

I put another mouse in the other corner, so they could be friends out foraging for food before the winter sets in.  I think this one looks more like scribbles.  But, hey, what do you expect?  😉

Wilma's quilt 5 012

I loved how the colors of the variegated thread popped off Wilma’s quilt.  It was as if this thread was made for this quilt.  But then, I think Wilma’s got great color sense and her quilts “pop” anyway.    Don’t you?