Under the Sea

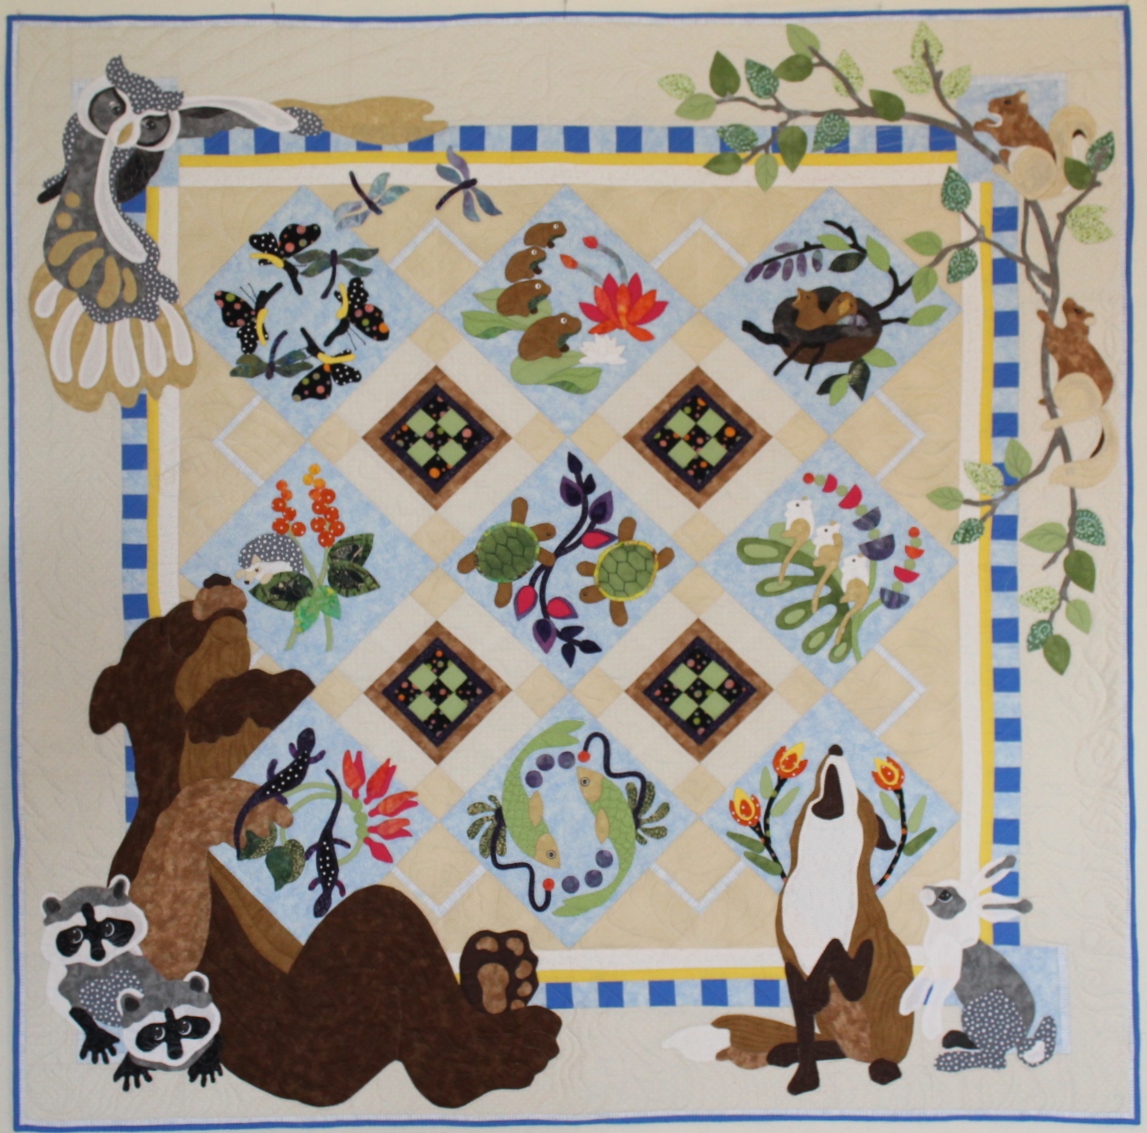
Finally finished with this one. It started out as a figment of my imagination, and I ran with it. I made this for my toddler grandson, so it’s a little too “involved” for that age, but I ran with it anyway.

When my daughter was pregnant, she had talked about making an ocean life quilt for her baby-to-be, but you know how pregnancy sucks up your life; that’s exactly what happened. I was already well into another quilt for the baby, so there was no way I could also whip one of these up, too. Time has passed and the ideas never left my head. The problem is how to make a sea life quilt for a toddler that does not look like it should belong to someone older. Well, I put smiles on the creatures faces… ALL of them.

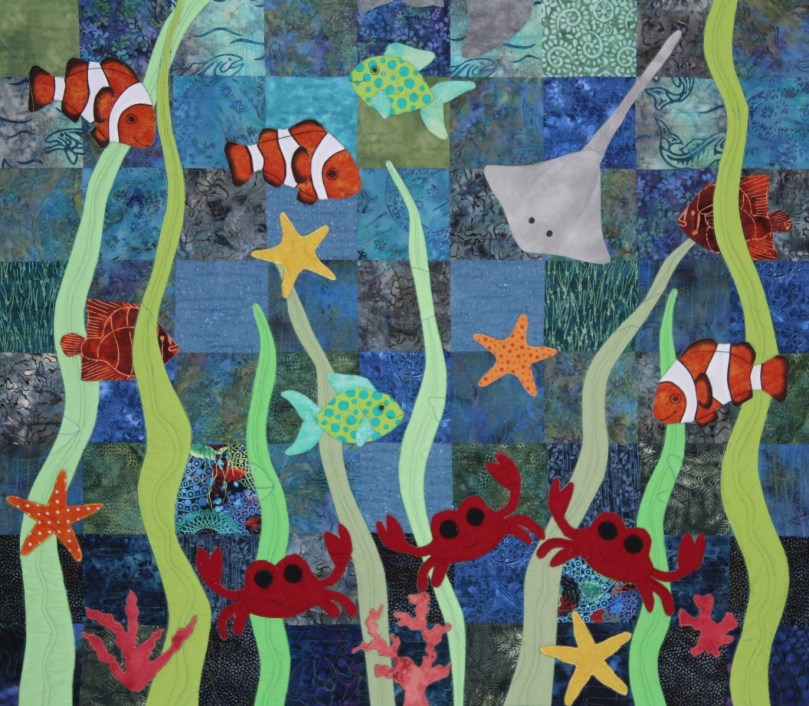
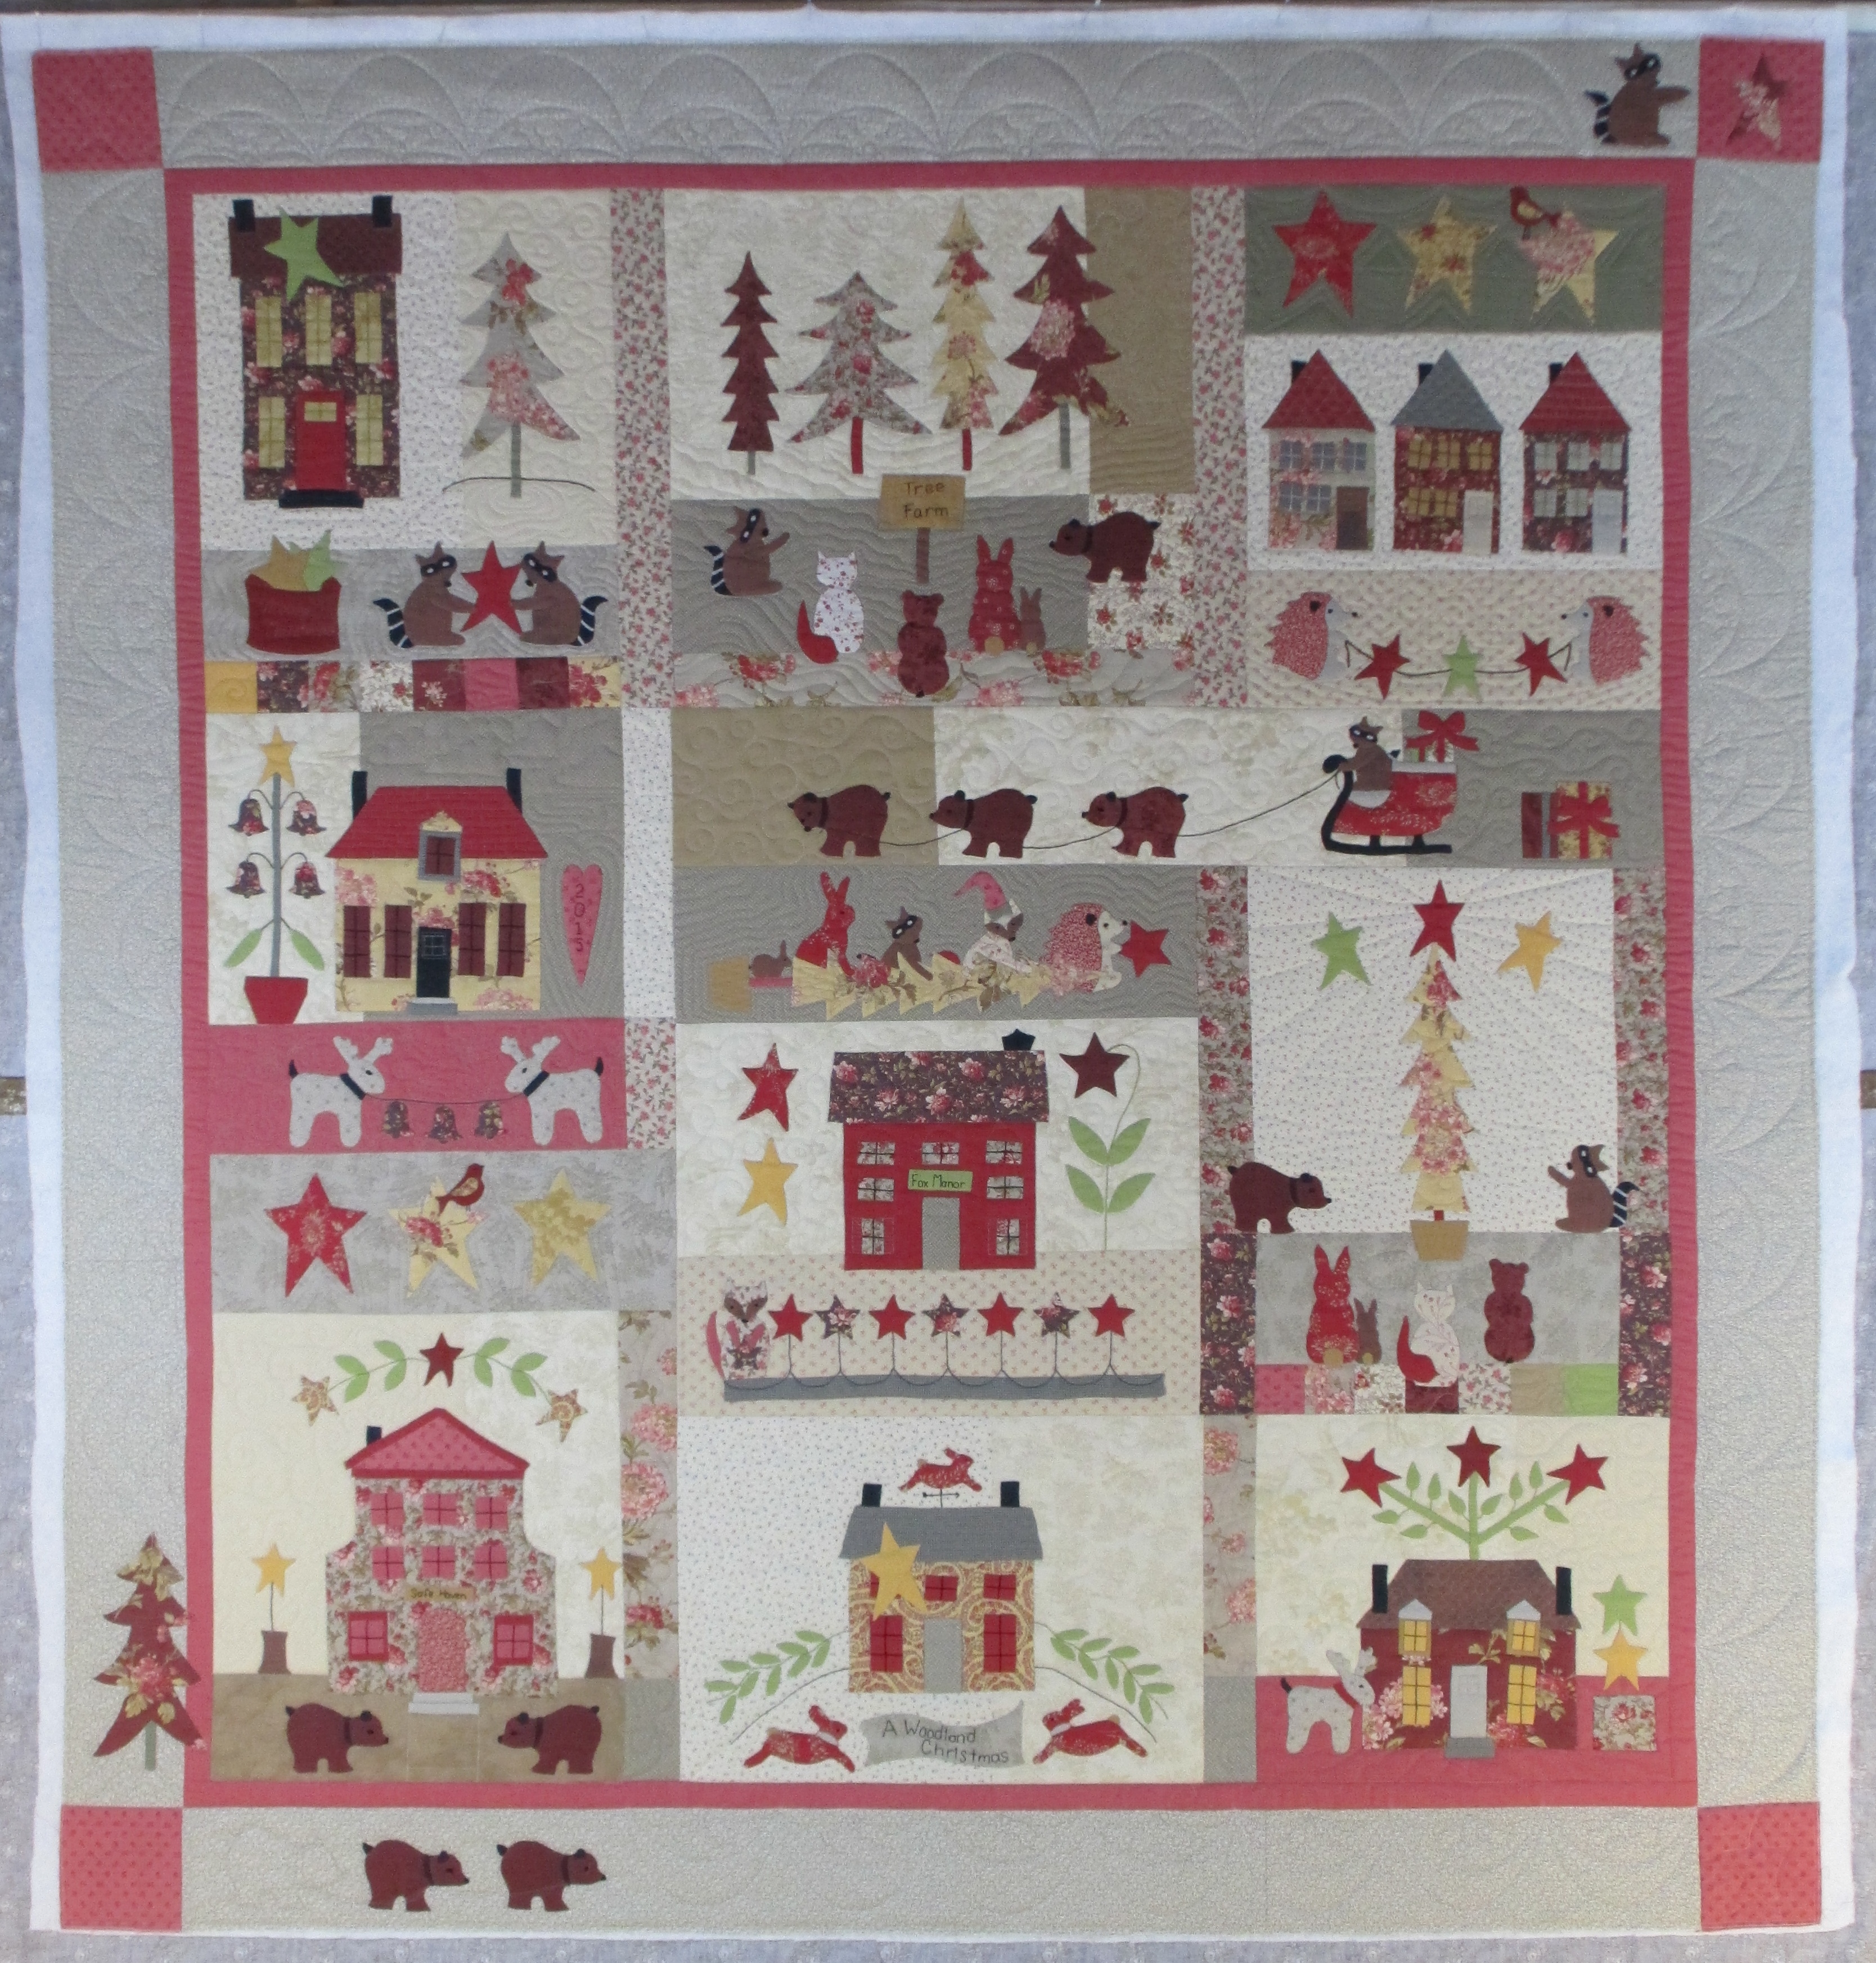
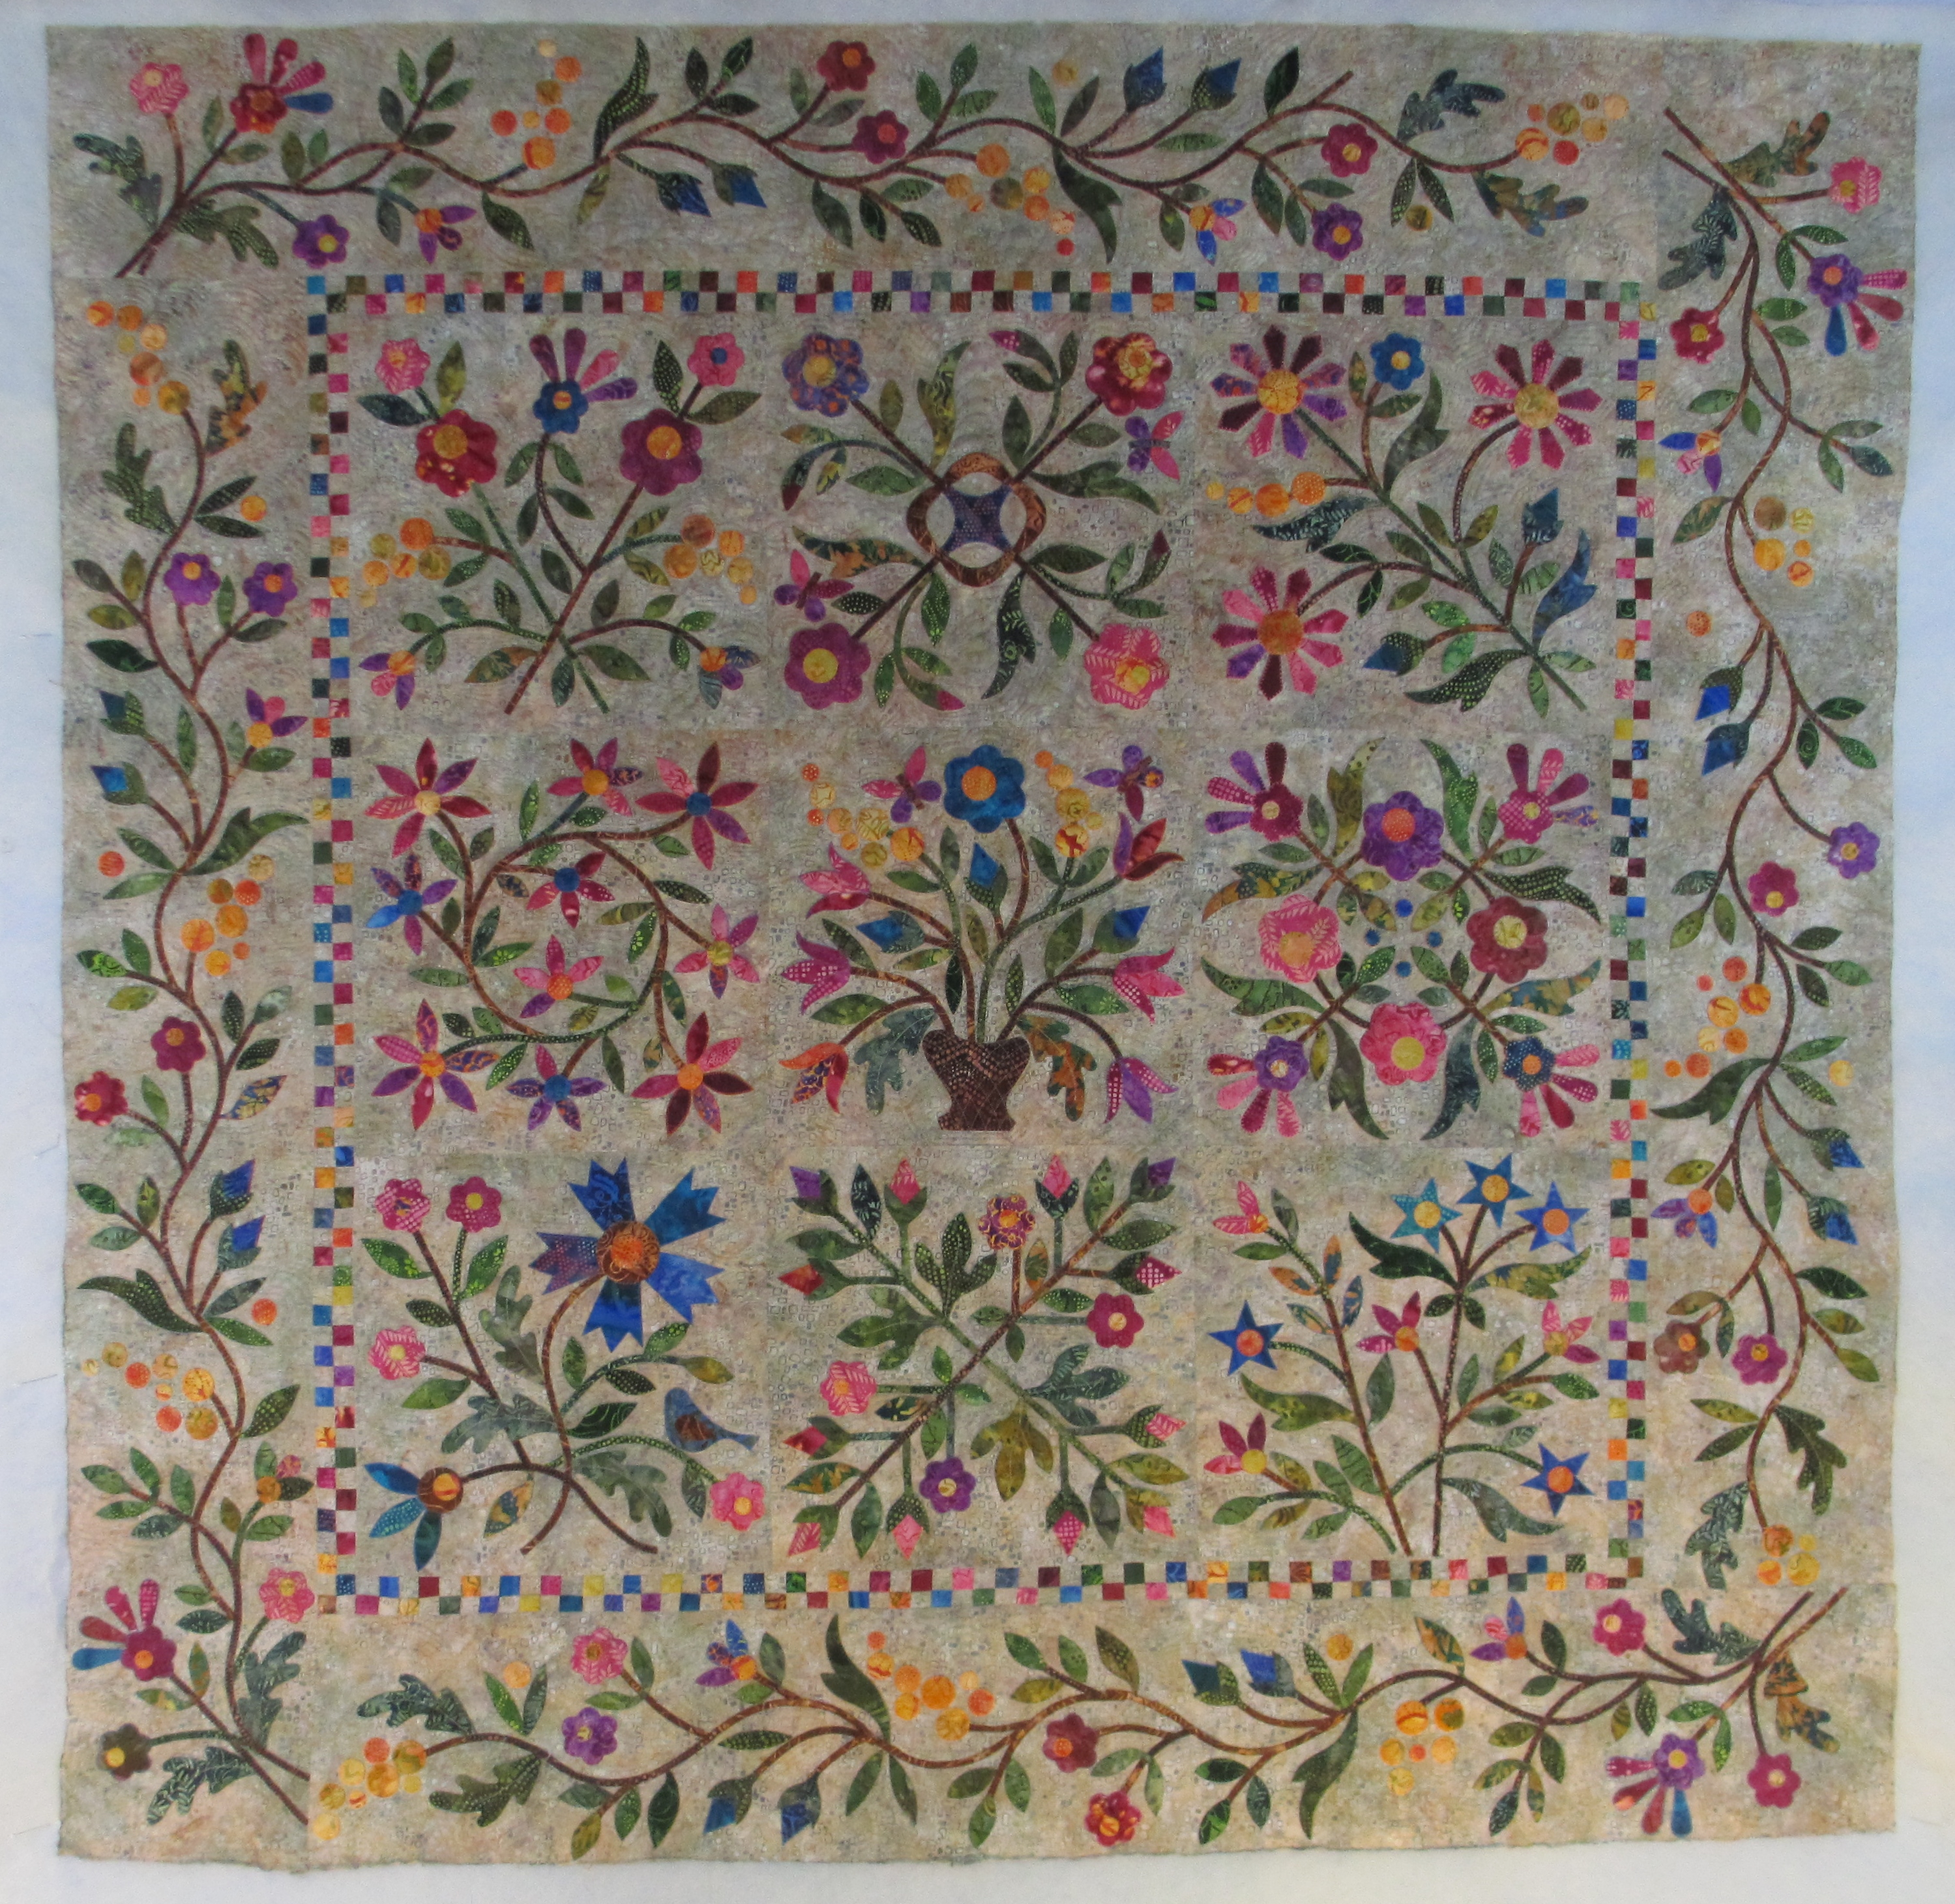
I started out by trying to use up a bunch of charm squares I’d gotten in a fabric exchange (of charm squares) and then randomly placing them with darker colors towards the bottom and lighter closer to the top. That would be my background. The picture above doesn’t do the coloring justice. Now, how to fill it up? Initially I had too many fronds of seaweed. I was randomly making different appliques, trying to fill the scenery. You can always take some away, but I didn’t want to have to make more later. So, I took some of the seaweed away, and I wish I had taken more.

I always learn something with each quilt I make. With this one, I wish I had made it a little more square. I was trying to place all those creatures at the bottom of the sea where they “belonged” and ran out of room. That is the reason for the random starfish elsewhere. I also wish I had made the fish different sizes. The clown fish really are too big, but they are colorful, and I needed that. I don’t know what possessed me to make all the fish around the same size. Lesson learned… thank goodness it’s for a toddler.

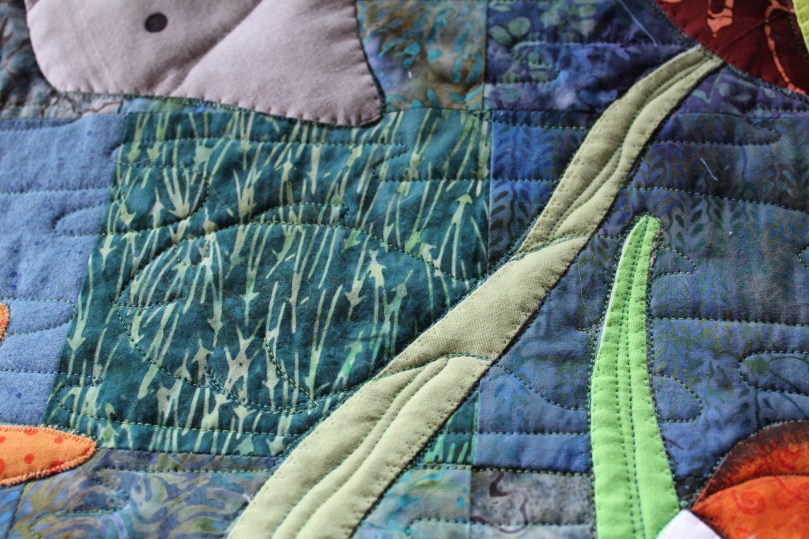
In placing the applique pieces, there were things I didn’t really have room for, or had forgotten to include, or didn’t know how to incorporate it into an applique onto a toddler’s quilt. I was going to put a sea anemone on there, using yarn pieces to float upwards. But, he could pull that off the quilt. Besides, the clown fish were already too big for what I was imagining. So, I added those items in with the quilting. In my haste, I also did not have enough fish swimming in between the fronds of seaweed. So, I added that touch here in the quilting. The trick is to NOT add too much quilting to this. I want it to be soft; the more thread I add the stiffer it will be.

One of my quandaries was how to applique the clown fish. There are orange bodies with black and white pieces. The black would look a little weird if I appliqued it, because I wanted it to look vein-y to show the texture of the fins. I ended up using a fabric marker and drawing the black on.

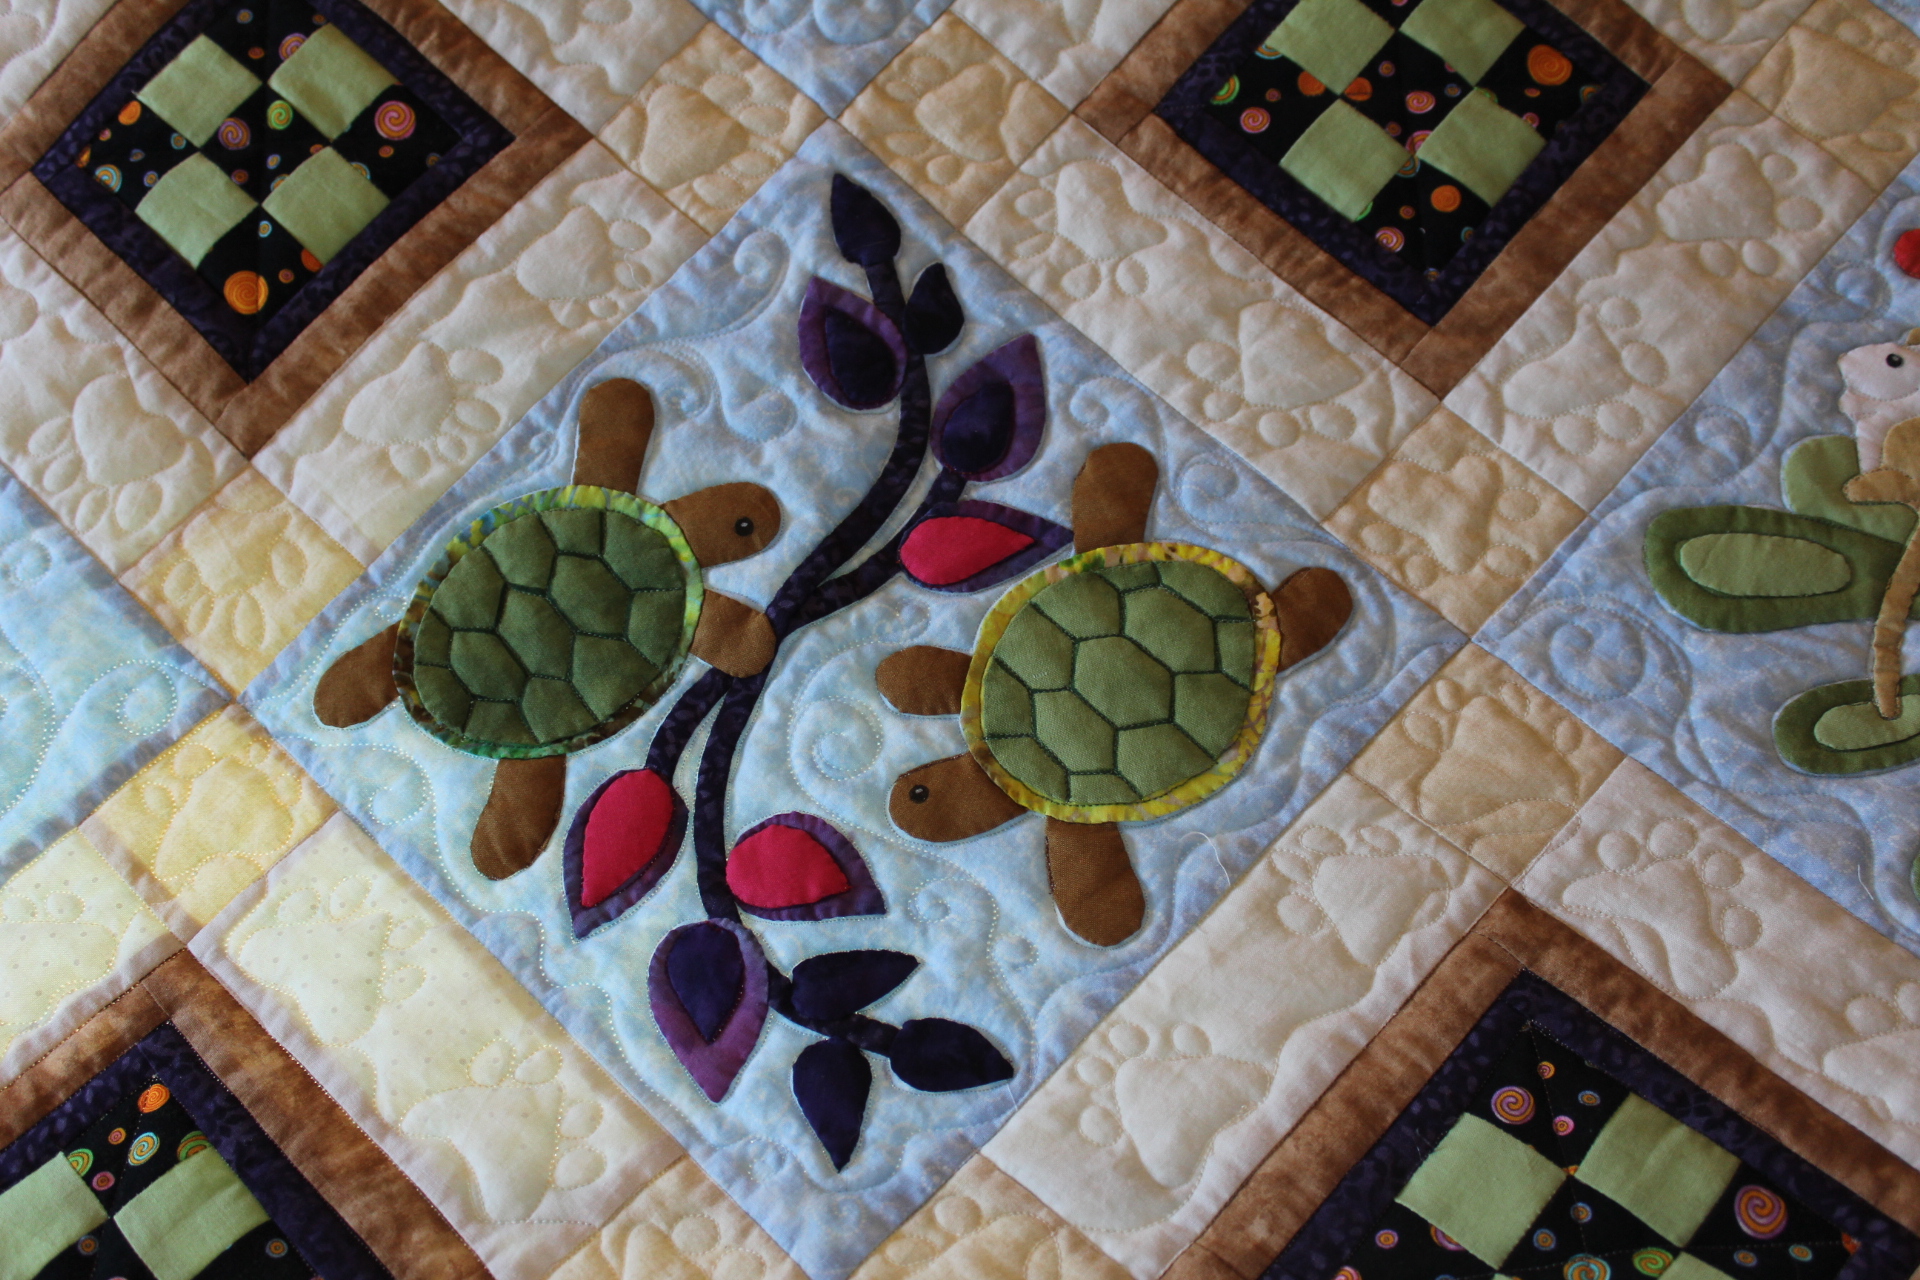
I wanted the turtles to have shells, but couldn’t find fabric that would work. So, I ended up using a muddy batik and drawing the shell on that. Quilting adds the dimension to it.

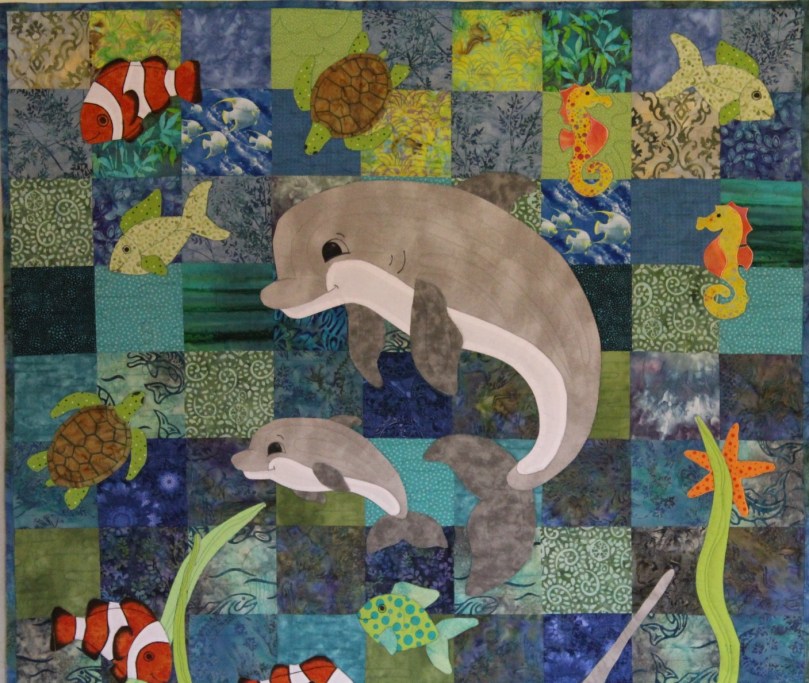
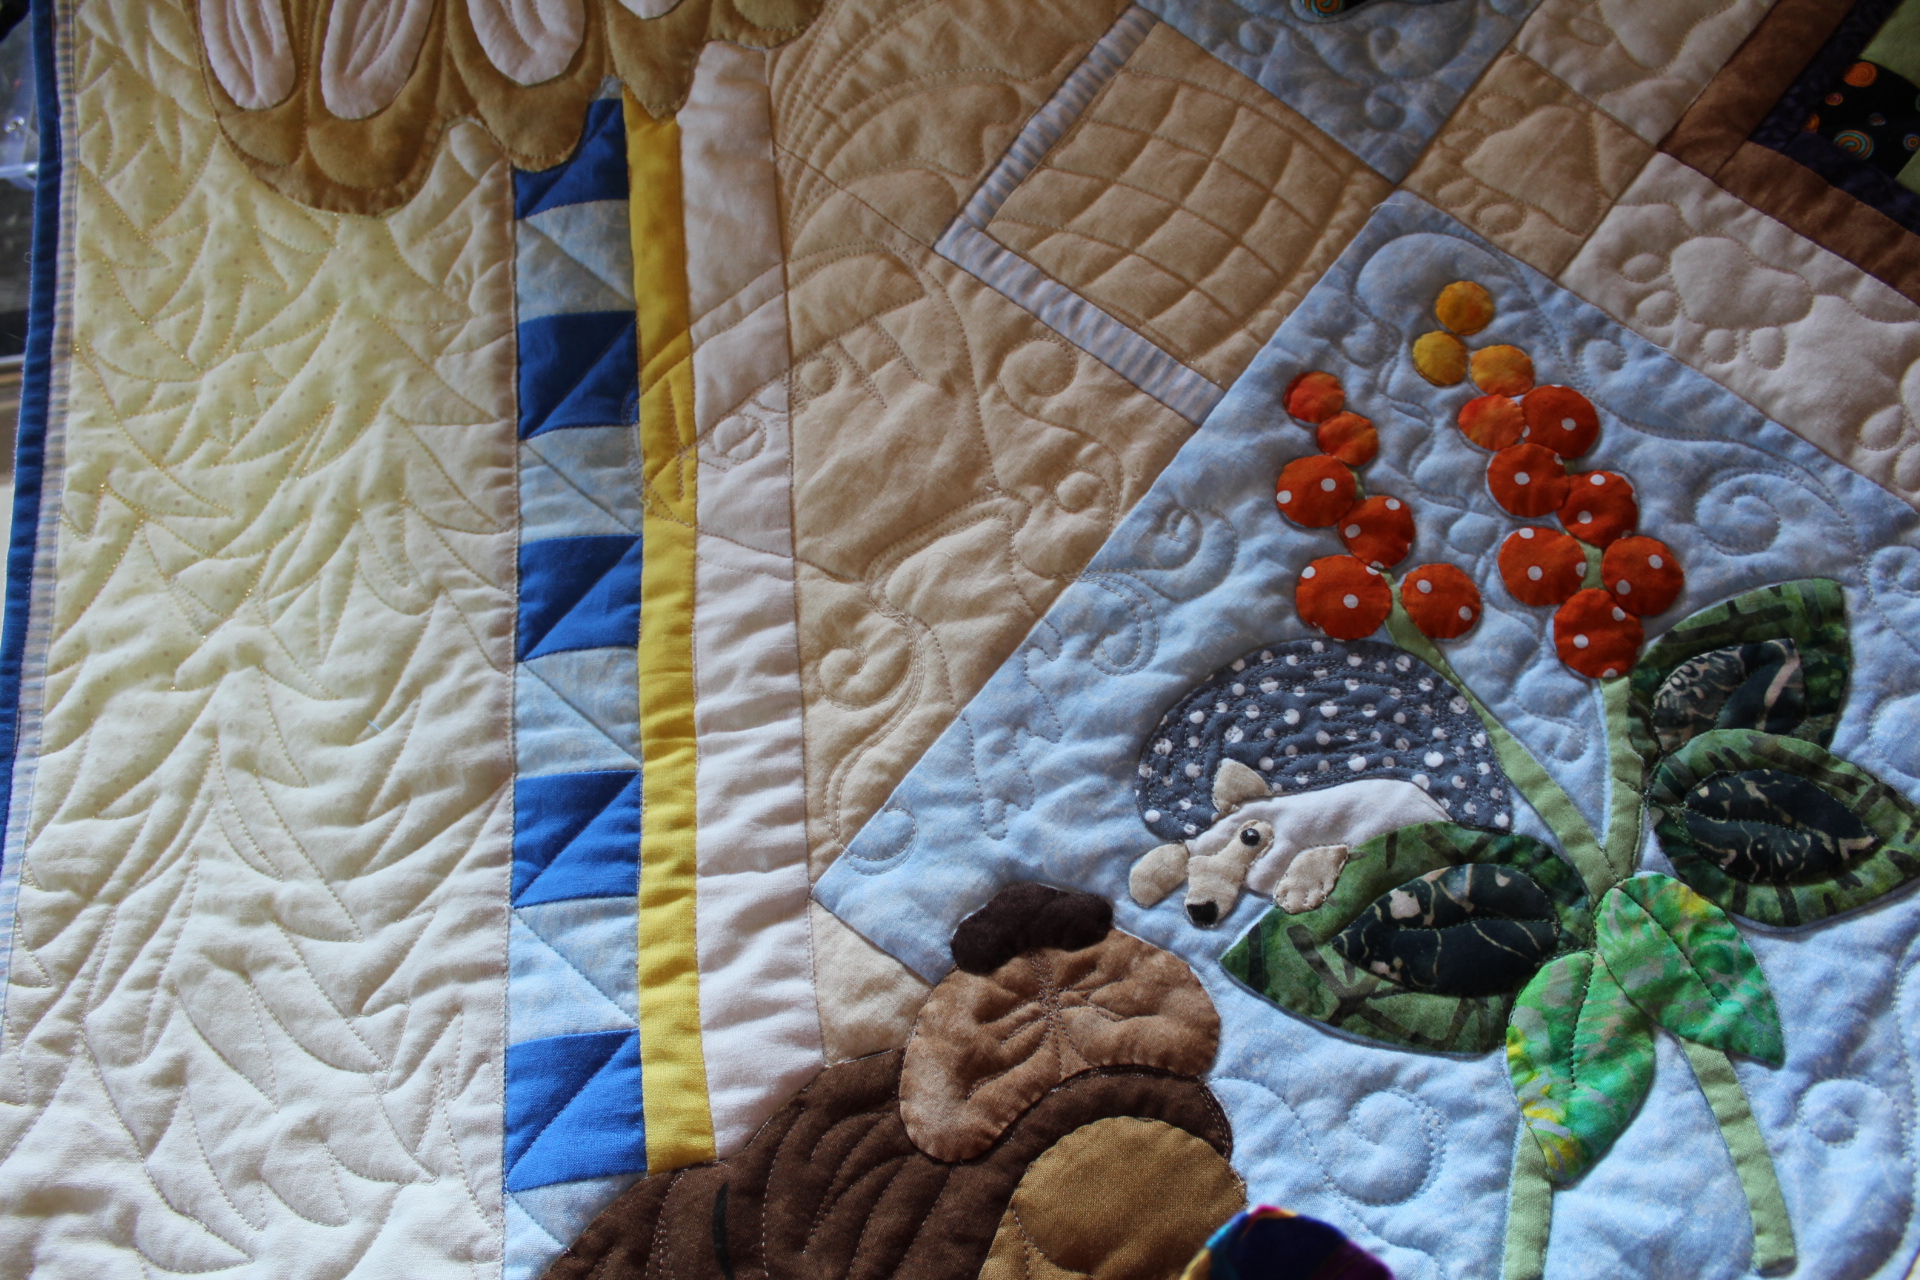
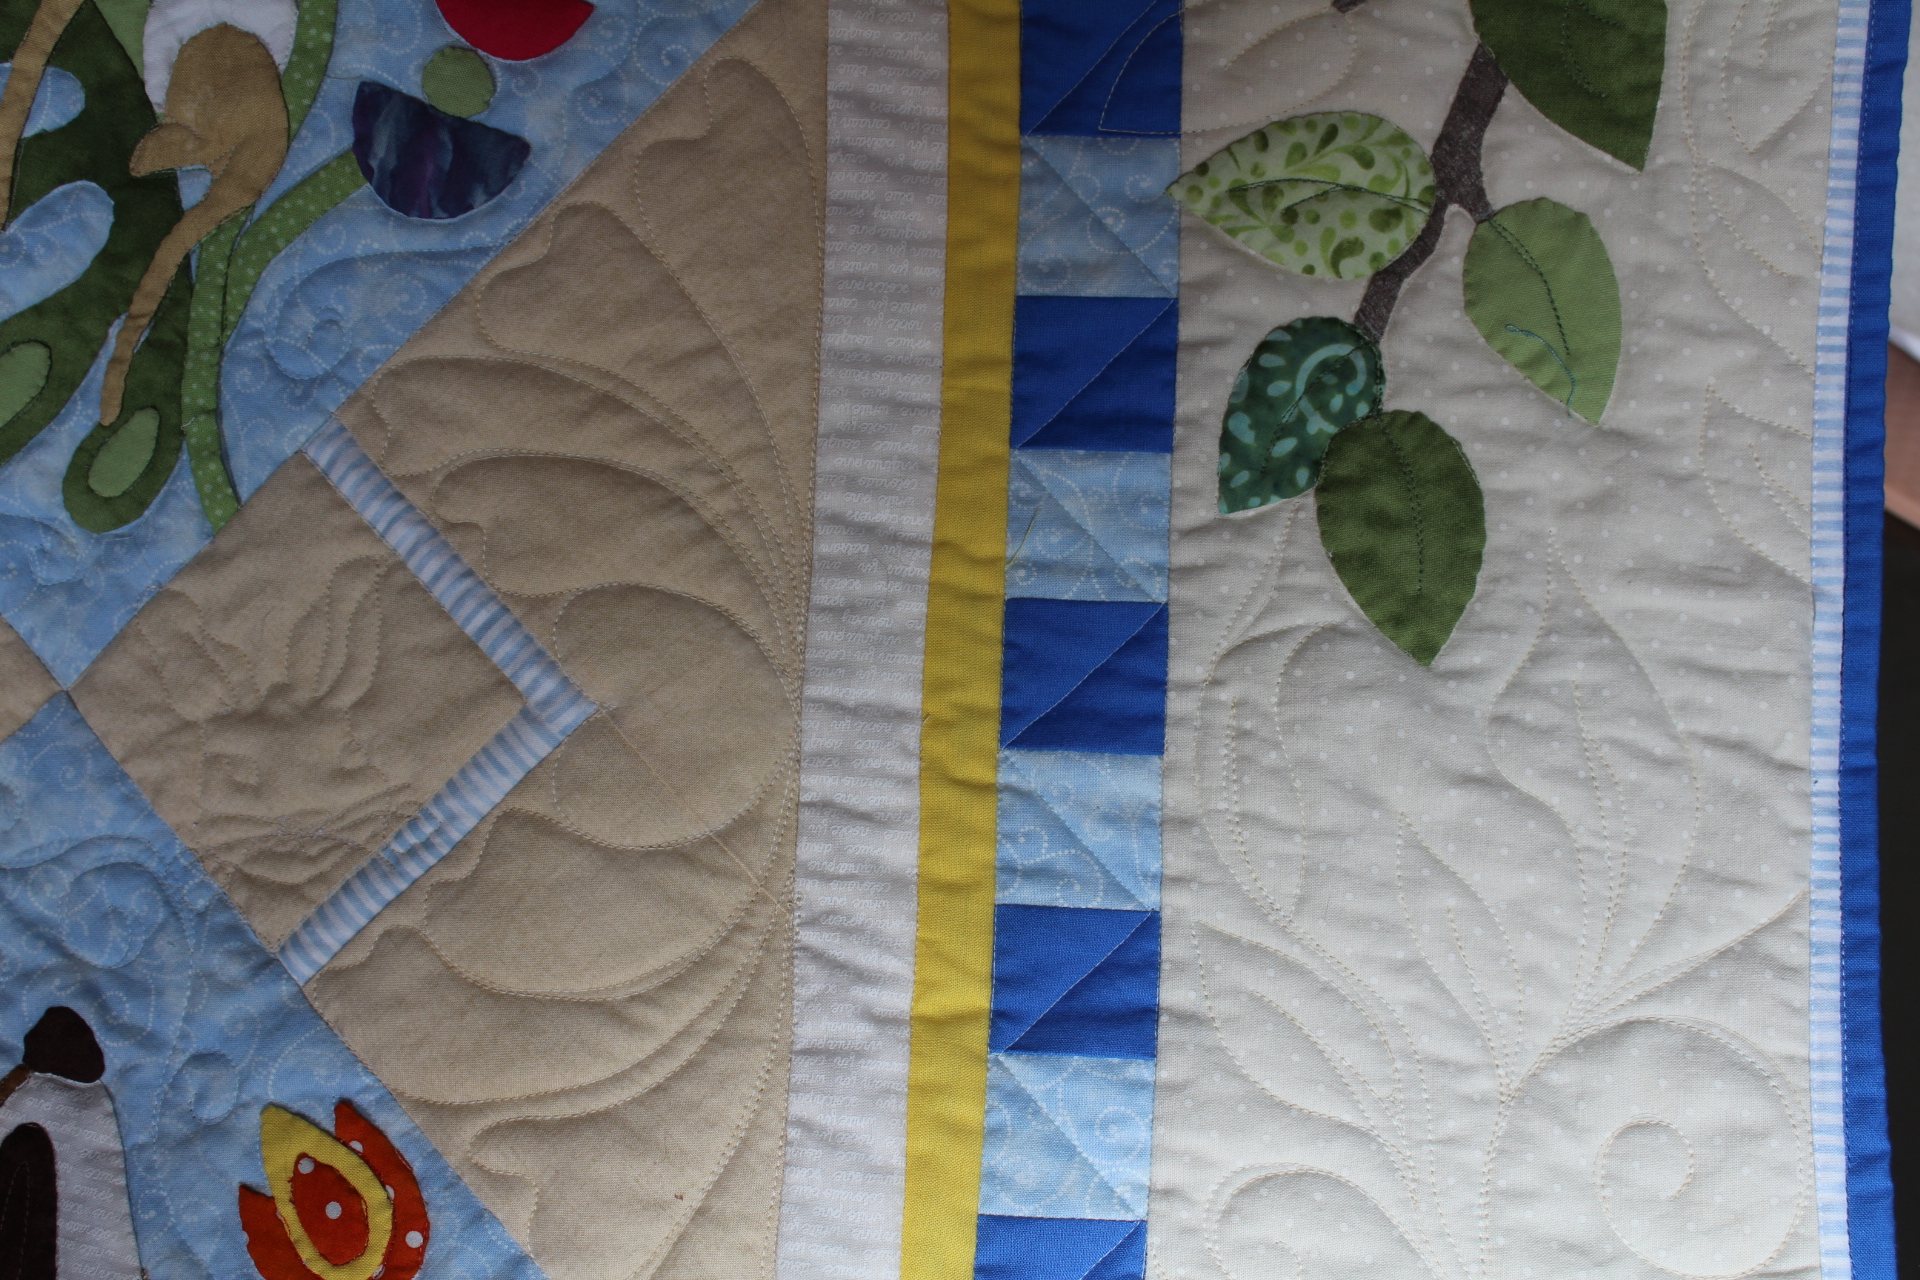
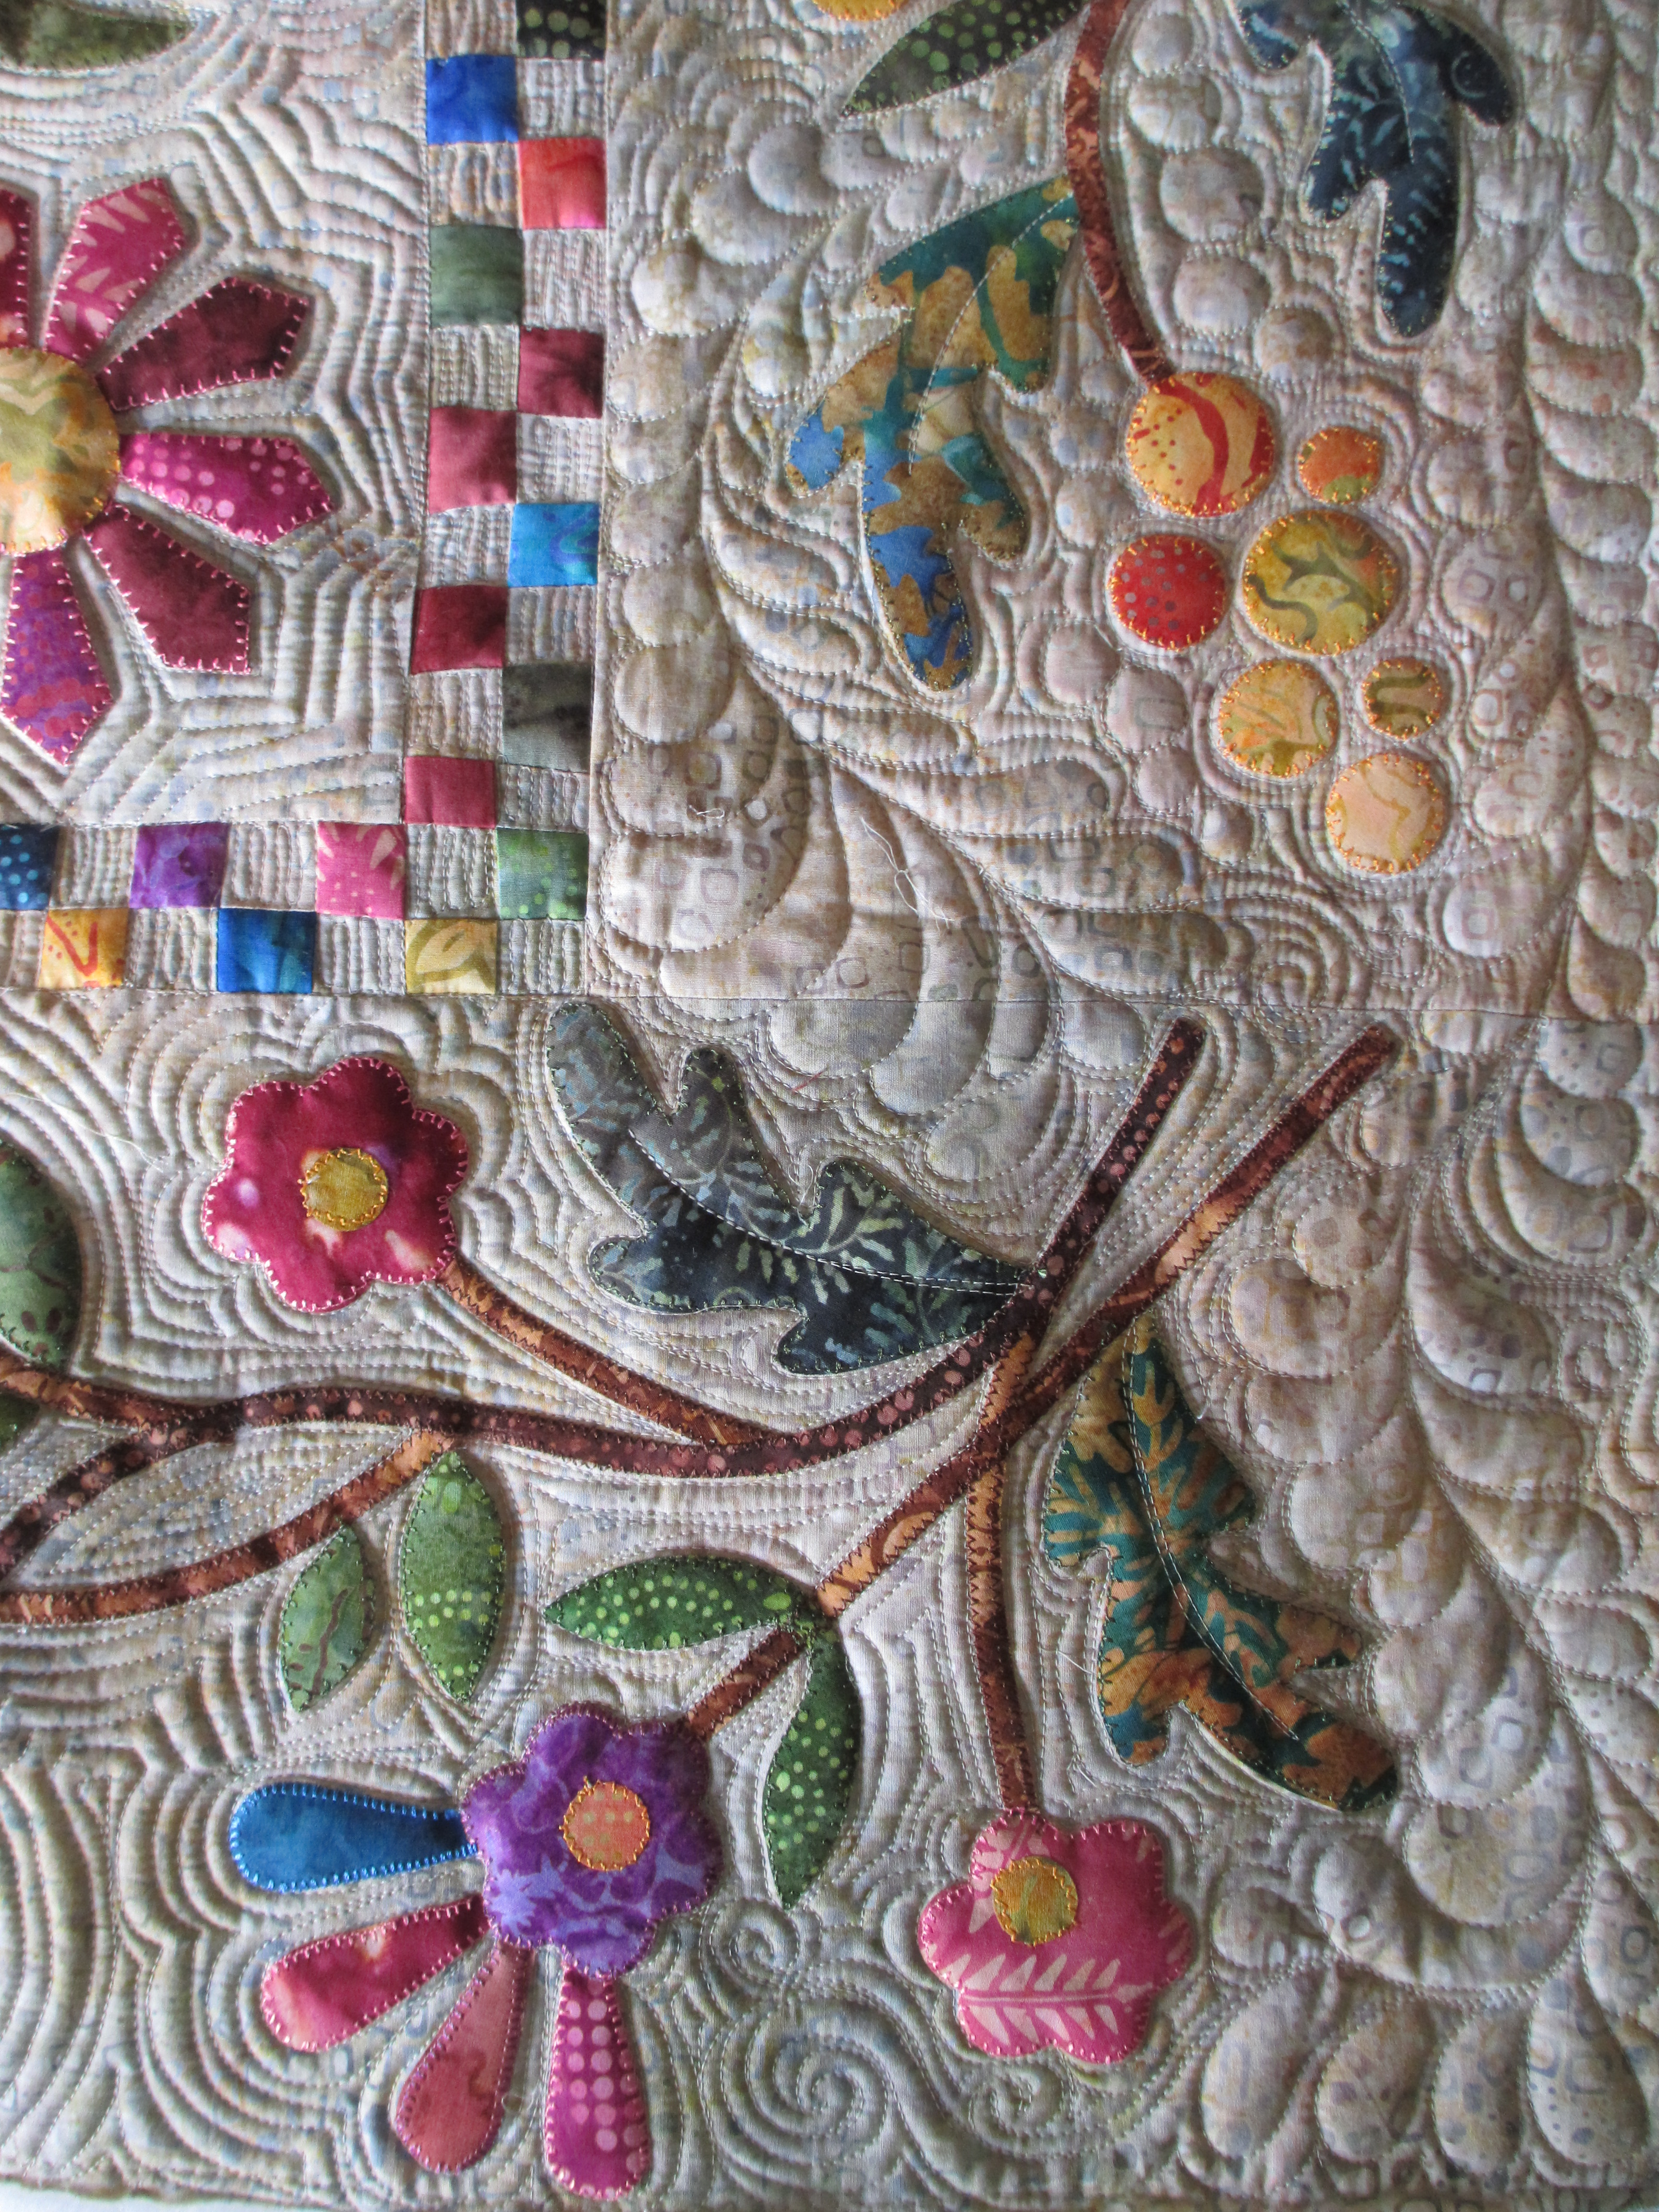
Closer view of the top half of the quilt…

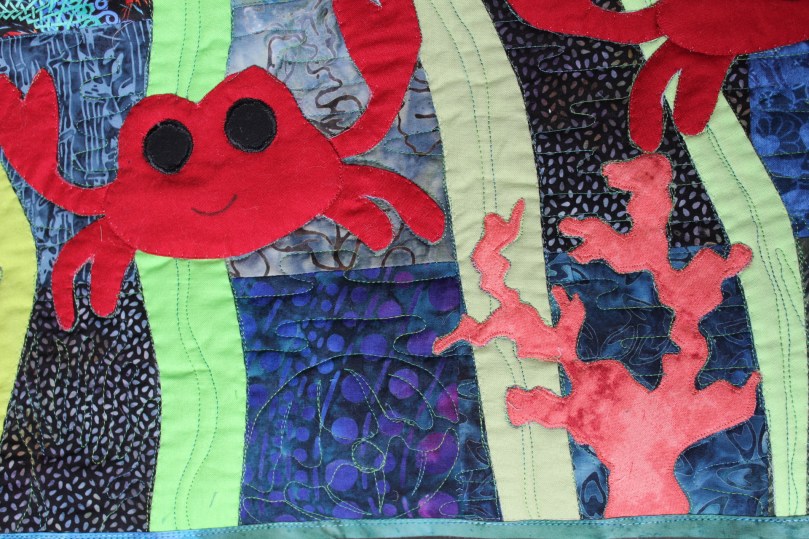
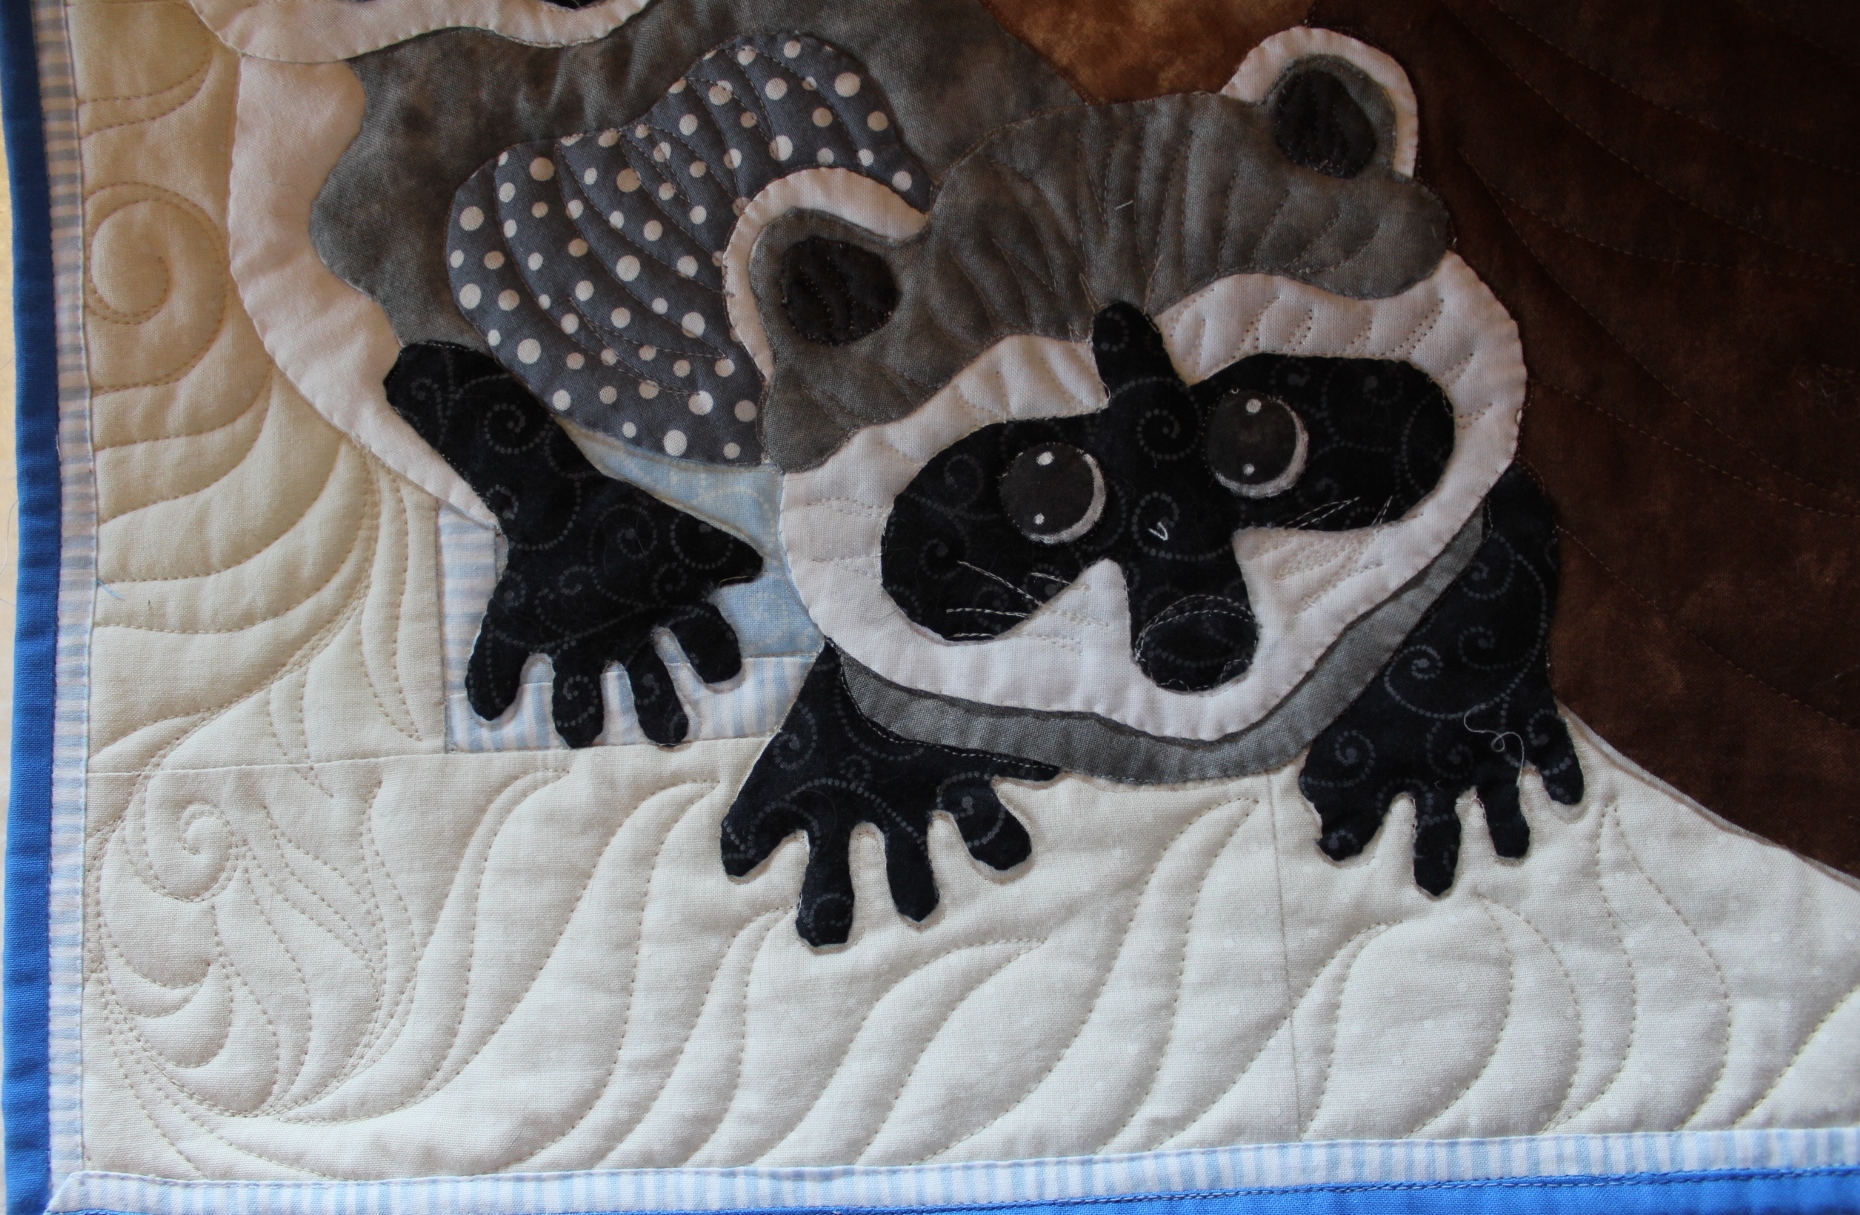
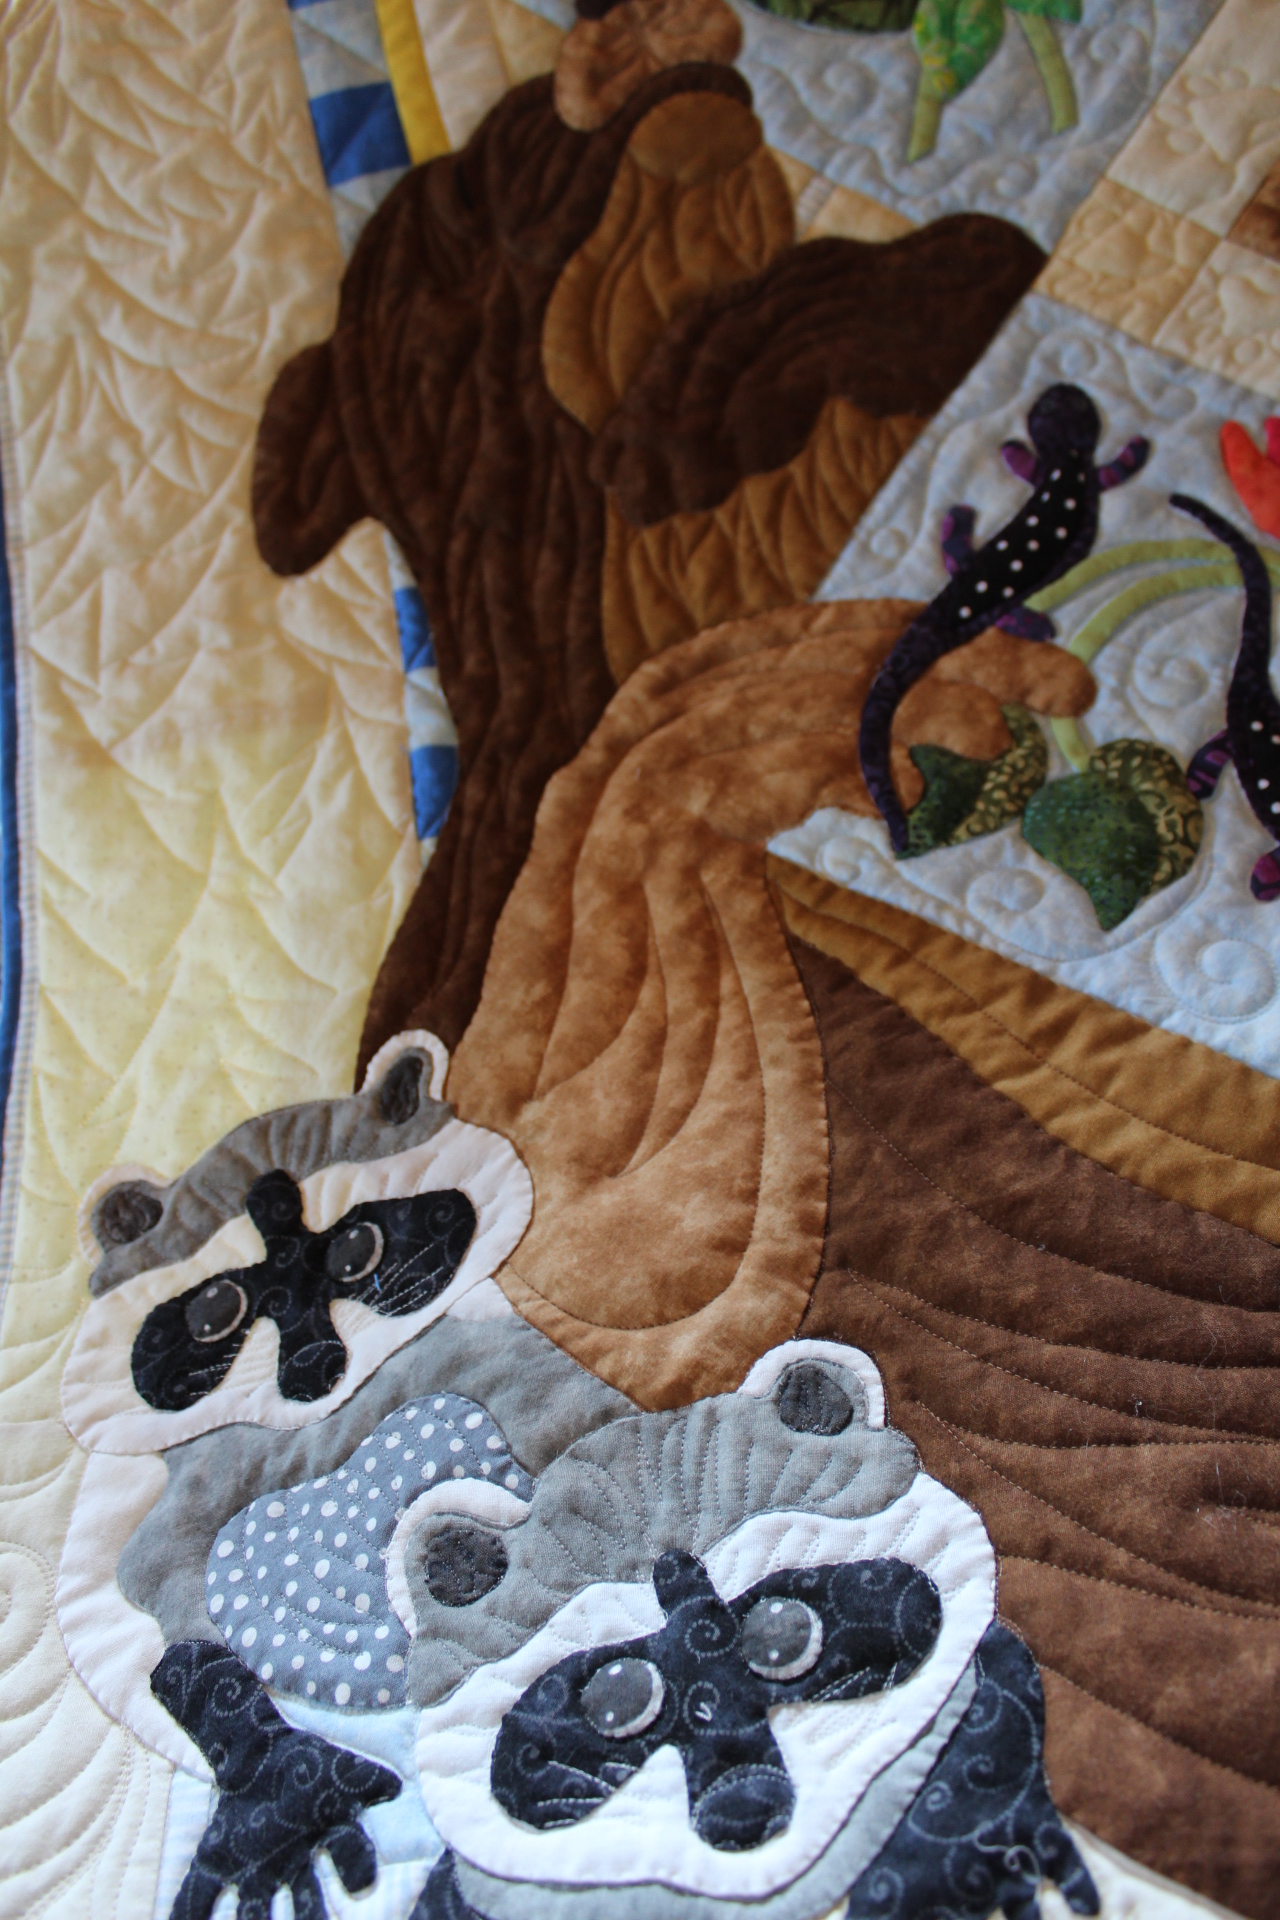
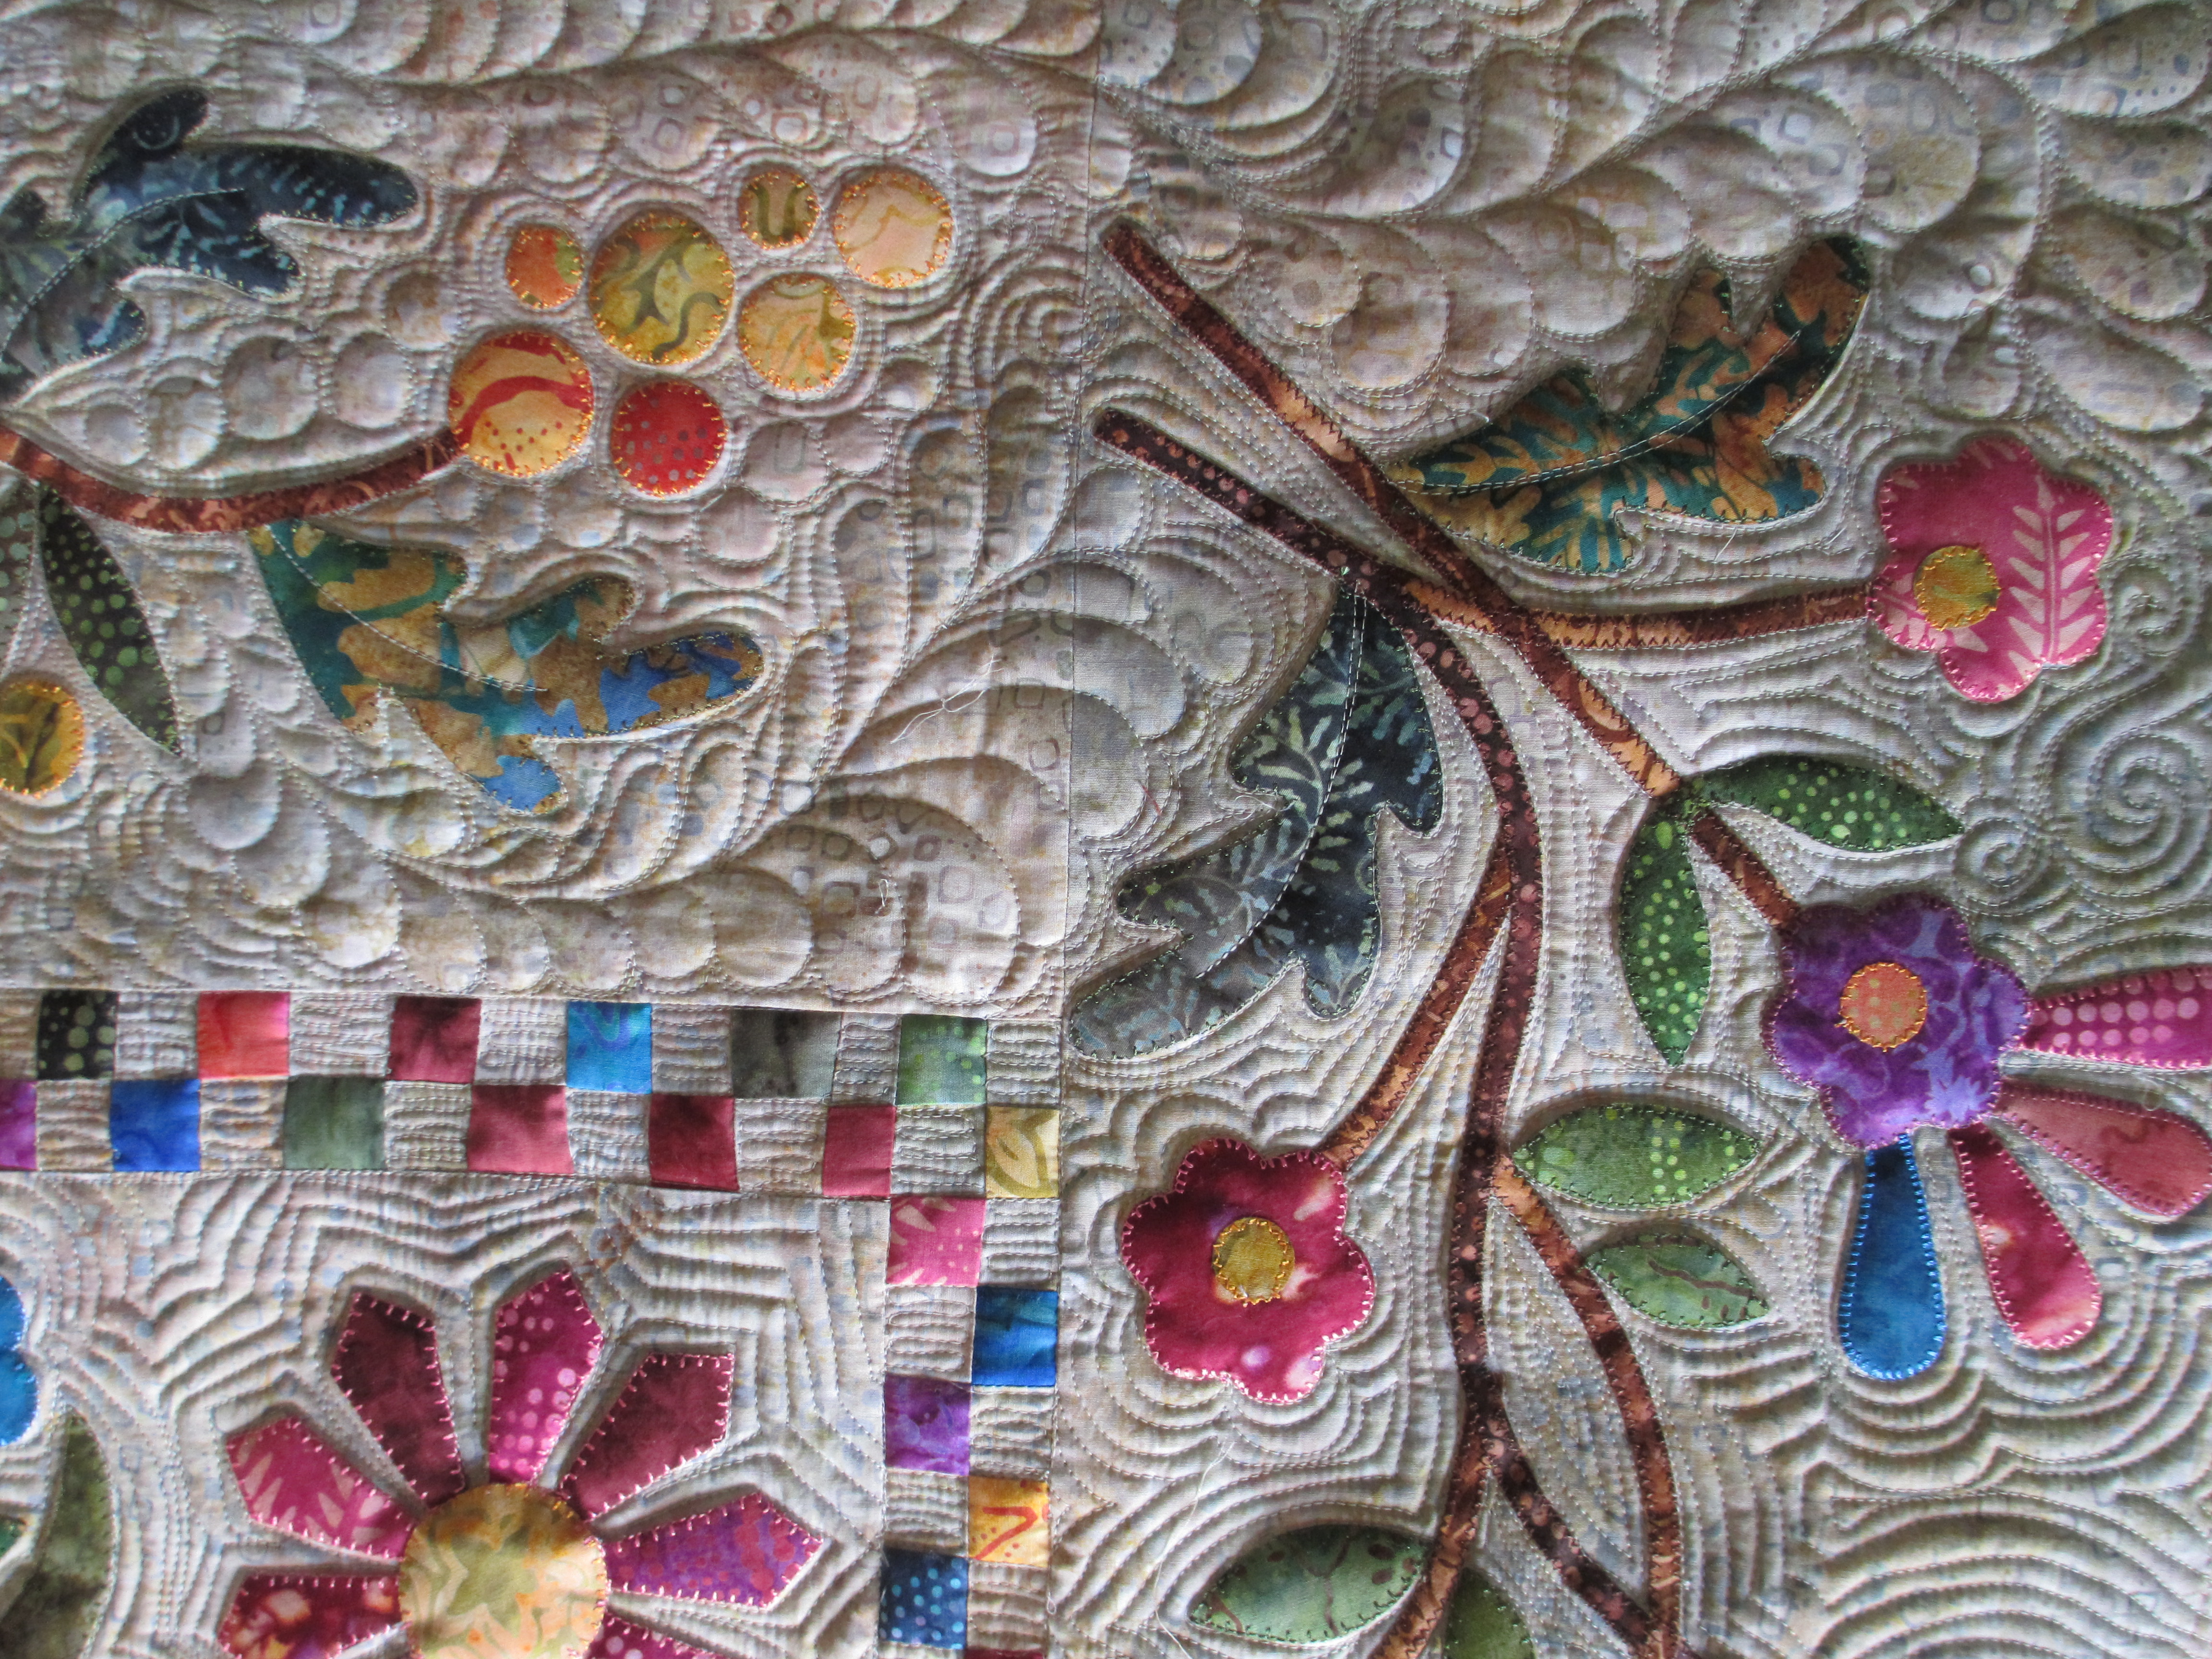
Closer view of the bottom half of the quilt…

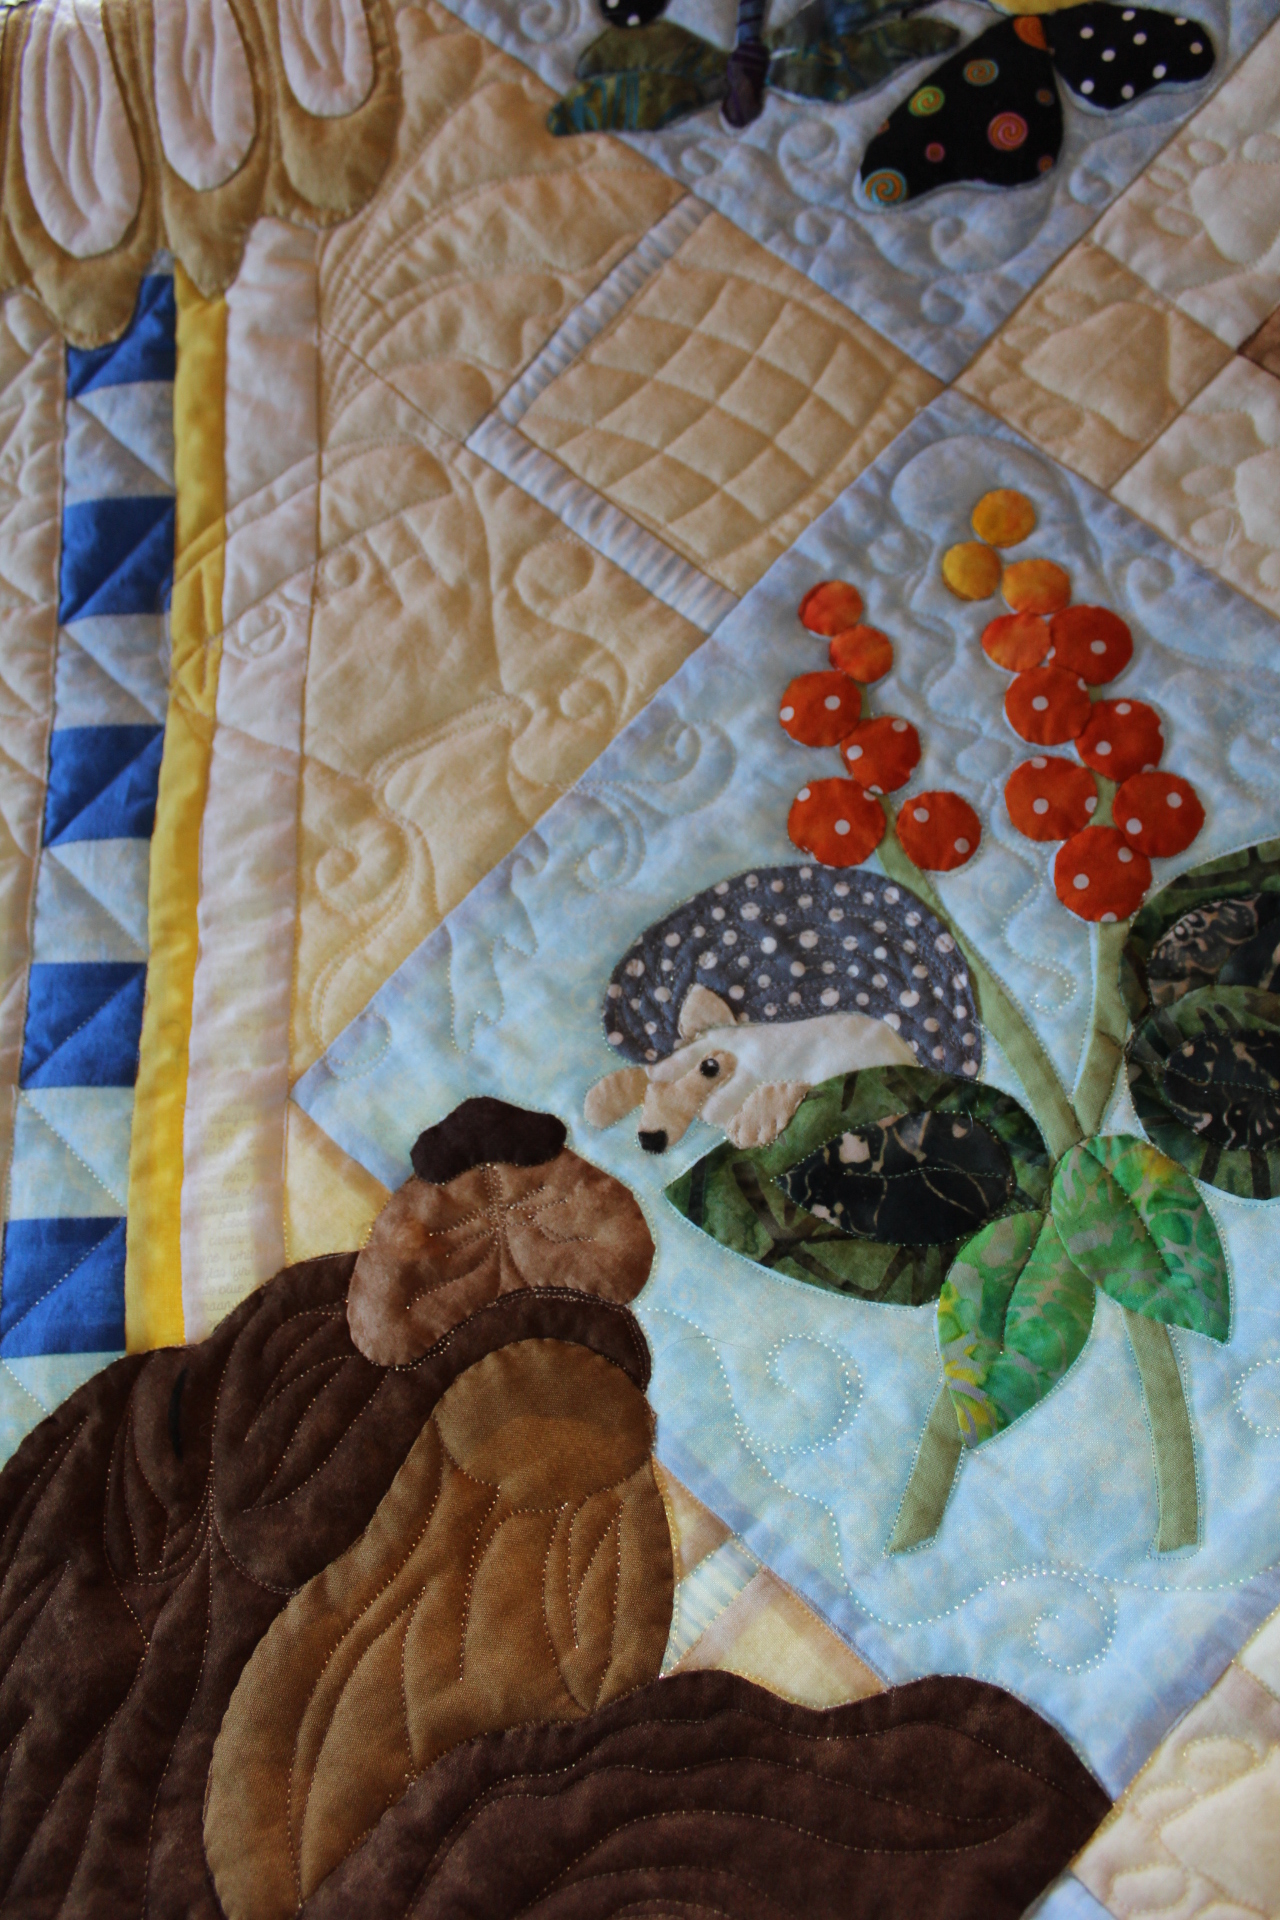
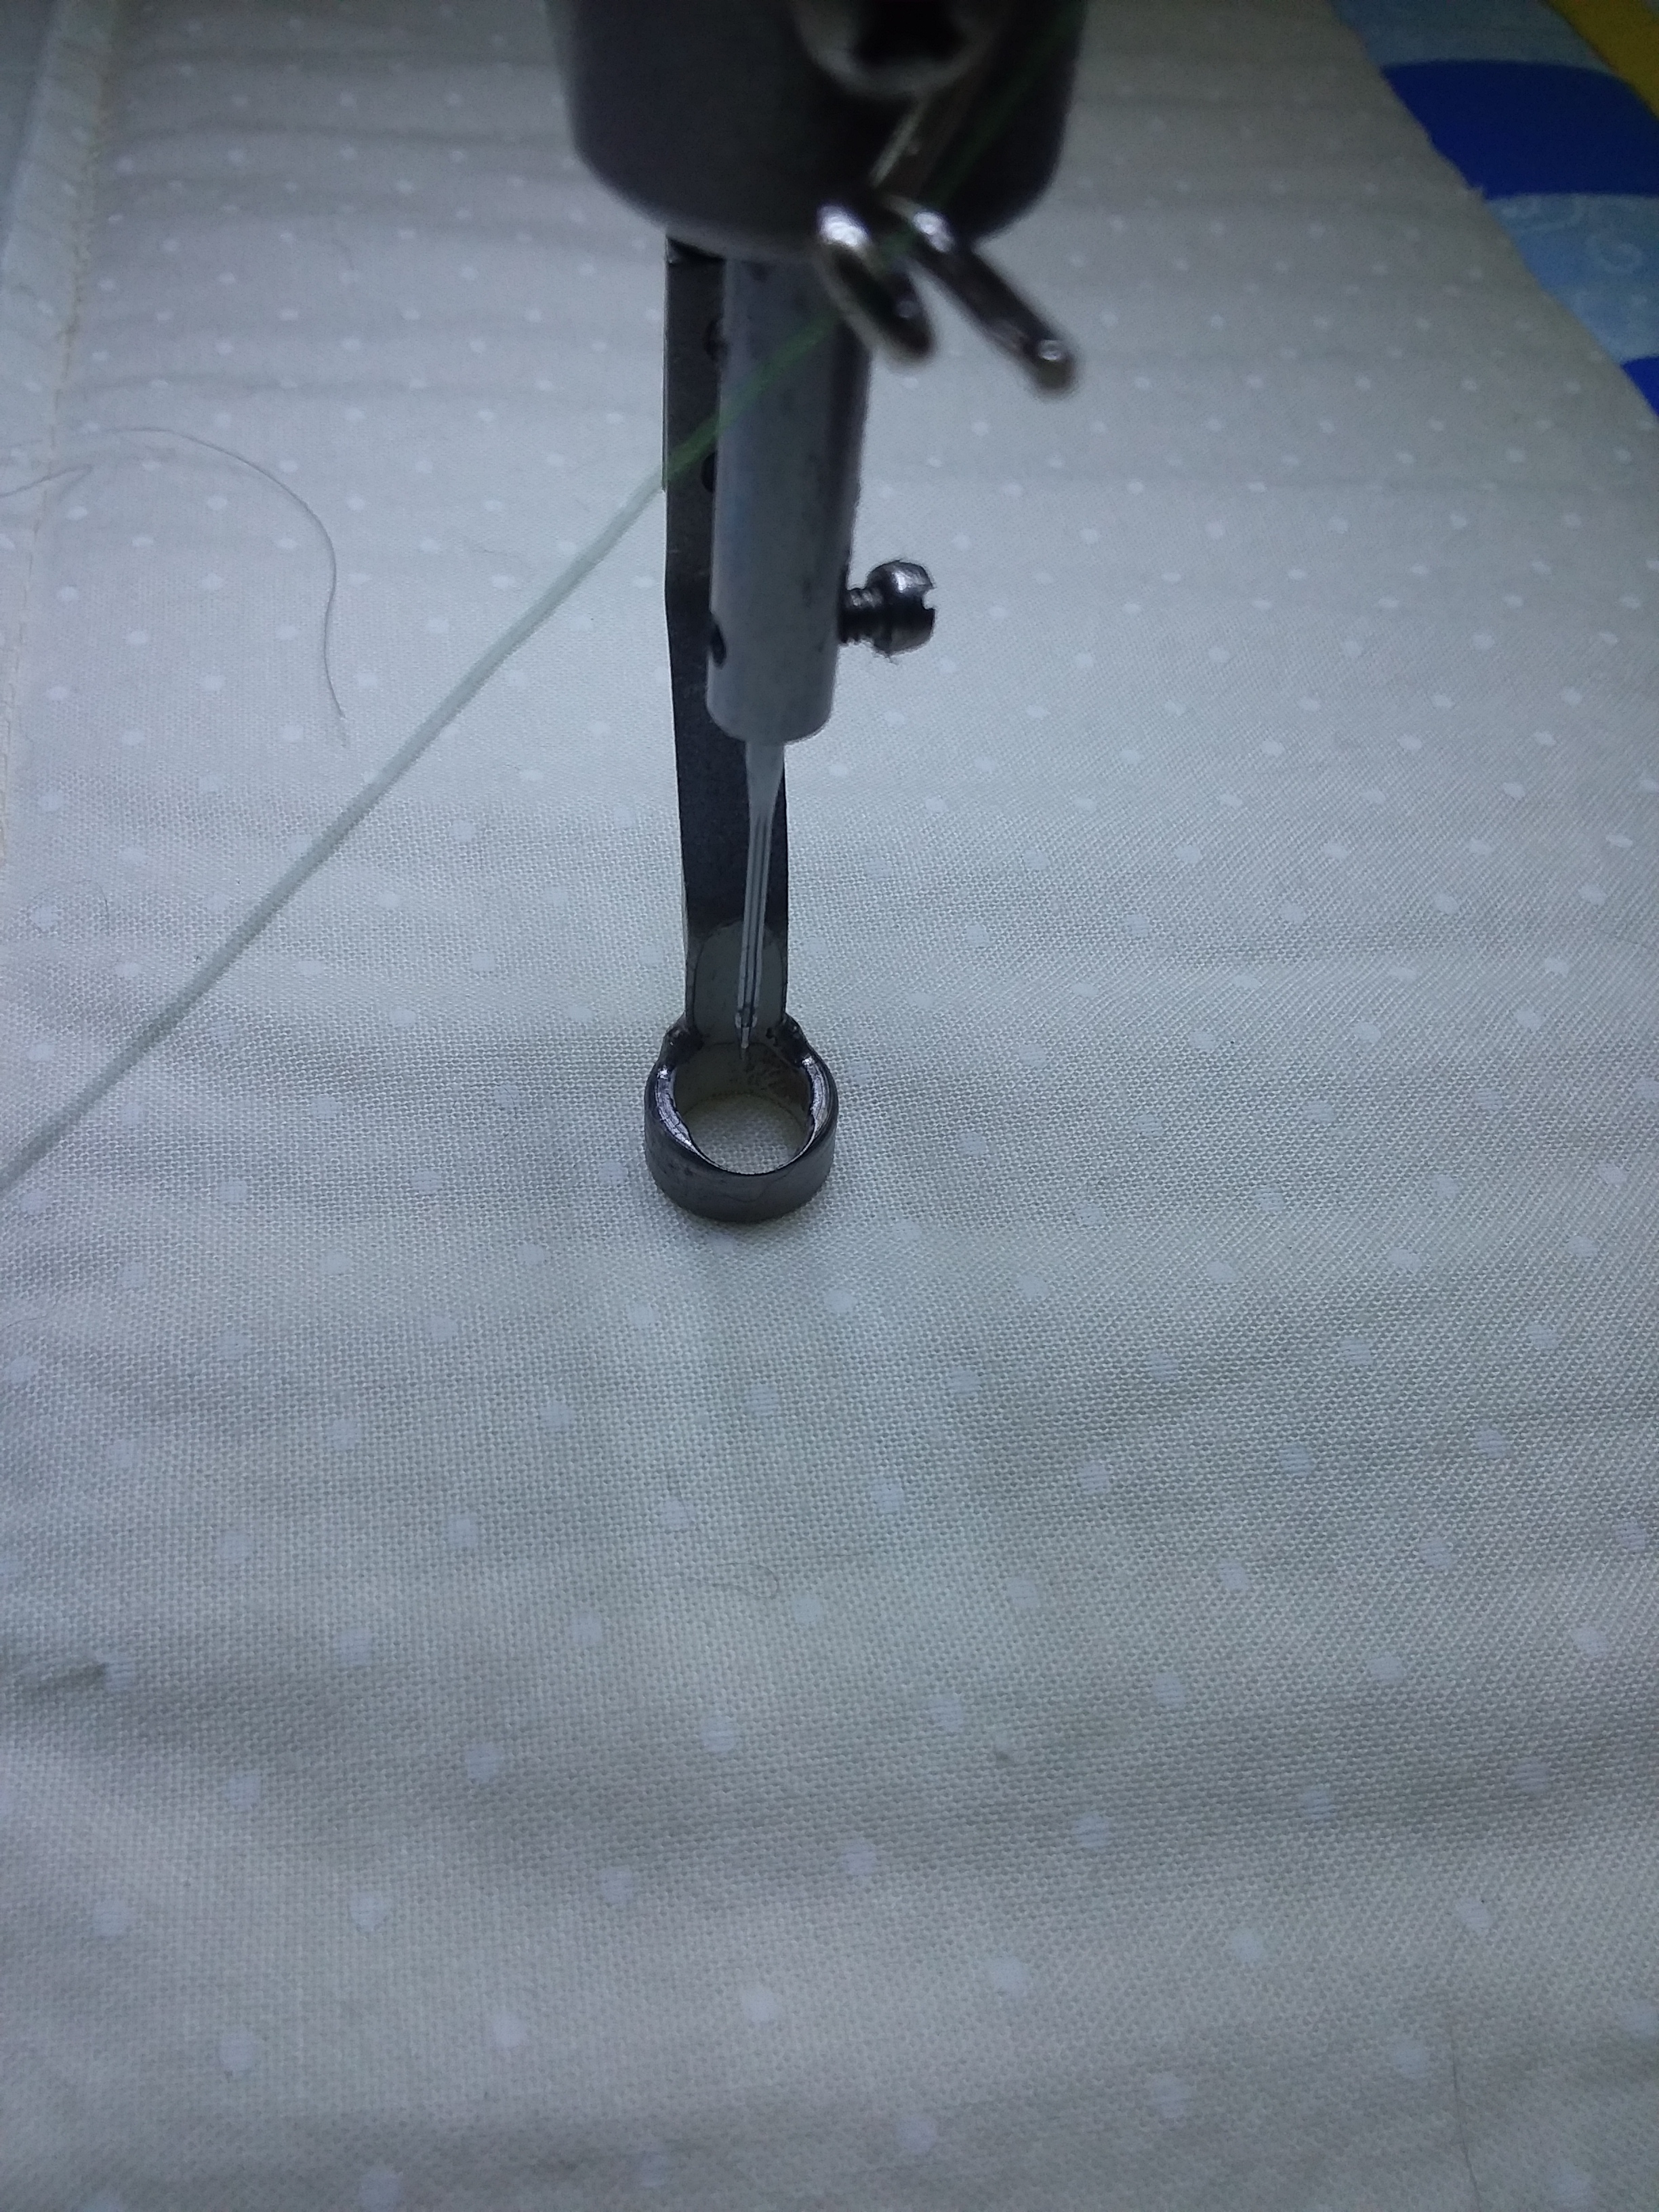
One of the hazards of quilting is all those loose, runaway threads. When you think you’ve got them all off your quilt, just take a picture, and you will find more! Did you find any?

Forest Galorest

I loved this pattern from Java House Quilts the first time I saw it.  If you love it as well, you can purchase it yourself here.  I started working on this quilt back in September.  The applique would be needle-turned, meaning by hand.  The edges would be turned under and stitched down by hand vs fusing down a raw edge applique onto the background and machine finishing the edges (a tedious, but much quicker method).  I figured it would take me about 2 years to finish; a nice project for me to work on in the evenings before bedtime.  My daughter was going to start “trying” to get pregnant soon.  Maybe this would make a nice baby quilt.  If she never conceived, I could keep this quilt for myself (trying not to get my hopes up).  Her older sister took several years of trying to conceive naturally and then several attempts of in vitro before getting pregnant.  So, 2 years… I would have plenty of time to casually work on this quilt.

Then, in October, she told me she was pregnant.  Or, was it late September?  She was due June 2nd.  I was shocked, floored.  Surely, it was too soon to know for sure… a false positive…  I admit it.  One of my first thoughts was about this quilt.  How on earth would I get it done in time?  It has plenty of big pieces but also LOTS of tiny pieces.  I figured I’d better get busy.  As I got farther and farther into this quilt, I was kicking myself for not machine appliqueing it.  It is what it is.  And, I am done now.  I’m late for the arrival, but I am done.  He’s about a week old now and a cutie patooty!

The question once I finished it was how to quilt it.  The more quilting you do on a quilt, the more thread you add to that quilt and the heavier and stiffer it gets.  This was for a baby, so I wanted it to be soft… or at least as soft as I could make it and still add details to it.  You will notice there are plenty of gaps in the quilting where it seems like there should be more quilting.  That was intentional to prevent the quilt from becoming too stiff and heavy.  I stitched down enough to give the effect of what I wanted and then let the rest go.  Sometimes you’ve just gotta “let it go.” 😉  My desired effect was playful, yet polished.

Simple swirls were stitched inside the appliqued blocks around the animals and flowers.  My instinct was to put something formal on the outside edges of the pieced blocks, but I ended up putting animal paws there instead.  They are not perfect, by any stretch of the imagination, but it’s okay (Let it go!).  The way you make these animal paws is to stitch a curvy triangle with 2 ovals going up one side and 2 ovals going back down the other side, all as a continuous path with no starts and stops.


What should I do with those outside odd blocks along the border?  I could have added nature scenes, but that would involve intense stitching.  It needed to be open and flowing.  So, I opted for something formal and polished in those areas; feathers and curved cross-hatching.  Traditional feathers would be nice, but I chose bumpy ones to mimic butterfly wings.

I did sneak some playfulness into some of those areas.


As for the borders, I started at the bottom and stitched a very loose fern to mimic a grassy look.

Moving up the sides, I stitched pine trees on the left by the raccoons and bear.  My pine trees got worse as I stitched more and more of them (Let it go!) up towards the owl.

On the right, I transitioned the ferns into leafy vines to meet the squirrels at the top.

At the top I transitioned the leafy vines to meet the rays of whatever that circle thing is around the owl’s head.  It could be the moon.  Or, it could be the sun.  Whatever your imagination sees is what it is.

A couple of notes… as far as the binding goes, I had a hard time deciding which fabric to choose.  I finally decided that I wanted to see that darker blue repeated somewhere in the quilt.  It’s one of my funny idiosyncrasies; I believe you need to repeat fabrics in a quilt to make it look more polished or professional.  So, I chose that darker blue for the border and had intended to make a piping of the pale blue stripes that you see very little of in the quilt.  The pale blue stripes are around the little square blocks where I stitched curved cross-hatching and also in the corners of the border.  To get that effect, you create a faux piping within the binding.  Here’s a tutorial by Margo Clabo from “The Quilt Show” of how to create that.  For whatever reason, I decided I wanted to go with 1/4″ piping, so I cut my strips at 1 3/4 inch for the pale blue stripes and 1 1/4 inch for the solid blue – after stitching the strips together and then folding that wider pieced strip, I’d have a 1/4″ piping instead of 1/8″ inch piping.  That was a mistake.  It turned out to be a flange.  There’s nothing wrong with a flange, but I was worried about it flapping around.  So, I stitched it down.  I’m okay with that.  It still looks fine (Let it go!), and I still get to see both of those fabrics along the border.

Also, if you are wondering how I place appliques on their blocks, I draw out the original design onto a piece of plastic first.  This particular piece is one of those pieces of plastic that hold papers together with a strip of hard colored plastic, while the clear plastic acts like a folder for the papers.  I use a vis-a-vis marker which stays on there until I run water across it.  I don’t know whether or not a dry erase marker would work.  If you have tried that and it does, please speak up in the comments.

My goal is to teach you something new with my posts, if I can.  So, I hope you learned something today!


Welcome Back!

I am giving up my website and coming back to this blog site.  I have no idea how this will work with the new Net Neutrality rules, but I’m okay with that.  I no longer quilt for others, but you will be seeing posts whenever I get a chance to quilt for myself.  This particular post will be full of tips, because I haven’t been quilting on a regular basis and just got back into the game – I’ve realized how many tips I’d taken for granted.  So, I will share them with you today.  Please forgive me if they seem to basic to you!

I just put this quilt on the frame and the first thing I did was make a straight stitching line to butt my quilt top up against so that my quilt will be straight and hopefully square – I don’t know if you can see that or not.  I also use a laser square to check as I go along, making sure any stitch lines going across or down are straight as well.

As I go along, I use a “centering” measuring tape across the quilt to make sure each side matches the original measurements.  At this point, I am near the bottom of the quilt and have decided to go ahead and stitch my straight line across the bottom of the batting and backing sandwich.  I’ll butt the bottom of the quilt up to that stitching line.

To make sure the sides are where they need to be, I put a pin where the measuring tape has hit along the sides to keep it square.


Then, I’ll pin it and baste it down along that straight stitching line.

I’m not the best quilt top maker in the world, which is why I prefer the quilting part of the process.  I can fix some of my problem areas.

Before

After… I just took the bulk and spread it along the side before basting it down.

I am not done with this quilt yet.  I’ll save finished pictures for another post.  But, I wanted to throw a couple more tips in here.  I have trouble with glare… a LOT of trouble with glare, which is why I created the quilting rulers in my shop.  Take a look at this picture.  I need to thread the needle.  Can you see the eye of the needle?  I can’t.

But, if I move the needle over onto some fabric, I’ve removed the glare from the bottom of the machine and, voila!  I can see the eye of the needle.

One final tip before I go.  For those of you who send your quilts to a quilter… if your quilter asks for 8 inches of extra backing fabric on each side of your quilt, this is the reason why.  That plastic thing is the base that fits on the bottom of my machine.  I thought I had the measuring tape showing in this picture so you could see for sure that I have 8 extra inches of backing fabric.  My needle sits in the middle of that square hole in the plastic base.  Do you see where it is on the quilt top?  It’s not even reaching the edge of the quilt top.  If I’m using that base, which I do on custom quilting (and for this quilt; quilting around the applique pieces), the base is going to hit those clamps and cause me to make mistakes along the edges.  So, PLEASE, if your quilter asks for 8 extra inches of backing fabric on all sides, make sure your backing has that much or more. You will be doing yourself and your quilter a huge favor!

P.S. If you’re wondering about this quilt, you can find the pattern, “Forest Galorest,” by Java House Quilts here.


A Woodland Christmas… by Joan

I figured I’d better get this on here while I’ve got the chance.  I’ve been busy lately working on things for my booth at the Kansas City Regional Quilt Festival, which starts next Friday, by the way.  And, I will continue being busy working on more stuff for the next week.  This was the last customer quilt I was able to work on before the quilt show.  Joan always lets me play and put whatever I want on her quilts.  It’s a very dangerous tactic, you know.

So, let’s show you a full shot of the quilt first before I get into the details of the quilting.

IMG_2511

Now, how on earth would YOU quilt this?  My first concern was the border, because that’s where I start.  The cornerstones were easy – Joan had an applique star in the upper right hand corner, so I just copied that into the other corners.

IMG_2527

As for the borders, I couldn’t come up with something creative enough (for me) that would go with this quilt, so I ended up doing something simple with holly leaves.  It would need to be able to work play well with the applique in the borders.  Just now, looking at these pictures, I wish I had added piano keys on the outside of the swags.

IMG_2515 IMG_2517

Along the lower border were 2 bears, but they needed a mama bear so I added her in the back of them.

IMG_2523

Joan asked how I got the bear to look just like the others.  Well, I cheated, and here is a tutorial showing you how I did it.  But… it shows what I did with the trees at the top of the quilt instead of the bear; I did the same technique.  I found myself going back and forth on this quilt, adding a bit here and a bit there.  It seemed to me that I was doing a lot of the same things, so in that big open space in the tree farm, I decided to add more trees.  I have a roll of vellum or onion skin (I can’t remember which I’d bought) for tracing designs. So, to add more trees, I simply traced the applique trees already there and added more trees around them.  This would be my quilting design.  If you look closely at the corners of the paper, you will see where I have straight pins holding the paper in place.  I just stick them straight down without trying to weave them into the fabric.  When I do that, it just turns out worse.

IMG_2502 IMG_2503

After I had the trees drawn out, I then hold my left hand on the paper and move the machine around with my right hand (if you are left handed, hold the paper with your right hand and move the machine with your left hand).  If you don’t already know this, a longarm quilting machine floats or hovers above the fabric and has no feed dogs (those gritty teeth things on the bottom/bobbin plate of a domestic sewing machine) to keep it steady and in place.  It doesn’t have to be perfect.  Unless someone shows you what I just did, you will never know if “I meant to do that” or not.

IMG_2504 IMG_2505

And, here is the result after I tore the paper off.

IMG_2507  IMG_2514

I tried to give each of the houses a different roof top, but some of them are repeated. If you go back and take a second look at the border pictures, you can see more houses in those shots.

IMG_2526 IMG_2522

Most of the houses in this quilt reminded me of the Victorian houses in the Colorado mountains.  This trio, however, could have been cabins, if I had thought about it long enough.  But, they turned out okay as Victorian houses as well.

IMG_2519

The final picture is of the star on top of the “town tree” shining down for its audience to “ooh” and “ahh”.

IMG_2520

All in all, this was a fun quilt to “quilt.”  I hope you enjoyed the show and learned something, too!  Merry Christmas in June!

Marian’s Spring Bouquet

If you’ve ever heard of Edyta Sitar from Laundry Basket Quilts, you know she creates masterpieces from scraps.  Marian recently made a quilt from Edyta’s pattern “Spring Bouquet.”  If you like what you see in this post, you can find the pattern at Laundry Basket Quilts here.

Let’s start out with a full shot, so you can really start drooling.

IMG_2408

As you can see, there are what looks to me like a gazillion pieces, many of them tiny.  I know this must have taken some time for Marian to complete.

Before I get on to the close-ups of Marian’s quilt, I want to show you a trick I use when quilting.  I have a couple of laser lights for making sure I get things square.  I have a laser square that I use for blocking quilts.  You can see how I use that here. Yes, it’s a tool you can find at your local hardware store; a place I get several other tools for my quilting work.  But, for when I don’t have the room for the laser square such as when I’m working on my quilting machine’s frame, I use another laser tool like this in the lower right of the picture below.  These can also be used for making sure you hang pictures straight across a wall.  I use it to line up seams and borders as I am moving along the quilt.  I can run my fingers along that laser line and nudge the top this way or that if it needs it.

IMG_2391

So, let’s take a look at some quilting I did along the borders so you can see what I did with Marian’s quilt.

IMG_2405 IMG_2404

And, then we’ll move a little inside the borders.

IMG_2403

I know Marian didn’t want any stitching inside the applique (some people do, some people don’t), but see those daisy looking flowers on the right in the picture below?  I couldn’t control myself and had to tack that center down.  It was trying to fly off the quilt.  Honestly, I usually try very hard to give the customer what he or she wants, but, since she was putting this in a show, I thought it might detract from the beauty of Marian’s work.  So, I stitched it down. <big breath>

IMG_2398

IMG_2417

Until we get to the middle…

IMG_2397

If you would like to drool on see this quilt in person, Marian has entered it into the Kansas City Regional Quilt Festival held at the Overland Park Convention Center next month…June 19 – 21.  For more information on the quilt festival, check them out here.


A Day Late and a Dollar Short… aka Merry Christmas!

Please forgive me.  The Christmas season is always crazy busy for me, and this December we had the added bonus of our daughter graduating from college as a doctor of Chinese Medicine.  Currently I am quilting one of my own quilts (on my holiday vacation) and I will fill you in on more details of my personal life then.  For now, let me share Diane’s holiday quilt that I quilted for her in December.

It is a BIG quilt, so this picture doesn’t give a good shot of the full length.

IMG_2056

Here’s a few more shots of close-ups.  Diane did a great job of piecing, embroidering and applique on the entire quilt. I enjoyed quilting it, and it sure helped me get in the mood for Christmas this year – just what I needed to get me out of the doldrums.

For the most part, I quilted holly and swirls throughout the quilt, but I added “branches” to the trees, which you cannot see in any of these pictures.  Diane chose a variegated red and green thread for the borders and trees and a cream color for the background.

IMG_2058 IMG_2060 IMG_2061 IMG_2064

What do you think?  Would this put you in the mood for Christmas?

Table Toppers

Just in time for the season of giving, this book includes quick and easy projects, perfect for gift-giving.  Projects are from Fons & Porter’s “Love of Quilting” magazine and include patterns from Terry Albers, Debbie Beaves, Jodie Davis, Marianne Fons, Sandy Gervais, Sue Marsh, Kelly Mueller, Debbie Mumm, Wendy Sheppard, Edyta Sitar, Betsy Smith, and Karen Witt.  I found the projects to be colorful and cute with clear written instructions  for foundation piecing, machine appliqué, wool appliqué, etc.  Being a machine quilter, I also really liked that this book has suggestions for quilting after you have stitched the table topper together.

Martingale - Table Toppers (Print version + eBook bundle)

Just in time for Halloween and Thanksgiving…

Martingale - Table Toppers (Print version + eBook bundle)

Cute for Christmas…

Martingale - Table Toppers (Print version + eBook bundle)

Springtime…

Martingale - Table Toppers (Print version + eBook bundle)

Or just because…

Martingale - Table Toppers (Print version + eBook bundle)

There is something for everyone in this book.  Check it out at Martingale’s site here.

Nap and Nod

Nap and Nod – 12 Adorable Baby Quilts by Myra Harder

Martingale - Nap and Nod (Print version + eBook bundle)

Myra teaches you how to do plush applique, curved seams, and monogrammed lettering in her book, Nap and Nod.  Although you will find hexagons and seemingly complicated patterns in her book, they really are simple and easy to make.  The one below would make a great baby gift; you can put either the length and weight of the baby or you can incorporate the birth date.


Martingale - Nap and Nod (Print version + eBook bundle)

I like how she uses monogramming in her quilts.  It gives them a more personalized touch, in my opinion.

Martingale - Nap and Nod (Print version + eBook bundle)

For all you modern quilt lovers, this next one will “allow” you to play with your quilting to make it unique.  I love how she uses the chevrons for water around the cute duck.

Martingale - Nap and Nod (Print version + eBook bundle)

For more on this book, go to Martingale’s website here.   Many thanks to Martingale and their photographer, Brent Kane for providing the book and the photos!


Book Review a deux

I am in between customer quilts that I cannot show you for “raffle” reasons, so I thought I’d try to get caught up on some book reviews.  I’ve got 7 books to share with you; I think I will break them up into 2 posts.

Book #1…  Uncommonly Corduroy; Quilt Patterns, Bag Patterns, and More by Stephanie Dunphy

Martingale - Uncommonly Corduroy (Print version + eBook bundle)

I was pleasantly surprised as I opened and perused this book. The pictures reminded me that my mother used to make utilitarian quilts with scraps of corduroy, denim, and broadcloth.  As I got further into the book, I felt it sucking me in as I noticed the texture and richness of the corduroy in the quilts and how the quilting popped against the corduroy. And, of course! Why didn’t I think of putting corduroy on my bags to make them stronger? There are several cute bag patterns that will suit almost any taste. She also has several quilt patterns, some of them mixing flannel and corduroy and some including embellishments for further texture.  I see corduroy in future quilting projects of mine.

Martingale - Uncommonly Corduroy (Print version + eBook bundle)

The above picture makes me think of all the leftover corduroy clothing that could re recycled into a bag (like the one above or the one below) or something else; it makes me smile.

Martingale - Uncommonly Corduroy (Print version + eBook bundle)

Cute purse and matching scarf!

Martingale - Uncommonly Corduroy (Print version + eBook bundle)

For whatever reason, I love the black corduroy in this quilt and the colors that pop against it.  It would make a great quilt to drag around the house (for me!).

Martingale - Uncommonly Corduroy (Print version + eBook bundle)


Book #2…  Sweet and Simple Sewing by Jessi Jung, Carrie Jung, and Lauren Jung

Martingale - Sweet and Simple Sewing (Print version + eBook bundle)

This book is full of cute projects with a more modern touch.  It has luggage tags, a hand-bound journal, pleated clutch, makeup bag among other patterns in it.  A lot of these can be made with less than one yard of fabric in a short amount of time and as gifts.   Take a look at the table of contents.

Martingale - Sweet and Simple Sewing (Print version + eBook bundle)

Isn’t this a cute quilt?  I haven’t seen this design before.

Martingale - Sweet and Simple Sewing (Print version + eBook bundle)

Here is the curling iron “cozy” – great for taking on trips!

Martingale - Sweet and Simple Sewing (Print version + eBook bundle)

I love the quilt pattern below.  Who would have through to make a fan block into something so cute?

Martingale - Sweet and Simple Sewing (Print version + eBook bundle)

Another great bag for traveling…

Martingale - Sweet and Simple Sewing (Print version + eBook bundle)

And a cute purse for those special occasions…

Martingale - Sweet and Simple Sewing (Print version + eBook bundle)


Book #3… Sew Practical by various authors of Martingale

Martingale - Sew Practical (Print version + eBook bundle)

I especially liked this book because of the variety of projects, but I guess that is what you get when you have so many designer authors; Pippa Eccles Armbrester, Cassie Barden, Linda Lum DeBono, Barbara Groves and Mary Jacobson, Adrienne Smitke, and Janis Stob and Margaret Linderman for Fig Tree & Co.   In the midst of the variety of designers, they will provide you with a variety of sewing techniques from which to learn.  I’ll let you take a look at the table of contents.

Martingale - Sew Practical (Print version + eBook bundle)

I can see the knitting case below being adapted for someone doing embroidery or hand sewing, and, of course, crocheting also.

Martingale - Sew Practical (Print version + eBook bundle)

I hadn’t really thought of making a cover for my sewing machine (I use it too much) until I saw this.  Martingale - Sew Practical (Print version + eBook bundle)

E-readers seem to be everywhere now.  Wouldn’t this make a nice gift?Martingale - Sew Practical (Print version + eBook bundle)

I love this work apron.  I wear a gardener’s apron when I quilt, but this apron tempts me to make a prettier one than what I currently have.Martingale - Sew Practical (Print version + eBook bundle)

I thought these place mats were interesting, because of the “woven” design element.  I can see them as mug rugs also.Martingale - Sew Practical (Print version + eBook bundle)


And finally…

Book #4…  Simple Appeal by Kim Diehl

Martingale - Simple Appeal (Print version + eBook bundle)

Kim Diehl is one of my favorite designers, so of course I would love this book.  It is full of scrappy quilts.  Some of them are pieced and some are appliqued.  She will show you how to do invisible machine appliqué as well as wool appliqué on cotton backgrounds .  I don’t have a picture of the table of contents on this book, but you can get an idea of the 14 projects inside this book with the following pictures.

The 9-patch inside the log-cabin block is interesting to me.  Couple it with the appliqued border and you have a win-win quilt.

Martingale - Simple Appeal (Print version + eBook bundle)

Kim must have used scraps for the background on this one (creative!).  I like how this one looks so natural in its setting, yet it is scrappy.Martingale - Simple Appeal (Print version + eBook bundle)

Something small to make for yourself or as a gift.  The thought of mug rug came into my mind, but I think I would be afraid to get it dirty.  Maybe bright colors on a black background for a mug rug?

Wait!  Is that embroidery I see?  🙂

Martingale - Simple Appeal (Print version + eBook bundle)

Who would have thought to make a primitive pincushi0n using an old jar lid?  Only Kim…Martingale - Simple Appeal (Print version + eBook bundle)

And, finally, I thought these quilts hanging like this, if nothing else, make a great statement and a nice decoration for homey homes.  Brent Kane really knows how to set up the quilts for photography!

Martingale - Simple Appeal (Print version + eBook bundle)

Many thanks to Martingale for providing the books and their photographer, Brent Kane, for these wonderful pictures!  You can buy these books from Amazon or go to Martingale’s website here.


Four Books for your Perusing Pleasure

Once again, I have a few books to review for Martingale (8 to be exact), so I will post about a few of them tonight and then follow up later with the others.  First off, since my blog is mostly about machine quilting, I’d like to tell you a bit about “You Can Quilt It!  Stunning Free Motion Quilting Designs Made Easy by Deborah M. Poole.   She quilts for Kim Diehl.  I hate to admit this, but I kind of figure I know a lot about quilting already, so I wasn’t sure what I’d learn from this book… but I was very pleasantly surprised.

Martingale - You Can Quilt It! (Print version + eBook bundle)

Here’s a look at the table of contents so you can get an idea of what to find in this book.

Martingale - You Can Quilt It! (Print version + eBook bundle)

Not only does she tell you what you will need as far as essential tools, but she also tells her secrets for using those tools to achieve perfect looking quilting.   In the “Feathers” section of the book, she gives you many different kinds of feathers to quilt, more than I’ve seen in any other quilting book.  This book is not just for longarm quilters, but also for domestic machine quilters as well.  It will have a prominent place in my library.

Another quilting book that I think is worth your time if you are a quilter is 501 Quilting Motifs from the editors of Quiltmaker Magazine.

Martingale - 501 Quilting Motifs (Print version + eBook bundle)   Martingale - 501 Quilting Motifs (Print version + eBook bundle)

As you can see, the book has a variety of motifs from which to choose, and shows you different ways to adapt and use then and to transfer them onto your quilt top.  I love the different motifs for children’s quilts and some of the fun styles this book shares.

Martingale - 501 Quilting Motifs (Print version + eBook bundle) Martingale - 501 Quilting Motifs (Print version + eBook bundle)Martingale - 501 Quilting Motifs (Print version + eBook bundle)

To keep with the “stitching” theme of this post, let’s take a look at My Enchanted Garden: Applique Quilts in Cotton and Wool by Gretchen Gibbons.

Martingale - My Enchanted Garden (Print version + eBook bundle)

Don’t you just love the colors on the cover?  Wait ’til you see the inside!  There are lots of different projects in this book, each as colorful as the cover.  The author combines wool and cotton in her applique and shows you how to embellish with embroidery (directions for embroidery stitches are included), beads, etc.  Clear cut directions are given for the applique.  I think you will find lots of eye candy to drool over in this book.

Martingale - My Enchanted Garden (Print version + eBook bundle)

Here are a couple of the close ups of the blocks on the above quilt, with embroidery, beads, and buttons added.

Martingale - My Enchanted Garden (Print version + eBook bundle)    Martingale - My Enchanted Garden (Print version + eBook bundle)

Martingale - My Enchanted Garden (Print version + eBook bundle)

Martingale - My Enchanted Garden (Print version + eBook bundle)Martingale - My Enchanted Garden (Print version + eBook bundle)Martingale - My Enchanted Garden (Print version + eBook bundle)

Yummy, yummy!  Even if I never make any of these projects, I will enjoy looking at them forever!

Finally, let’s take a look at 25 Patchwork Quilt Blocks, Volume 2 by Katy Jones.

Martingale - 25 Patchwork Quilt Blocks Volume 2 (Print version + eBook bundle)

This is a great book for beginning or intermediate quilt makers or those who want to expand their horizons a bit.  Katy takes traditional and contemporary quilt blocks and throws a couple of news ones in there and combines them with fun and funky fabrics for a fresh look.

Martingale - 25 Patchwork Quilt Blocks Volume 2 (Print version + eBook bundle)  Martingale - 25 Patchwork Quilt Blocks Volume 2 (Print version + eBook bundle)  Martingale - 25 Patchwork Quilt Blocks Volume 2 (Print version + eBook bundle)  Martingale - 25 Patchwork Quilt Blocks Volume 2 (Print version + eBook bundle)

Techniques and strategies for making each of the blocks are given in easy-to-understand format.

I hope somewhere in these 4 books, you found one you’d like to look into further.  You can order these books from the Martingale website  or from Amazon.com.  Many thanks to Martingale Publishers and  their photographer, Brent Kane, for providing these books for me to review and the many pictures for you to enjoy!