Ahhhh… back to some normalcy, whatever that is…

And, for me, normalcy is me in my studio, working on quilts.

I had said in an earlier post where I was talking about using Zipper Leaders to hold quilts onto the frame that I would also post a picture at a later date of the clips I use – the Grip-Lite Clamps.  Well, here they are.  They are about the size of those potato bag clips, but a little bulkier.  I like them because they are easier for my old hands to open and close in order to clamp onto the fabric.

Joan's quilt 001

On the back of the clamp gives you a website where you can buy them.  Of course, if you Google them, you will find other places that sell them, too.

Joan's quilt 003

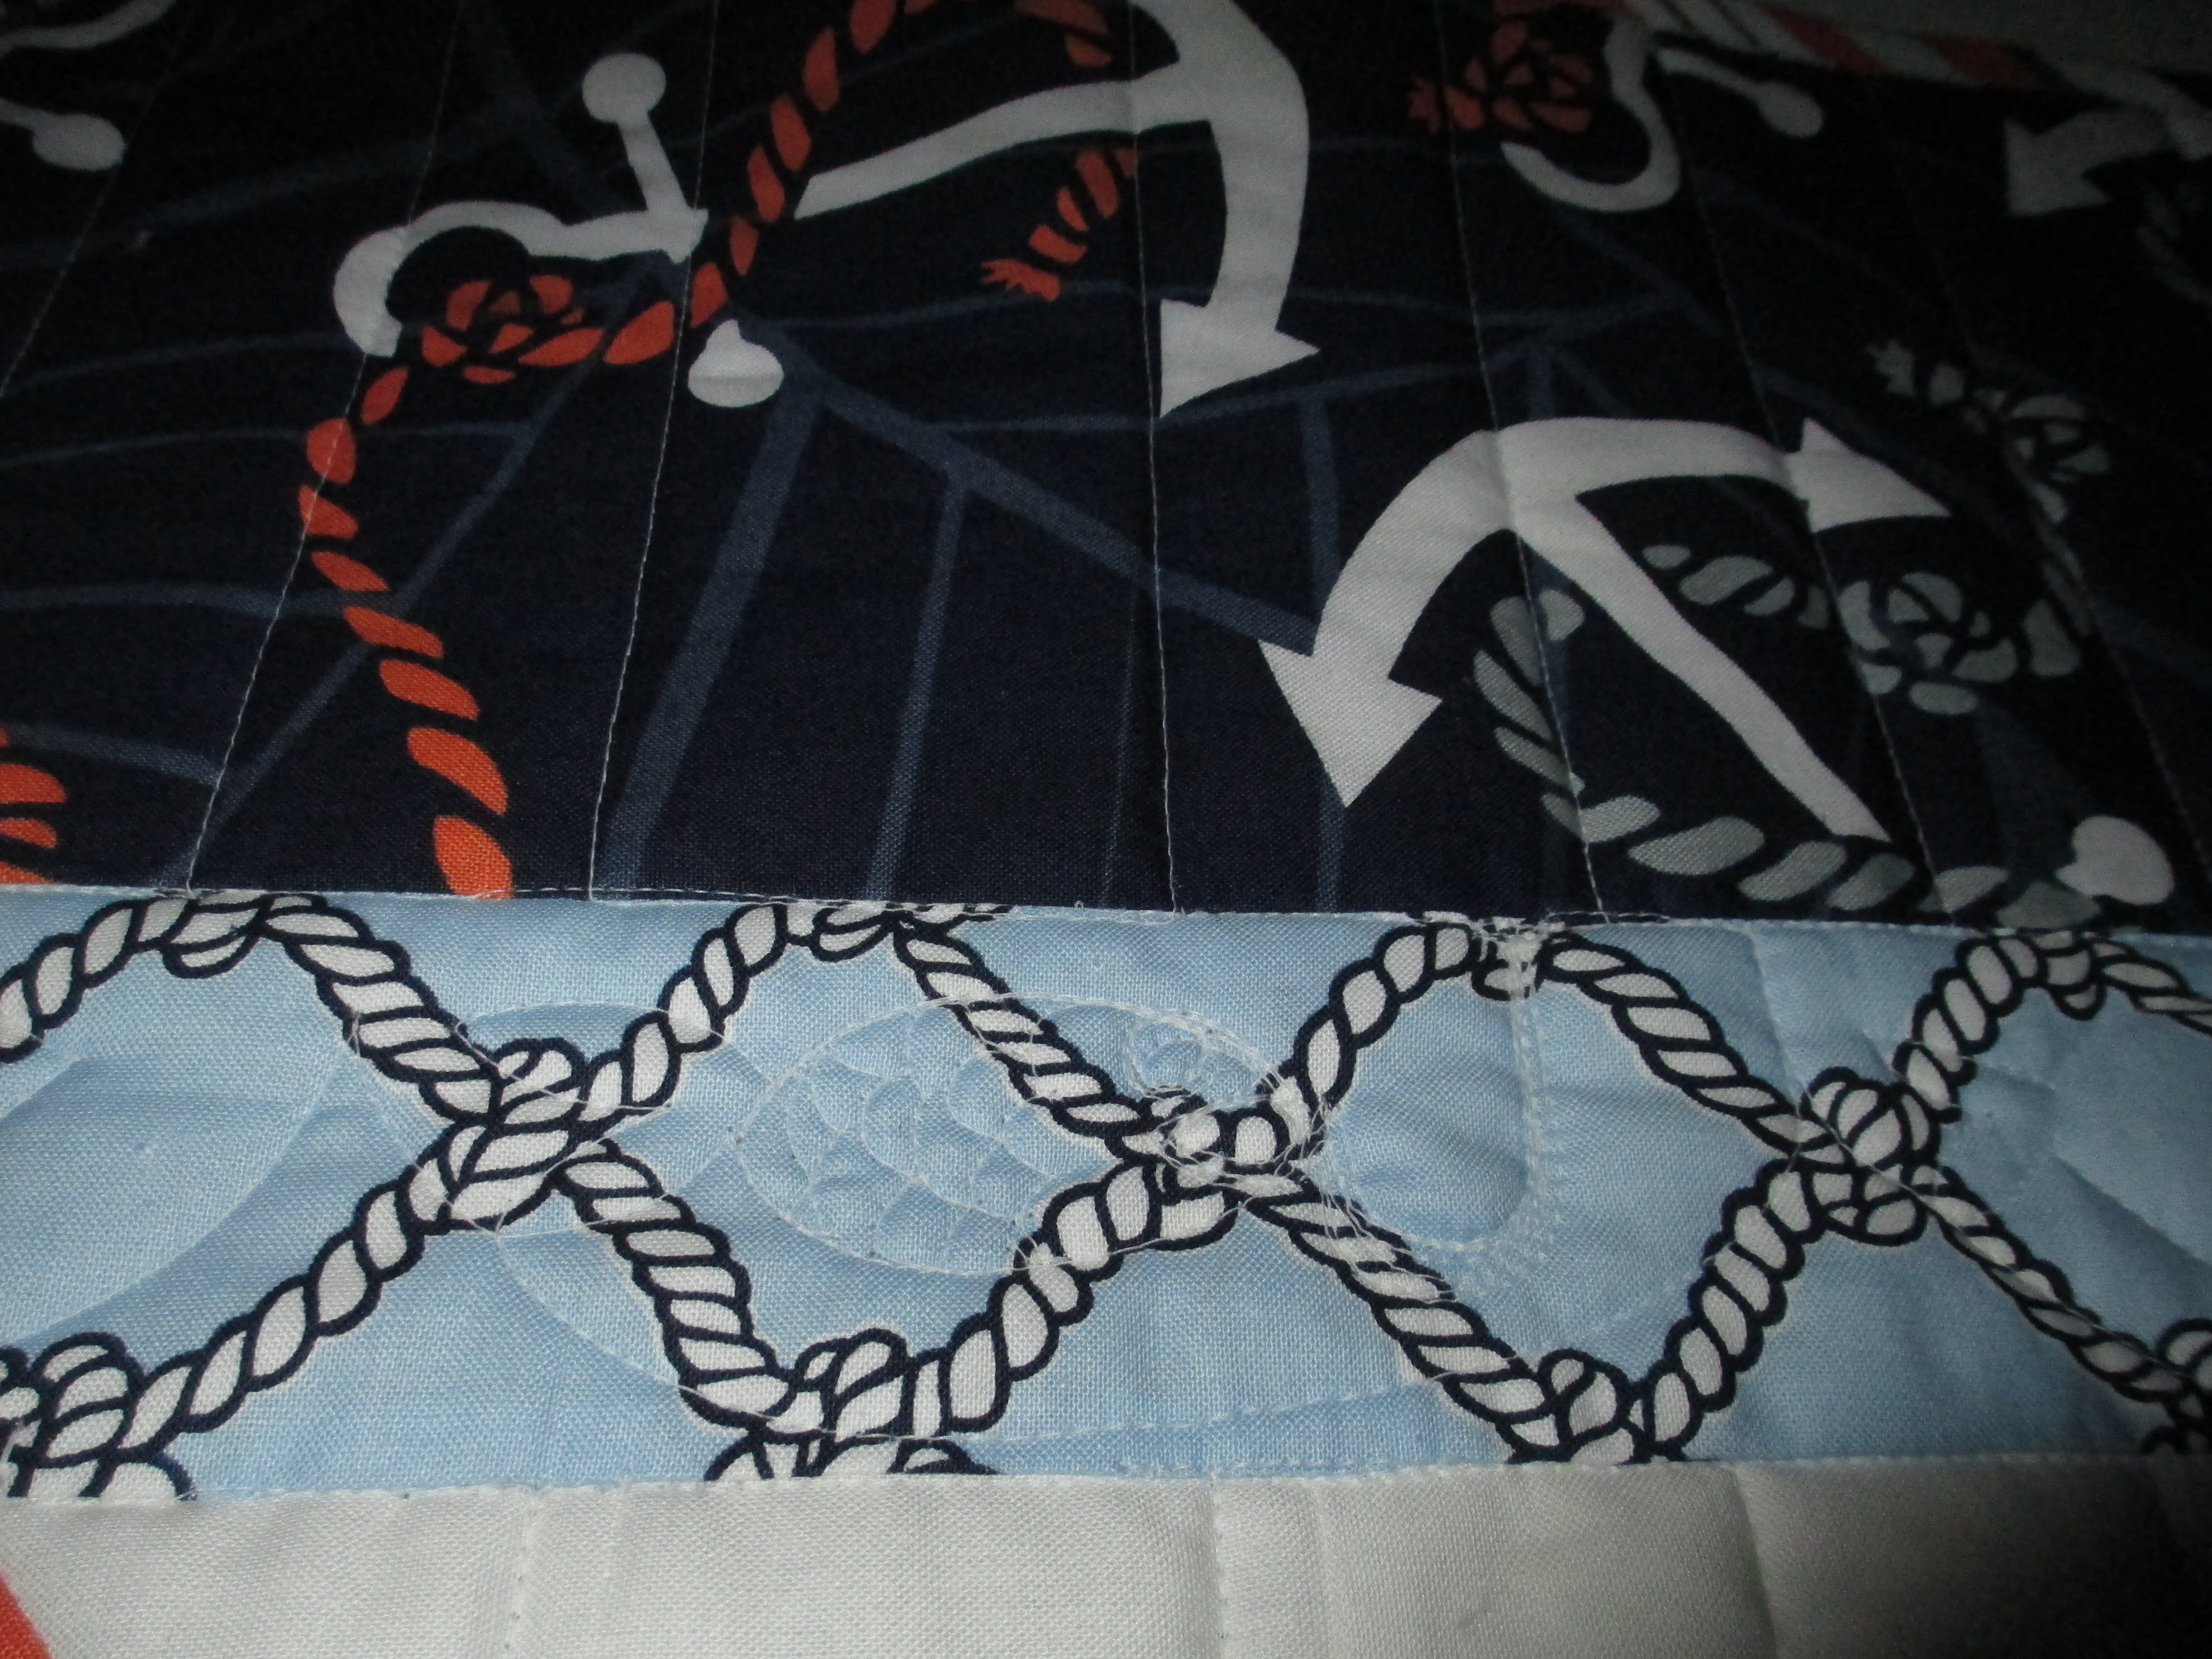
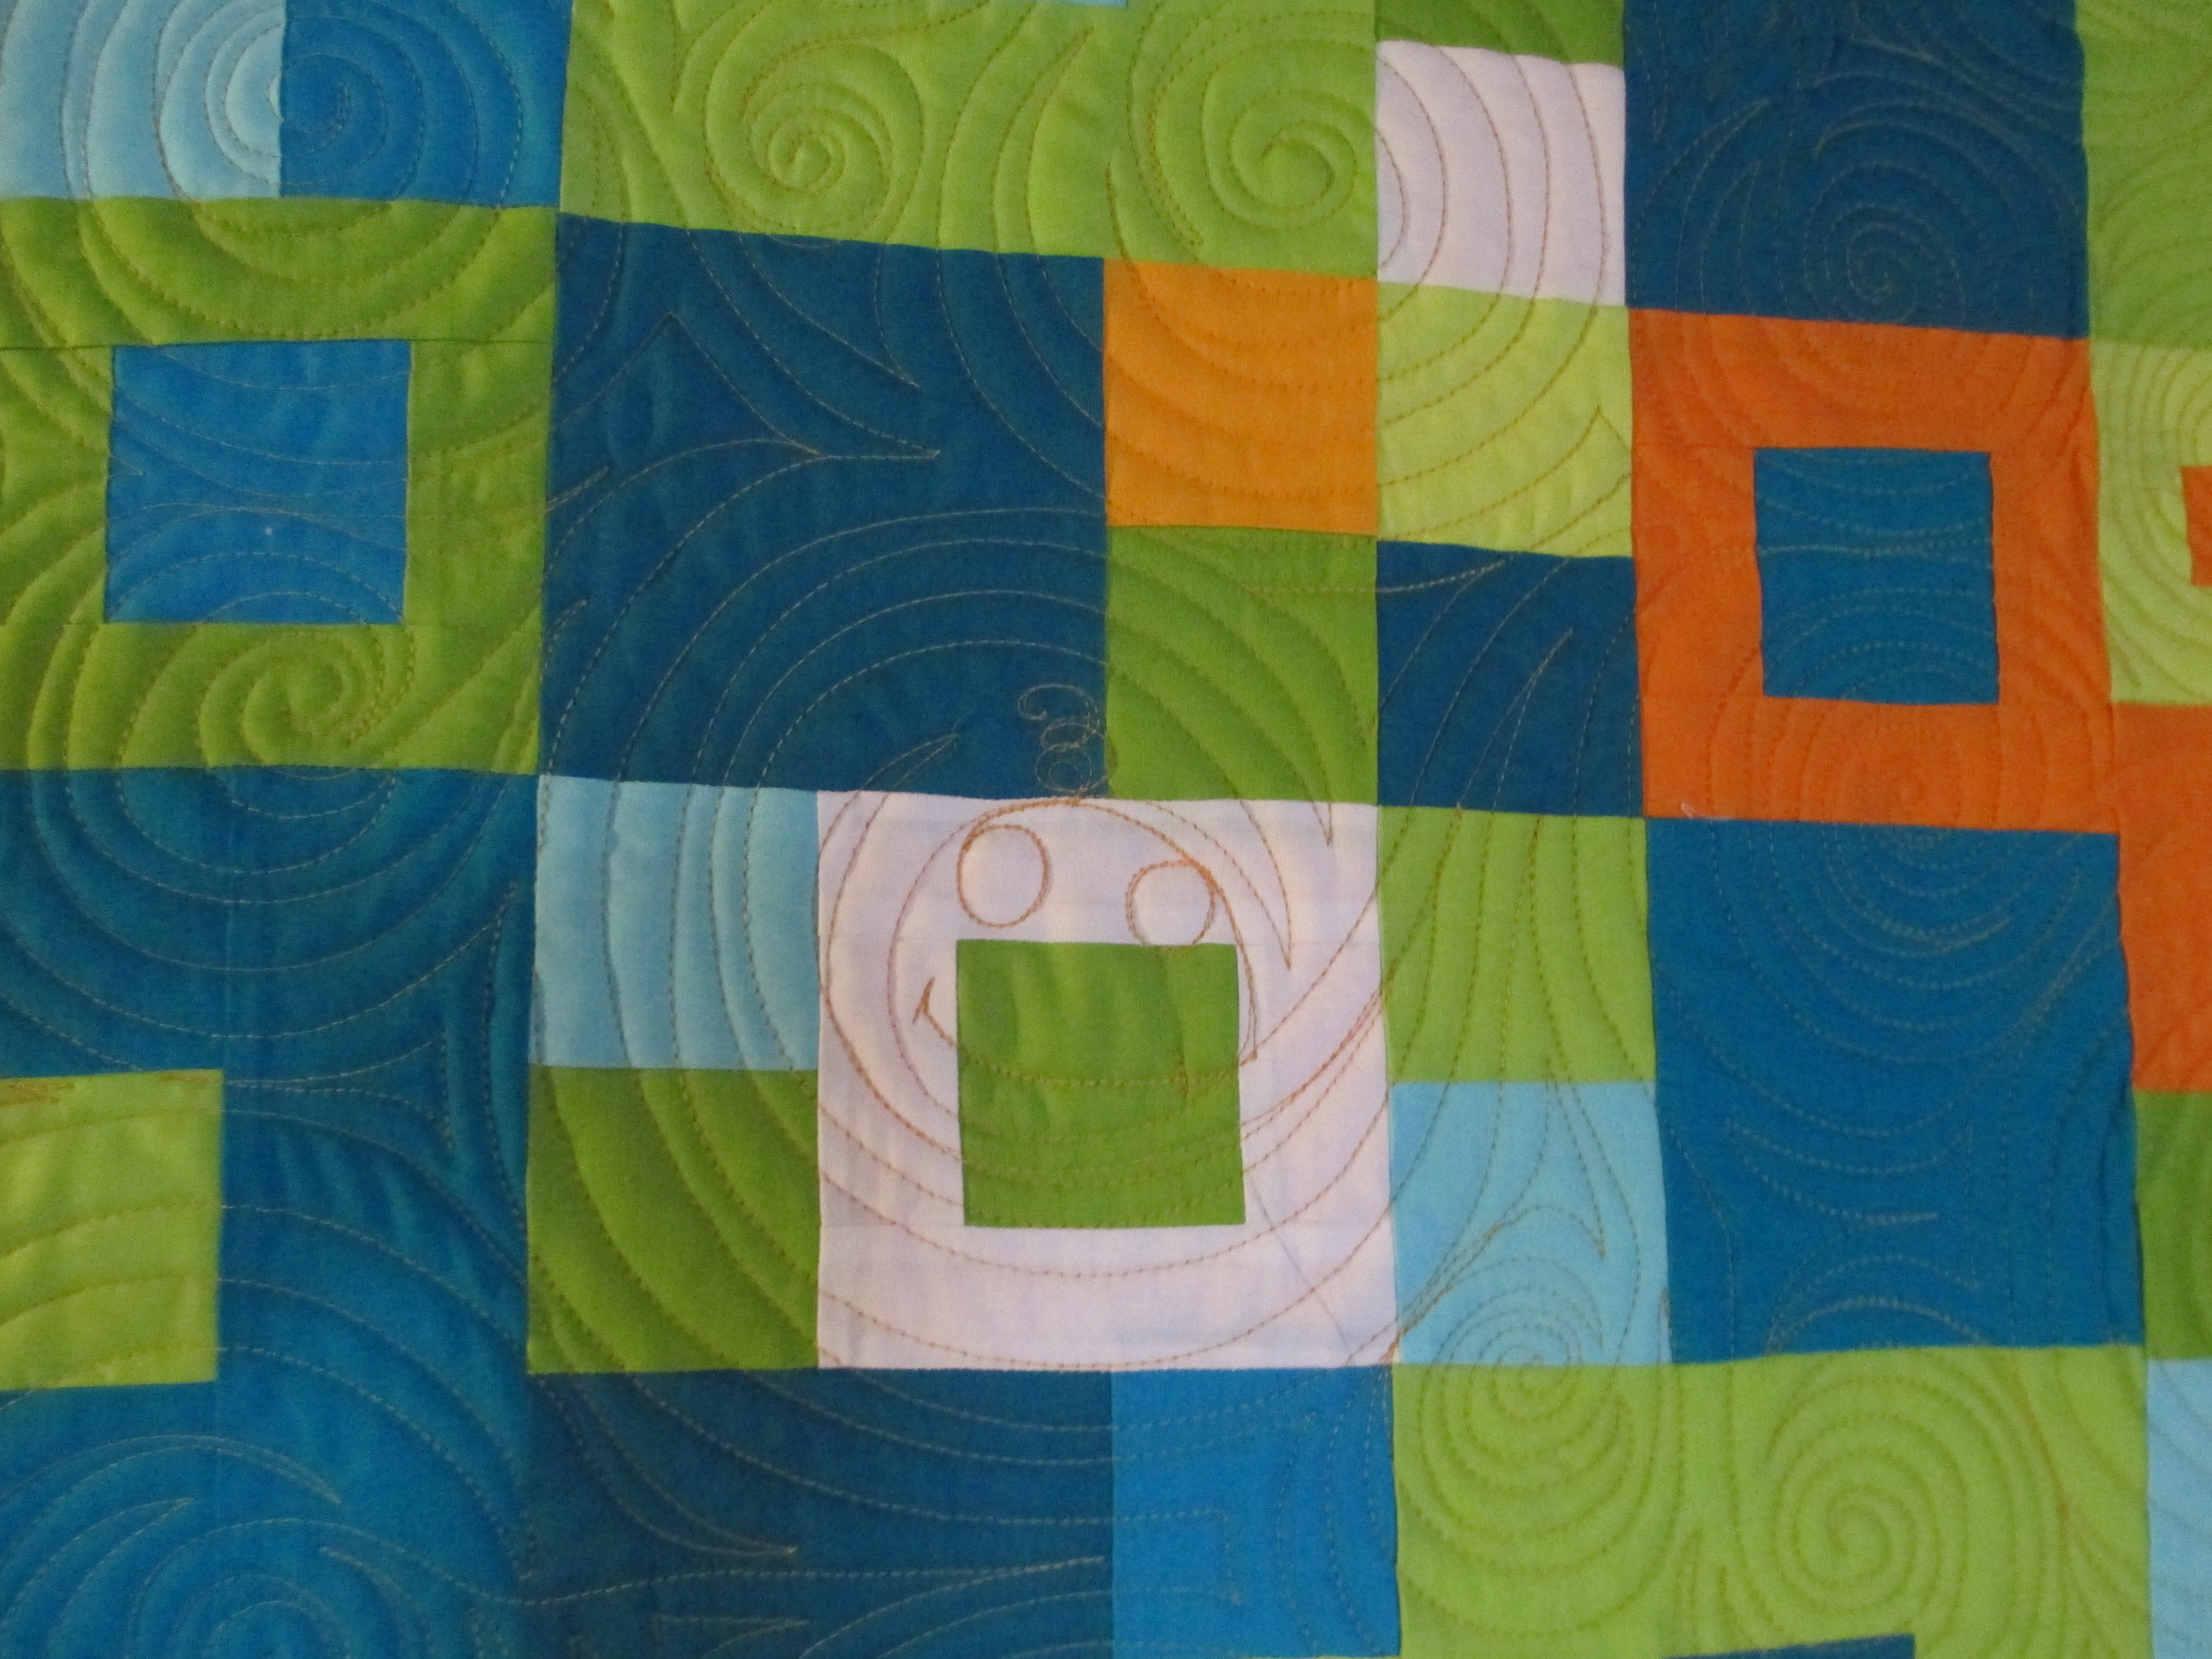
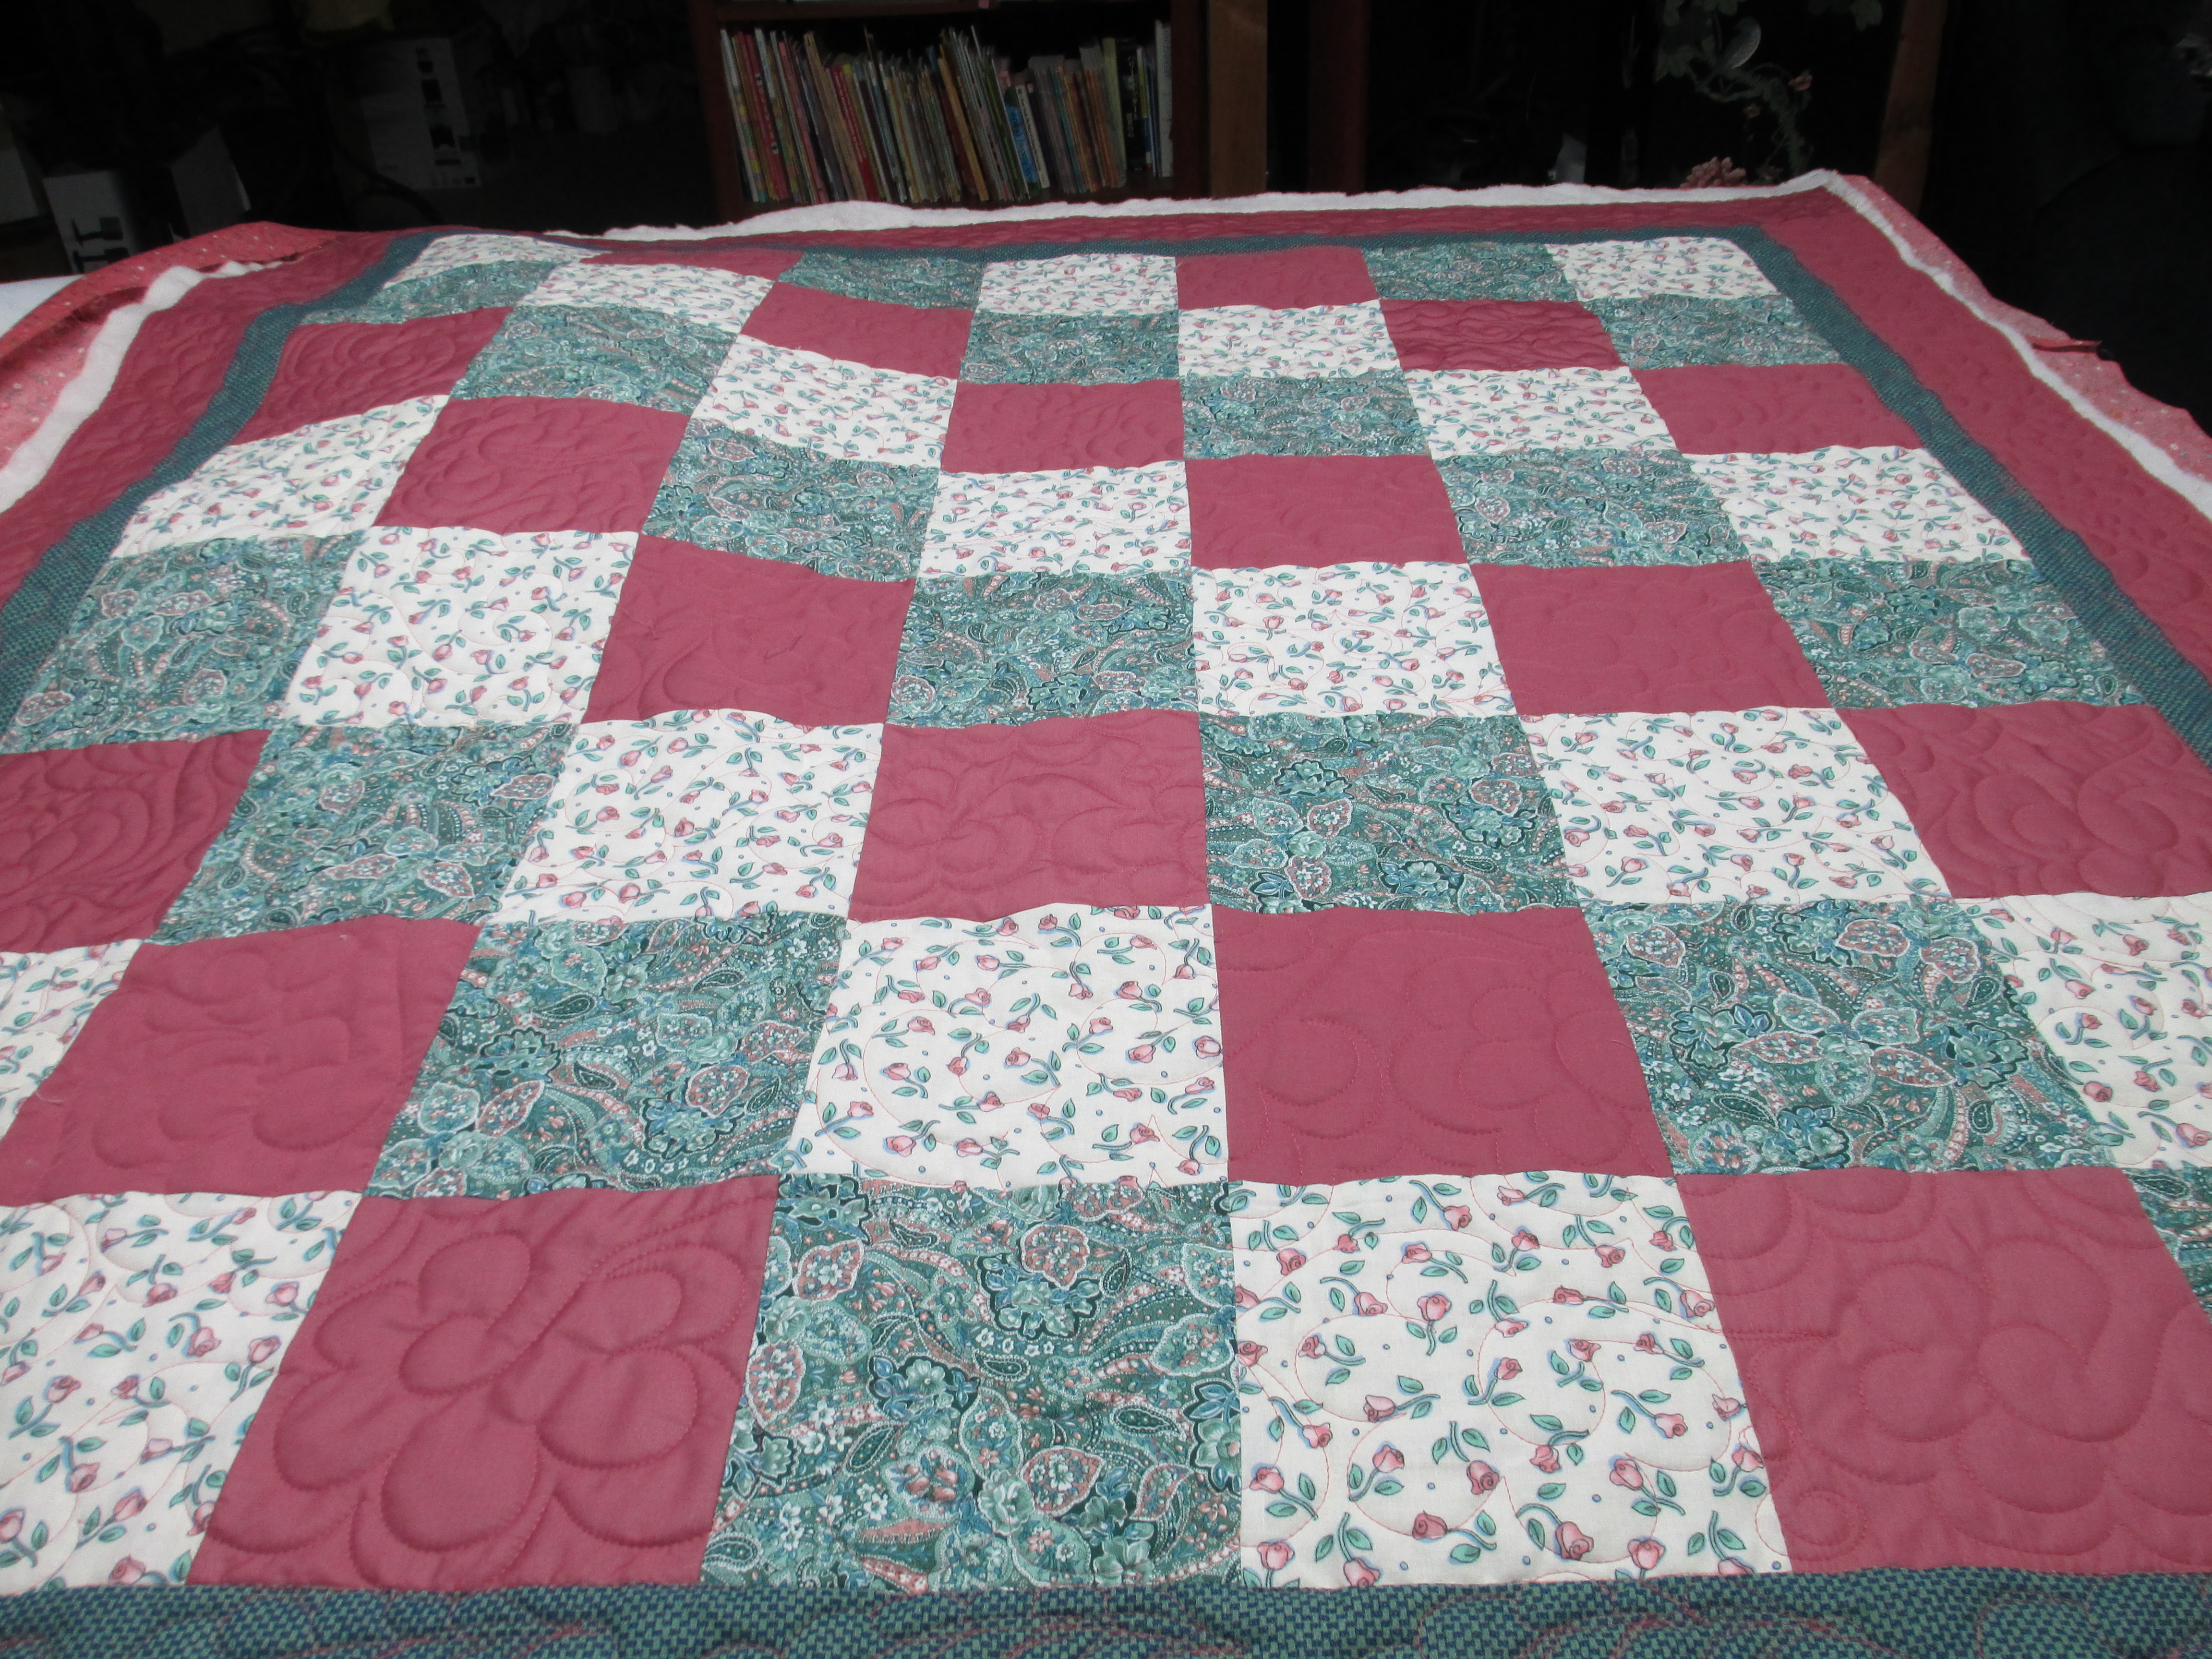
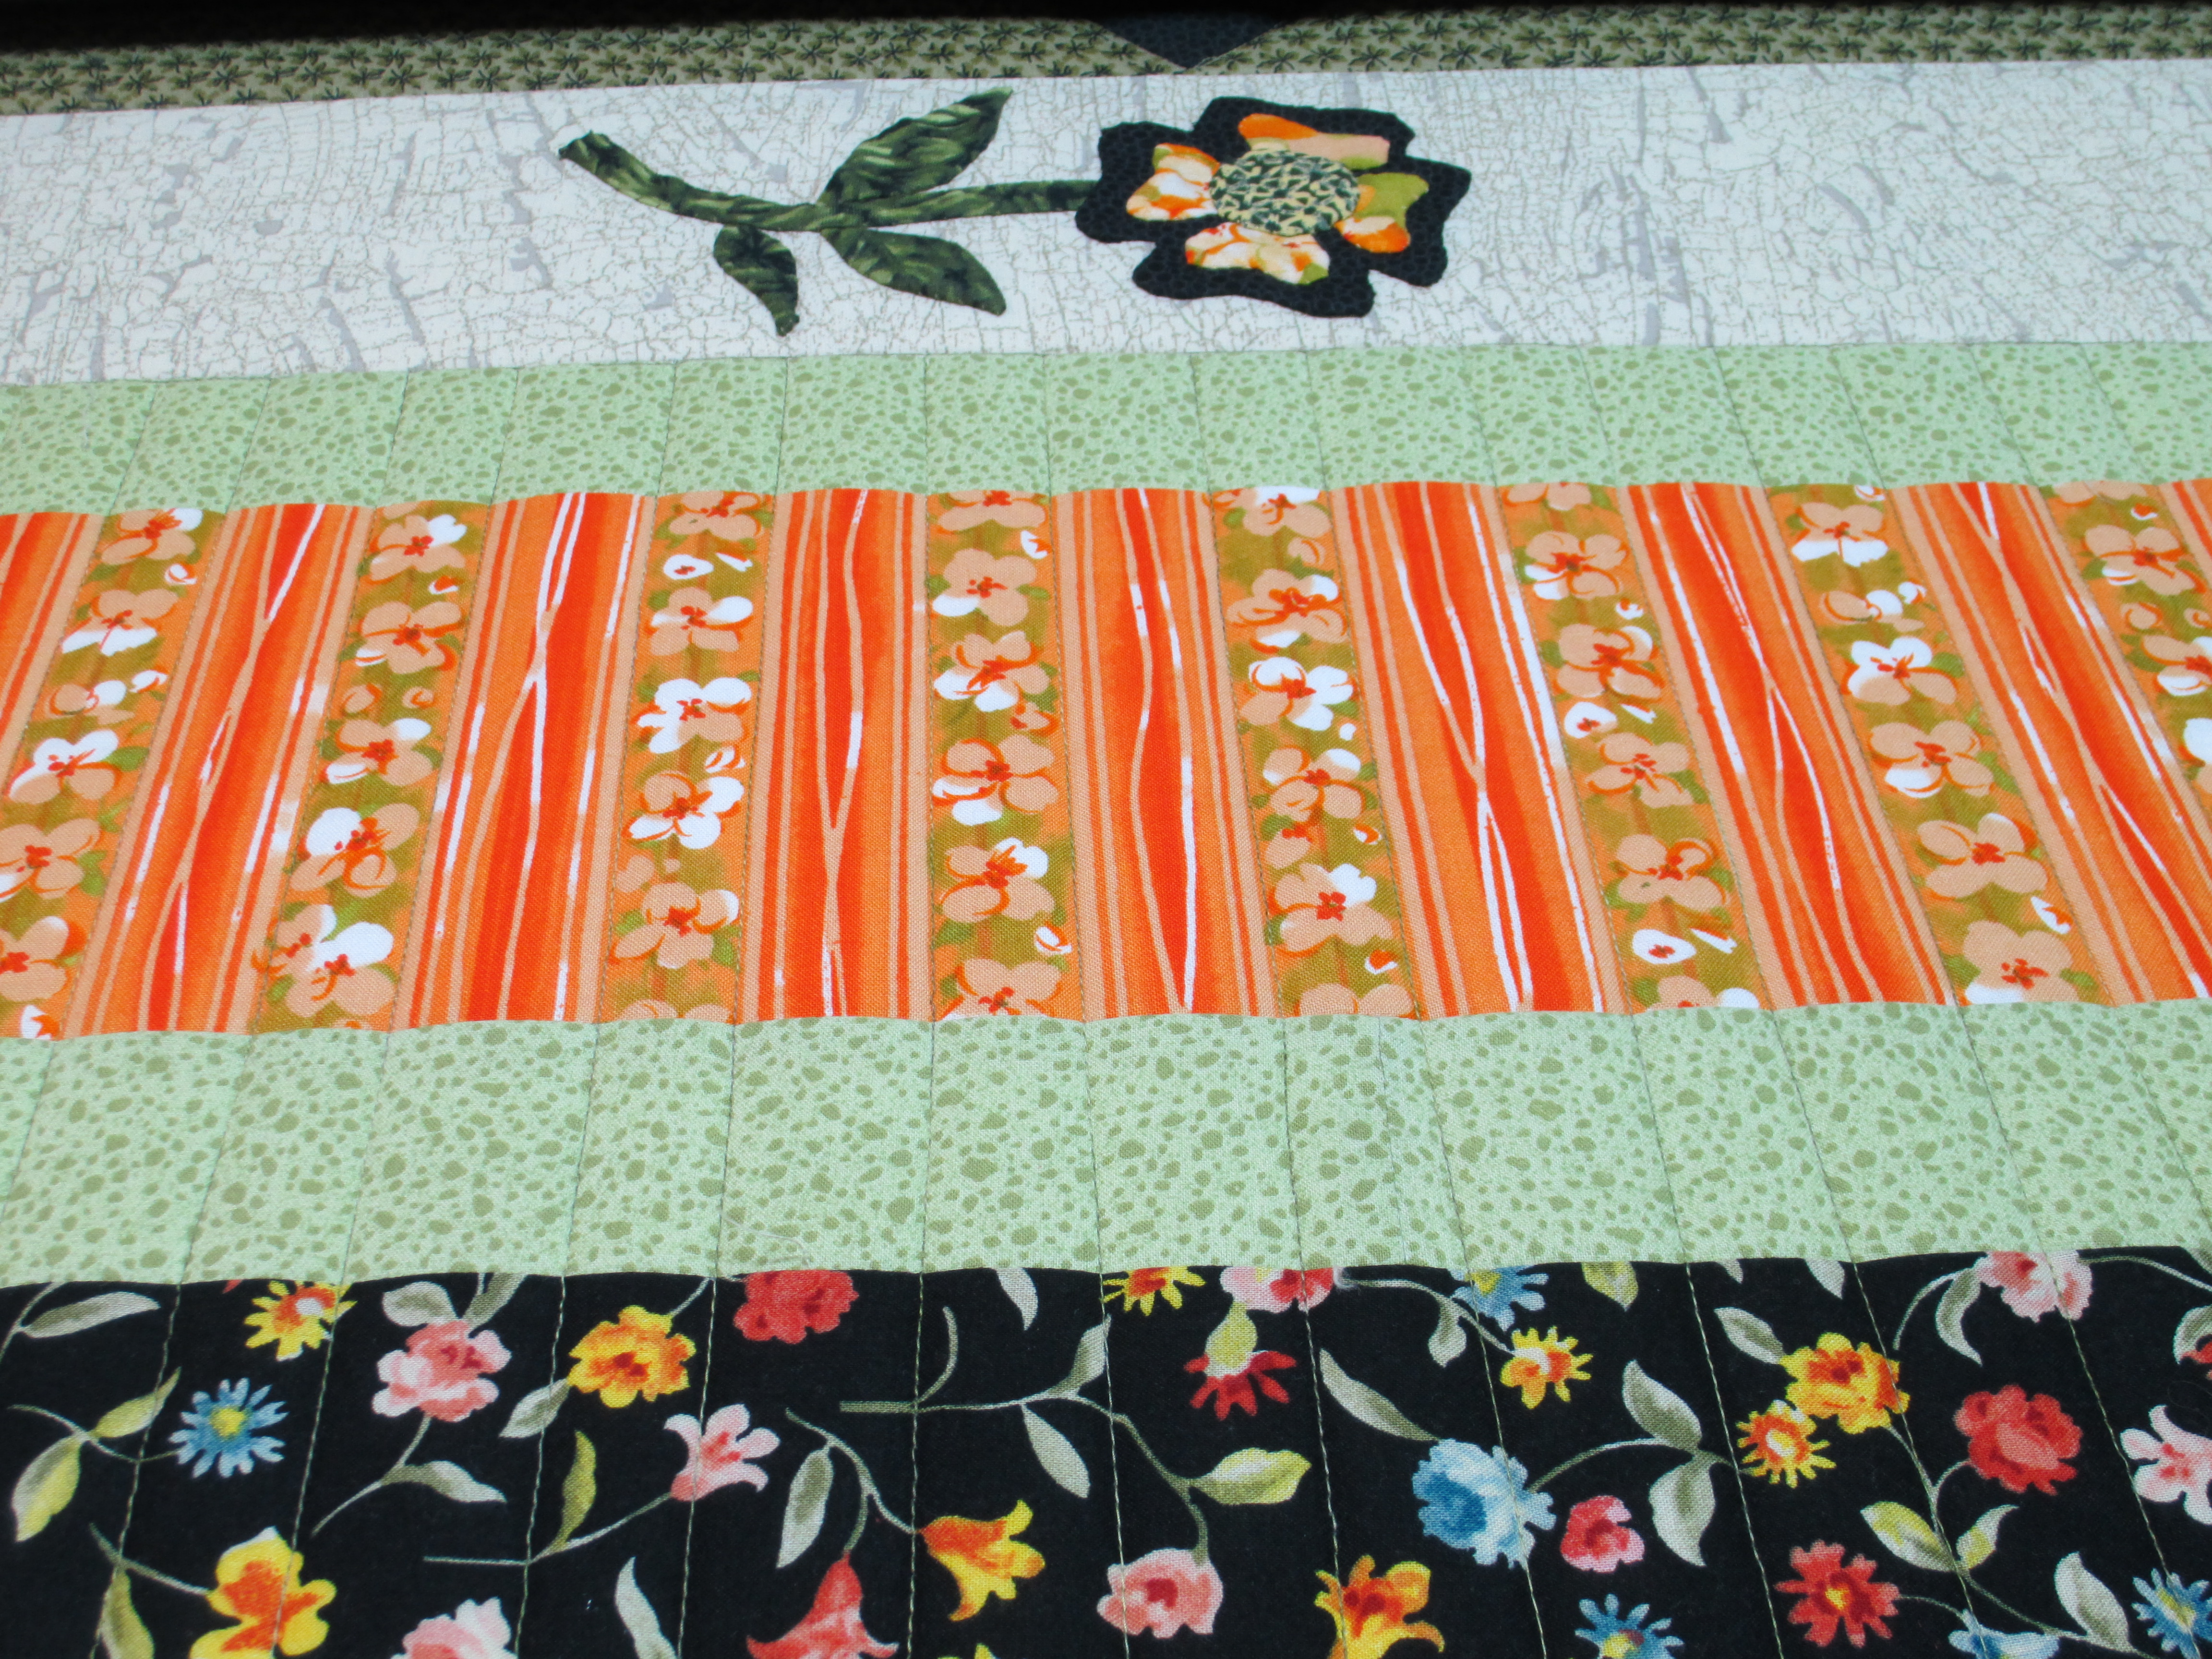
Onto the quilts I’ve been working on…  It was Christmas in August here.  It’s a good thing Joan gave this to me now, because quilters get VERY busy the 3 months before Christmas, and if you don’t get your Christmas present quilt top to us early on, you stand the chance that it may not be done in time for Christmas.  Joan wanted swirls quilted onto her quilt, and I was so happy and relieved to do that for her.  Have I told you that I LOVE swirls?  I have had so much fun quilting swirls into quilts.  Other than the surprises that my evil twin sneaks into quilts, swirls are probably my favorite thing to quilt.  This is her finished quilt and a picture of the swirls on the blocks.  She chose a variegated cream, which goes well with this quilt, and the swirls do not interfere with the pictures on the blocks.

   Joan's quilt 007      Joan's quilt 015

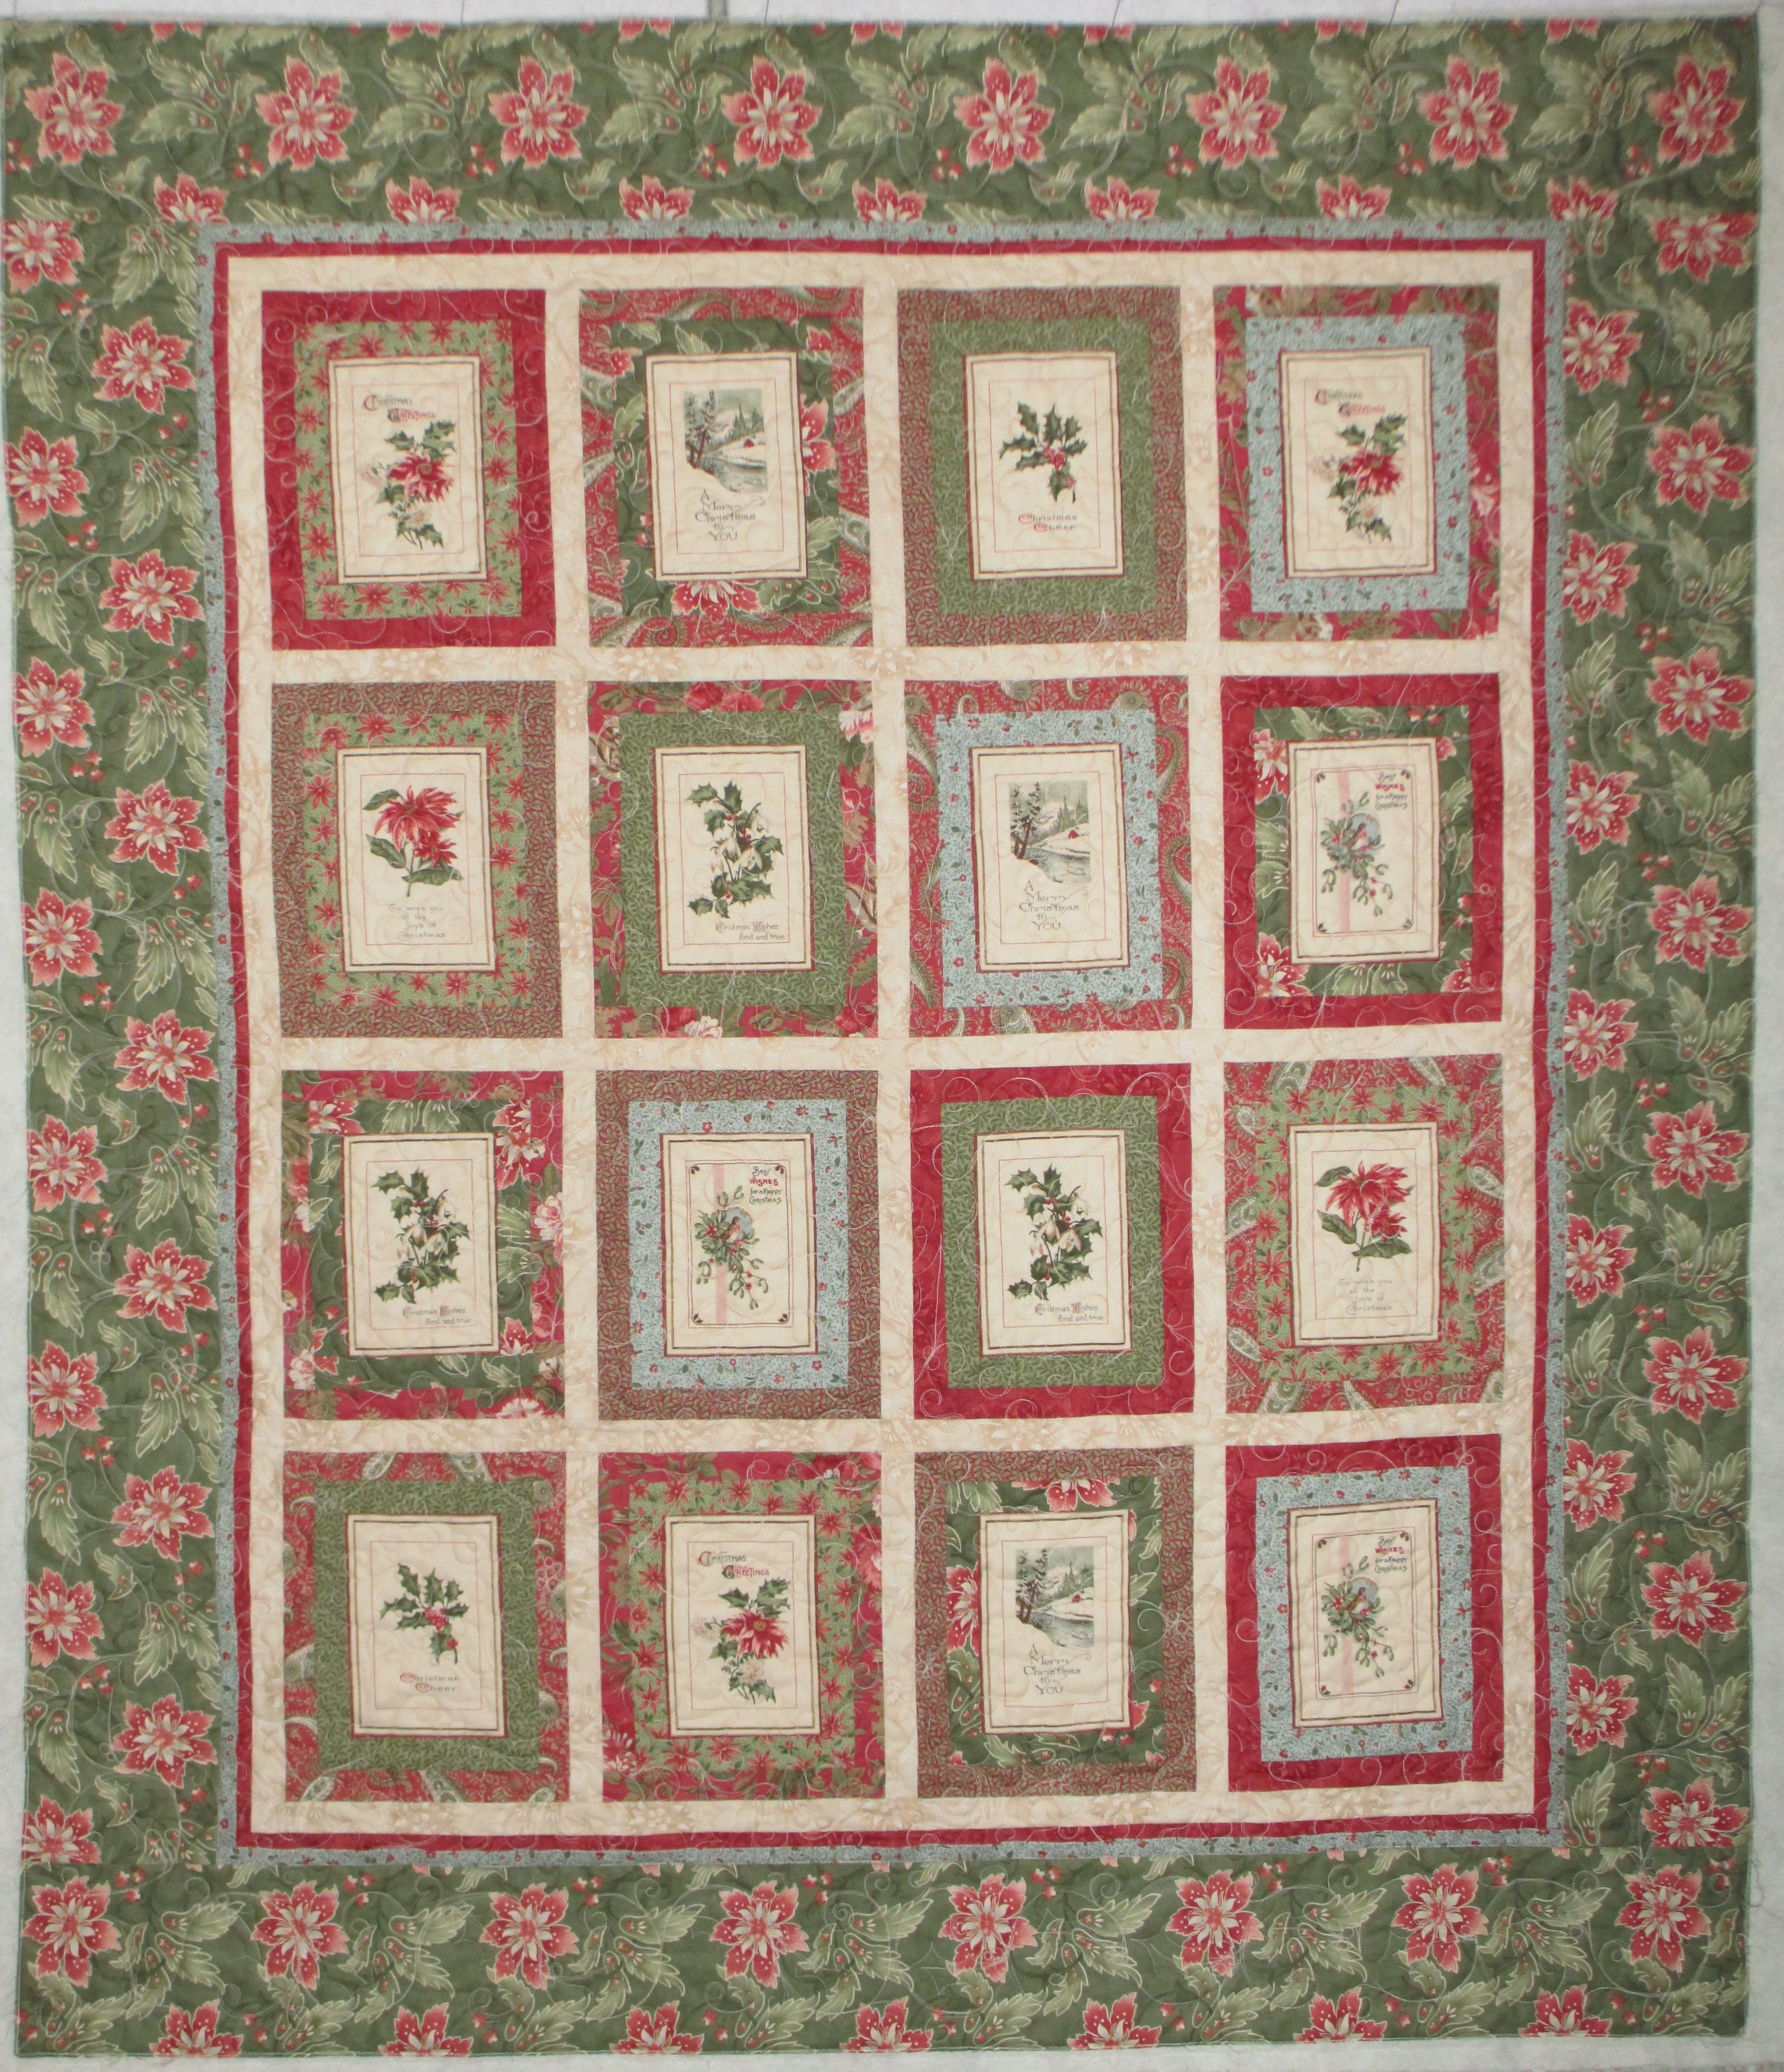
I also mixed some holly leaves and berries in the swirls but tried to keep them off the pictures themselves in order not to interfere or compete with them.

Joan's quilt 014

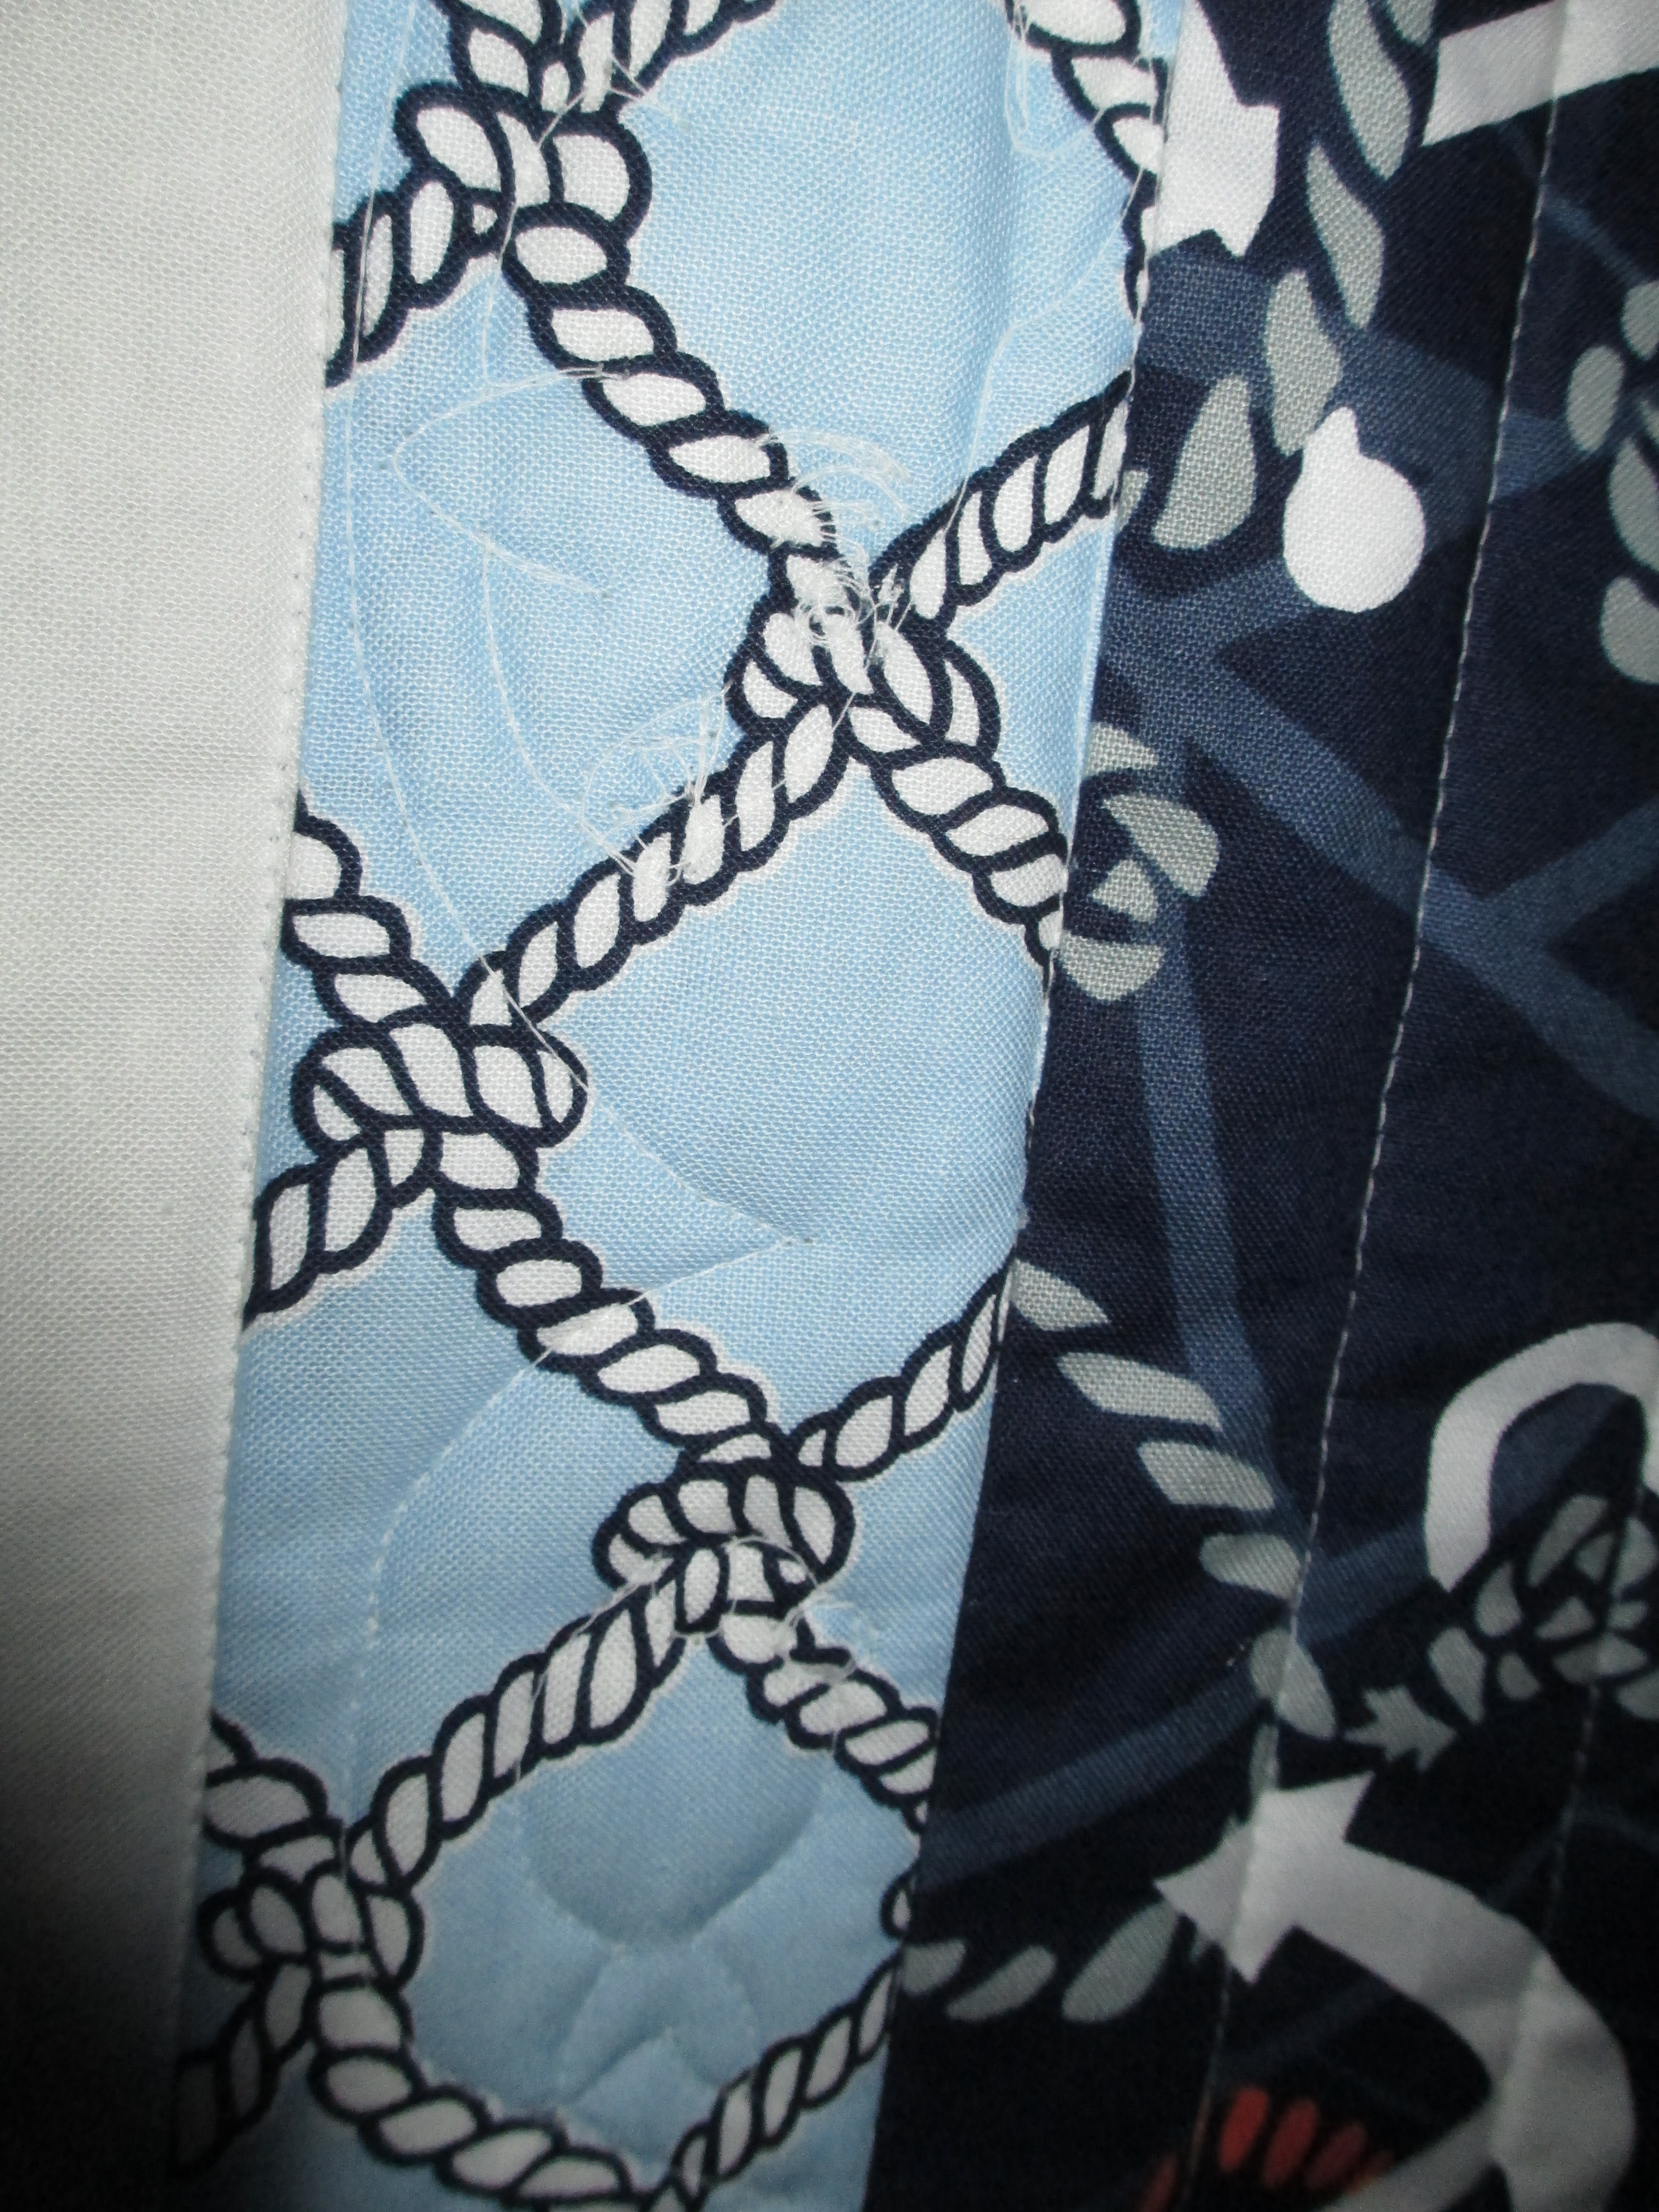
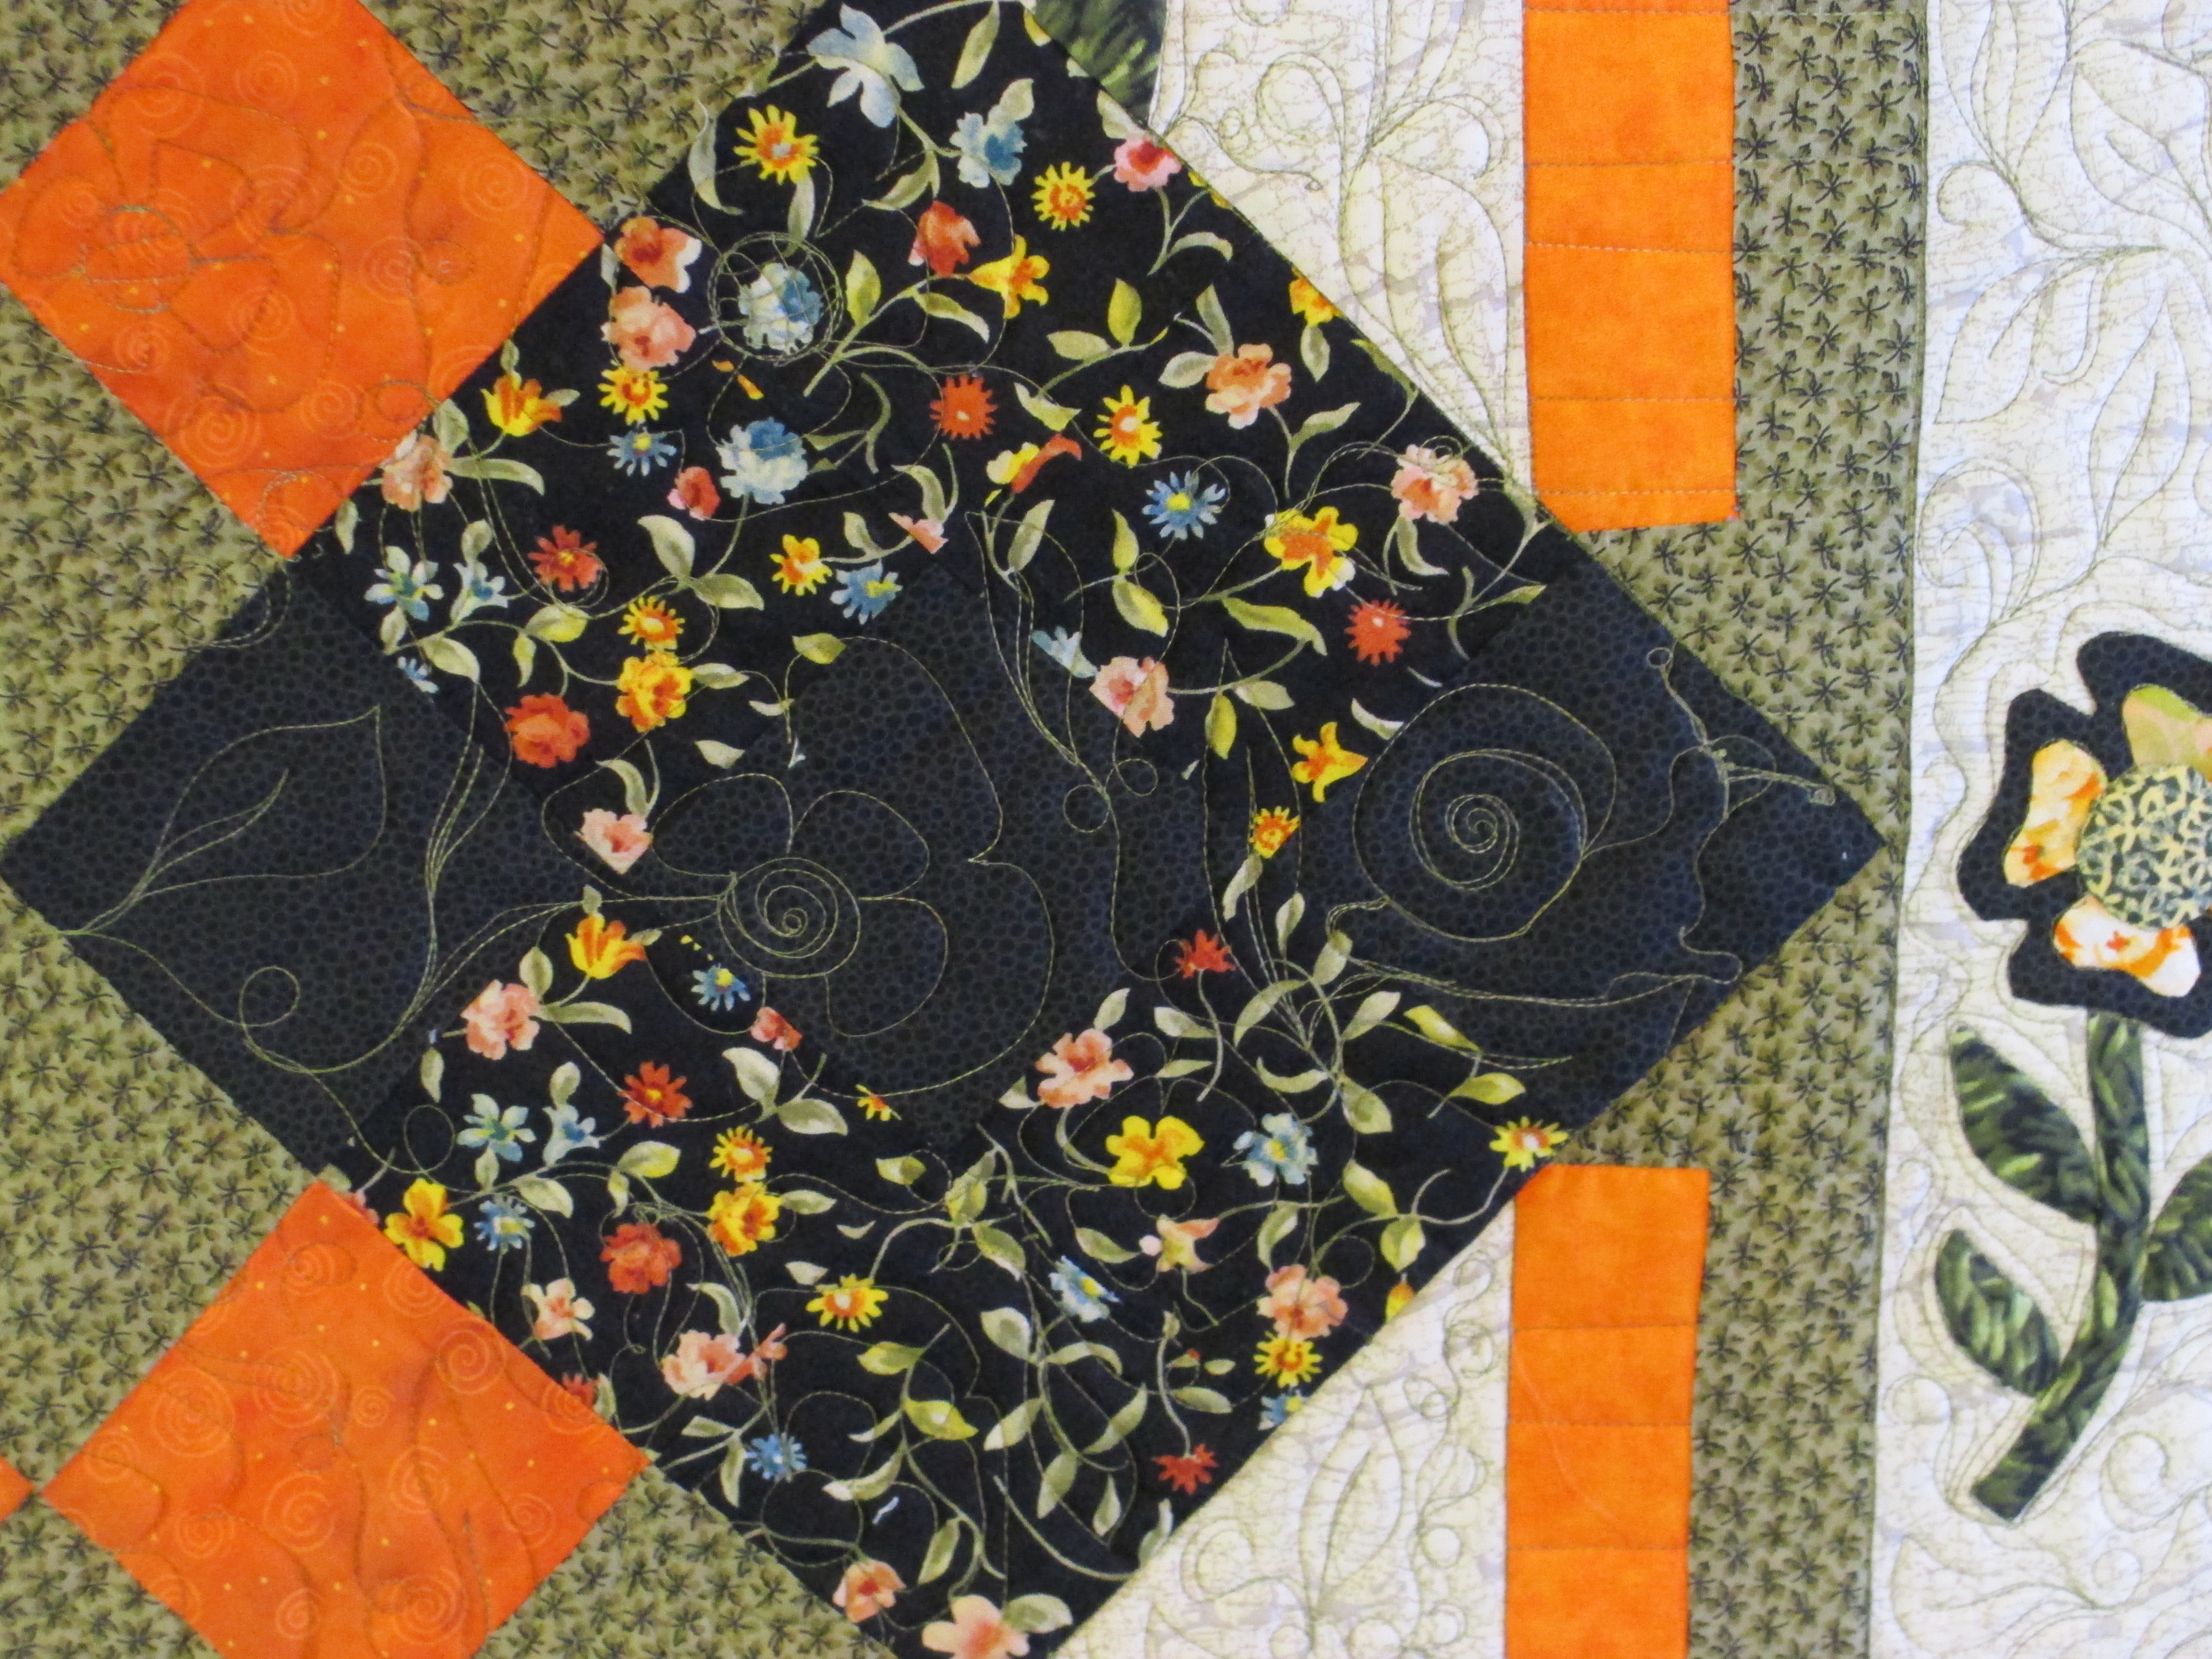
We did a separate border with the same theme; swirls with holly and berries.  I played around on my drawing board for ideas for the border.

Wilma's quilt 5 007

And, this is what I did, swirls with holly in the center of the back and forth swirls, similar to my bottom drawing.

Joan's quilt 004

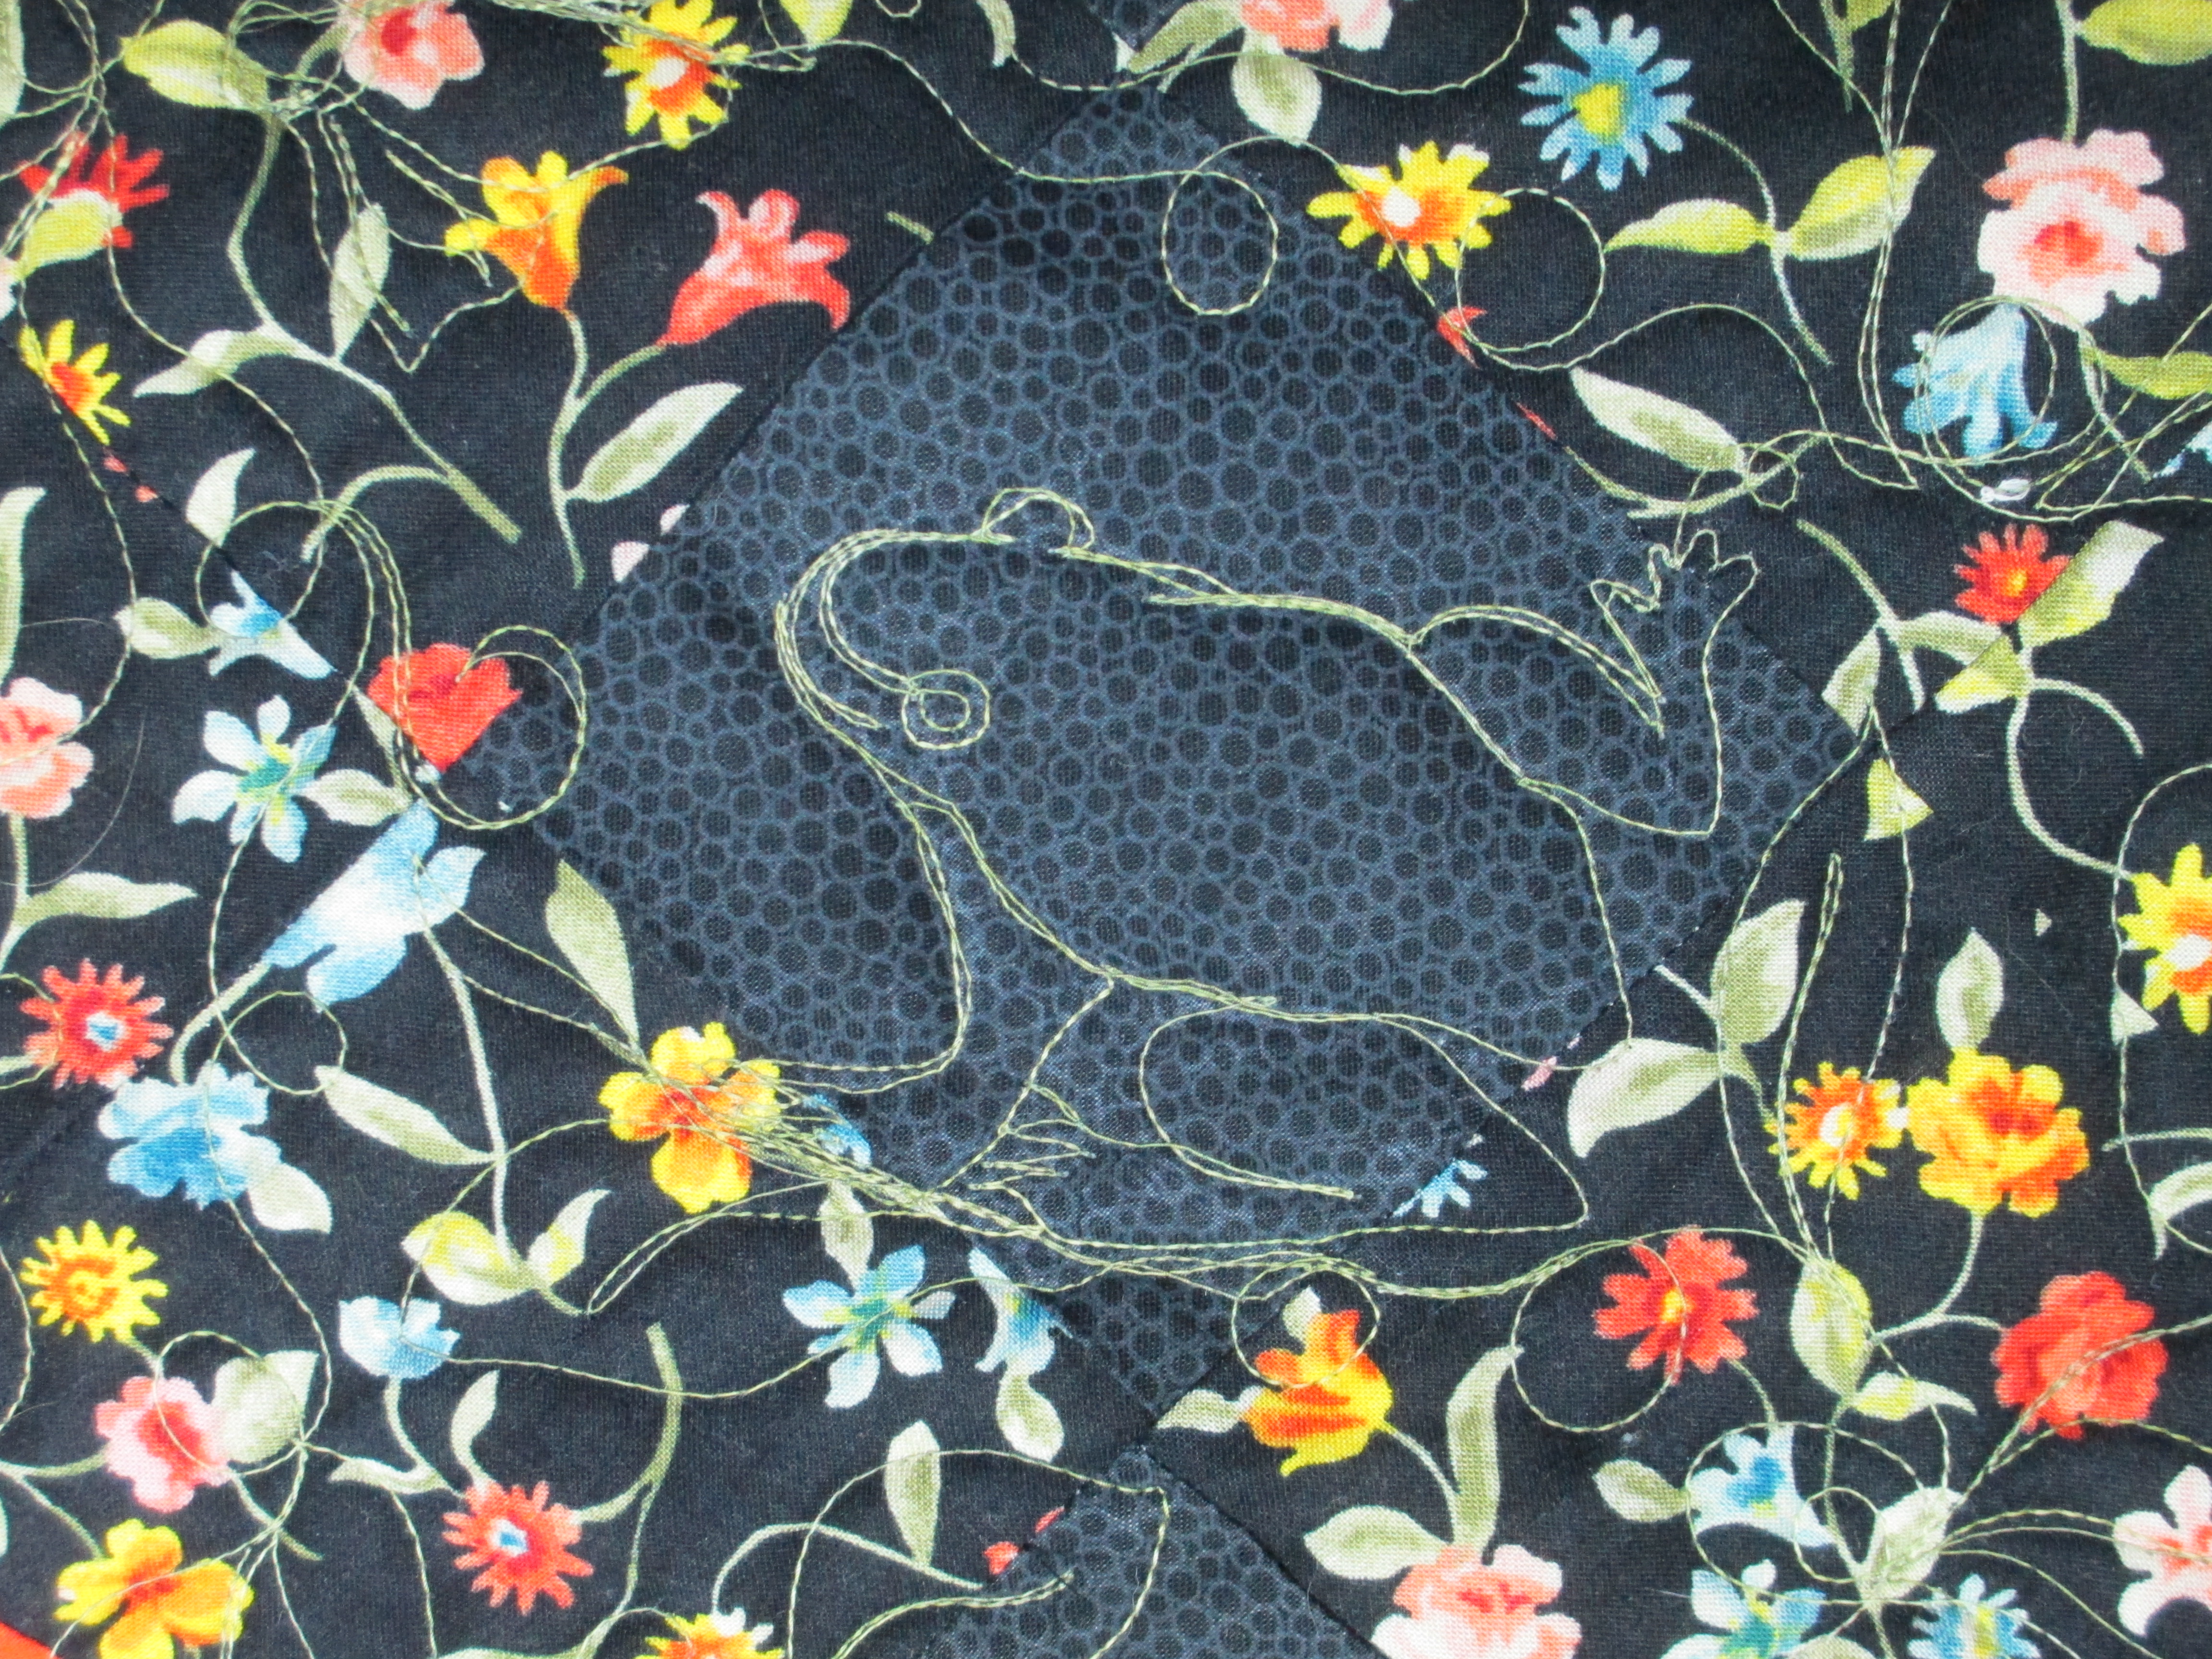
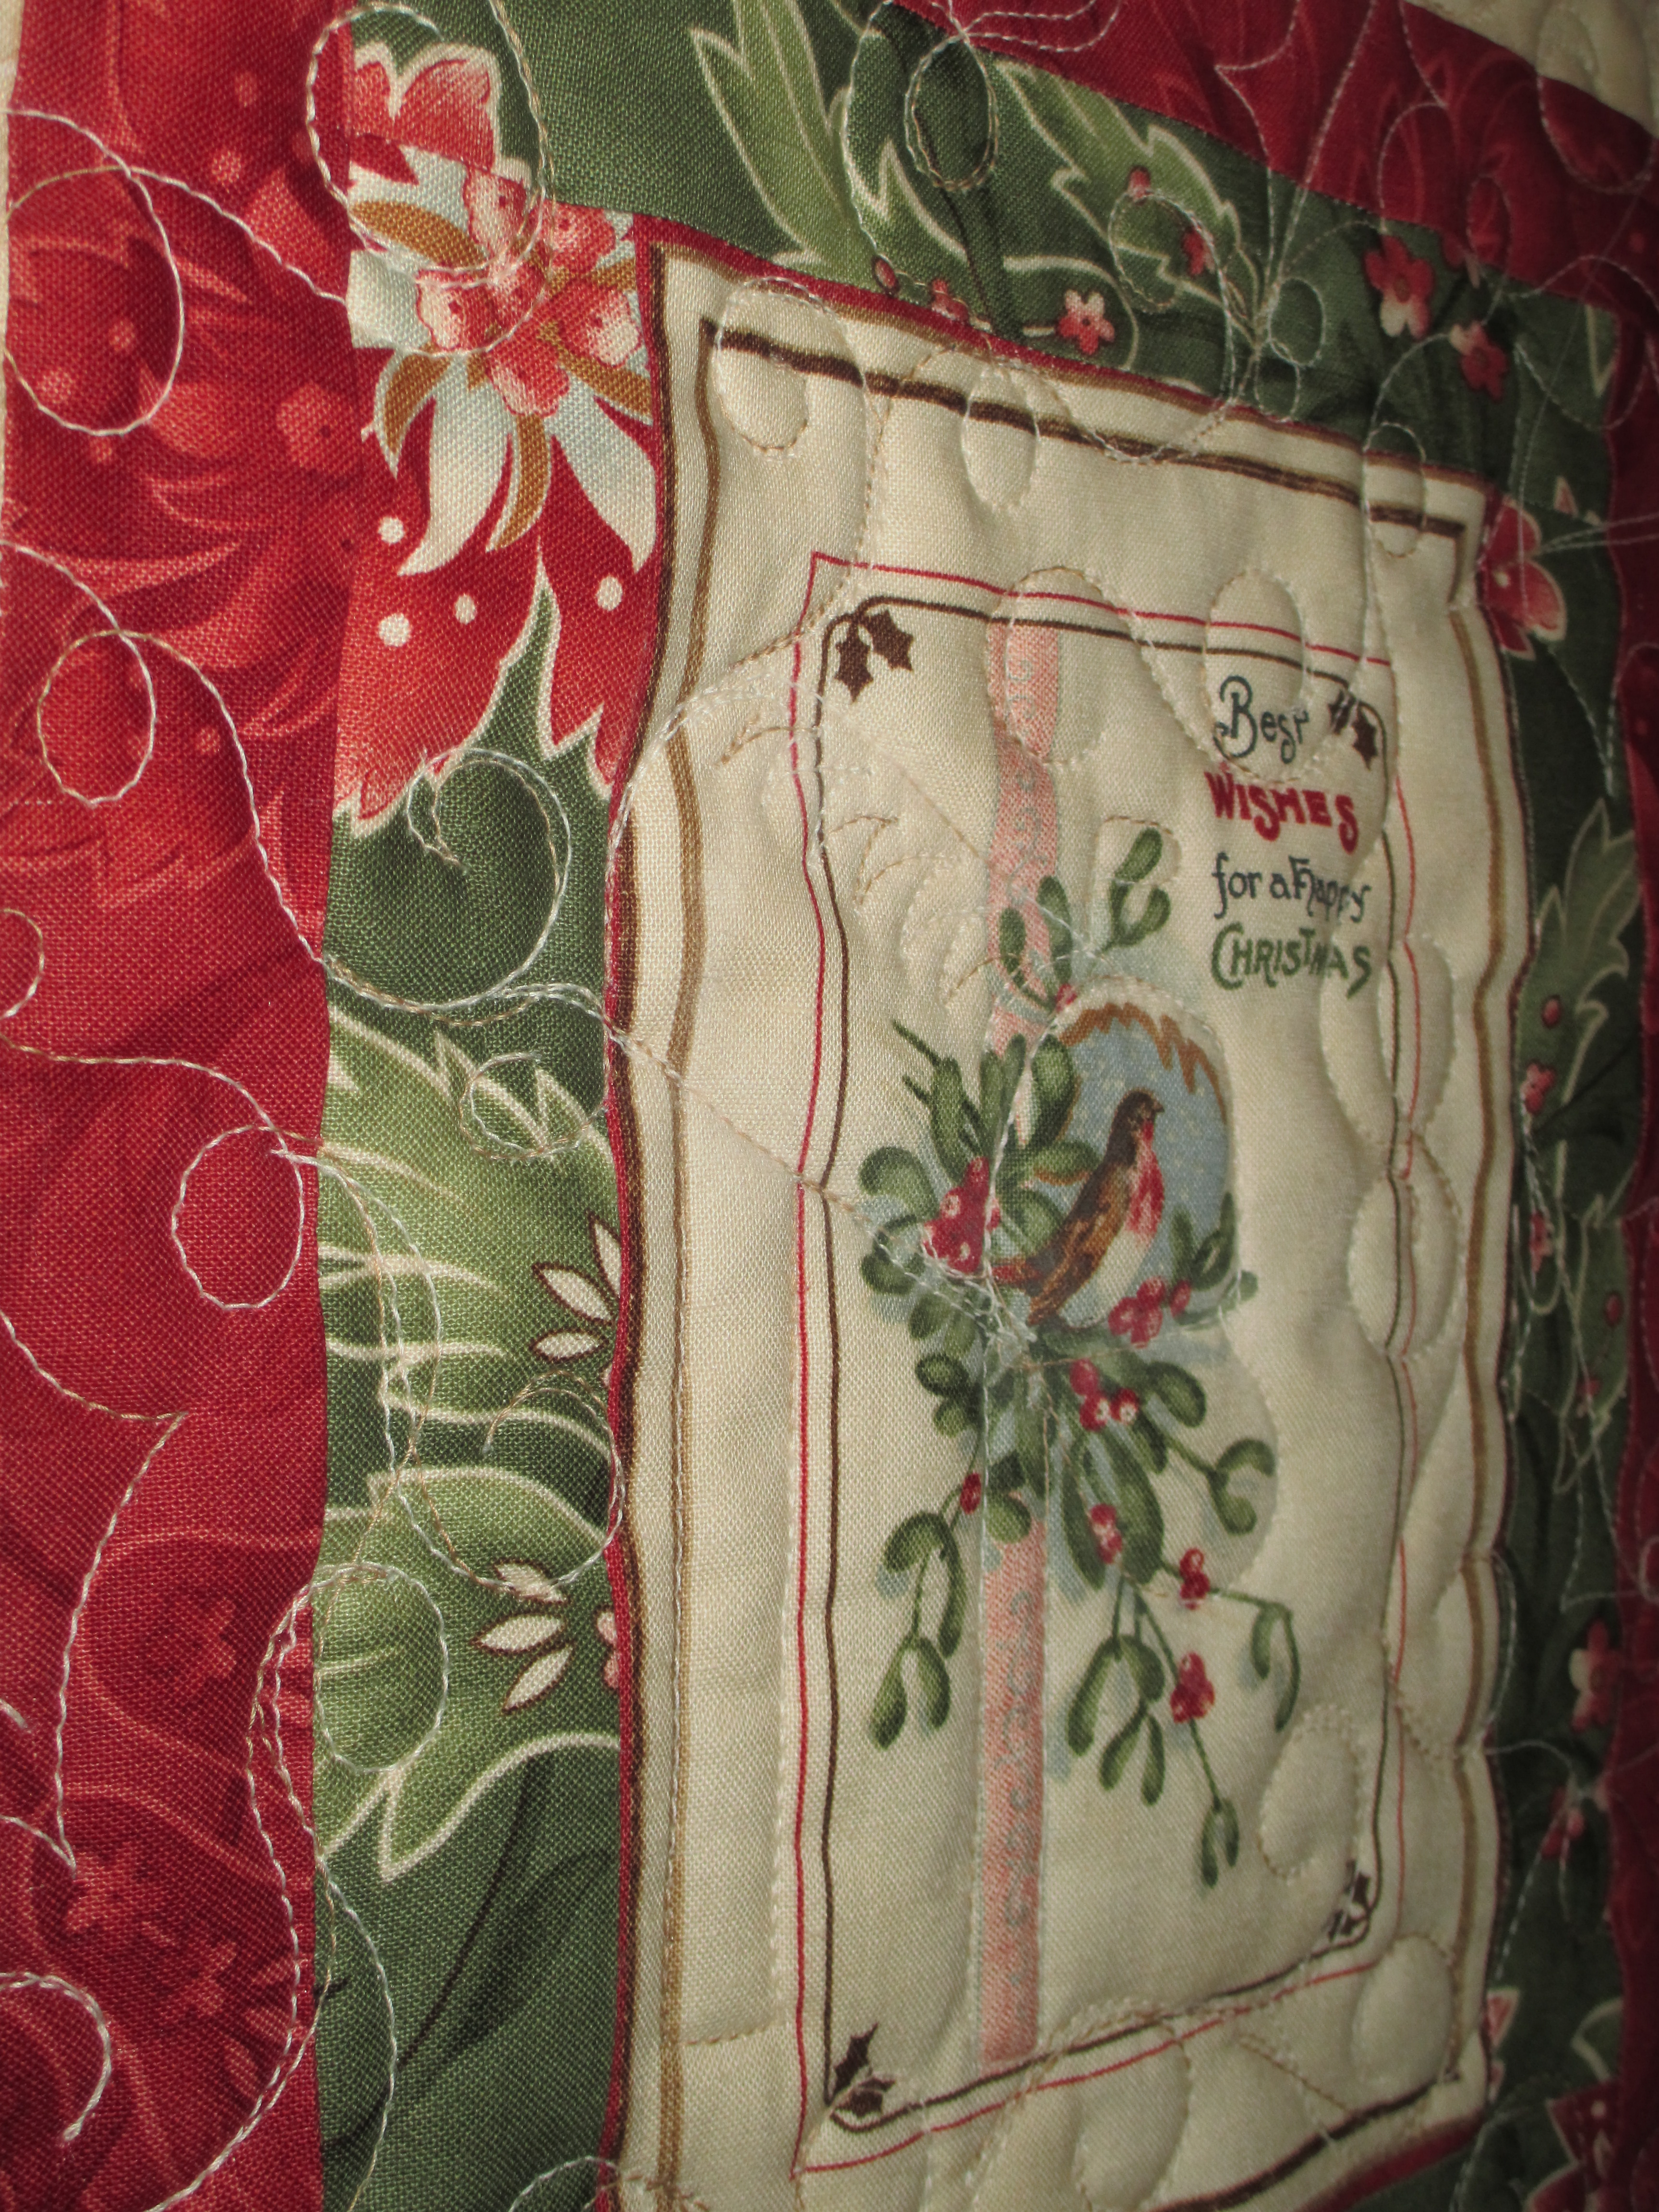
And, finally, a couple of surprises to make this Joan’s personal heirloom quilt… mailbox stitched around the bird and 2013 stitched into the bottom right of a block.  She’s got one more surprise, but it’s a very small one.  I’ll let her wonder what it is and look for that one.  I had a LOT of fun with this quilt!

  Joan's quilt 011     Joan's quilt 012

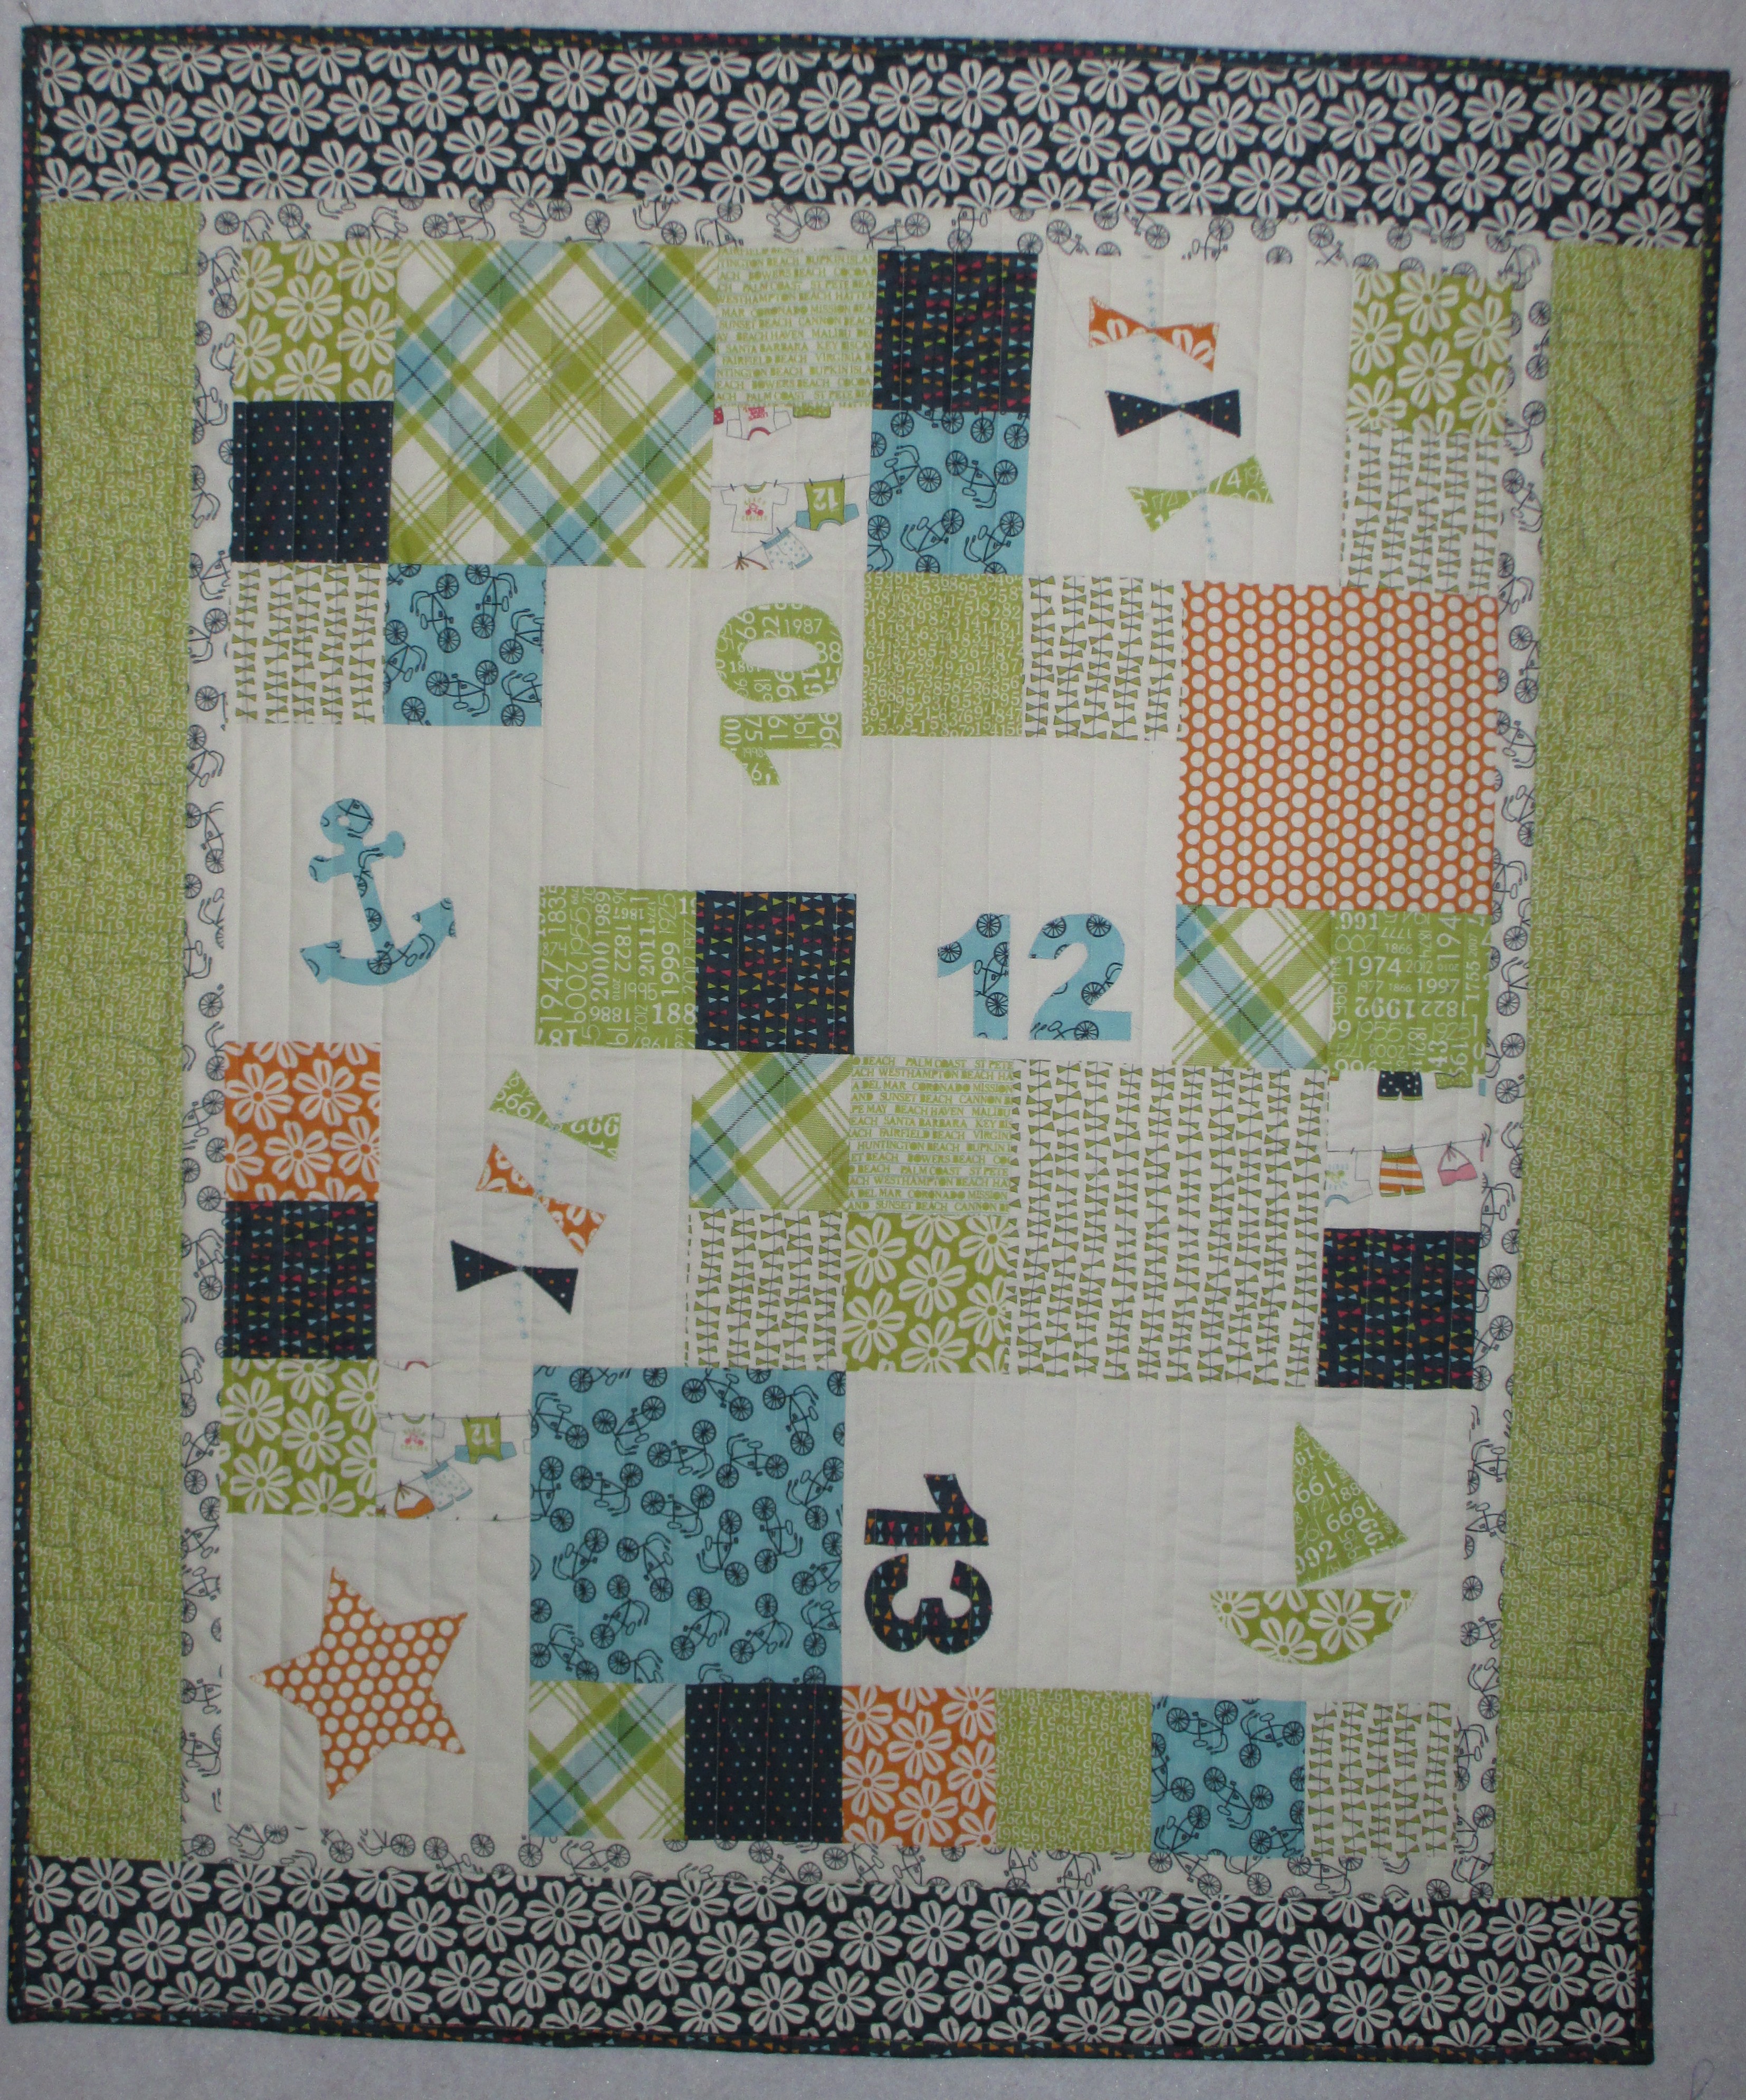
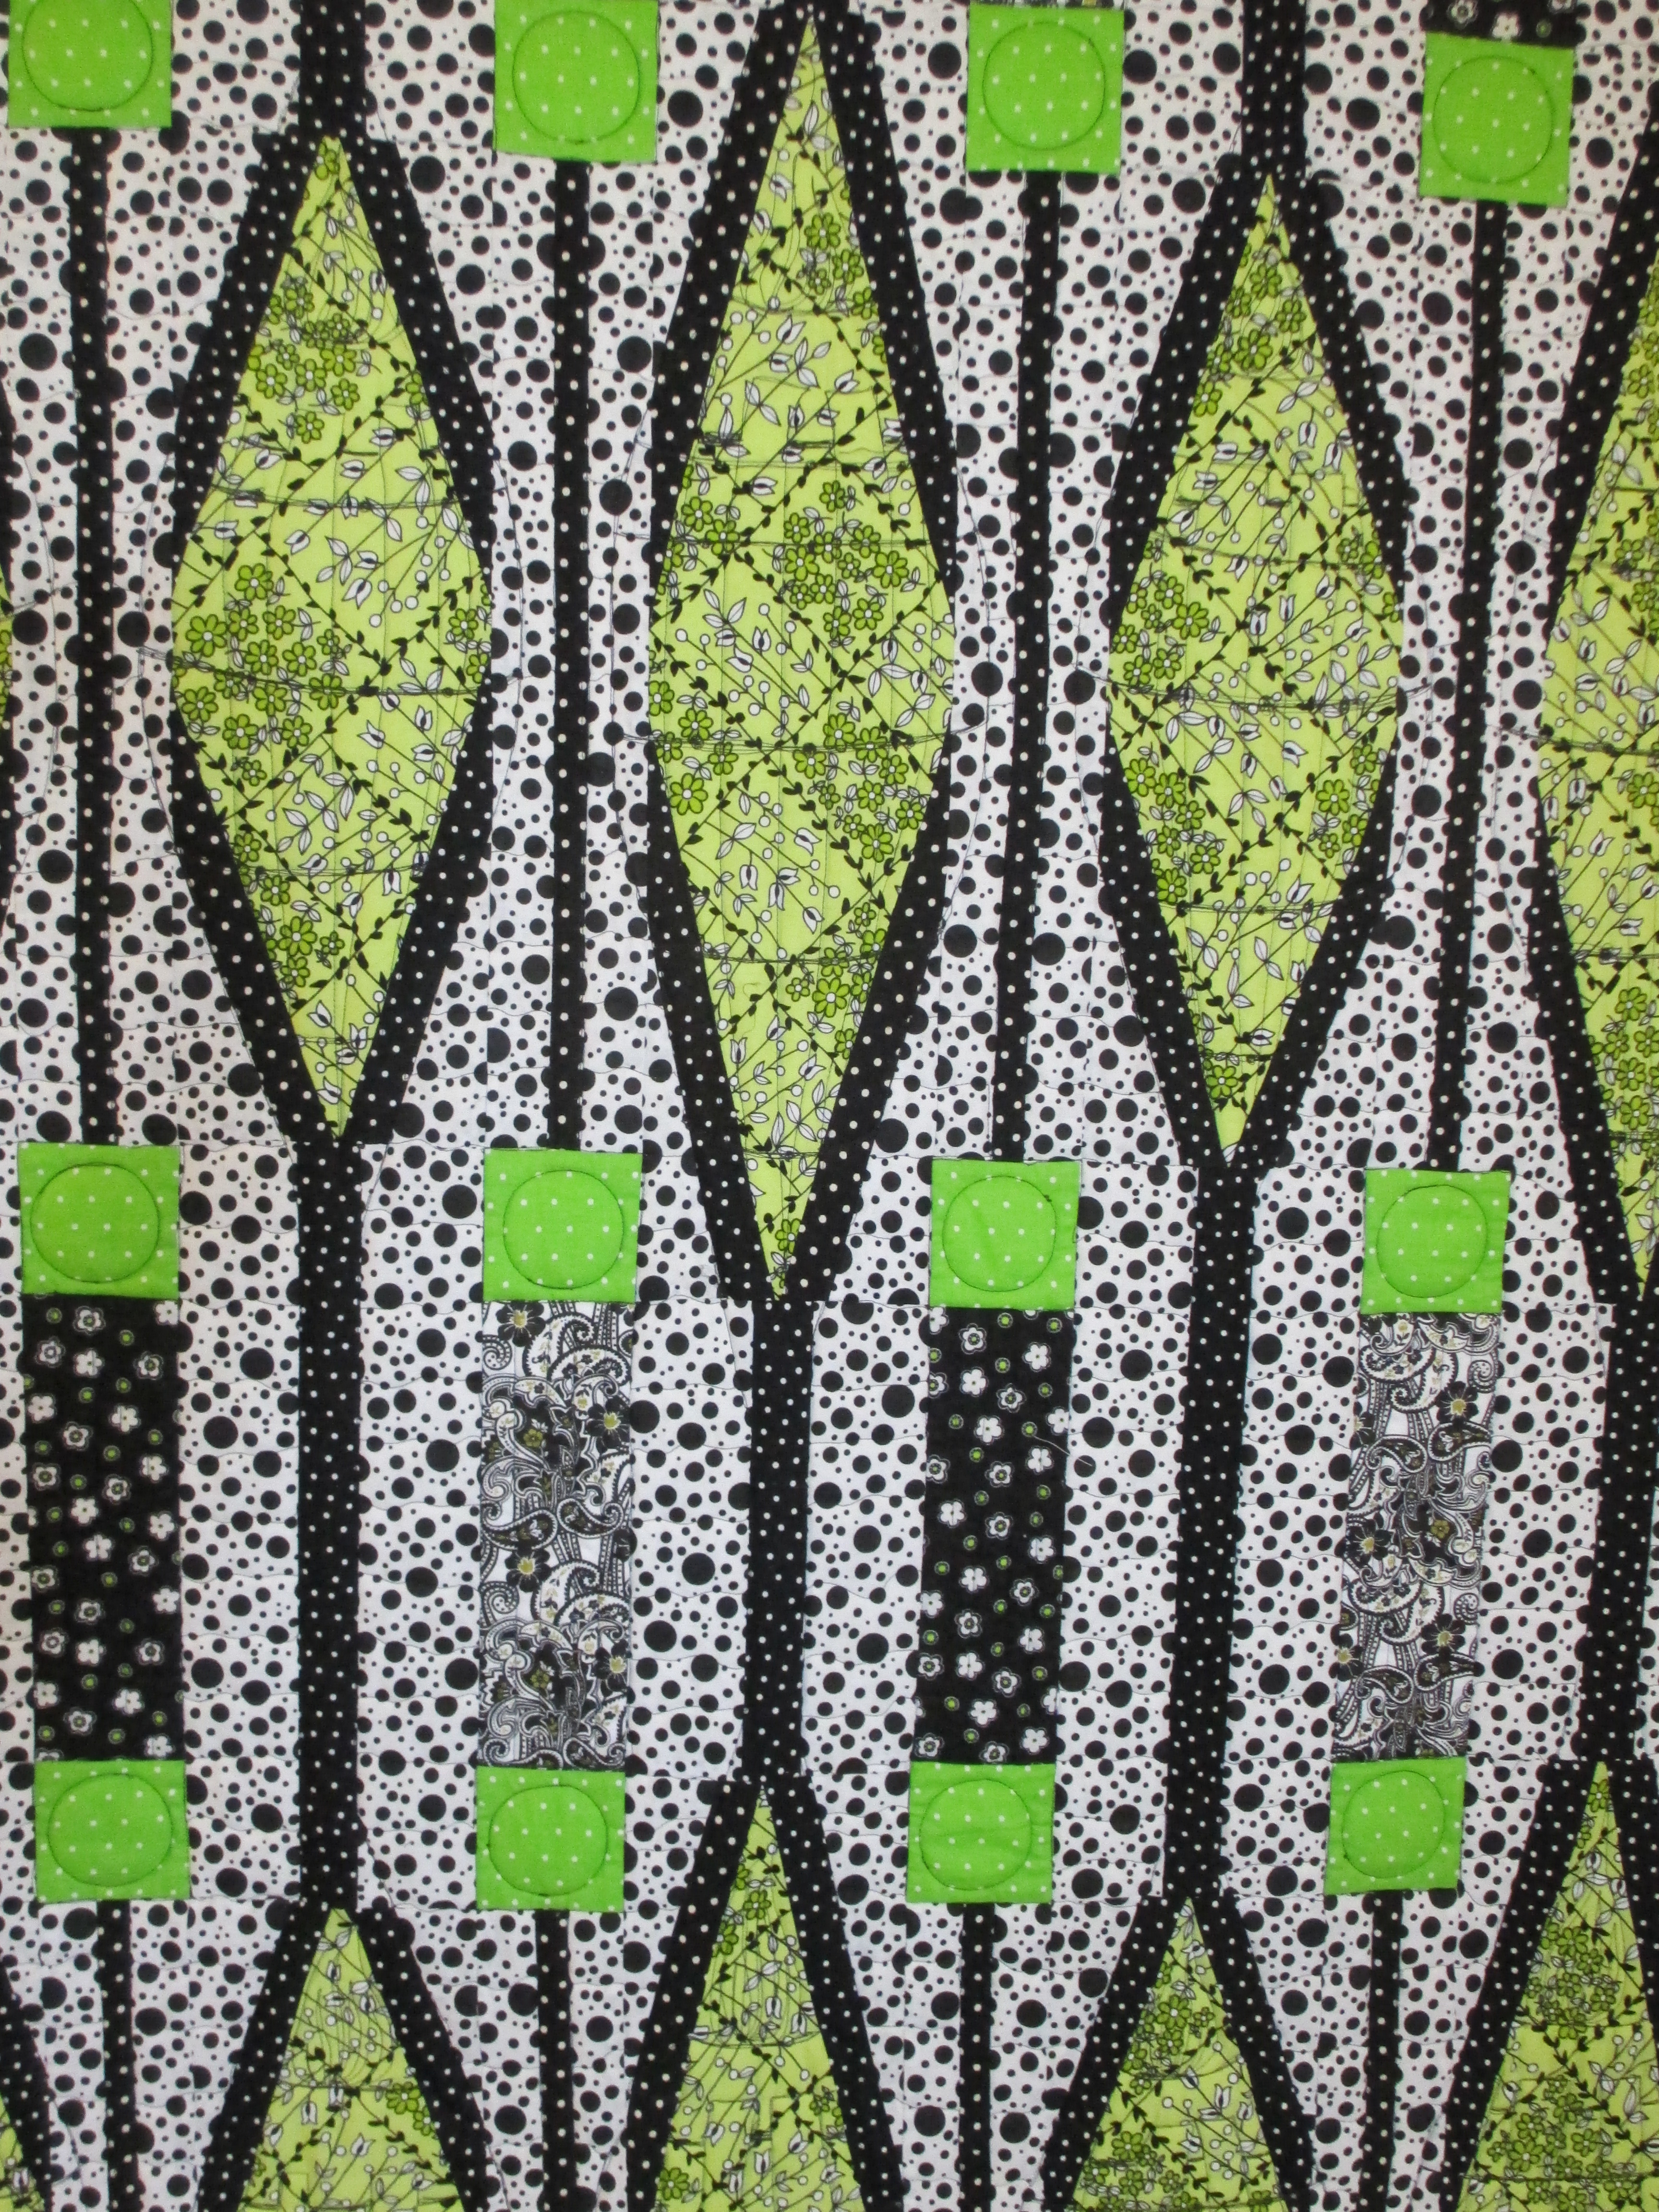
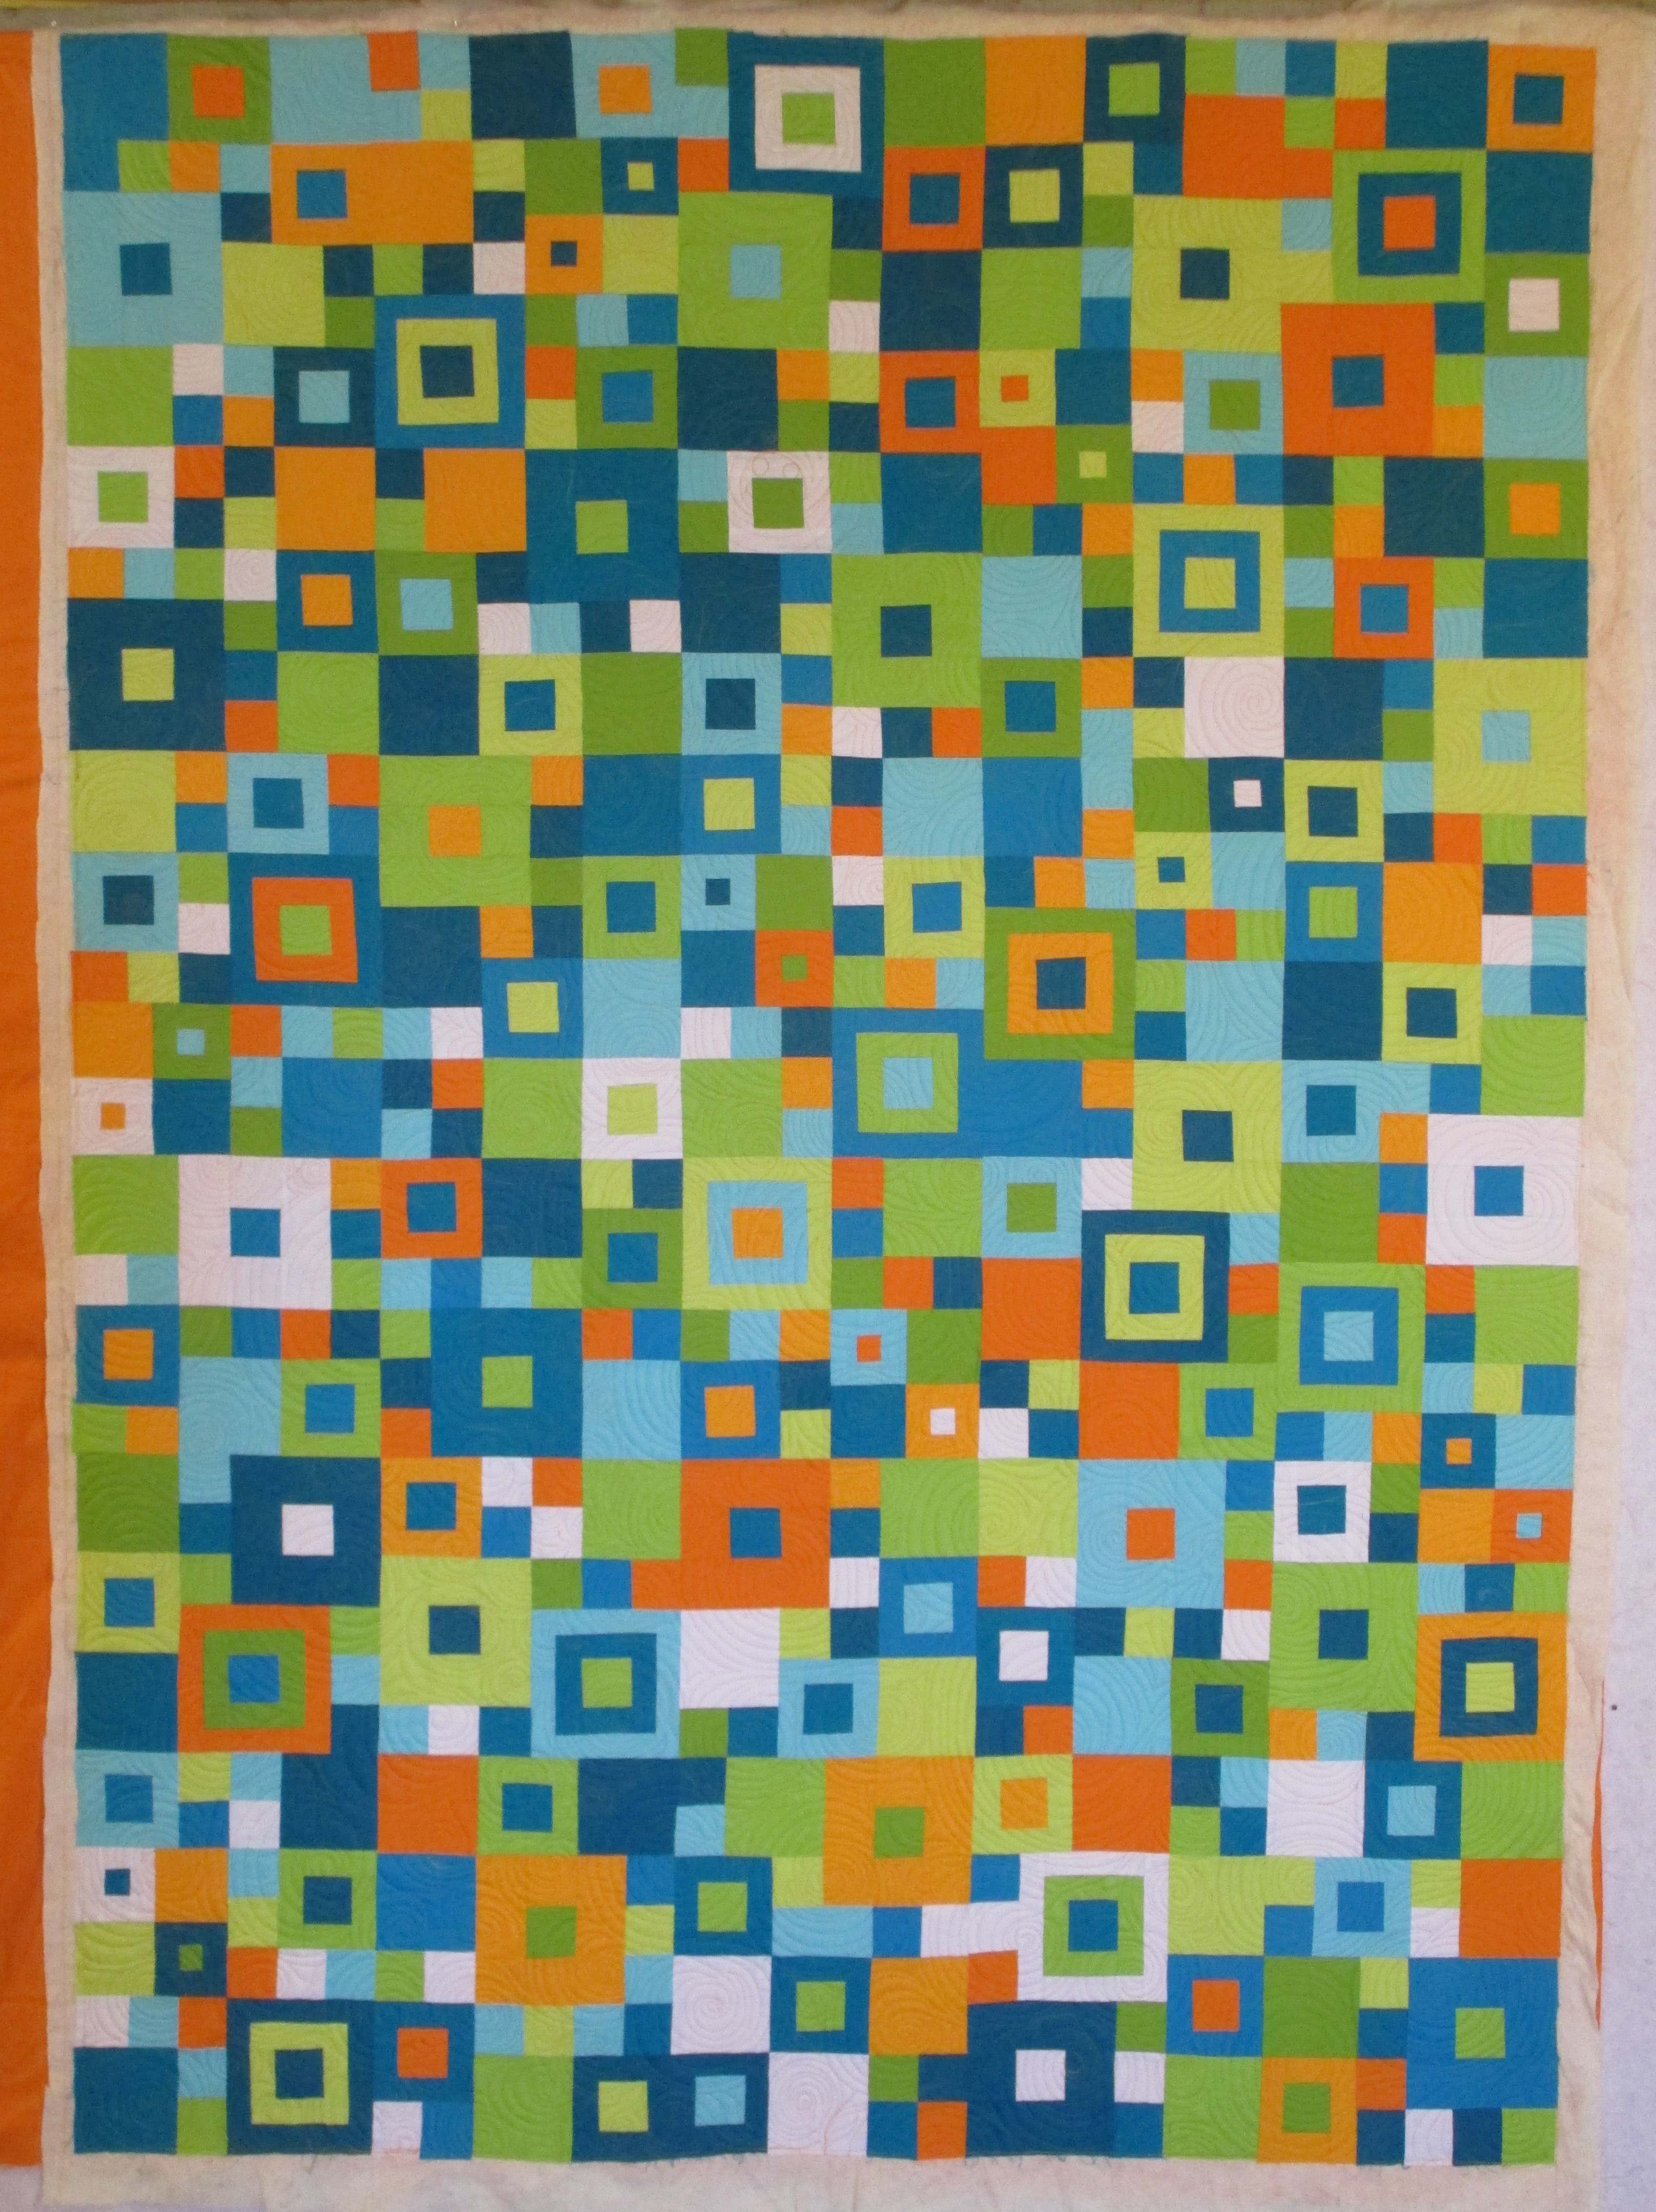
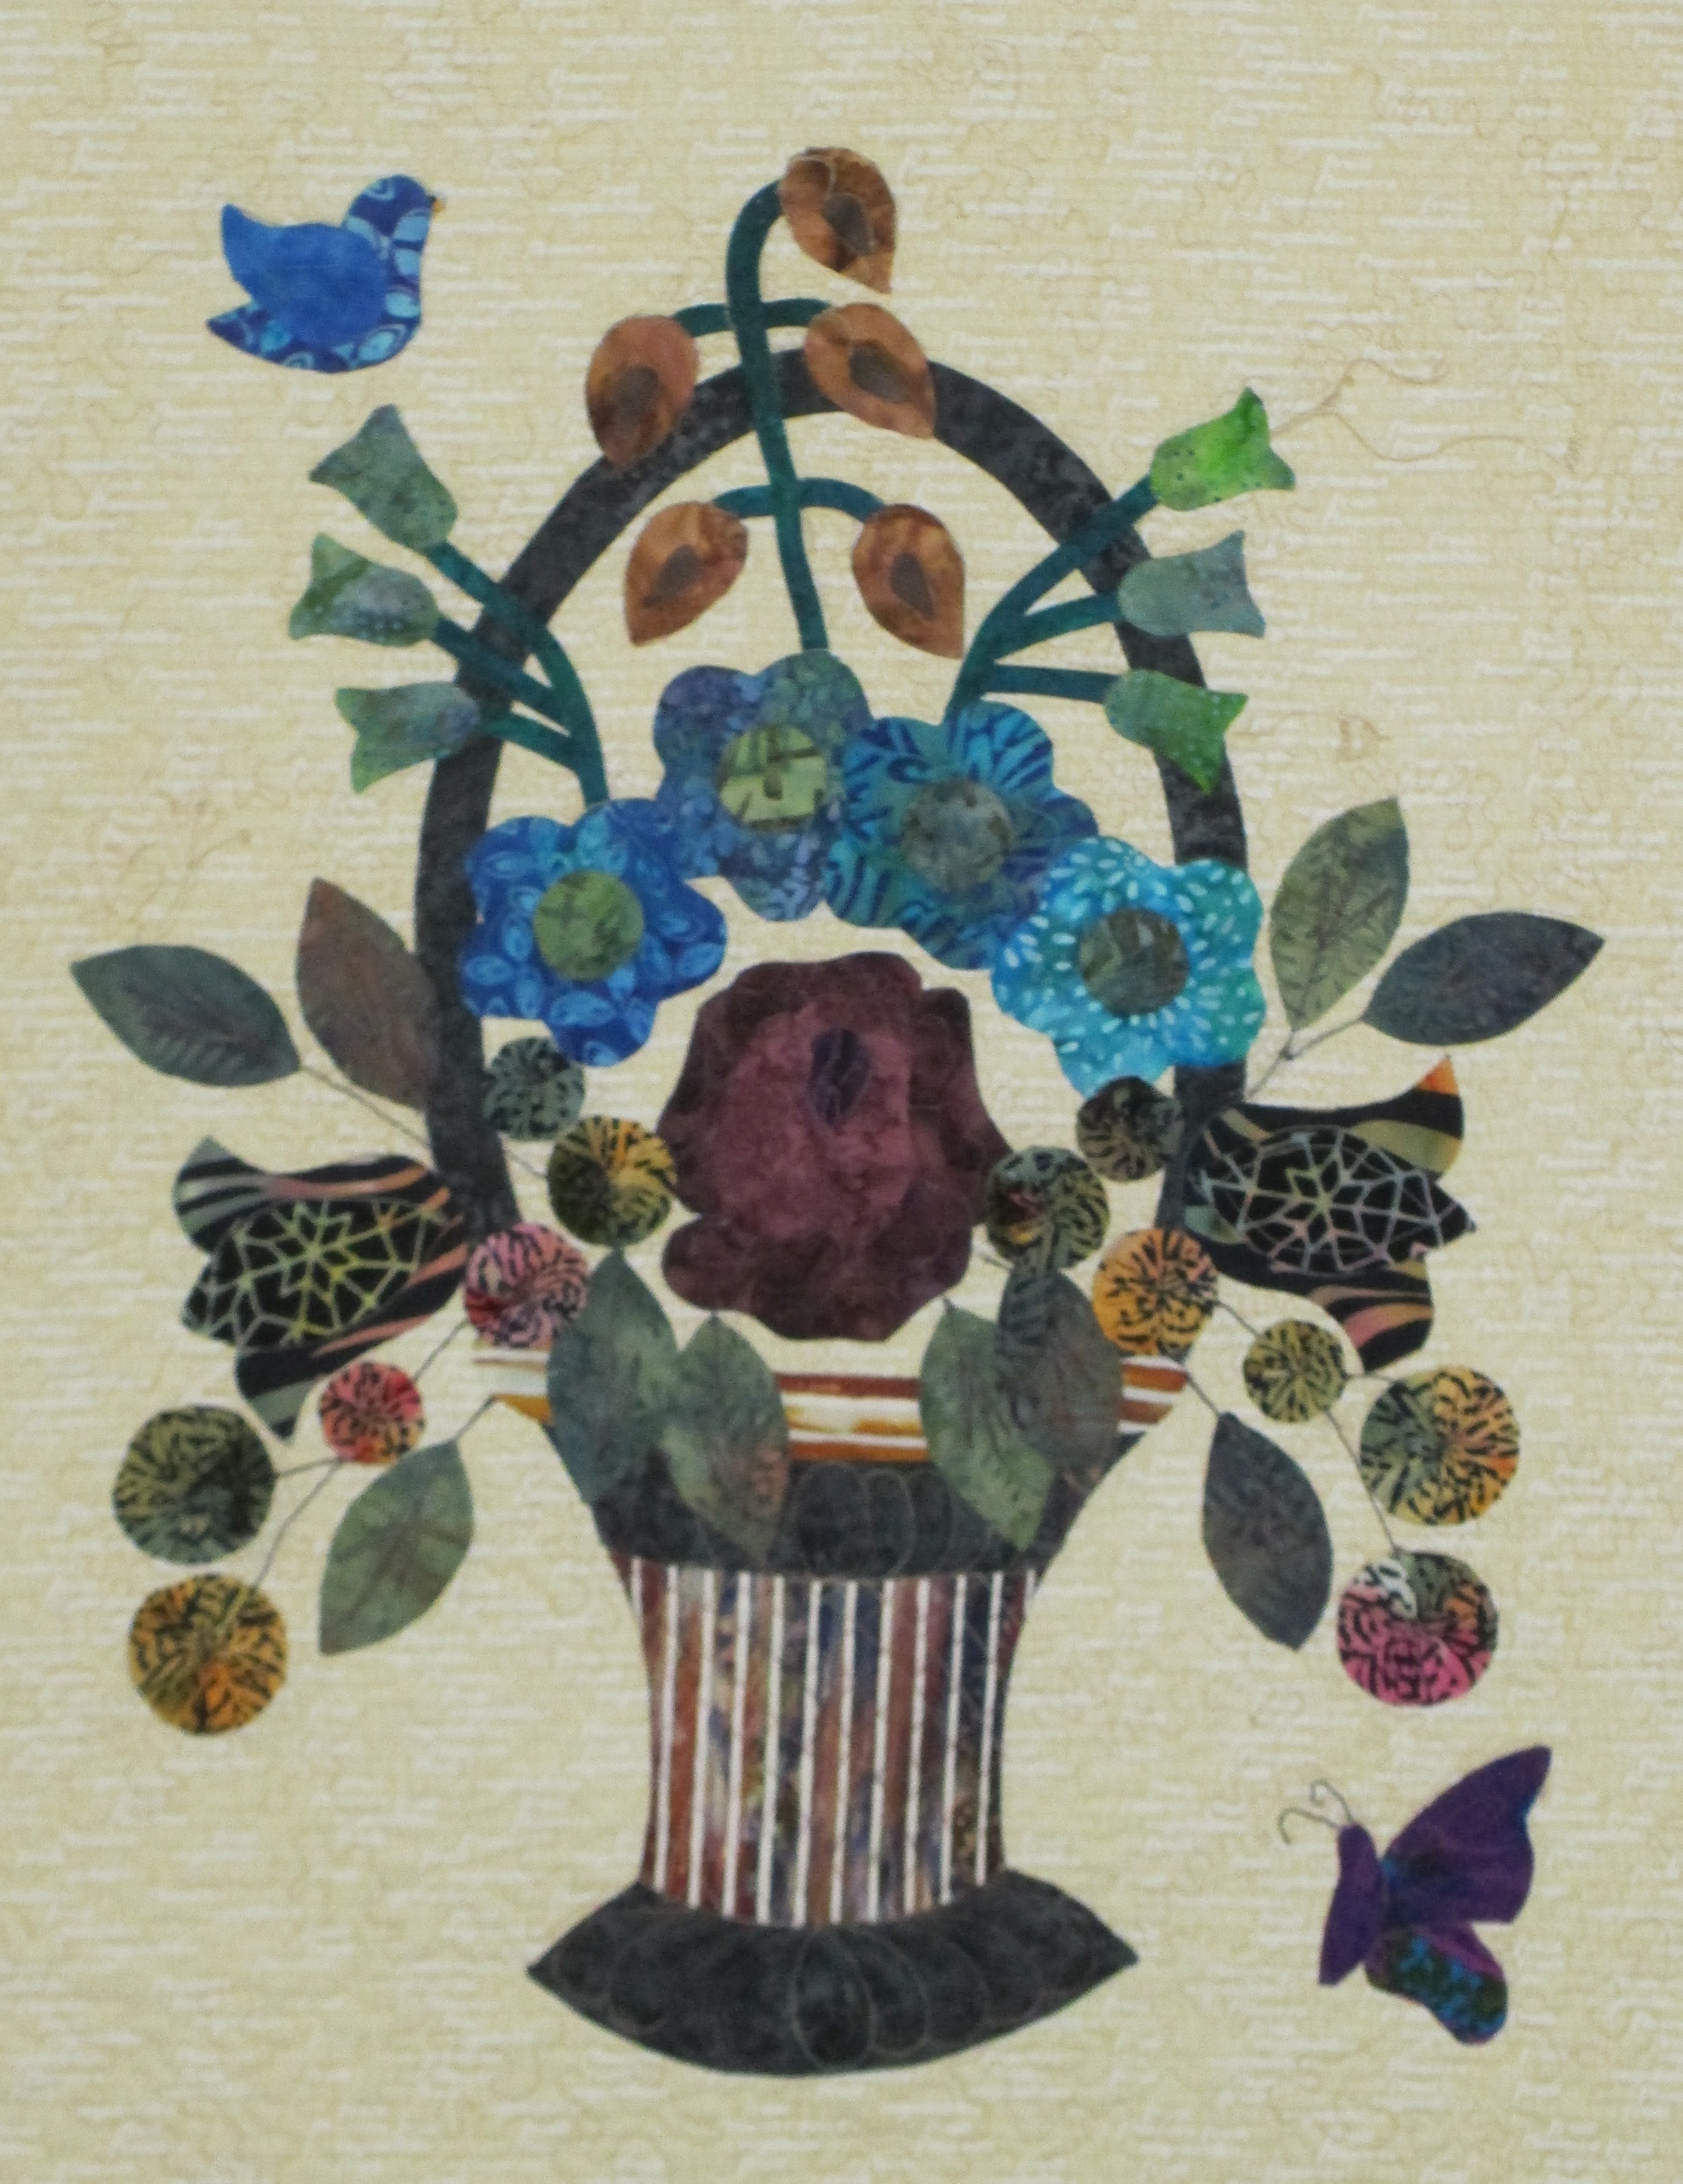
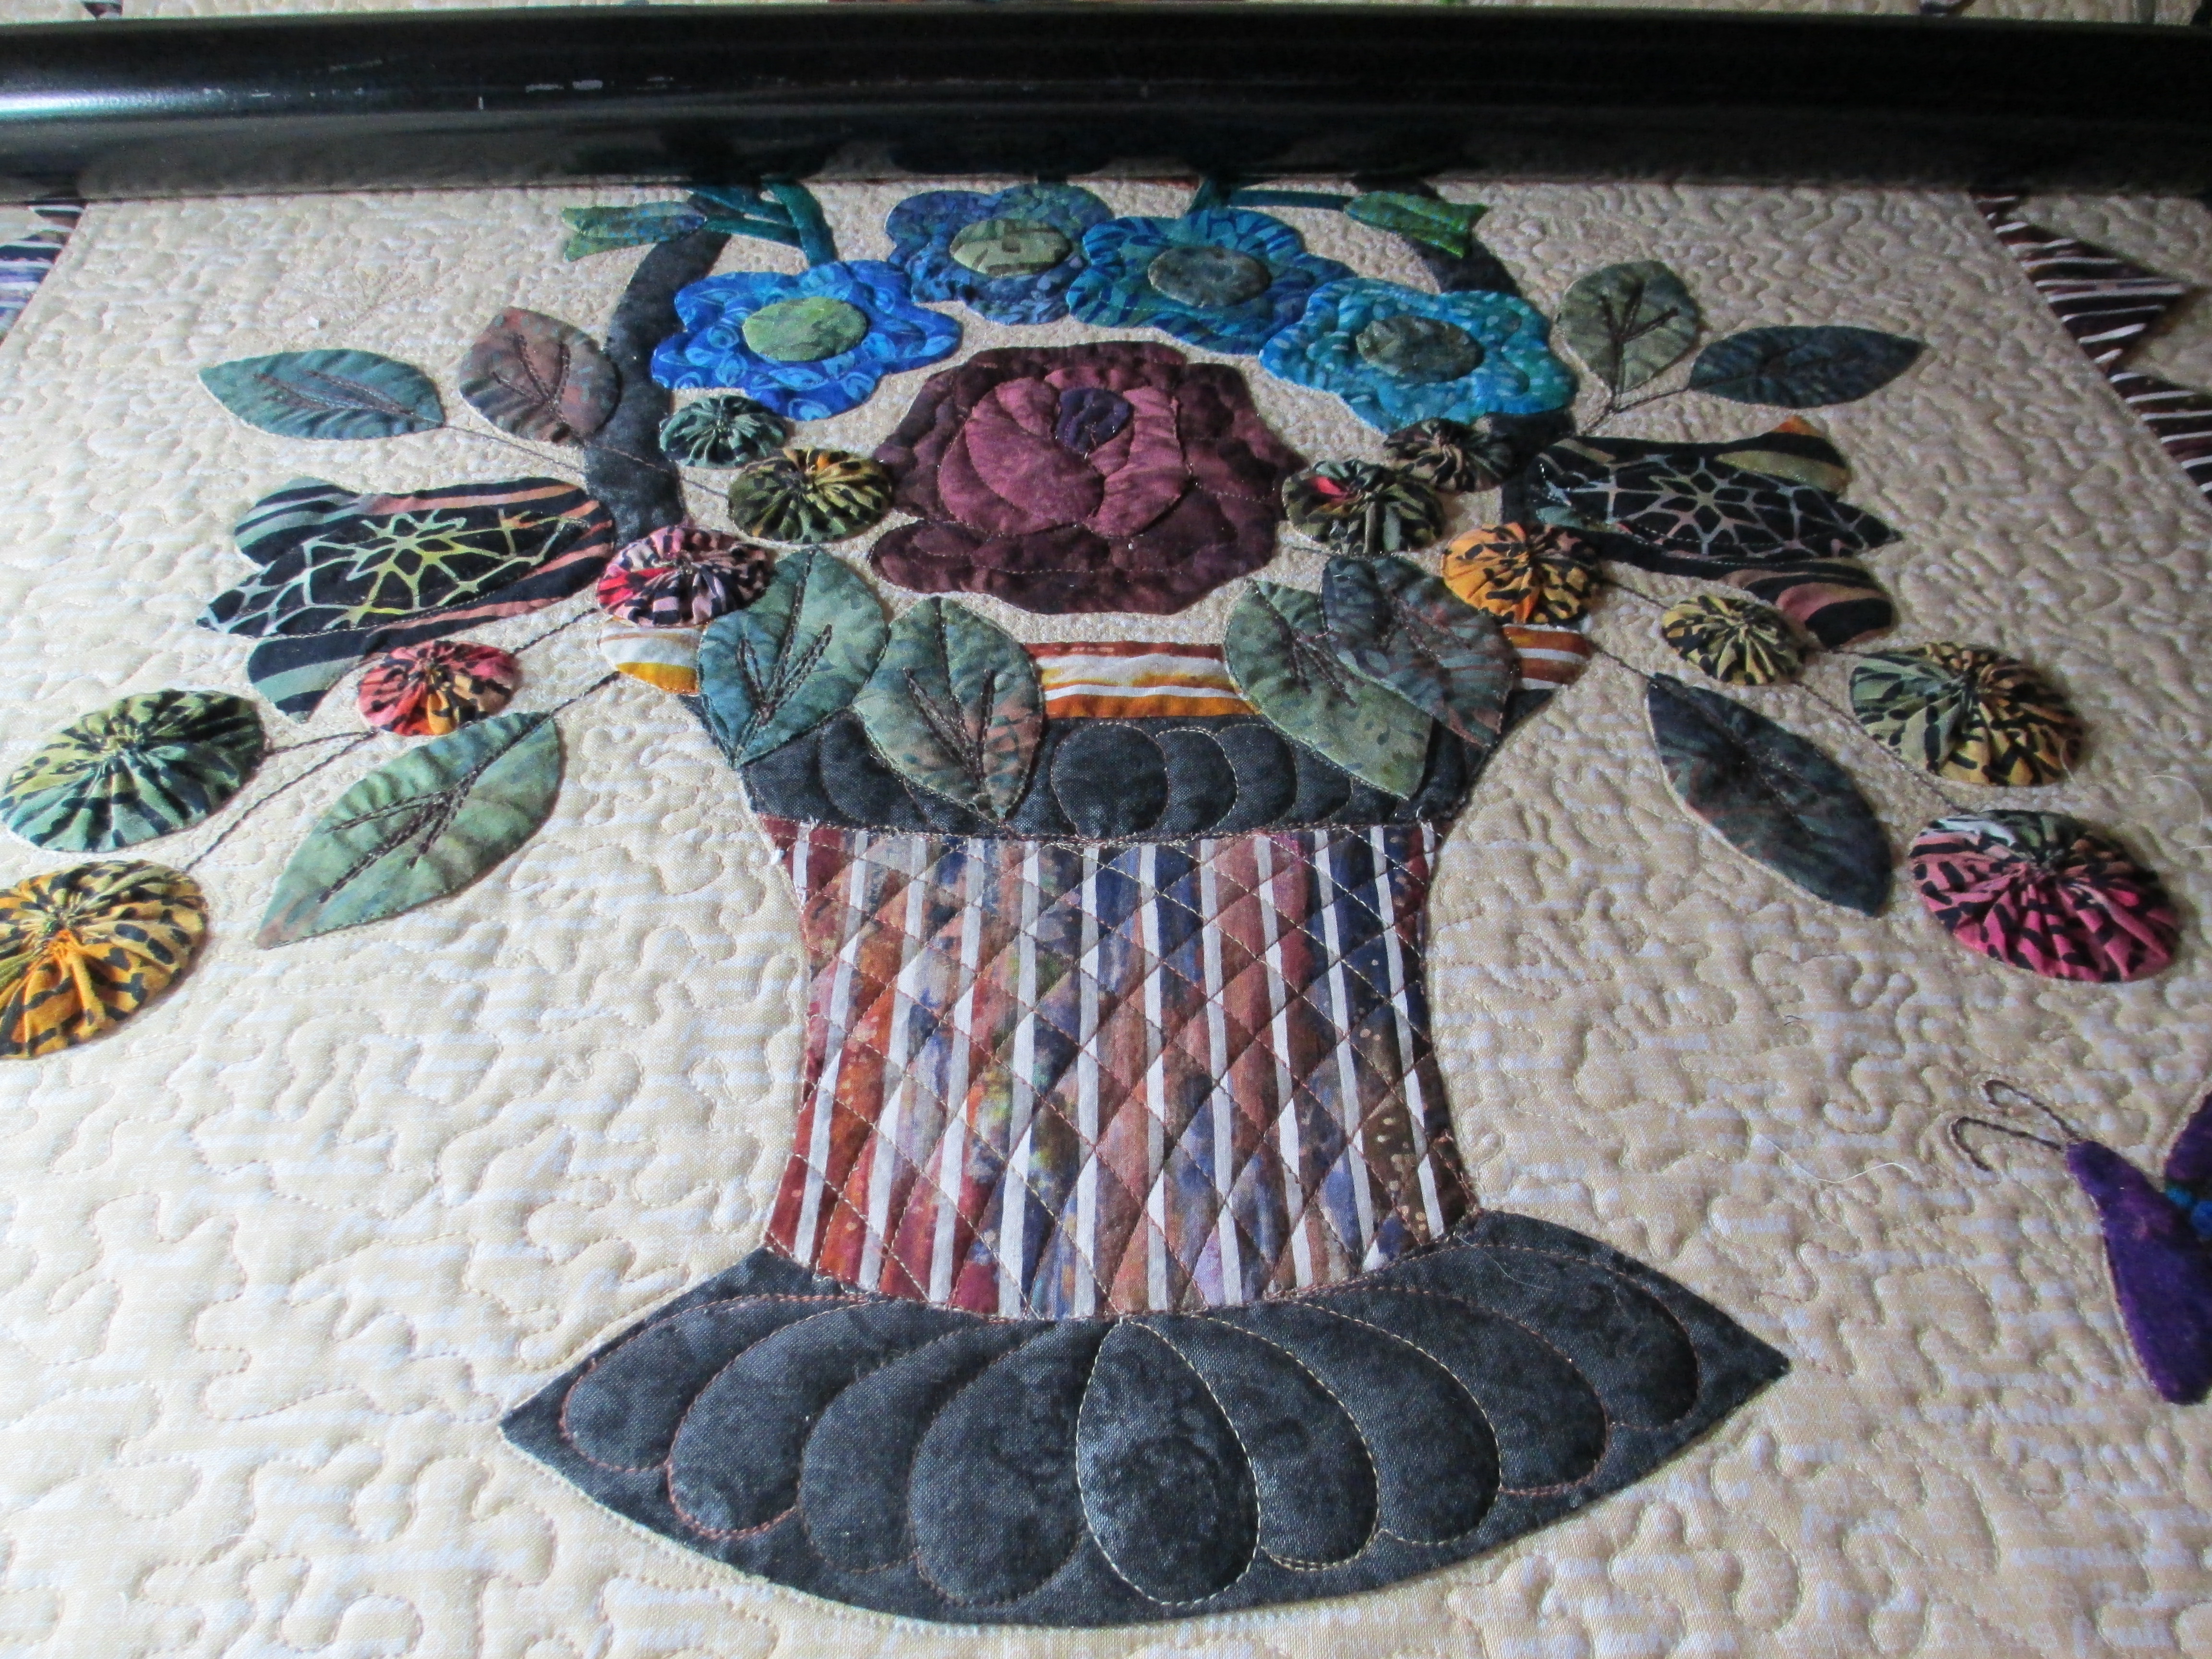
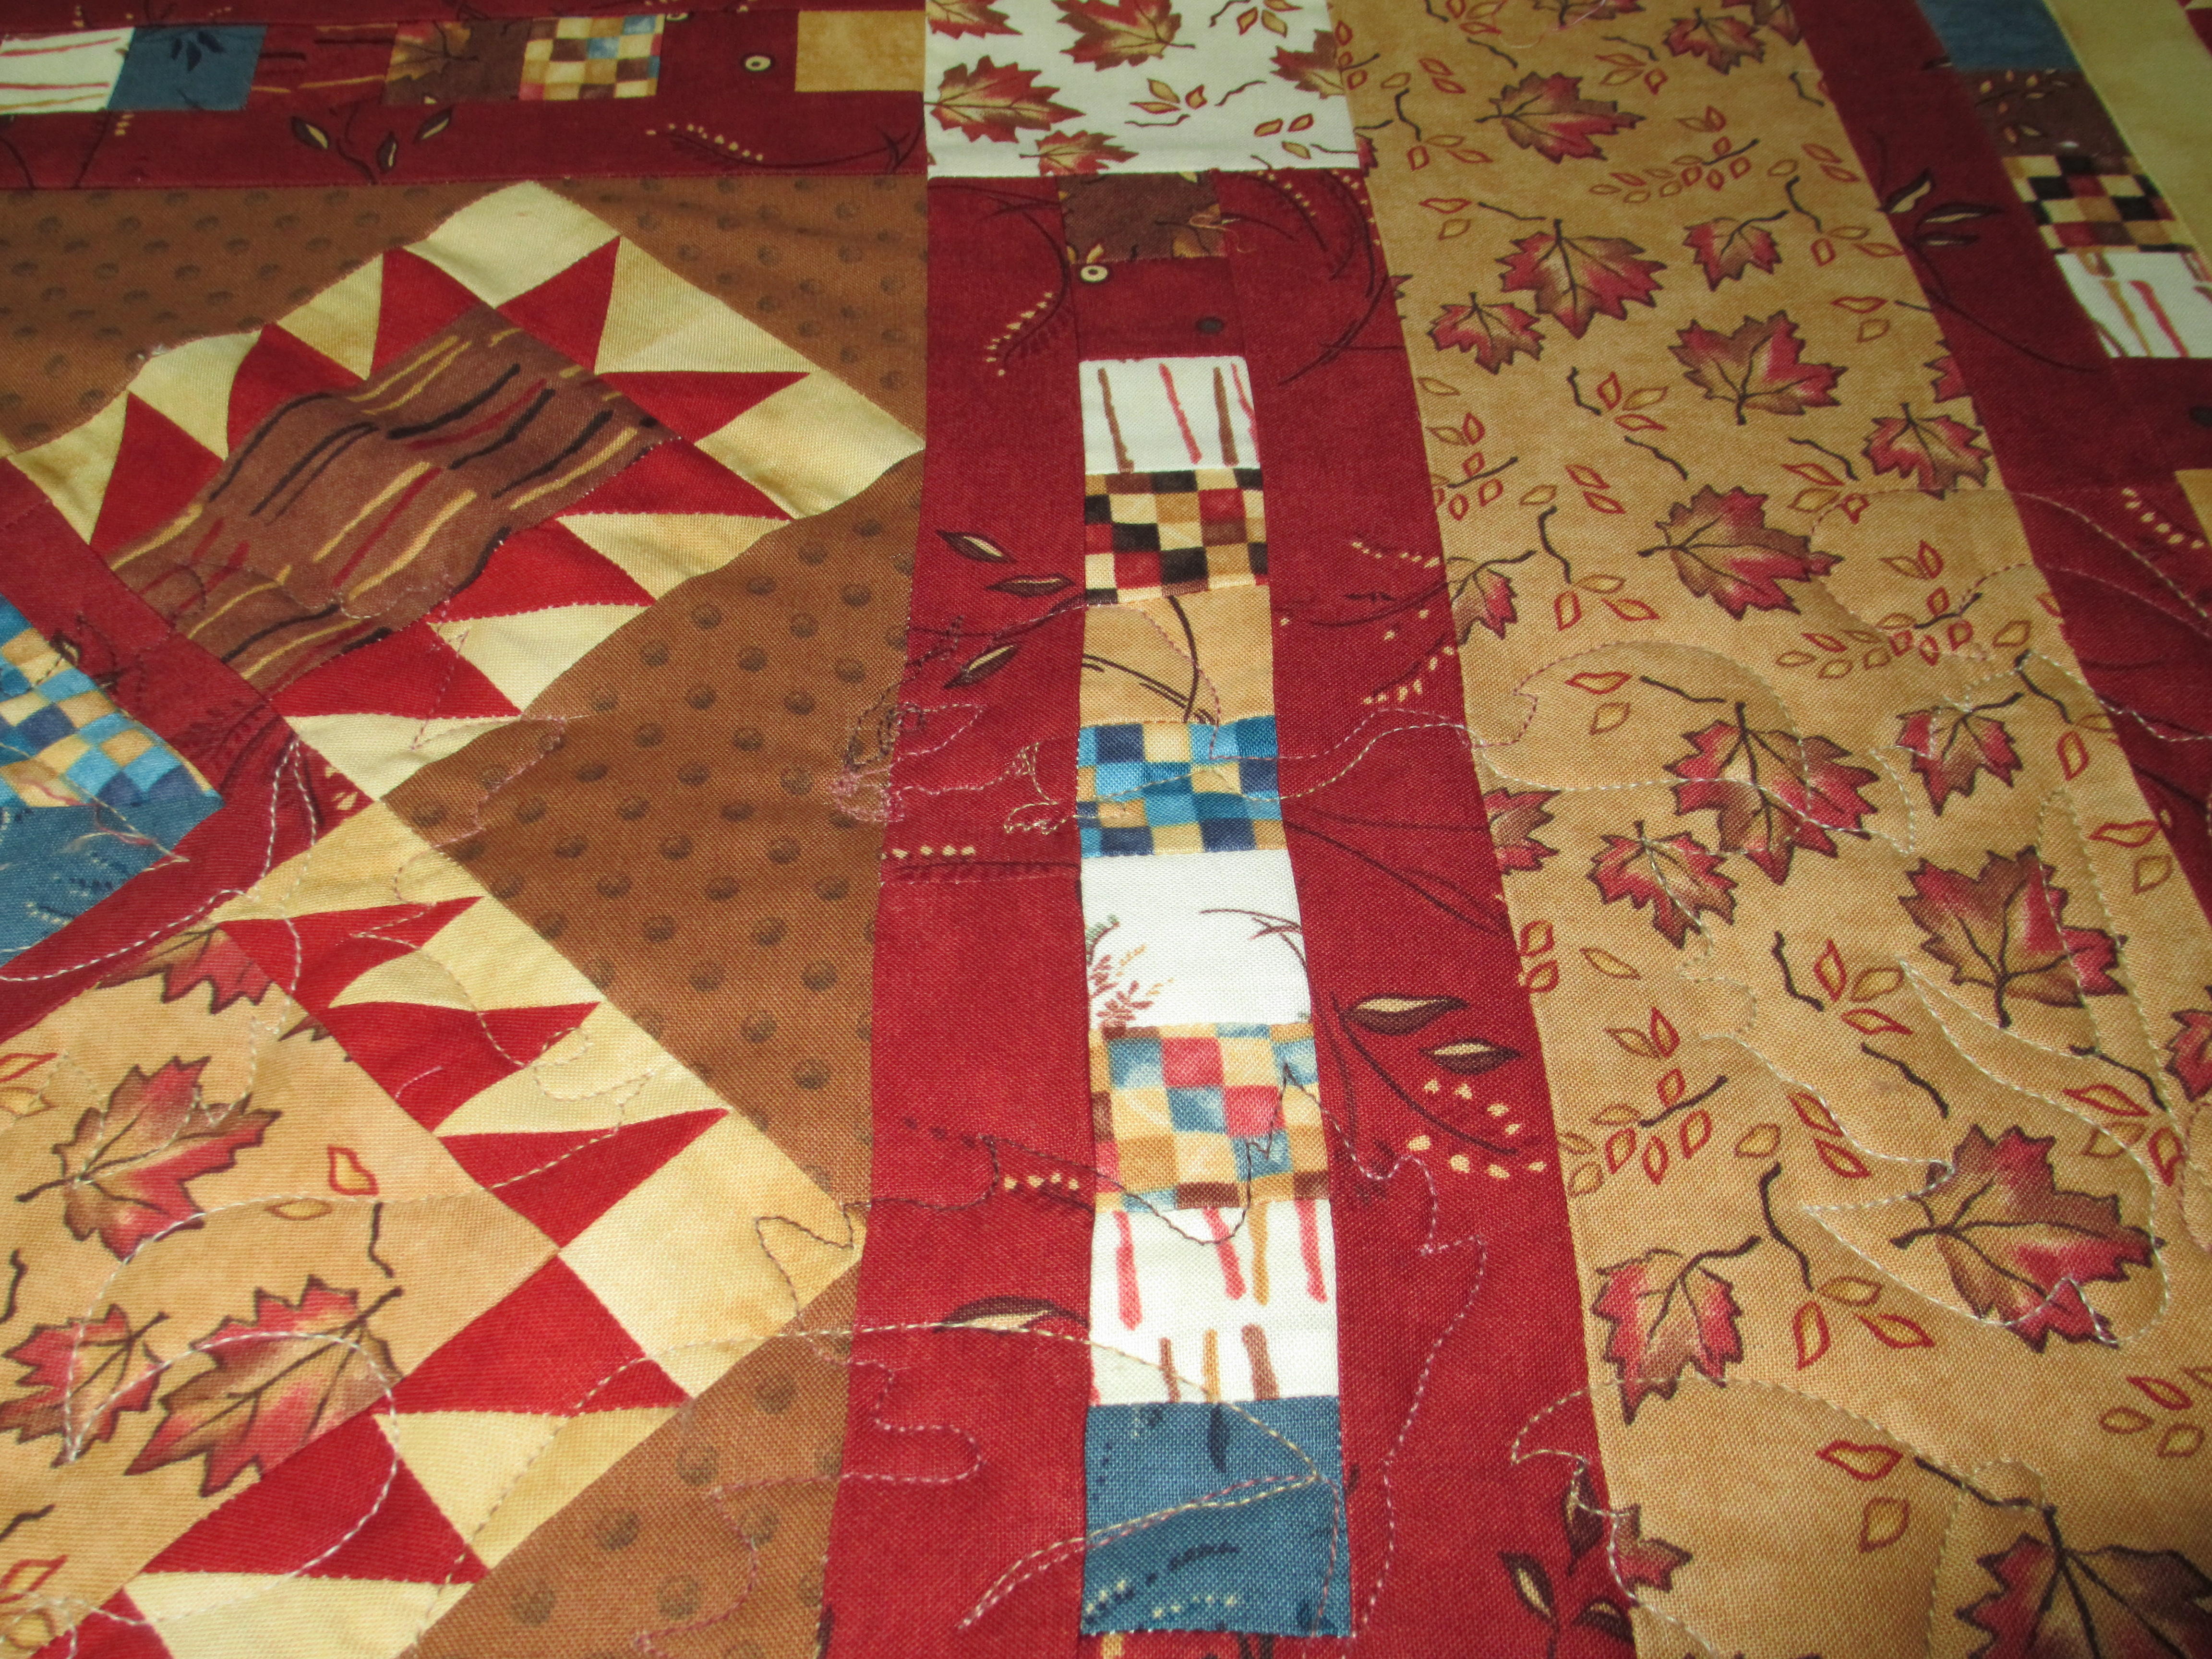
This next quilt is Wilma’s.  I don’t know how she does it, but I swear, she’s been piecing at least one quilt a month.  She’s keeping me busy, and I am perfectly okay with that!  😉  Here’s a full shot of her quilt.

Wilma's quilt 5 009

She wanted maple leaves quilted into it to match the fabric, so she chose a pantograph that had the maple leaves for the body of her quilt and piano keys for the border.  The pantograph I used was Maple Breezes by MeadowLyon Designs.  You can find the pattern here.  Angela Meadows and Judy Lyon are a team of quilters in business together.  As far as I know, Angela does the quilting, and with Angela’s input, Judy designs the pantographs.  If you’ve used their pantographs or seen their pantographs, you know they have a wide variety of designs.  I don’t know where Judy comes up with all her designs!

Wilma's quilt 5 017

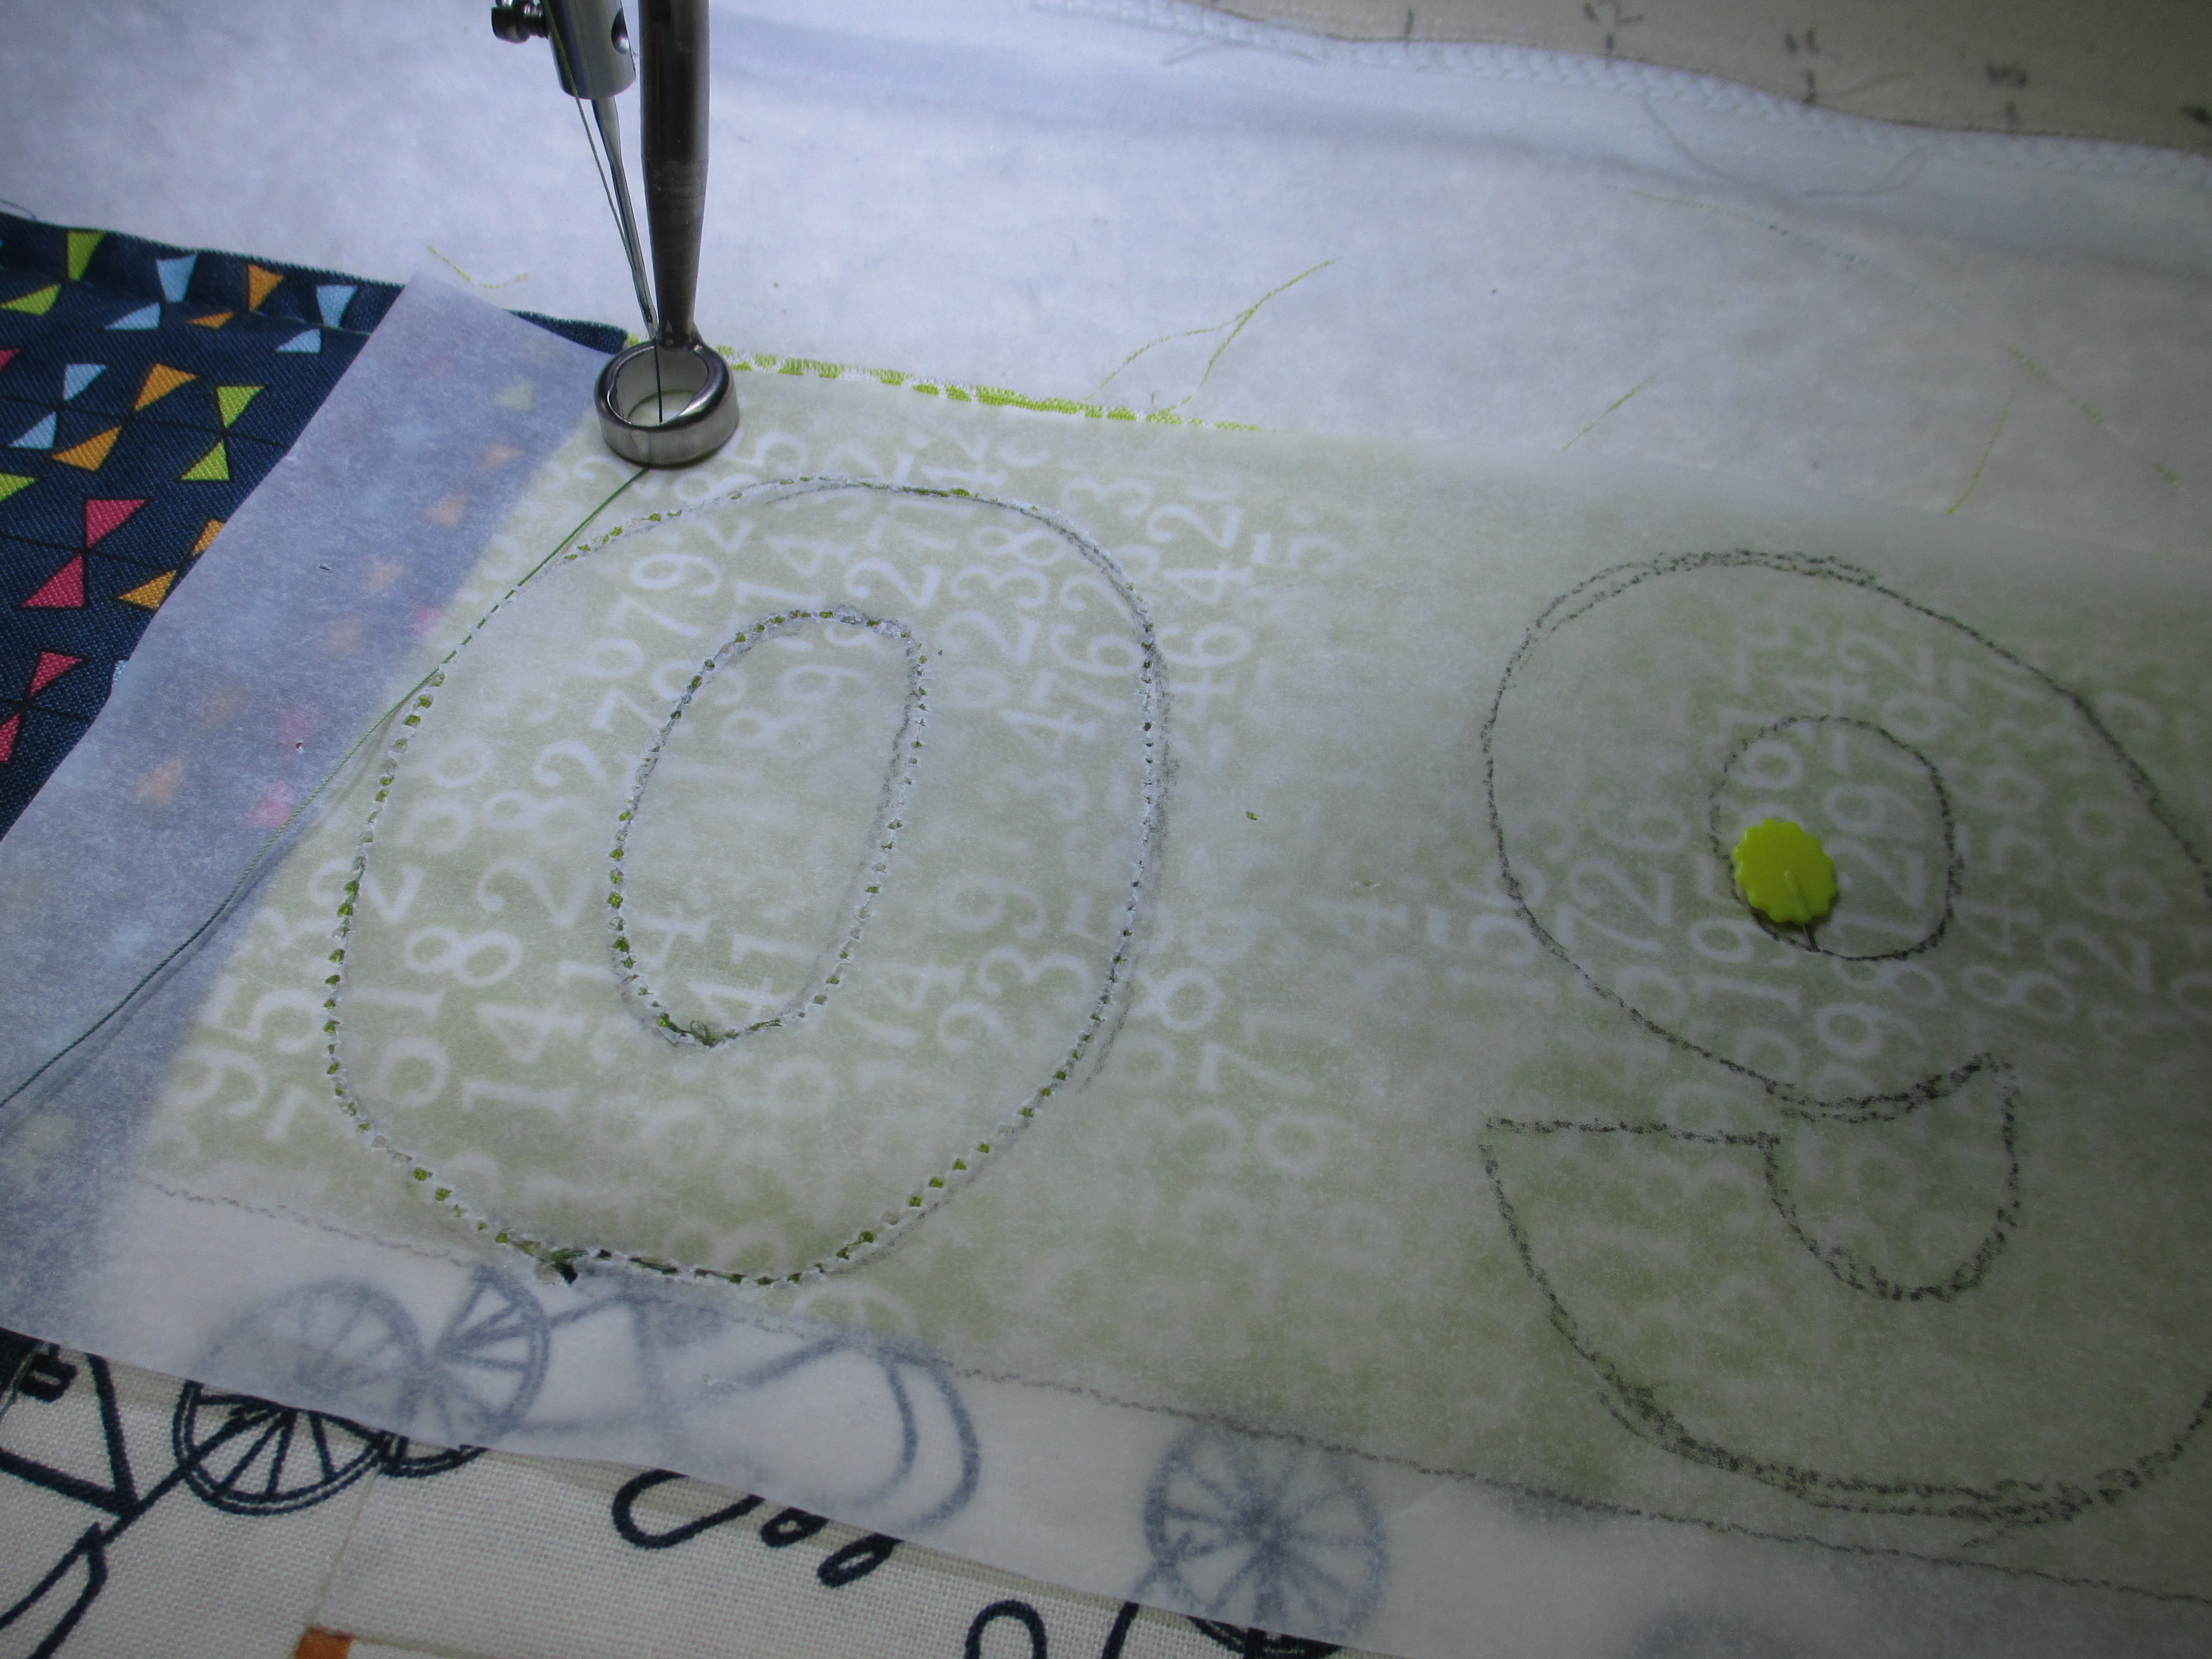
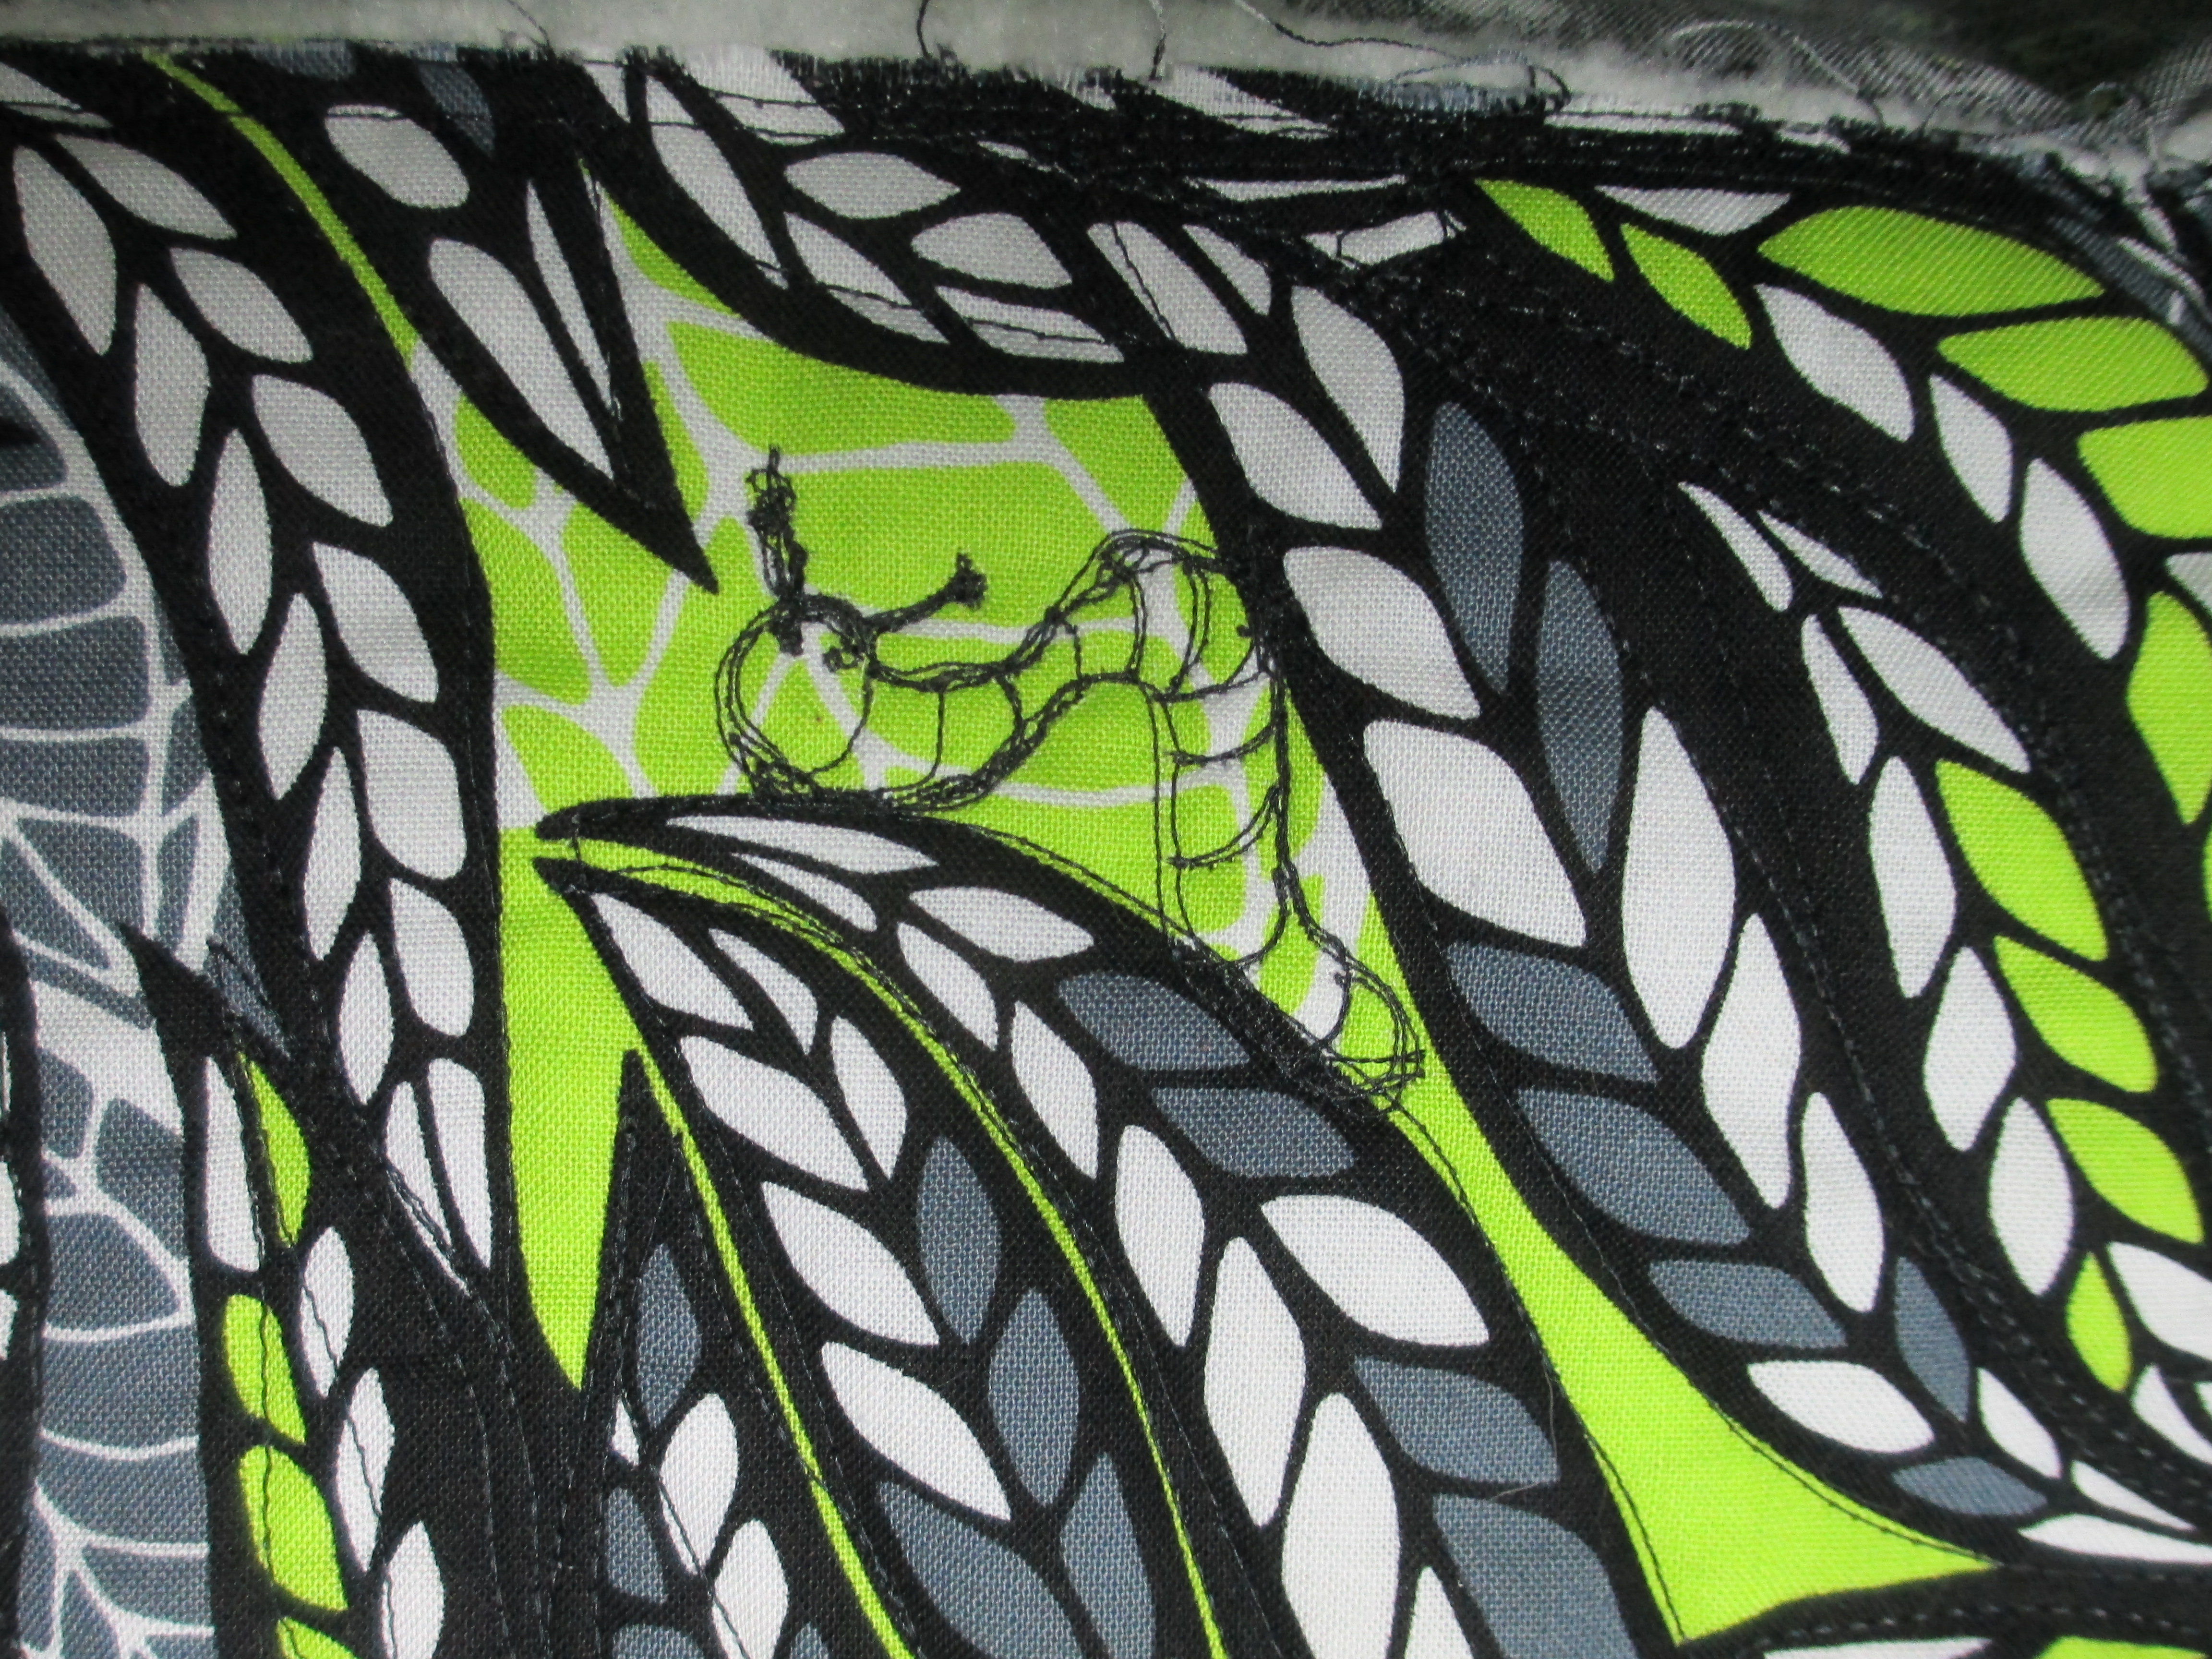
Now the problem with this (for my evil twin) was how on earth I would be able to add surprises to a pantograph…  I couldn’t add a surprise to the border, because it was all piano keys; straight lines.  The good thing about this particular pantograph is that there were some areas that had big swirls where I could put a surprise in its place.  If you’ve ever used a pantograph, you know you have to play around with the edges anyway and especially when you are almost done with the quilt and have only 1/2 of a row for a full row of pantograph.  So, you just draw lines with a dry erase marker on the plastic on top of the pantograph, so you can adapt it to fit the space you have available.  Okay, so if I can do that, I can add a surprise.  I just drew out a mouse on Vellum paper to be eating within all those leaves and taped it to the spot where I wanted it to go.  That red dot is the laser light pointing where to follow the lines.

Wilma's quilt 5 001

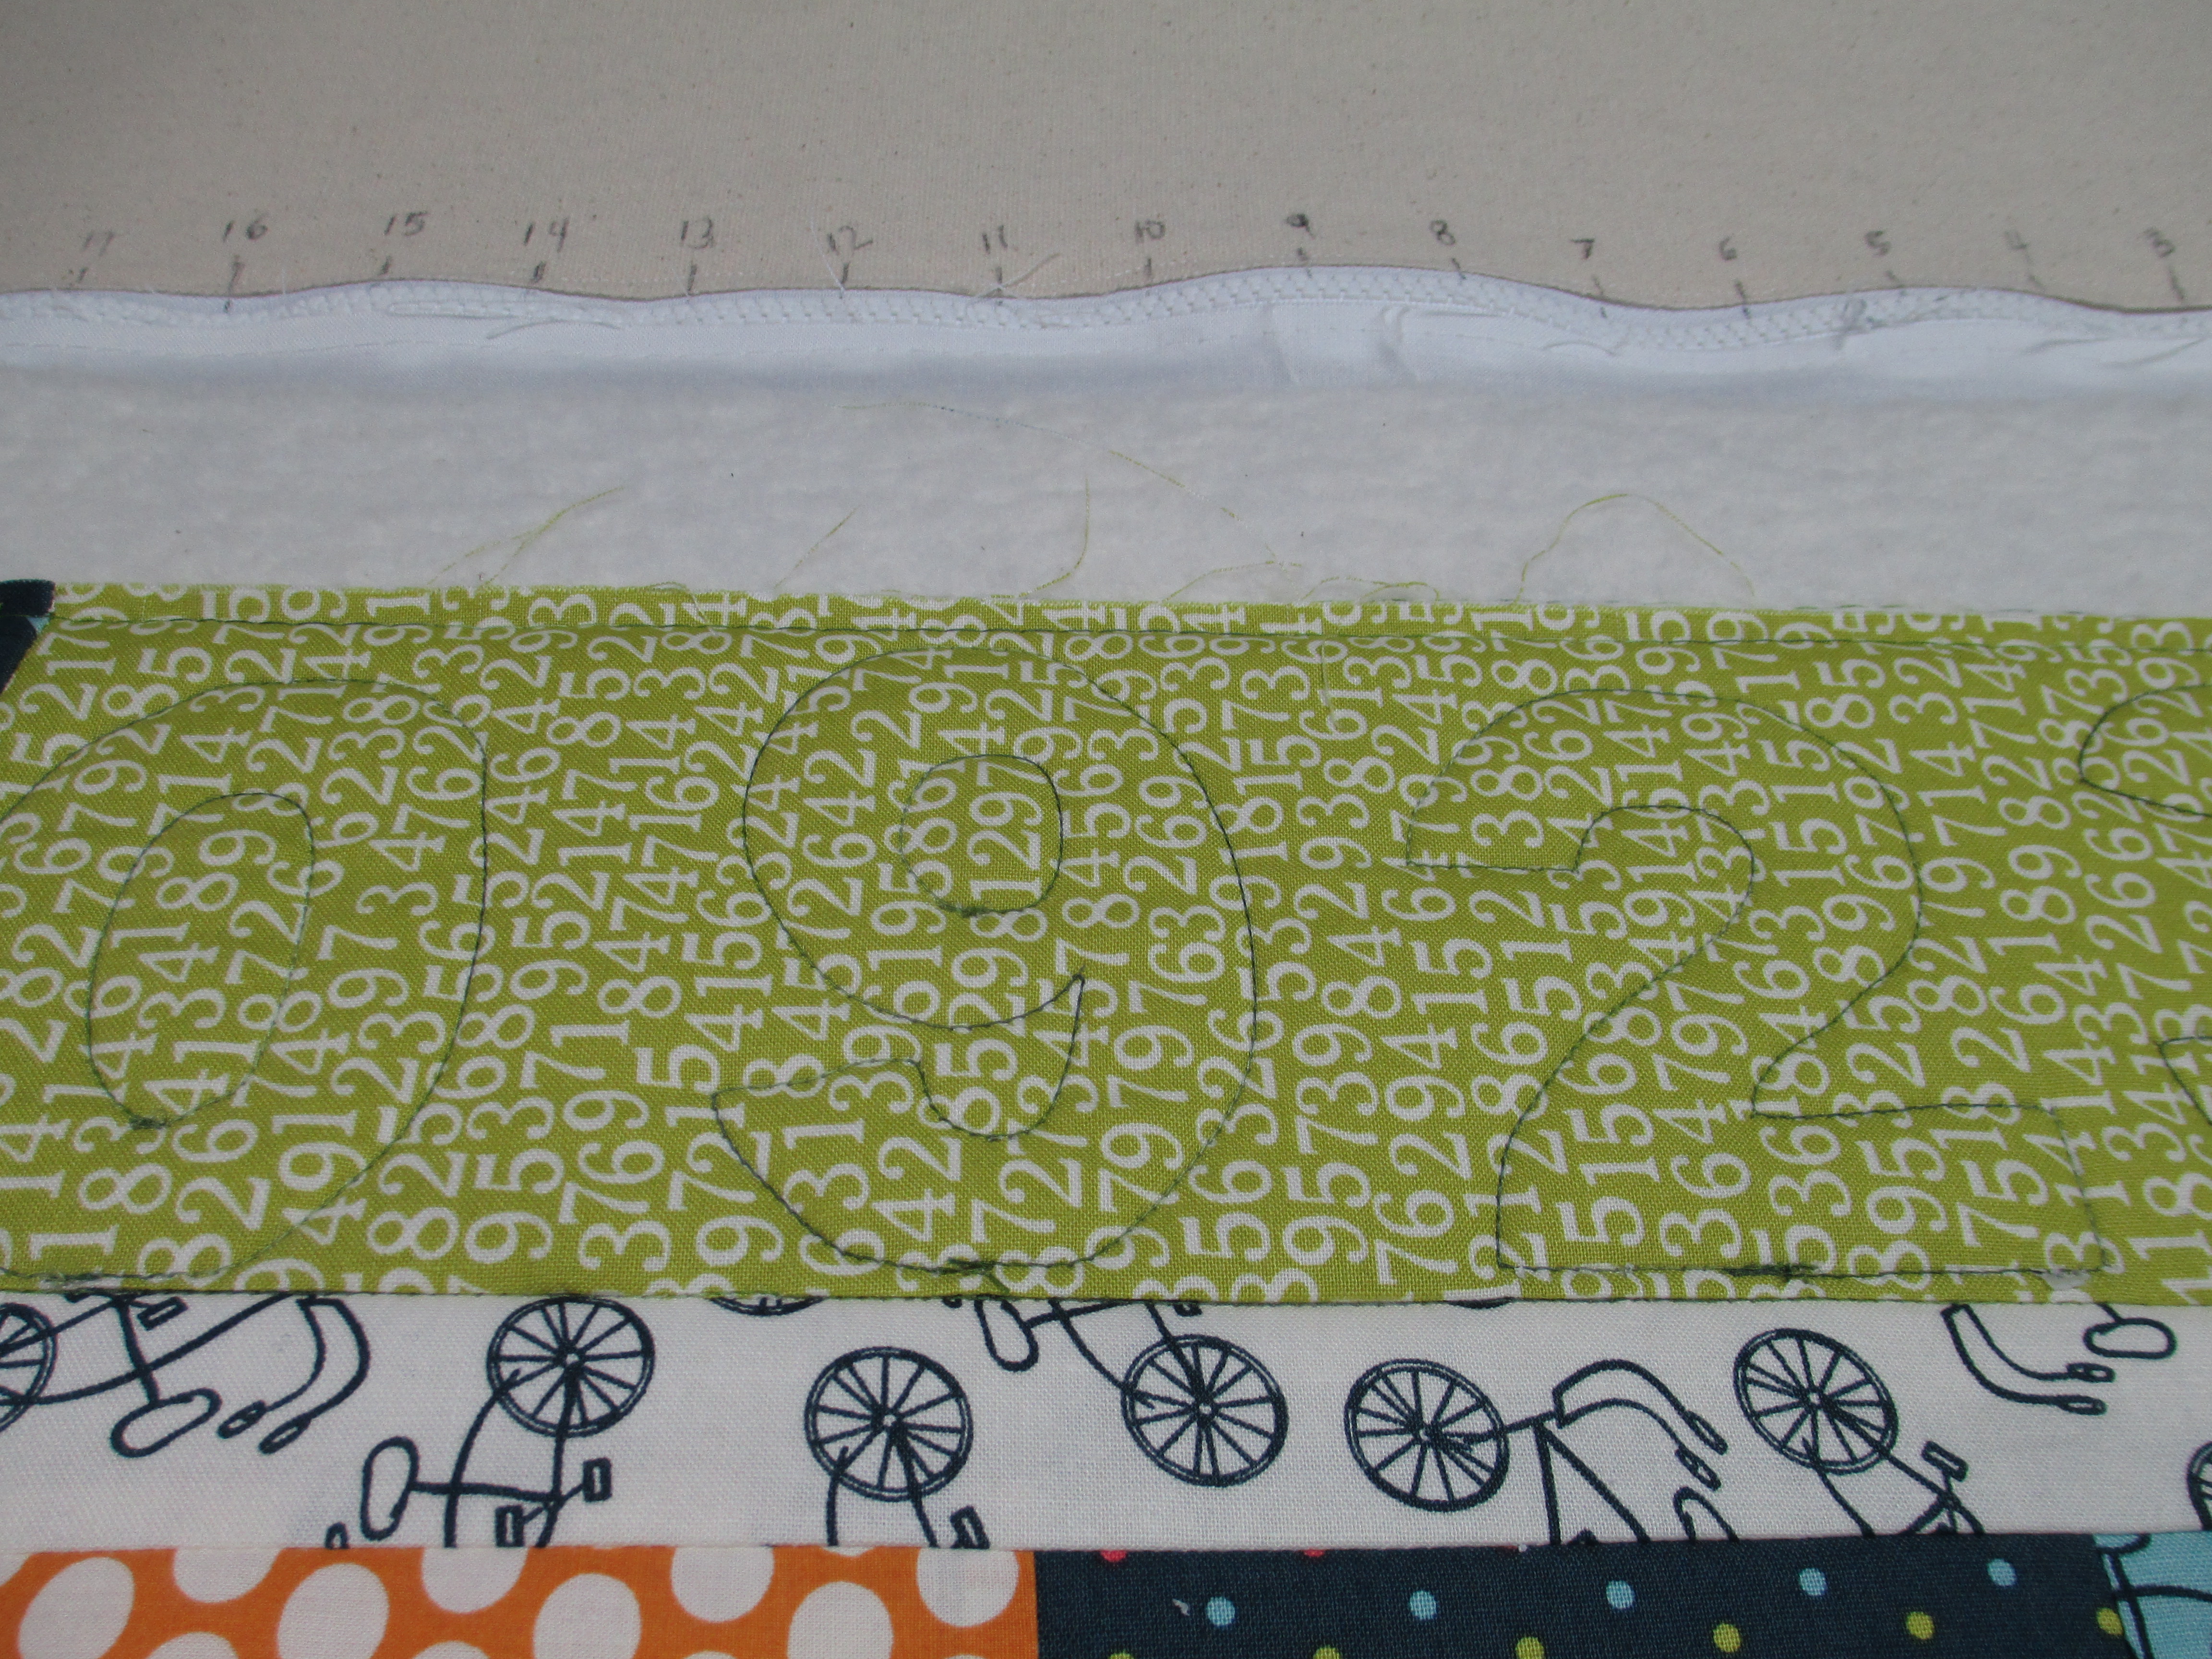
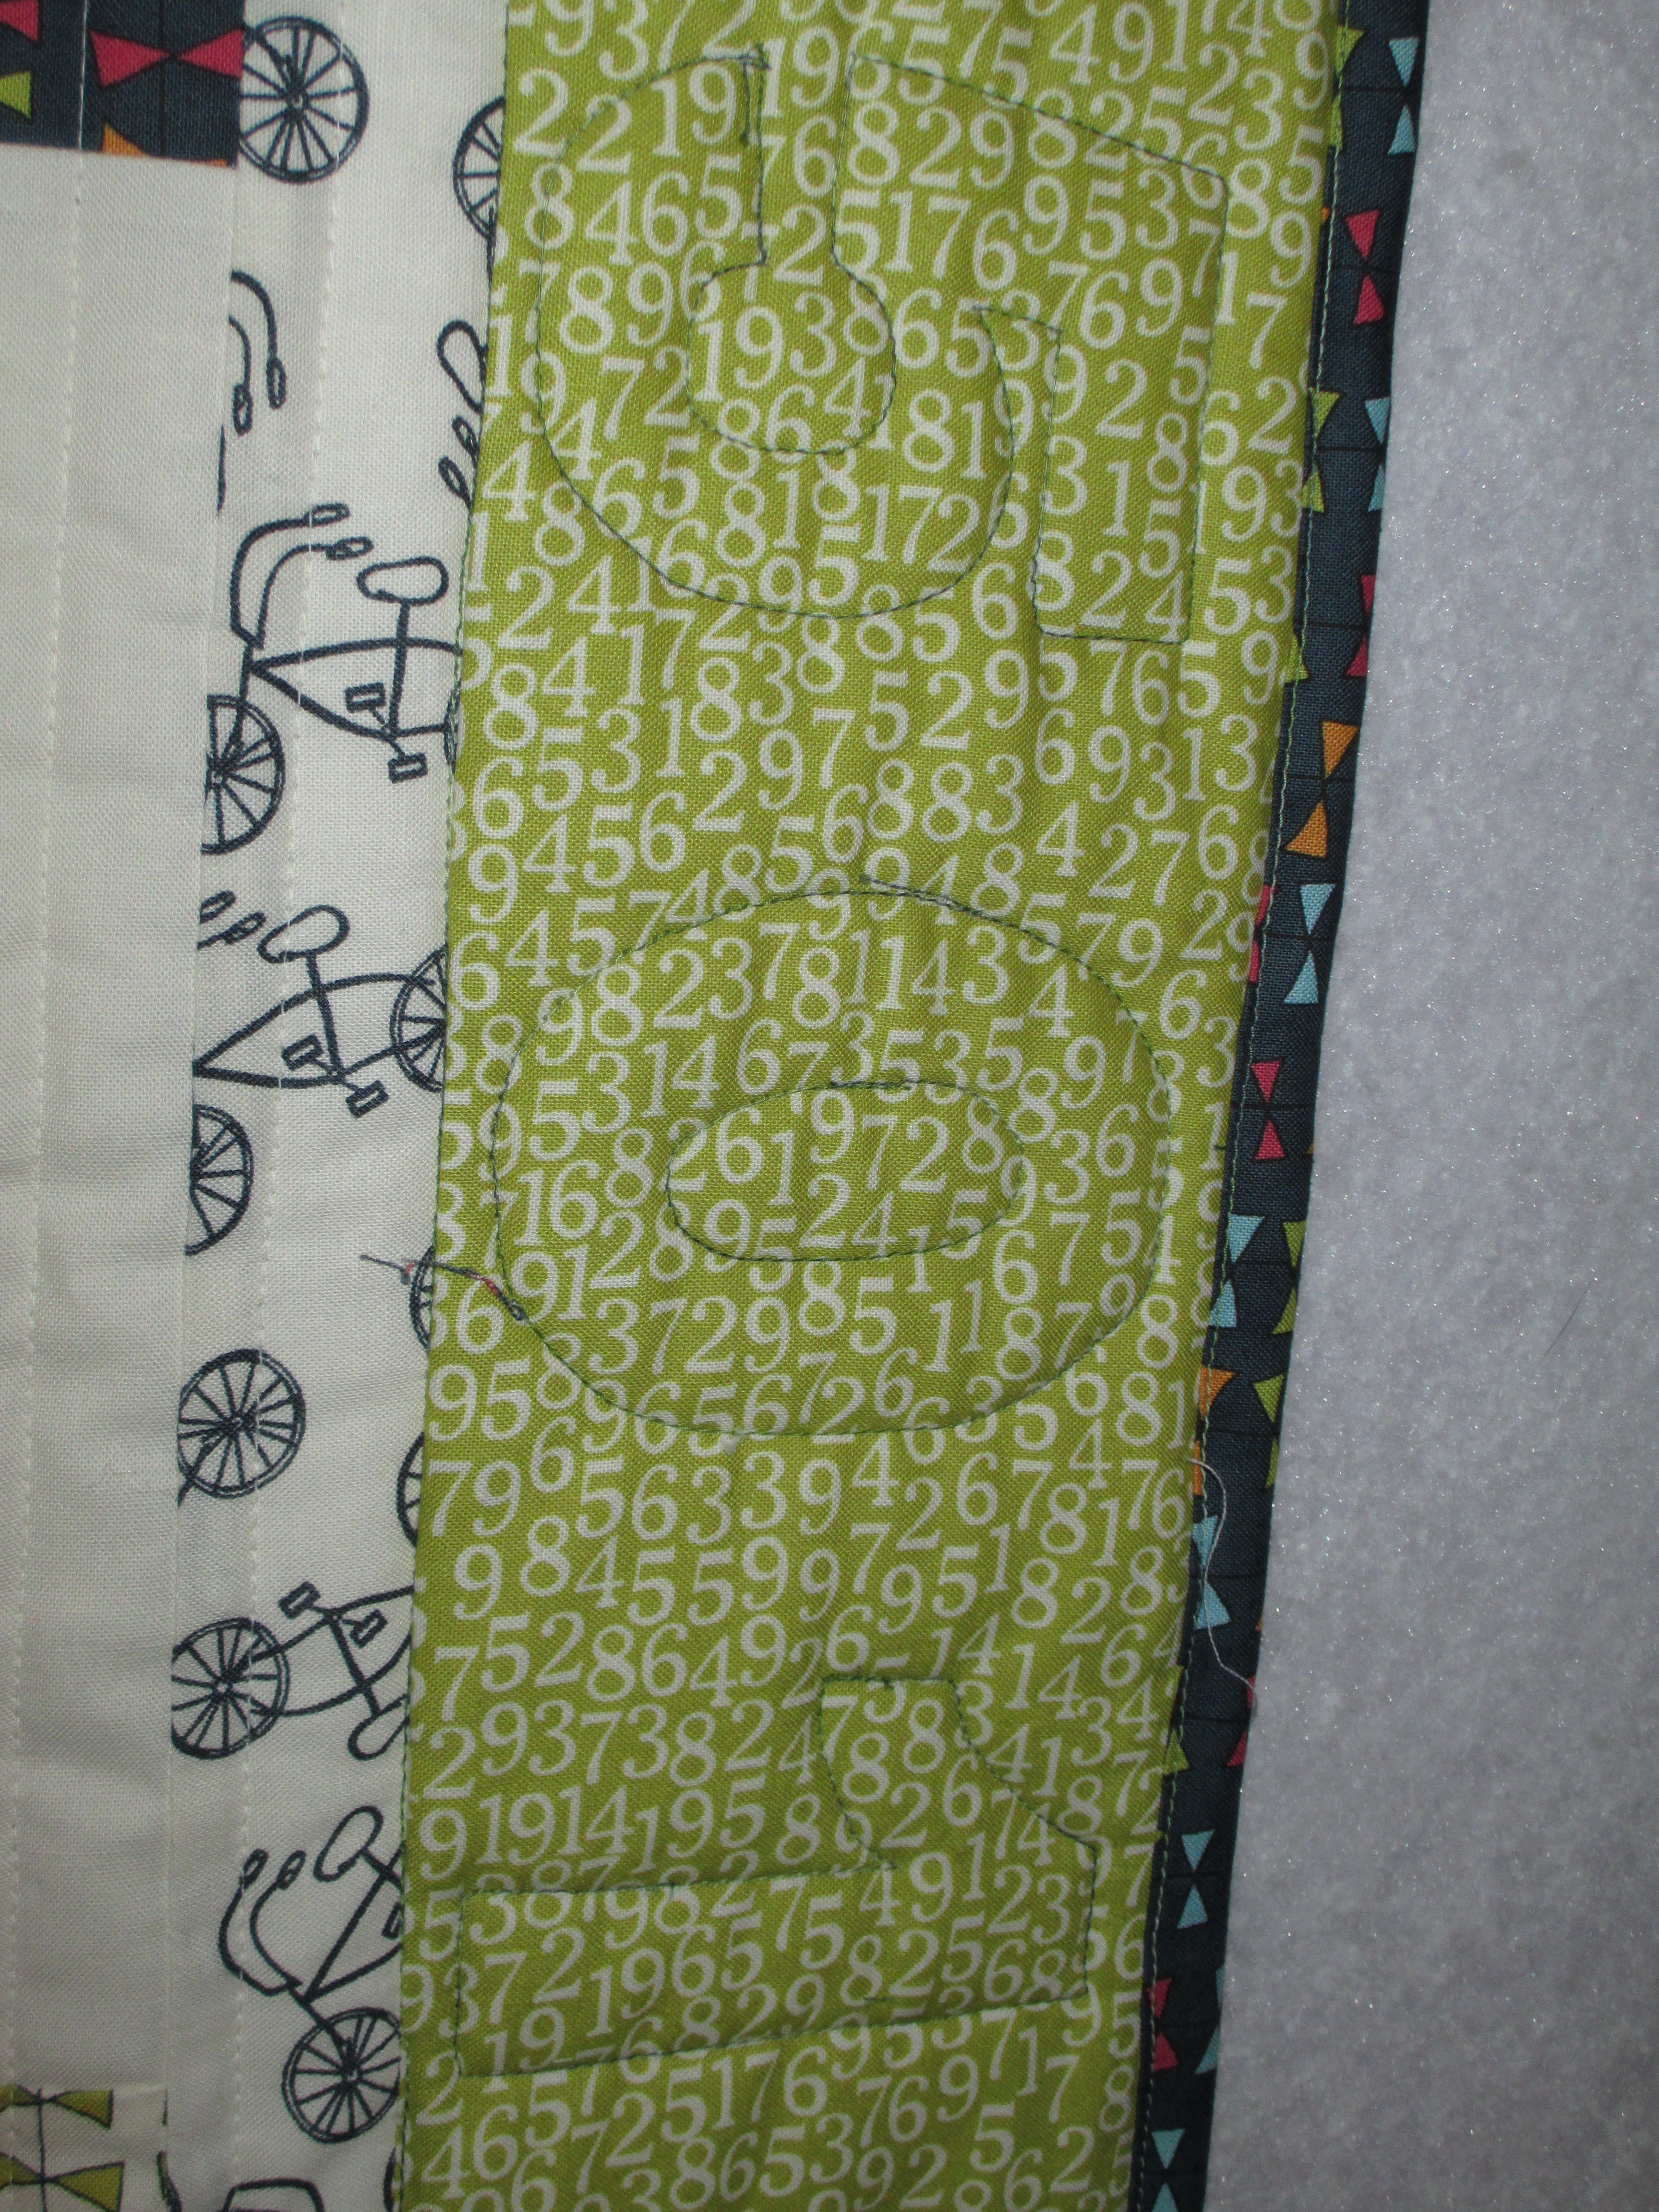
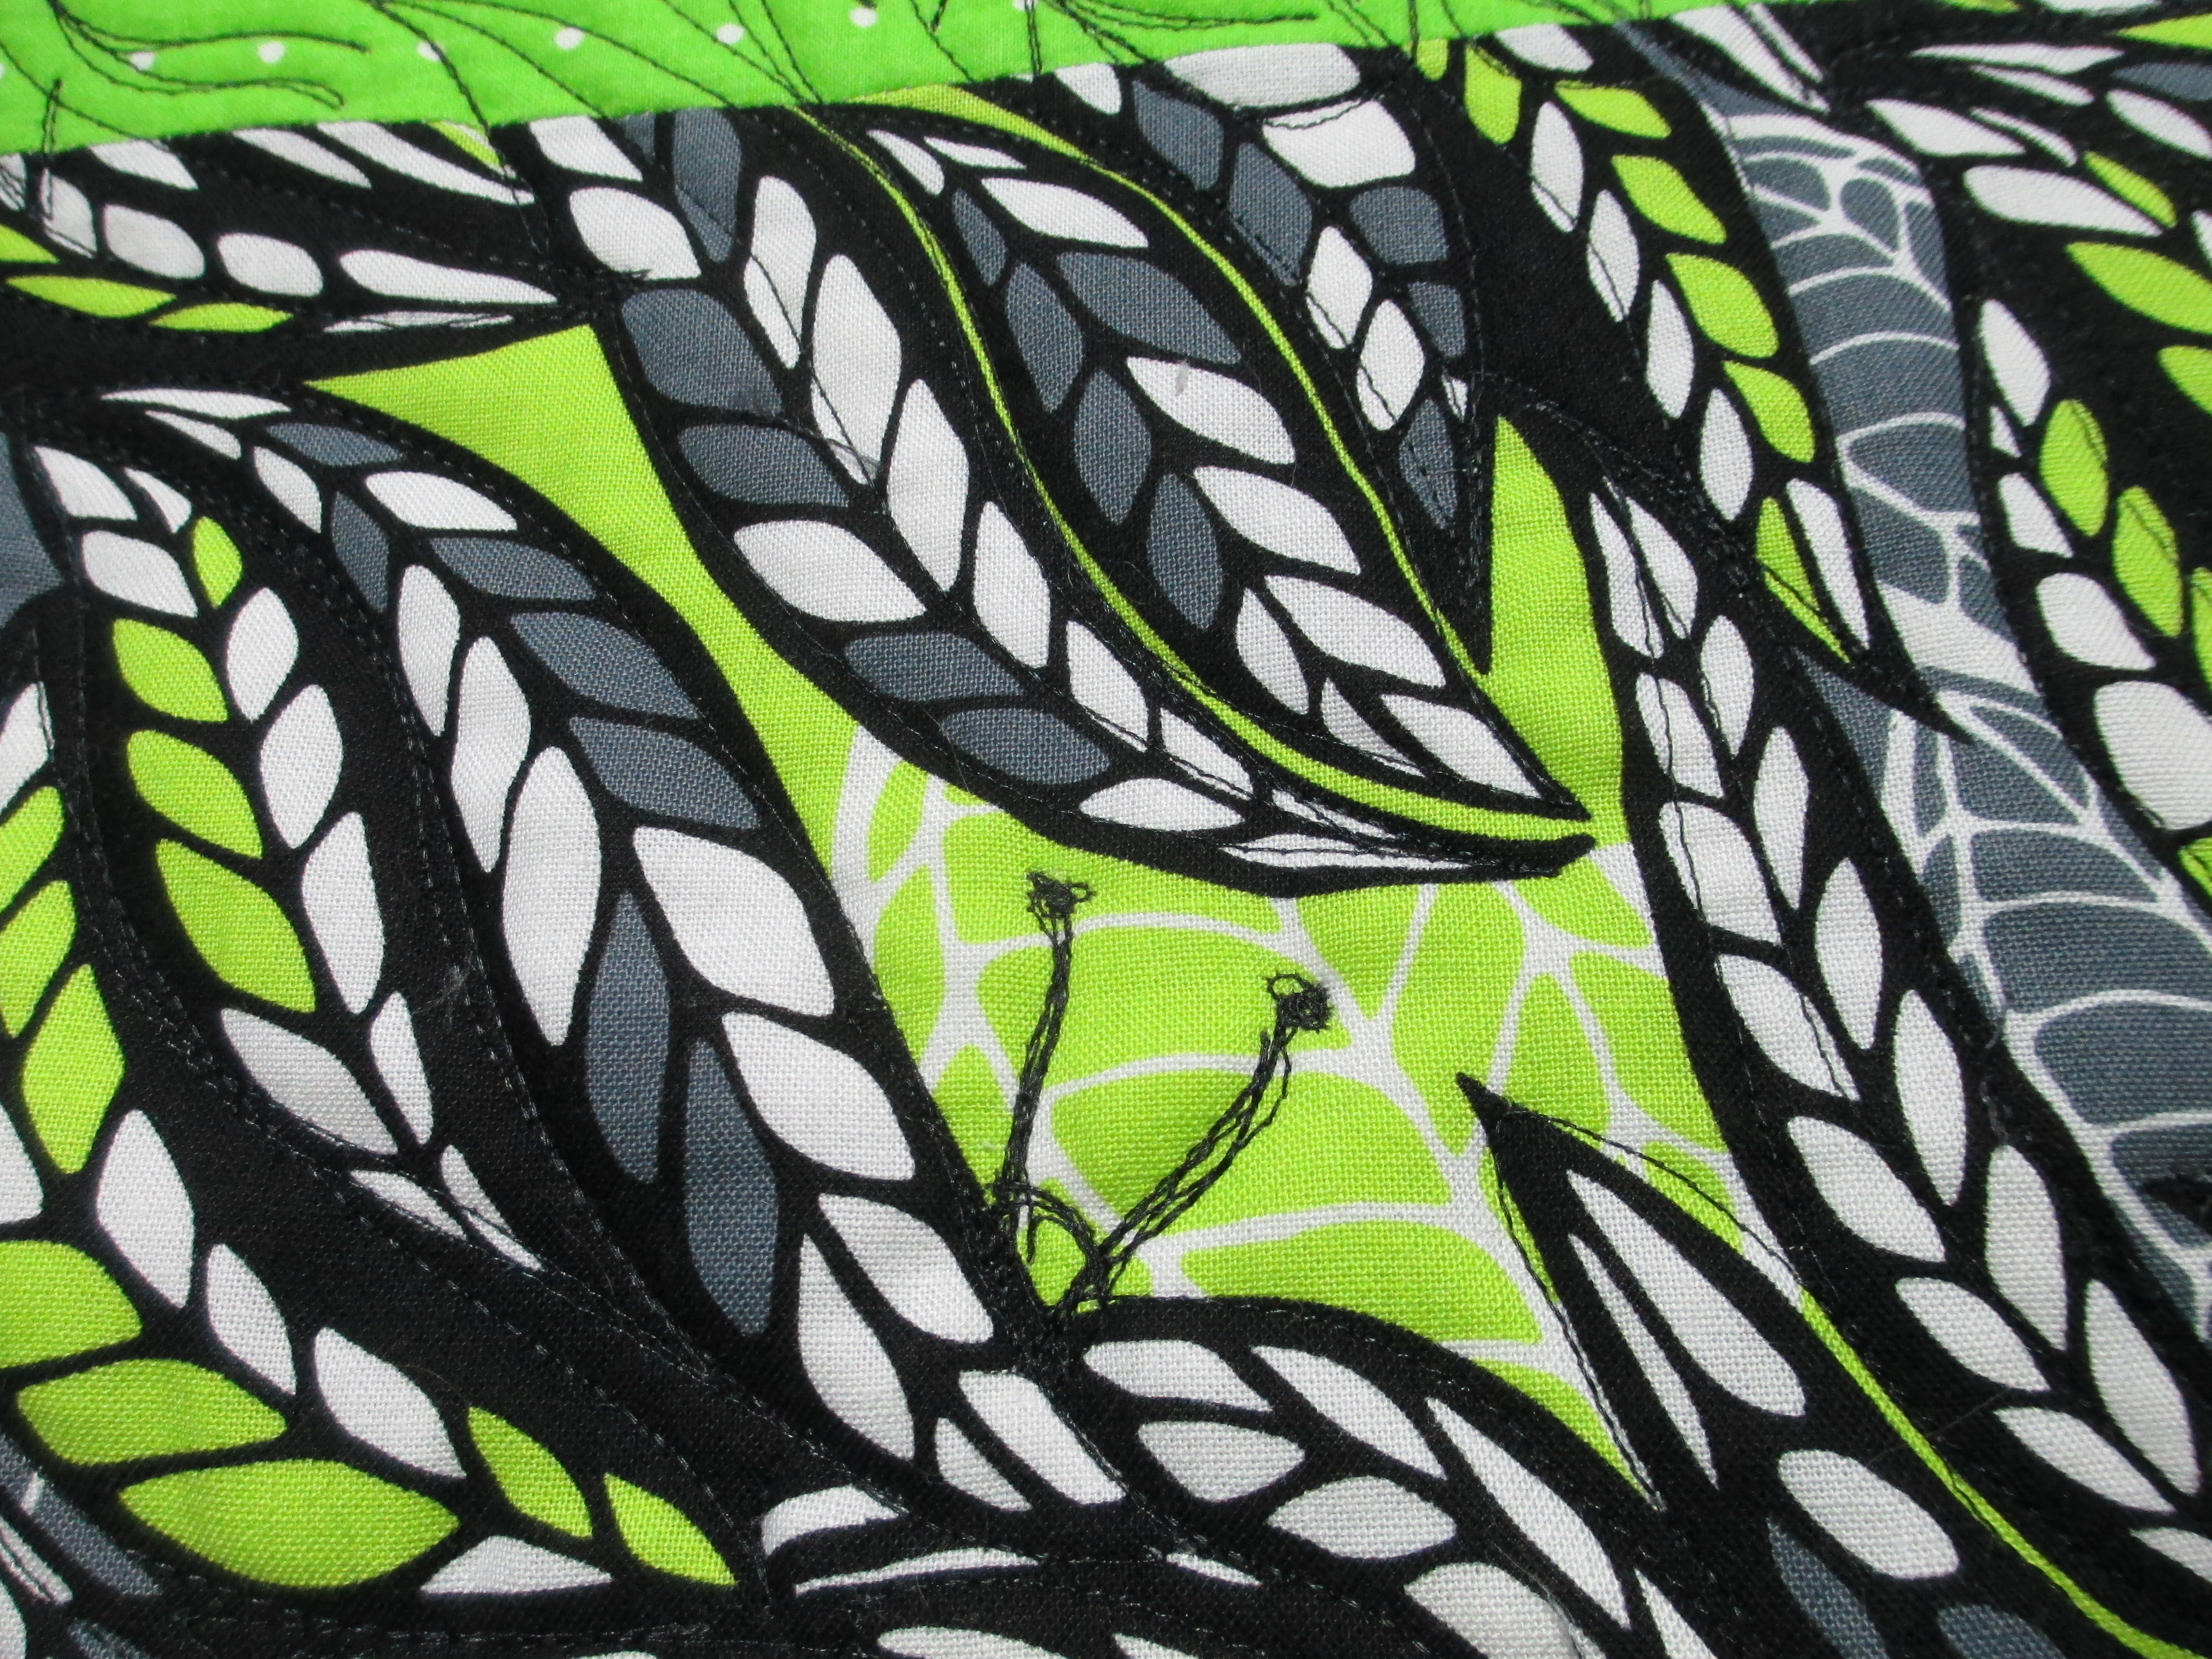
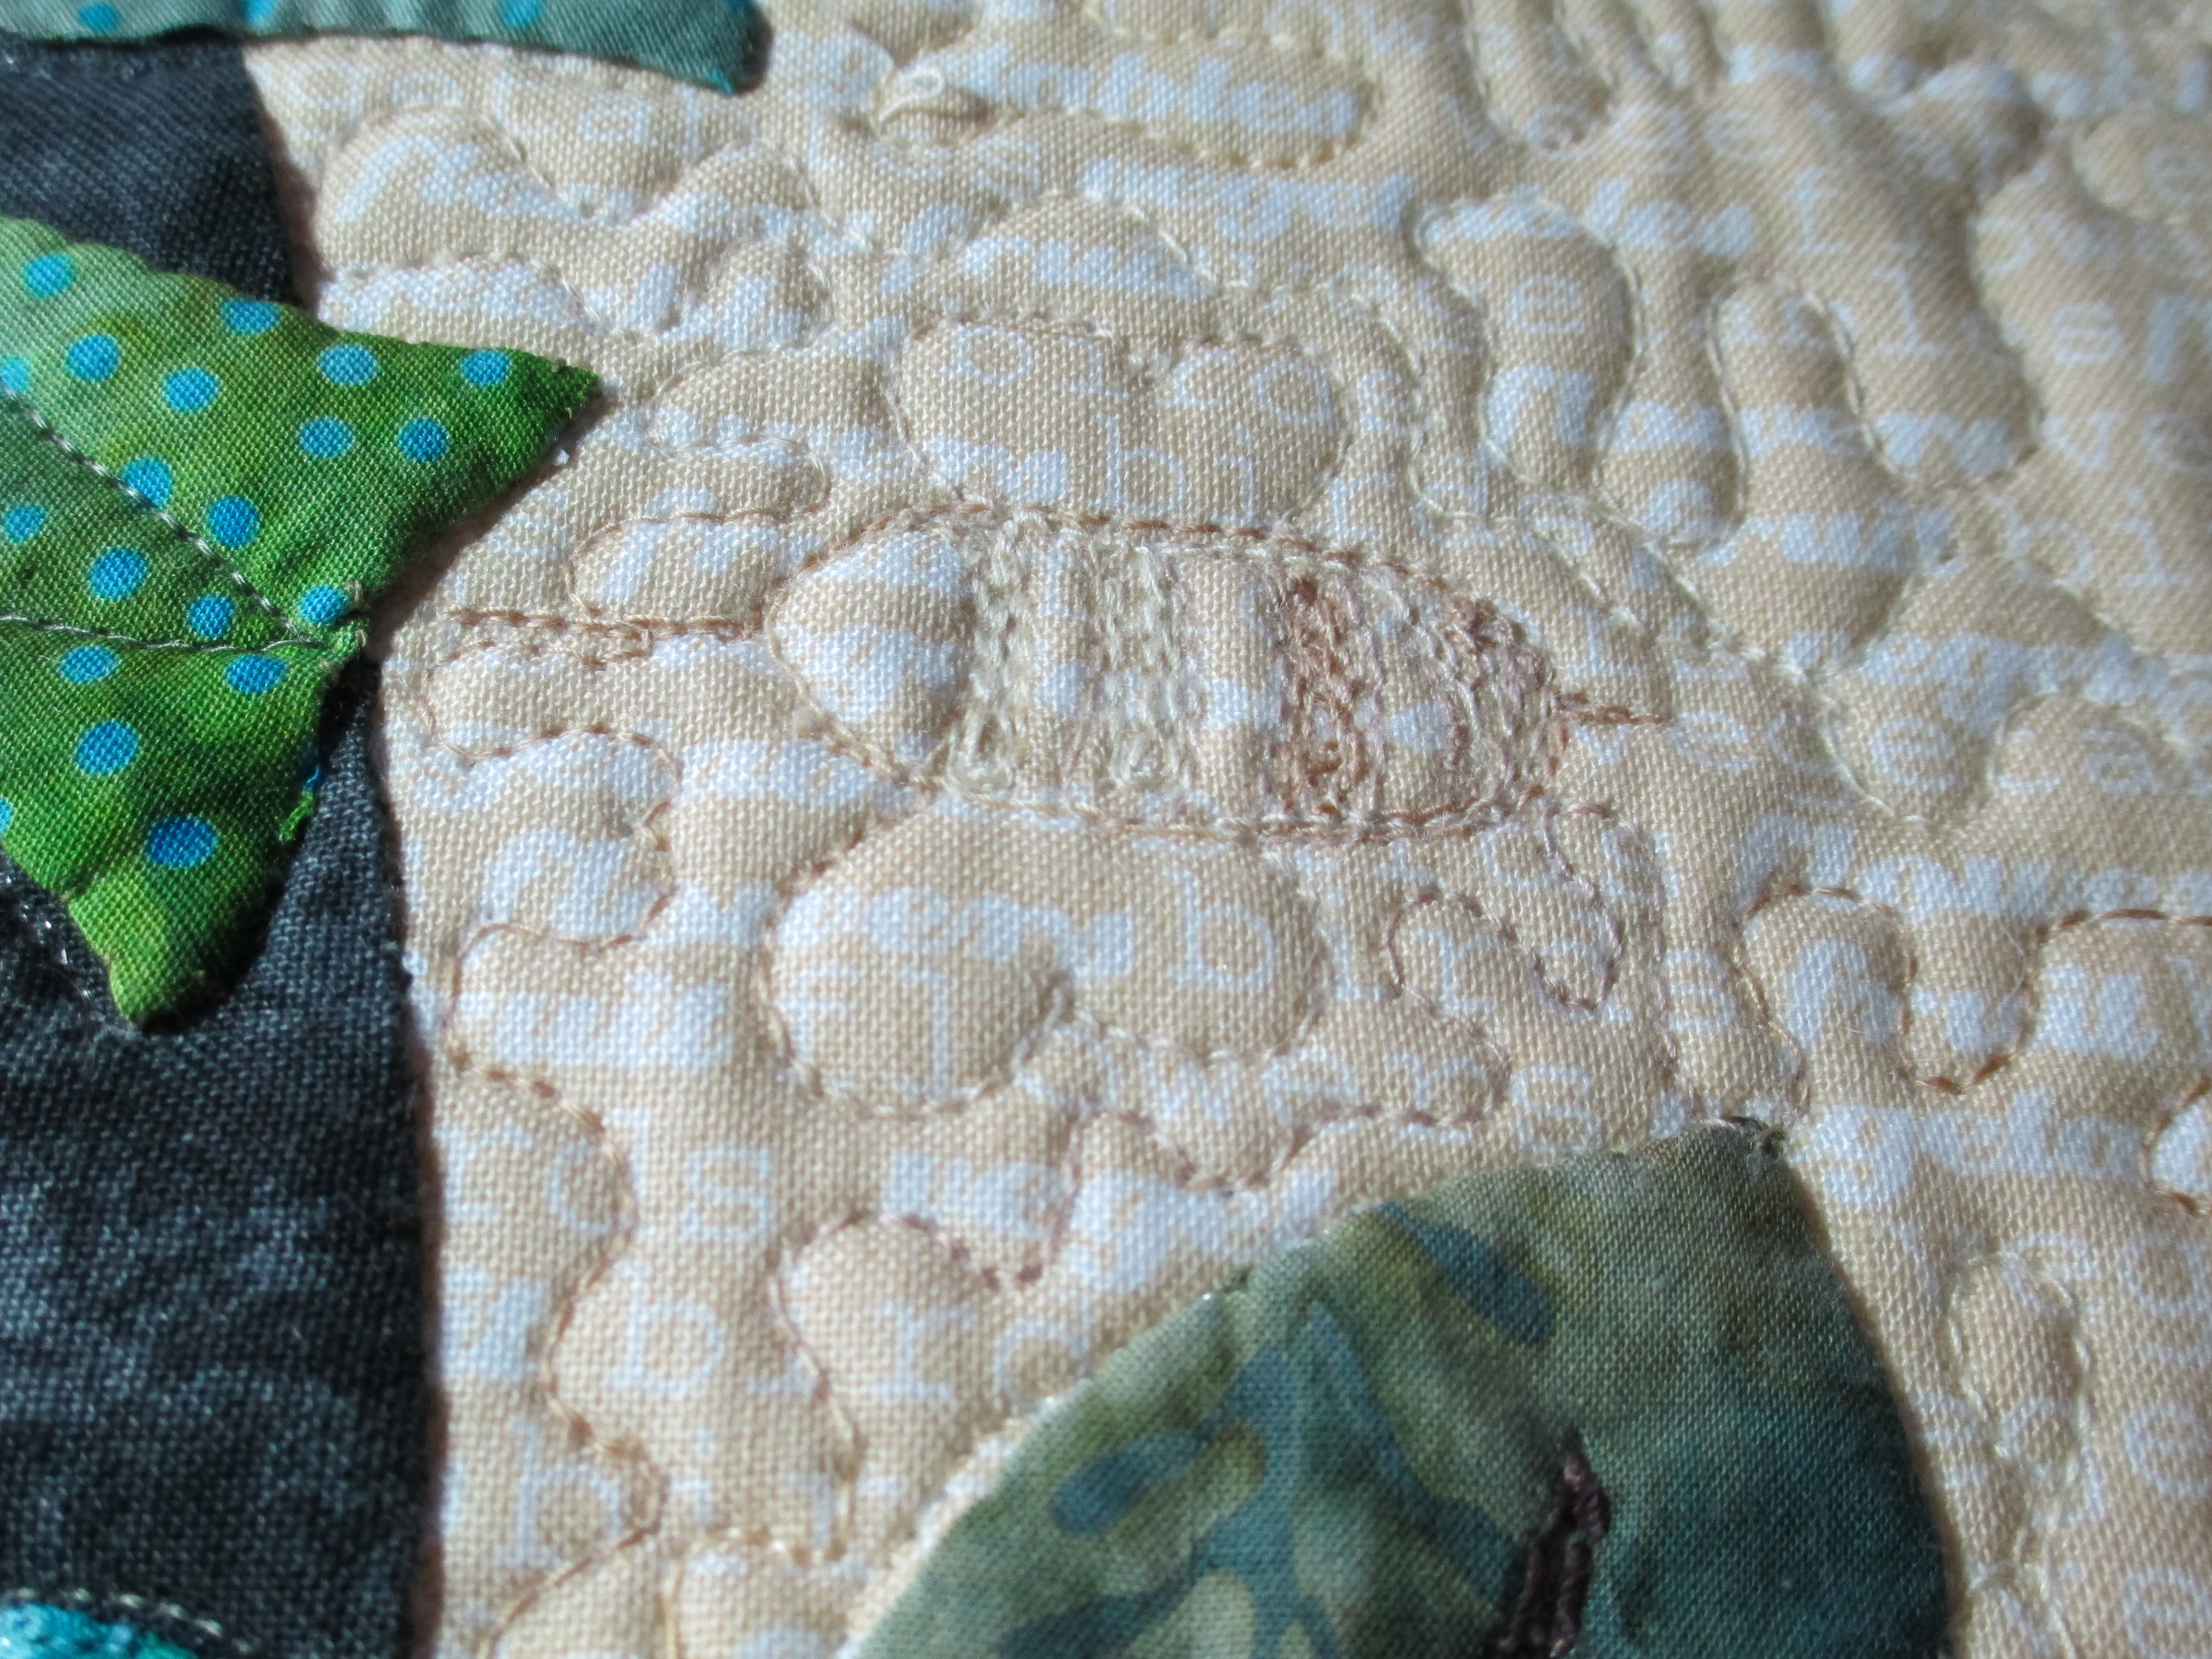
And, here is what the mouse looks like stitched out.

Wilma's quilt 5 004

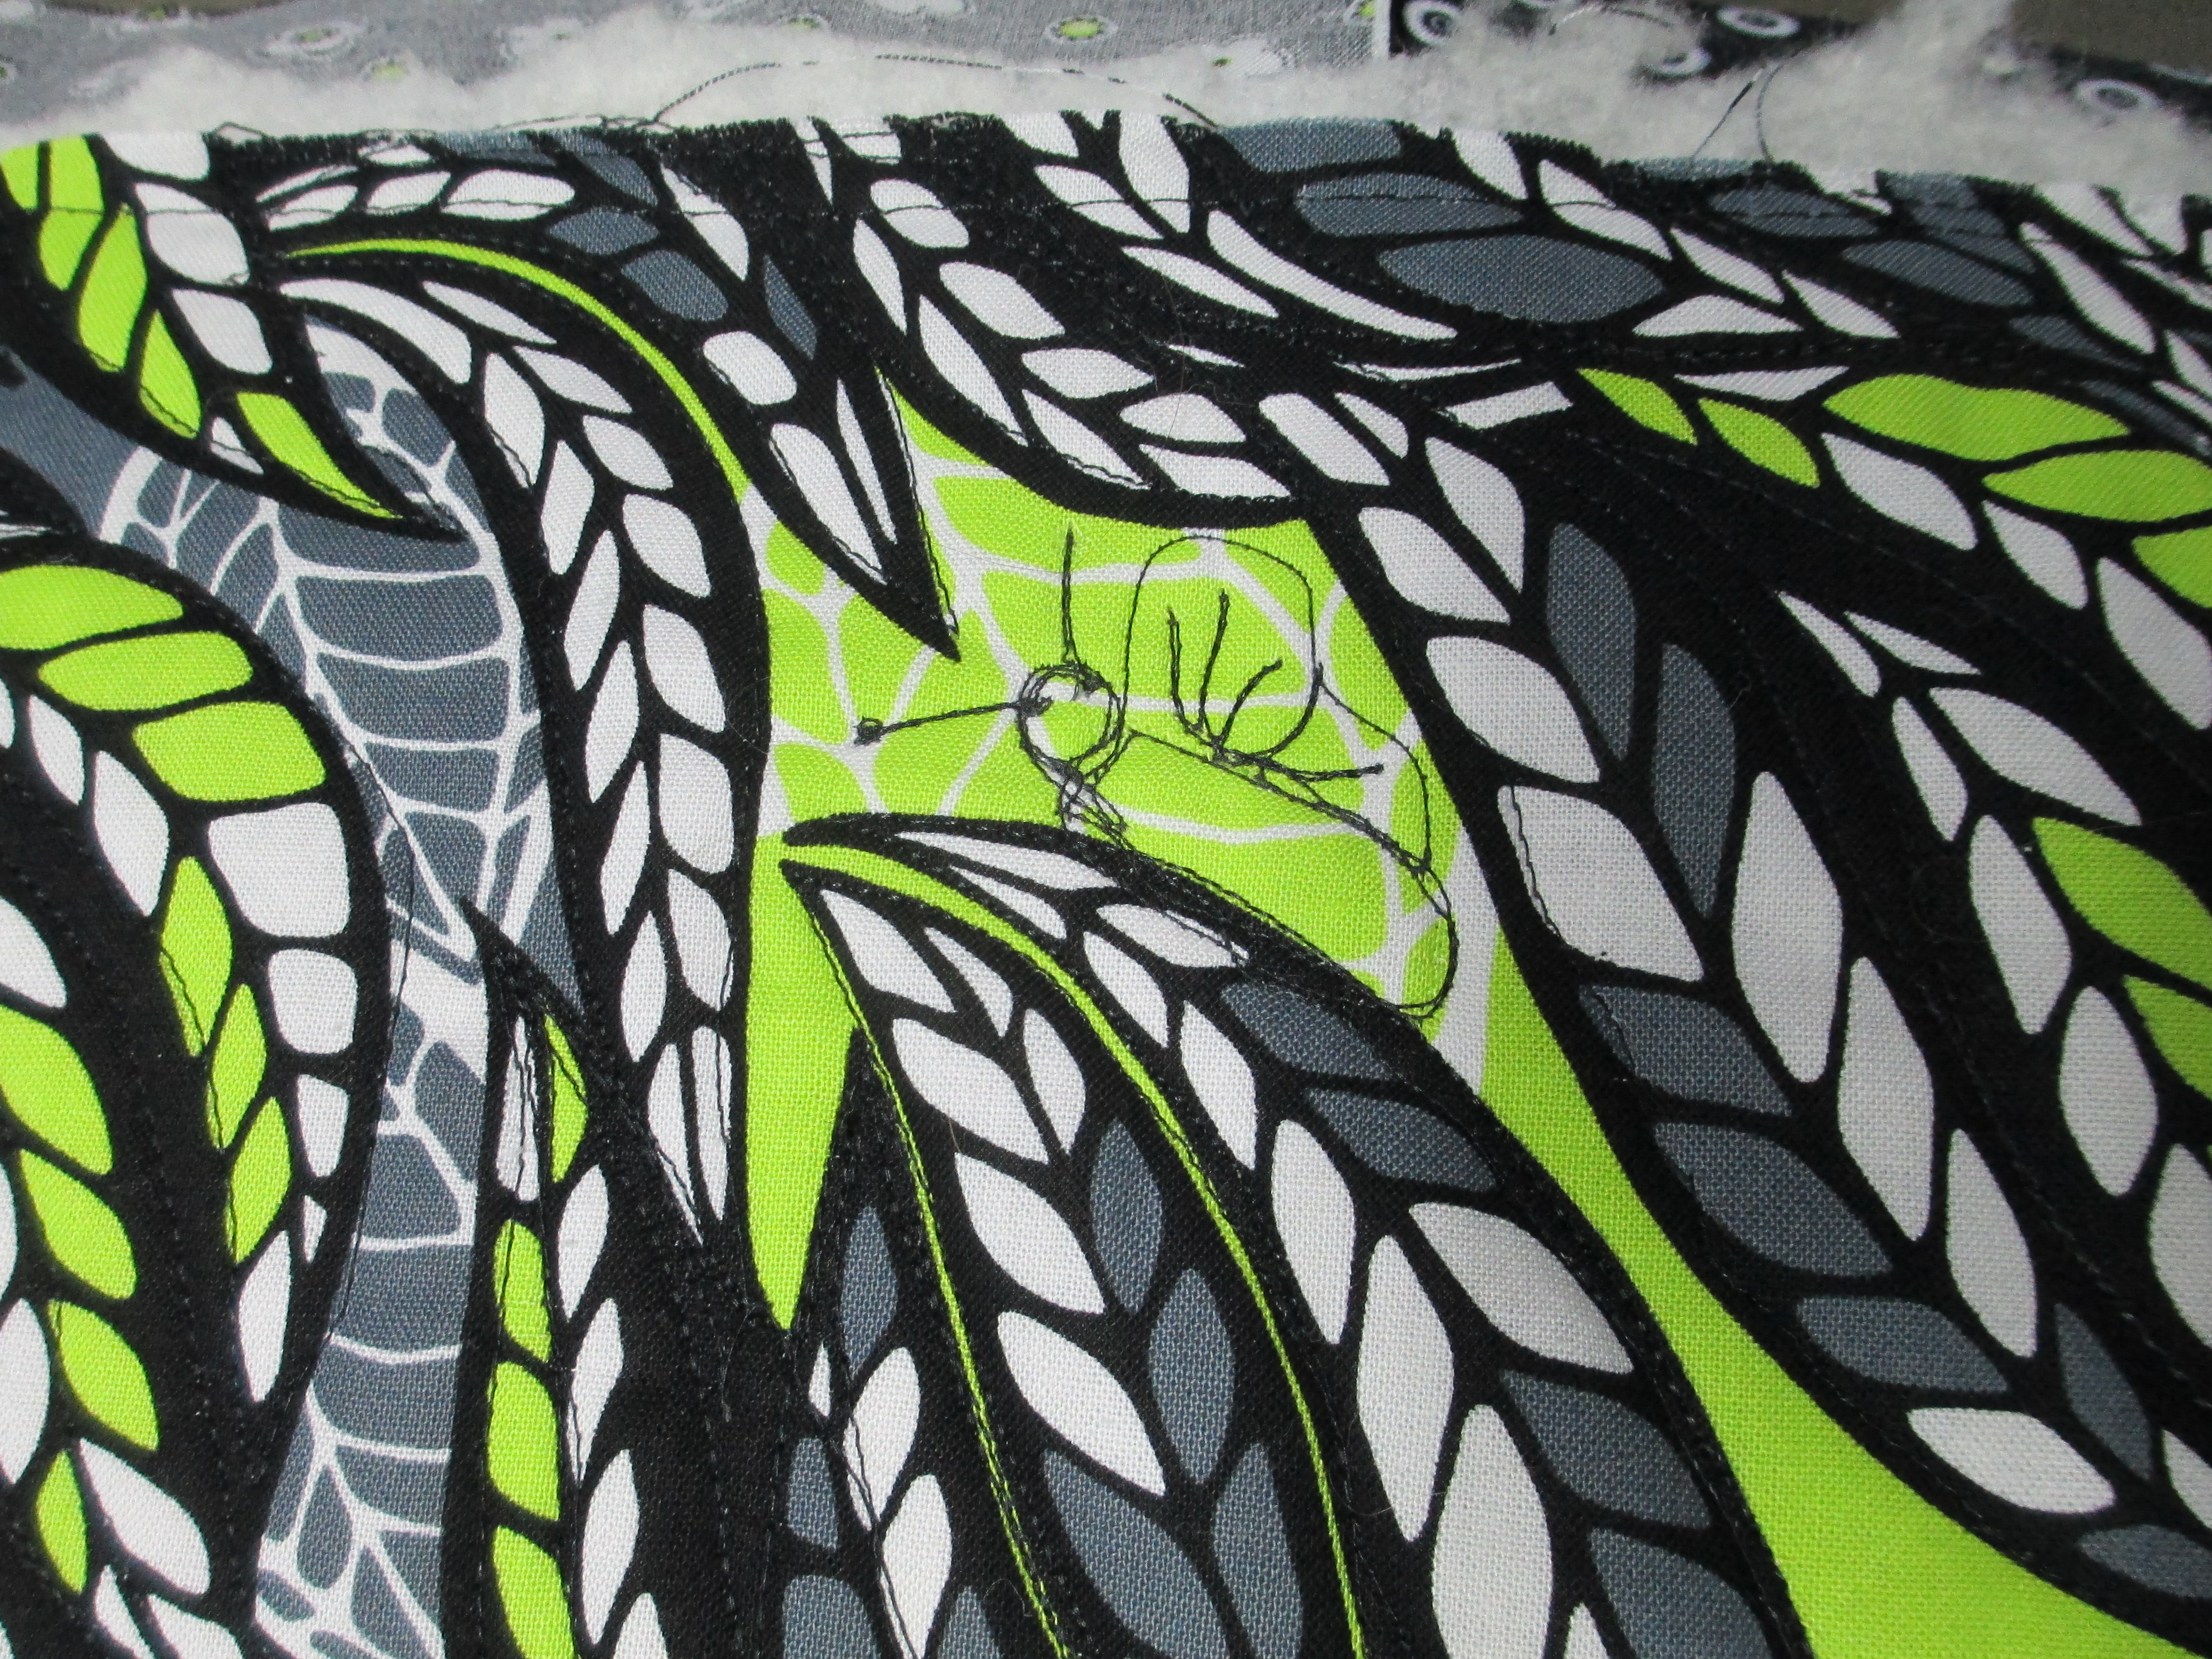
I put another mouse in the other corner, so they could be friends out foraging for food before the winter sets in.  I think this one looks more like scribbles.  But, hey, what do you expect?  😉

Wilma's quilt 5 012

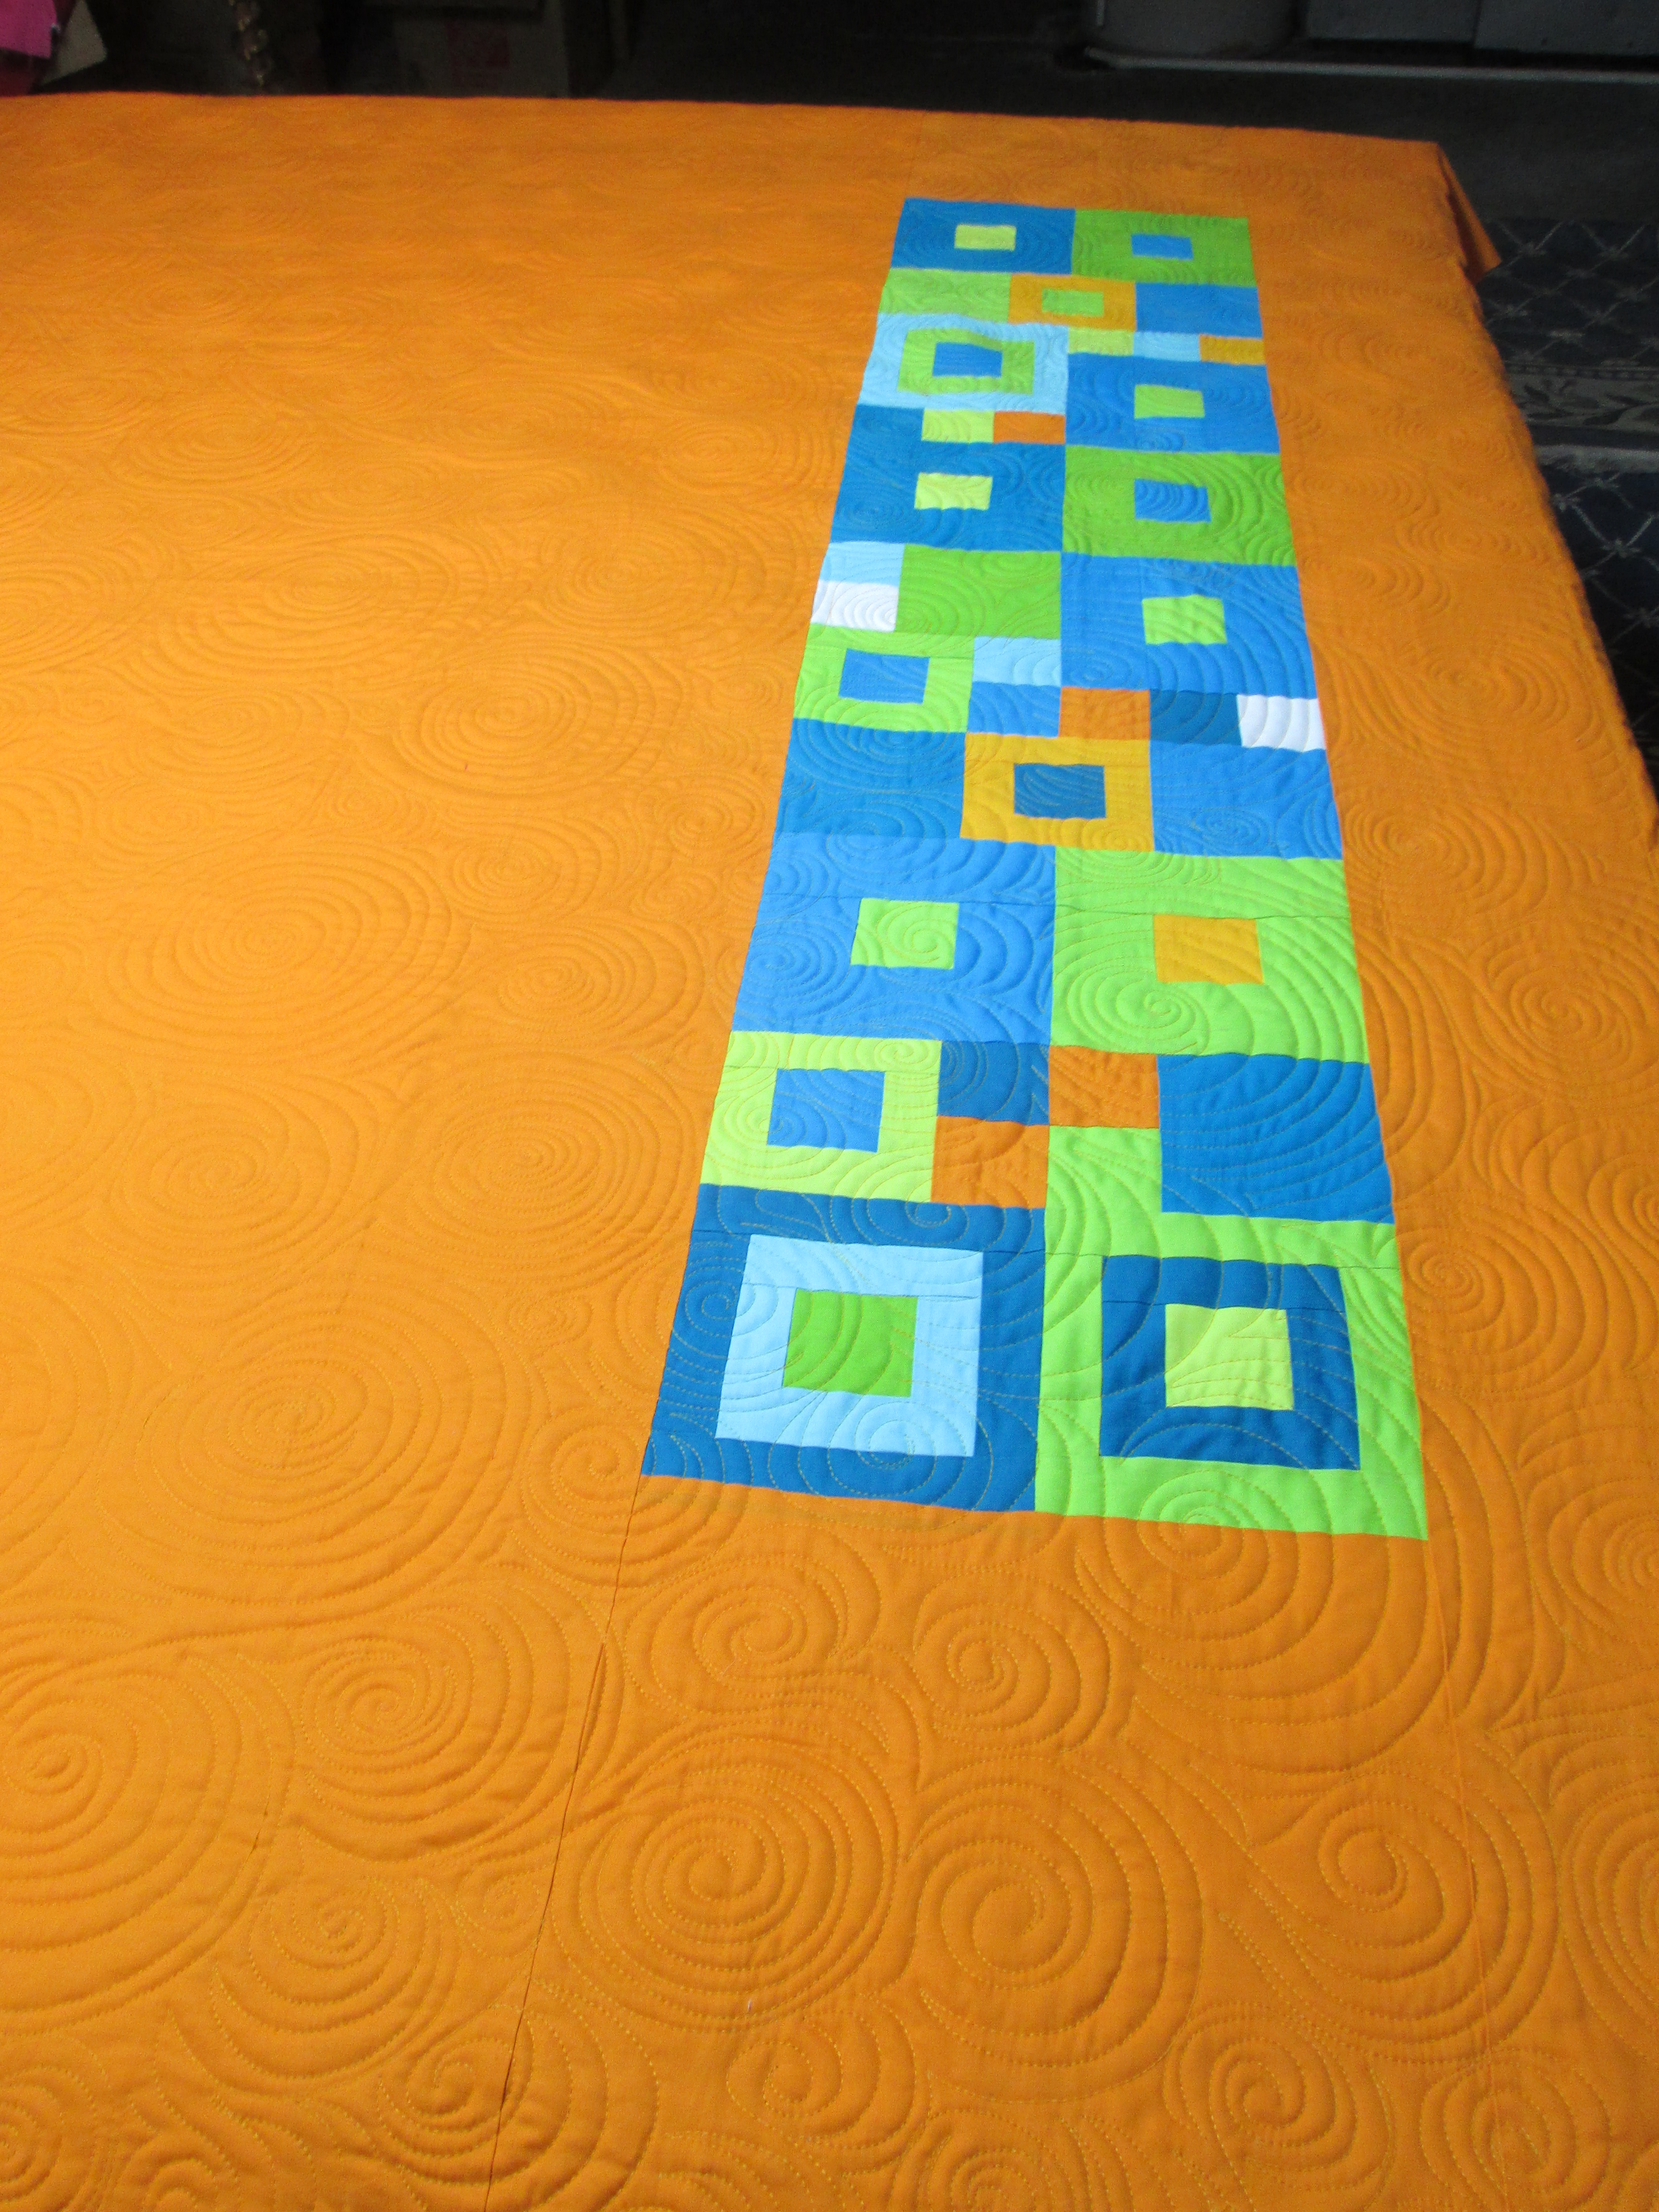
I loved how the colors of the variegated thread popped off Wilma’s quilt.  It was as if this thread was made for this quilt.  But then, I think Wilma’s got great color sense and her quilts “pop” anyway.    Don’t you?

Cutting it Square

Last time I told you about Robin’s bedspread top, but what I didn’t tell you was that she wanted it cut 79″ x 81″ to fit the bed top.  And, this will be for a customer of hers.  So, not only did I need to worry about making sure my customer was happy with the finished product, I was now also making sure it was good for her customer (double-edged sword).  I was nervous about cutting this exactly as measured.  You know how one mistake can mess it all up…

So, I took out my trusty laser square to help me get the measurements exact and not skewered, with one end longer than the other or wonky with curved lines.  The first thing I did was get close to the edges of where I quilted and put my 12 1/2 inch ruler in that corner (you can see the ruler in the upper right hand of the picture).  Then I took my laser square and lined up the laser lines with the cuts I had made.

hoarder sale 002

I proceeded to cut along the laser lines with my long ruler and rotary cutter until I got to the middle of the sides. For the top end, I used my 12 1/2″ square ruler to start the other long side and then I would use my laser square to get down those long sides.  When I got to the bottom end of the “quilt” I then put my laser square at that end to join the lines and proceeded to cut from there.  I measured the sides several times along the way to make sure I was meeting the exact measurements of 79″ across.  And, then I moved the laser square to the other end and started to cut across the bottom in the same manner after I’d measured to be sure I had 81″ along each side.

hoarder sale 004

I am not sure where I got my laser square, because I’ve had it for awhile now, but I’m pretty sure I got it at Home Depot.  My husband is not handy, so he would not have one of these in his tools,  But, if your significant other is handy, look in his/her toolbox for one of these before purchasing it yourself.  I have found this to be a huge help to me many times.  It’s definitely worth the $42.97 that Home Depot charges for it.

Oh, one more thing…  After all this measuring, I took this to my client’s house (yes, I travel to my clients to make it convenient for them) and we measured this folded in half the long way.  It measured 78″ folded.  Talk about sweating bullets!!!  Oh my gosh, I thought I was going to faint right then and there.  We then unfolded it and it measured 79″.  So, it just goes to show you how rolling or folding quilts in any manner, to include on a quilting machine frame, can make your quilt shrink up or appear to shrink up.  :-\

Frida’s Finally Finished

In my last post I said the quilts were next, and they are.  But, before I get to all the quilts my machine, Frida, has been putting out, I want to add that before I went to Amana, I put a ceiling fan up for my hubby and then put up another one after we got back.  I still have one more to put up when things slow down.  I am busy this week getting ready for a garage sale.  I used to teach English Language Learners (grades K-12) in the public schools.  When we moved back here in 2009, I was unable to get any job in education, not even a teacher’s aide.  The budget cuts were so severe at that time that schools were closing and teachers were being laid off.  Anyhow, I have moved on in my life and no longer need any of my teaching stuff, so I am selling it in a garage sale this weekend.  I don’t remember garage sales being this much work, but I was much younger the last time we had one, which was a very long time ago.  Hopefully I will make enough money from this garage sale to fix my front porch.  Last summer when we had the drought, our porch sunk quite a bit, and the insurance does not cover it.  I am not complaining, but quilters just do not get rich doing what they do.  They do it because they love it and no other reason.  Therefore, I am forced to be creative with our finances and the porch has had to wait.

So, onto what Frida, my quilting machine, has been up to, spinning her magic thread… This is Wilma’s One Block Wonder quilt.  I love the way Wilma works magic with colors.  This picture doesn’t do her quilt justice.  The fabric is silky soft with leaves and music notes.

wilmas 4 007

So, she asked me to quilt leaves in the middle portion and music notes in the green.

wilmas 4 017     wilmas 4 012    wilmas 4 011

Can you see it?  What a lot of people don’t realize is that I customize my customers’ quilts by adding personal touches.  Wilma is okay with me quilting little surprises into her quilts and in the past, I have quilted bugs, birds, and butterflies into her quilts.  This time I did something different and put a poem into her quilt.  She never did find it – that’s the thing about quilting.  People look at the colors, blocks and quilt first and tend to notice the quilting as an afterthought.  So, you can sneak stuff into there.  The poem goes like this.

One Block Wonder
Spirals around
Creating magic
With fabric found
Like leaves in the fall
Dancing down to the ground.

I also quilted a quilt for Wilma to give to Velma’s family.  Velma passed away a couple of months ago, and her family donated her fabric to the quilt guild.  Wilma generously made a quilt from Velma’s fabric, and I quilted it with a quick E2E (Edge to Edge) design.  Wilma will be giving it to Velma’s family soon.  Once again, you will see Wilma’s got good color sense, imho.

wilmas 4 003

Hang in there!  Only three more quilts and a coverlet to go!

Cindi very graciously took a chance on me and had me quilt 3 of her quilts.  She is a newbie quilt-maker, and I think she did an absolutely fabulous job on her quilts!  Of course, she is still in the stage where she notices her mistakes and points them out to others, but she will learn that others make so many more mistakes than the very few that she did, but they don’t, or won’t admit to them!  I love this girl!

Here is the first quilt I quilted for Cindi.

Cindi's 3 quilts 001

She wanted simple straight lines quilted on it and numbers in the borders.  I used her numbers as the guidelines for the numbers I put into her borders.  I think if I had put different kinds of numbers, such as skinny numbers, etc. it would not have accented her work as well.  Anyhow, this was the procedure I followed for the numbers.  First, I copied what numbers she had on her quilt and then I looked online for numbers that matched her numbers and made them the same size.  I then took a piece of vellum (actually, I think I used onion skin on this one) and traced numbers in a random order on the the paper that was the size of the border; 1 piece for each side.  And, then I poked pins straight down into the paper and fabric and stitched the pencil drawn numbers.  You pull the paper off when you are done with the row of numbers.

Ruthie 003   Ruthie 002 Ruthie 001  Ruthie 004

Here is the back and binding of this quilt.

Cindi's 3 quilts 003   Cindi's 3 quilts 002

The above quilt and the next one are for her grandsons, if I remember right.  All three of these quilts will be at her lake house, so if you notice a theme going on here, that is why.

It was hard to stitch any surprises into this quilt with the straight lines and the numbers.  Of course, after I finished them, I thought I could have put faces into the numbers.

Front, binding, and back…

Cindi's 3 quilts 005 Cindi's 3 quilts 006 Cindi's 3 quilts 007

And, this quilt is for Cindi.  I LOVE this quilt and think she did a stupendous job on it as well as the 2 above.

Front and back… By the way, the numbers are representative of birthdays/birth months/birth years.

Cindi's 3 quilts 009   Cindi's 3 quilts 023

I think we can figure out how old Cindi is by this picture, but trust me, she DOES NOT LOOK IT!!!  I thought she was younger than me!  Cindi wanted straight lines for the quilting on this one, except she wanted fish quilted into the light blue border.  It’s always nice to find out things about the people you quilt for, so I try to listen for bits of information so I can personalize their quilts.  This was an easy one to personalize.  I knew she had grandsons from the 2 earlier quilts, and I knew they were at the stage where they might like monsters, etc.  So, I stitched some monster fish into the light blue border, along with a bunch of “normal” (if there is such a thing with free-hand quilting) fish.  I also stitched a hook next to an open mouth of a fish, and I stitched a shark looking at a “surprised” fish that is looking back with bulging eyes.

Cindi's 3 quilts 011  Cindi's 3 quilts 012

I was so happy Cindi asked me to finish these quilts for her and hope I did a good enough job that she will ask me again (surprises and all!).

Finally, this next “quilt” is actually for an interior designer, Robin.  She is making a bedspread for a customer, but she does not quilt.  So, she just had me quilt this “coverlet” for the top and she will add piping, etc.  All she wanted was the designs outlined/traced.  Some people call that custom quilting, but I call that Edge to Edge.  It was easy peasy!

Robin's coverlet 001   Robin's Quilt 001

I would love to see what Robin does with the rooms and the homes she decorates.  Maybe one of these days???  Who knows what the future holds?…

Anyhow, as you can see Frida and I have been busy, busy this past month.  I am glad for it, because I do love spending time with that machine and creating what I consider works of art and many future heirlooms.

Wide backings for quilts are the way to go!

I have always been a proponent of using wide backings for quilts.  In fact, I have LOTS of 118″ wide fabric and some 108″ wide fabric in stock for my customers’ quilts.  Attempting to sew through multiple layers of seams can wreak havoc on my longarm quilting machine, so these wide backs make my job a lot easier and does less damage to my machine.  I just read this article on another blog that I thought was worth sharing.  She mentions how it really is cheaper (and it is, trust me!) to use wide backs than it is to buy regular width fabric and then piece it.  She even has measurements of how much fabric you will need.  I have to disagree with her on the amount, though, as I cannot get a quilt backing with only 1 inch.  I need a minimum of 4 inches extra on EACH side – see the tab above marked “Batting and Backing.”  Check out her blog post here.

Finito

Fi·ni·to

/fəˈnētō/Adjective; meaning “Finished.”
I am finally done with the quilt.  Frida, my longarm quilting machine, is taking a much needed rest before I can go back and check the timing on her; a task I never look forward to doing.  You need a micro-magnifying glass to do it, and I can’t see squat anyhow.  So… I am working on Home Improvement projects this week and will get around to “massaging” Frida and giving her a check-up when I am done with the other things I’ve been neglecting around my house. 
In the meantime, here are a couple of pictures of the customer quilt I just finished. 
WJ 3 008
A close-up of the lanterns…
WJ 3 011
And, the various handicapped and overweight insects…
WJ 3 007 WJ 3 006 WJ 3 005 WJ 3 002 WJ 3 003  WJ 3 001
Of course, all I could think to put on the leaves were inchworms, so I snuck a couple of animals peeking over the leaves.
WJ 3 004


Which is it? Square peg in round hole? Or round peg in square hole?

Jackie and Wilma have been so gracious lately to let me quilt their quilts and they seem thrilled when they see them.  I  don’t see what they see.  Can you tell me?  Here is Jackie’s daughter’s quilt… Kat’s quilt.  I love the bright solids in this quilt, don’t you?  Lots of squares, so it kind of reminds me of a city block… for whatever reason…

J&W 012a

Jackie wanted something round quilted onto it, to balance the squares and chose the following quilting design.   We used light orange thread on this, a good choice, imho.  Pay no attention to that man behind the curtain mess behind the quilt.  Yes, I work in an unfinished gray dungeon.  Quilts like this make my work so much brighter.  🙂

J&W 002

Here’s a shot of the finished product “relaxing” on the table.  Yes, I let the quilts relax overnight, so that the fabric that was stretched on the frame can relax, the batting can “breathe,” and the stitches can snuggle down into the quilt.  That way I can check the next day to see if I missed any spots or if I need to add more stitching or fix something.

J&W 006

And, here’s a shot of the back.  Wasn’t Kat creative in putting this group of blocks into the solid back panel?  I know a lot of people are doing that, but I thought this one was extra cool.  I loaded the quilt sideways so the top and bottom were on the sides of the frames.  This row of blocks was near the bottom of the frame.  I now wish I had loaded this side at the top, so it would be just a little farther from the side edge.  Lesson learned!

J&W 004

In any case, Jackie was happy with the finished product, when I gave it to her today.  She is such a dear for being thrilled.  And, yes, I know that sounds silly, too, but when others are happy, it makes me happy.  I wonder if/when Jackie or Kat will notice the Smiley Face my evil twin snuck into the quilting…

J&W 017

Playing Catch Up

First off, let me show you the quilting that didn’t show up on Jackie’s Quilt post.

Jackie's quilt 006

Stitching this Pantograph was so easy peasy I felt guilty charging Jackie for the quilting.

After I finished her quilt, I caught up on this charity quilt that I haven’t been able to get to in a couple of months.  simply quilts 001 simply quilts 002At this point, I just wanted to finish it, so I opted for a quick edge 2 edge design and then failed at attempted to add a matching border.   It turned out okay.  Not happy with the border, but it’s done.  Our guild has a charity sewing day every February.  Kits are made up for us to piece together and then to quilt.  I was hoping for a bigger quilt, but this is what I was given, and it’s just as well since it’s taken me this long to finish it.

What I am currently working on is the following quilt.  My new favorite kind of fabric is solid colored fabric.  I love the colors in this quilt and how they pop against each other.

Kat's quilt 001

Jackie says her daughter, Kat, can outquilt her any day.  I don’t know about that, but I do love this quilt Kat put together.  She just wanted circles quilted all over it to break up the squares, so here is what I’ve done so far.

Kat's quilt 005 Kat's quilt 003

The thread is a light orange – I think this was a good choice on the customer’s part.  As for the circles… my circles aren’t perfect – they are done freehand.  I like the circles against the squares, another good choice on the customer’s part. I’m always impressed with my customers’ choices.  I learn a lot from their tastes and their styles.  I’ll post more pictures when I am done.

It Gives New Meaning to Frogging…

Okay, I admit it. I cannot stop myself from drawing stuff on customer quilts that they don’t ask for.  One of my customers has nicknamed me “Sneaky.”  The problem is… I’ll be quilting along and my brain will say that something such as a frog would look cool on this quilt.

Bob's little pony 008

Now, I know better than that!  It’s not my quilt, and I tell my brain that, but before I know it, I am stitching a frog into the quilt.  I honestly don’t know what happened to me with this quilt.  I am quite embarrassed at how bold my “evil twin sister” was in putting these items on this customer quilt.  All I wanted was for my quilting to complement the customers quilt top.

Wilmas quilt 2 final 005  Wilmas quilt 2 final 006  Wilmas quilt 2 final 007

Did you notice they are all drawn into the black spaces where they can easily be seen?  WTH???  I get embarrassed by my quilting anyhow and don’t want it screaming at the world, so what came over me (oops! I mean my evil twin sister) with this one?

For those of you who don’t know what frogging is to a quilter, it’s where you rip out the stitches… rip it… rip it… rip it…  Get it?  I can only hope the customer will be okay with the results of this quilt, or I will certainly be frogging this one next week.  😦

What she really wanted was viney leaves and flowers to match her applique.  This is what I did before adding my trademark signature “surprise” of thread art…

Wilmas quilt 2 final 013

She also wanted piano keys, but she was worried how the green thread would show up against the orange striped border.  I was a bit worried how it would look, too, so I stitched right inside the parts with the green in it to help the green thread blend into the background (so how come my evil twin sister was so brazen with the creatures stitched into the black fabric?).

wilma 2 006

That meant I would need to measure out the stitching along the sides to match the different piano key widths of the bottom and top.  My straight line stitching needs a lot of practice… sigh…

wilma 2 005

But, here is the finished product.  From here, you can’t see any of the stitching, for which I am truly grateful.

Wilmas quilt 2 final 016

I love her applique work and the way she brought it all together!


Applique Basket

Here is my latest customer quilt, finished.   She did all this by hand; needle-turn applique.  Isn’t it beautiful?

Wilma's quilt 1 013 copy

And, here is a picture of just the basket of flowers.

Wilma's quilt 1 014

I love her selection of batik fabrics and how she coordinated it all.    She chose this color thread.  What is strange is how it showed up on the background fabric.  I swear it gives off a pinkish color in some places.  It’s funny how you can see a thread in one light and it looks different in another or next to other colors, such as the colors in the batiks.

Wilma's quilt 1 010

So, this is what I did with it.  I was a bit stumped on what to quilt into the basket.  There are lots of things you could quilt into it… berries and vines, flowers, etc.  But, I opted for curved cross hatching, because I thought it would be better understated than too much.  I didn’t want to over power the applique.

Wilma's quilt 1 002

You know how I love to sneak stuff into my quilting.  Well, I couldn’t resist adding a few surprises to add to the garden feeling of this quilt… one more reason why I didn’t want to add too much frilly stuff to the basket and opted for simple curved cross-hatching.  See the overweight hummingbird drinking nectar from the wrong color bloom?  That’s what happens when I freehand quilt a bird that is color-blind.  😉

Wilma's quilt 1 006

And, then there’s the confused bumblebee that looks like it has stingers on both ends…

Wilma's quilt 1 008

Or the butterfly that barely looks like a butterfly…

Wilma's quilt 1 009

But, I am fairly happy with the quilted vine that looks kind of like the vines the customer appliqued onto her quilt… if I could just get those outlines more even and not fat in one place and skinny in another.   I don’t know what happened there.

Wilma's quilt 1 001

Okay, the one at the top of her quilt looks better.  The good thing about being a quilter is that quilting isn’t usually the thing that pops out on a quilt; it’s the colors, the piecing and/or the applique.  So, even though I am not as good as I would like to be (and I never will be – there’s ALWAYS room for improvement), it will still look good if the piecer/appliquer is good.  And, she is!

Wilma's quilt 1 004

When I first saw this lovely quilt, I was concerned about the prairie points sticking up after quilt.  You know how quilting will draw up your fabric?  Well, the prairie points were not quilted, so I was worried I would ruin her quilt.  But, they actually lay fairly flat and look really nice as an frame for her bouquet.  This quilt gets returned to her tomorrow.  I hope she is happy with it and that she likes it!  I was honored to get to be the quilter for this quilt and for her.  She is a special lady who does so much for so many others.  I hope when she looks at this quilt on her wall that is makes her smile.